How does automated bookkeeping work in Vyapar?
Stop manually posting journal entries. Vyapar’s professional double-entry logic works in the background, instantly updating your financial books every time you save a sale, purchase, or expense.

Before You Start

Cash & Bank Setup: Ensure your bank accounts and “Cash-in-hand” balances are added to track money movement.
Party Registration: Add your customers and vendors to enable automated “Money-In” and “Money-Out” tracking.
Expense Categories: Pre-define categories like Rent, Salary, or Fuel for automated expense logging.
Step-by-Step Guide: Action-Based Automated Bookkeeping:
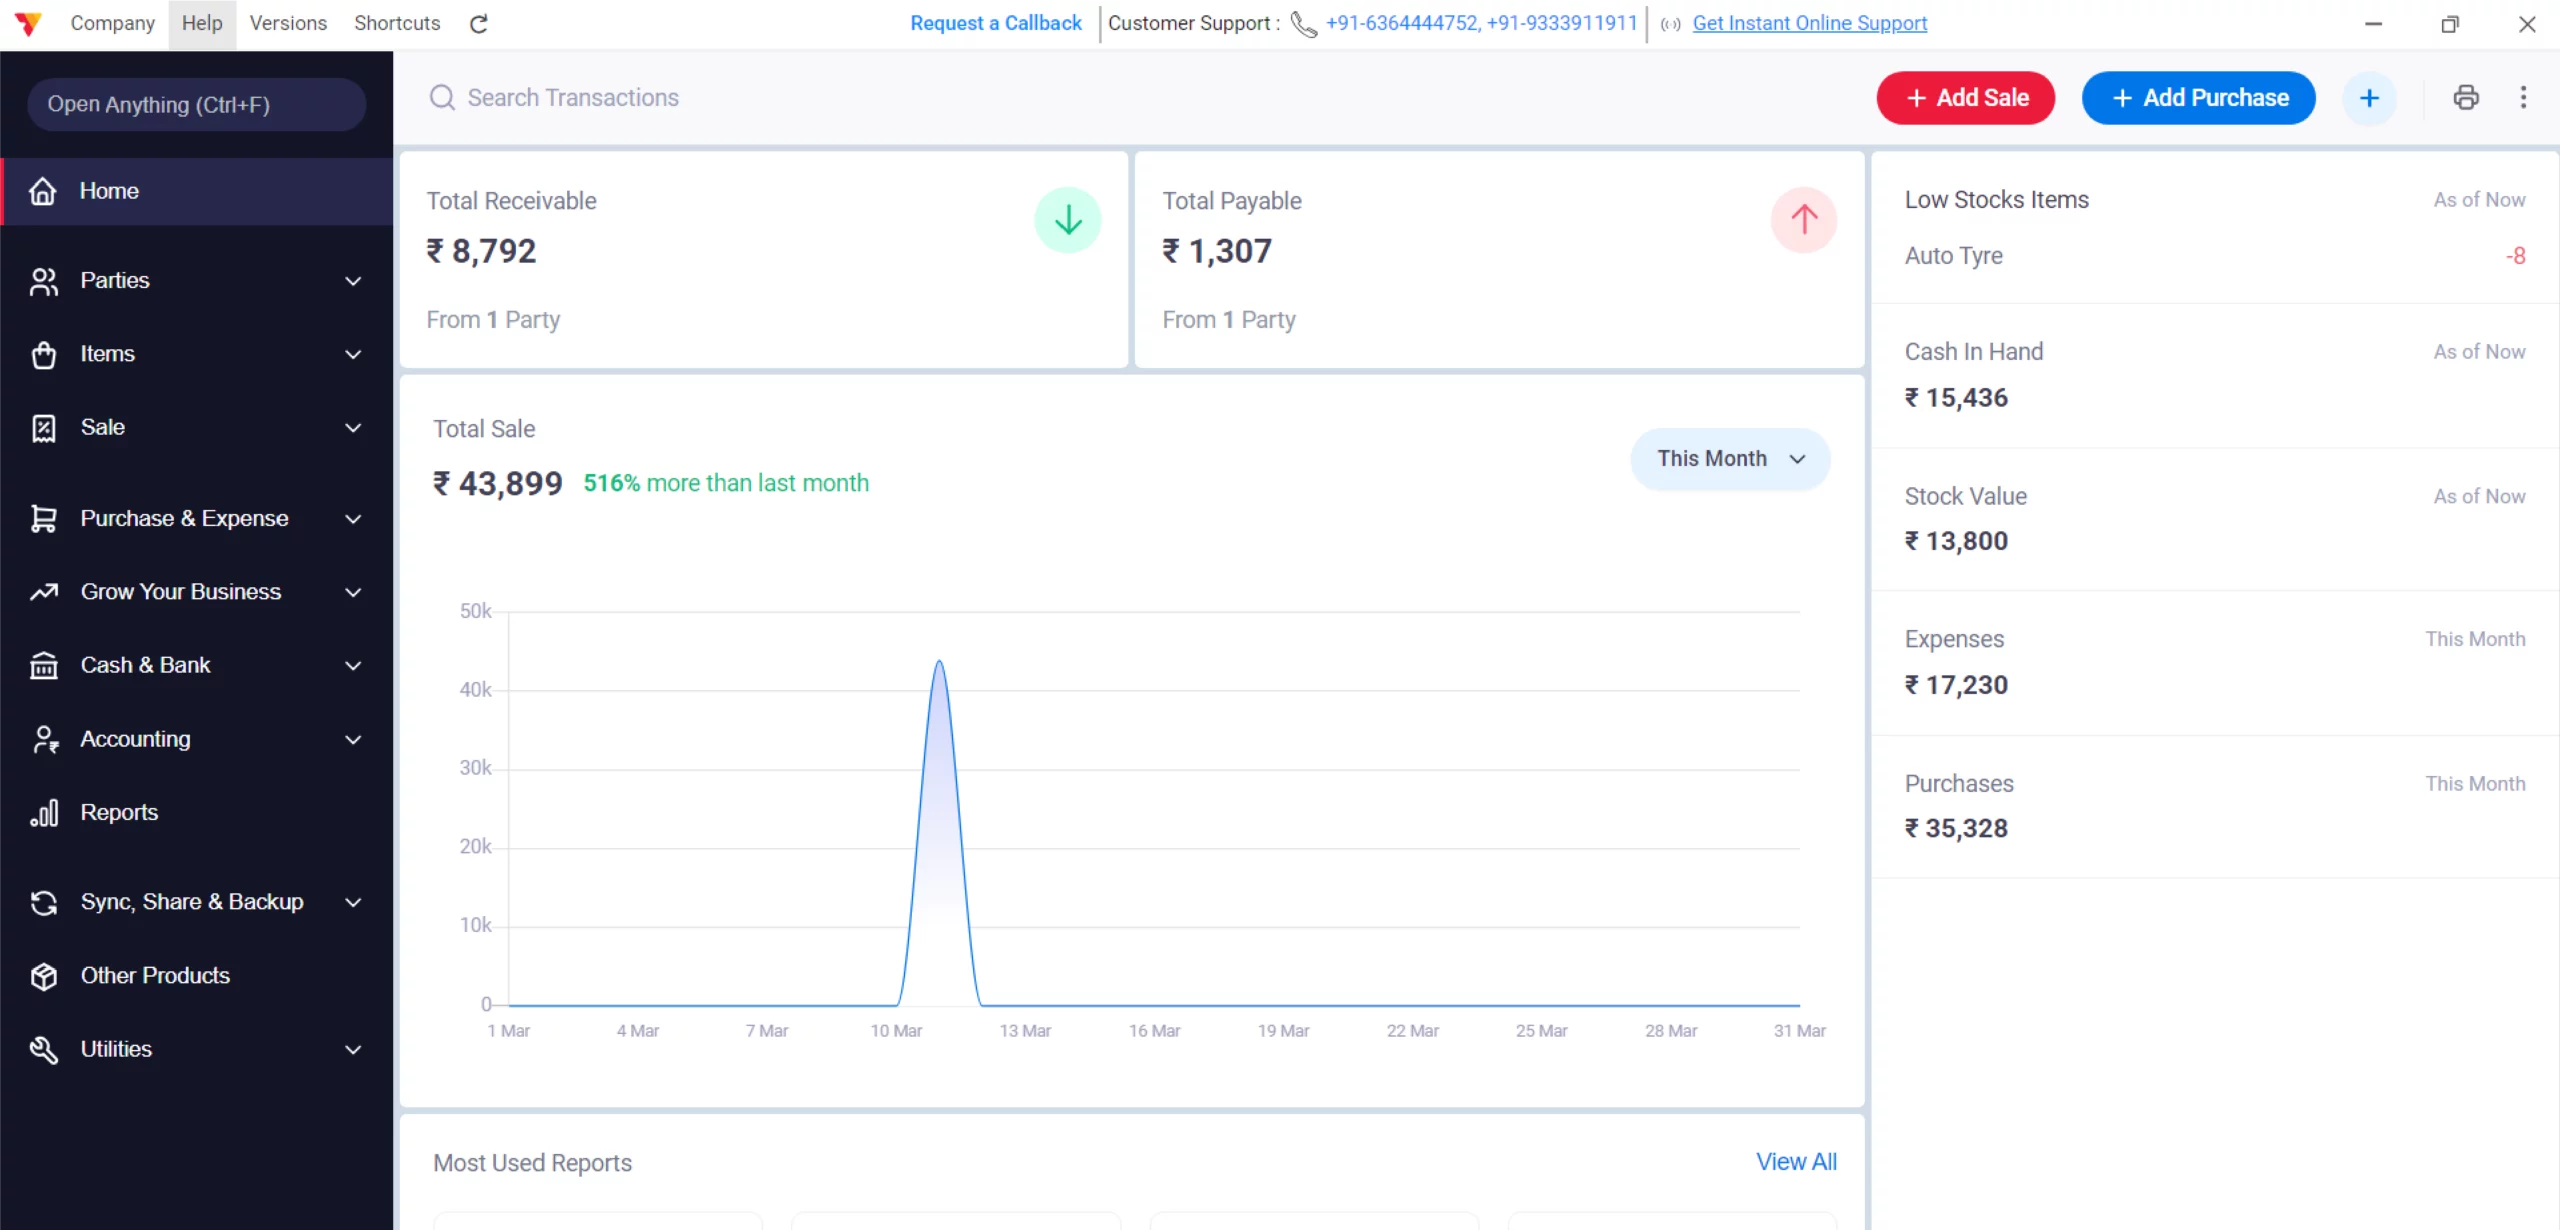
Open Vyapar App
Launch the Vyapar accounting software on your Desktop.
01

Add Sale
Click on “+ Add Sale” to create a sale transaction from the dashboard.
02
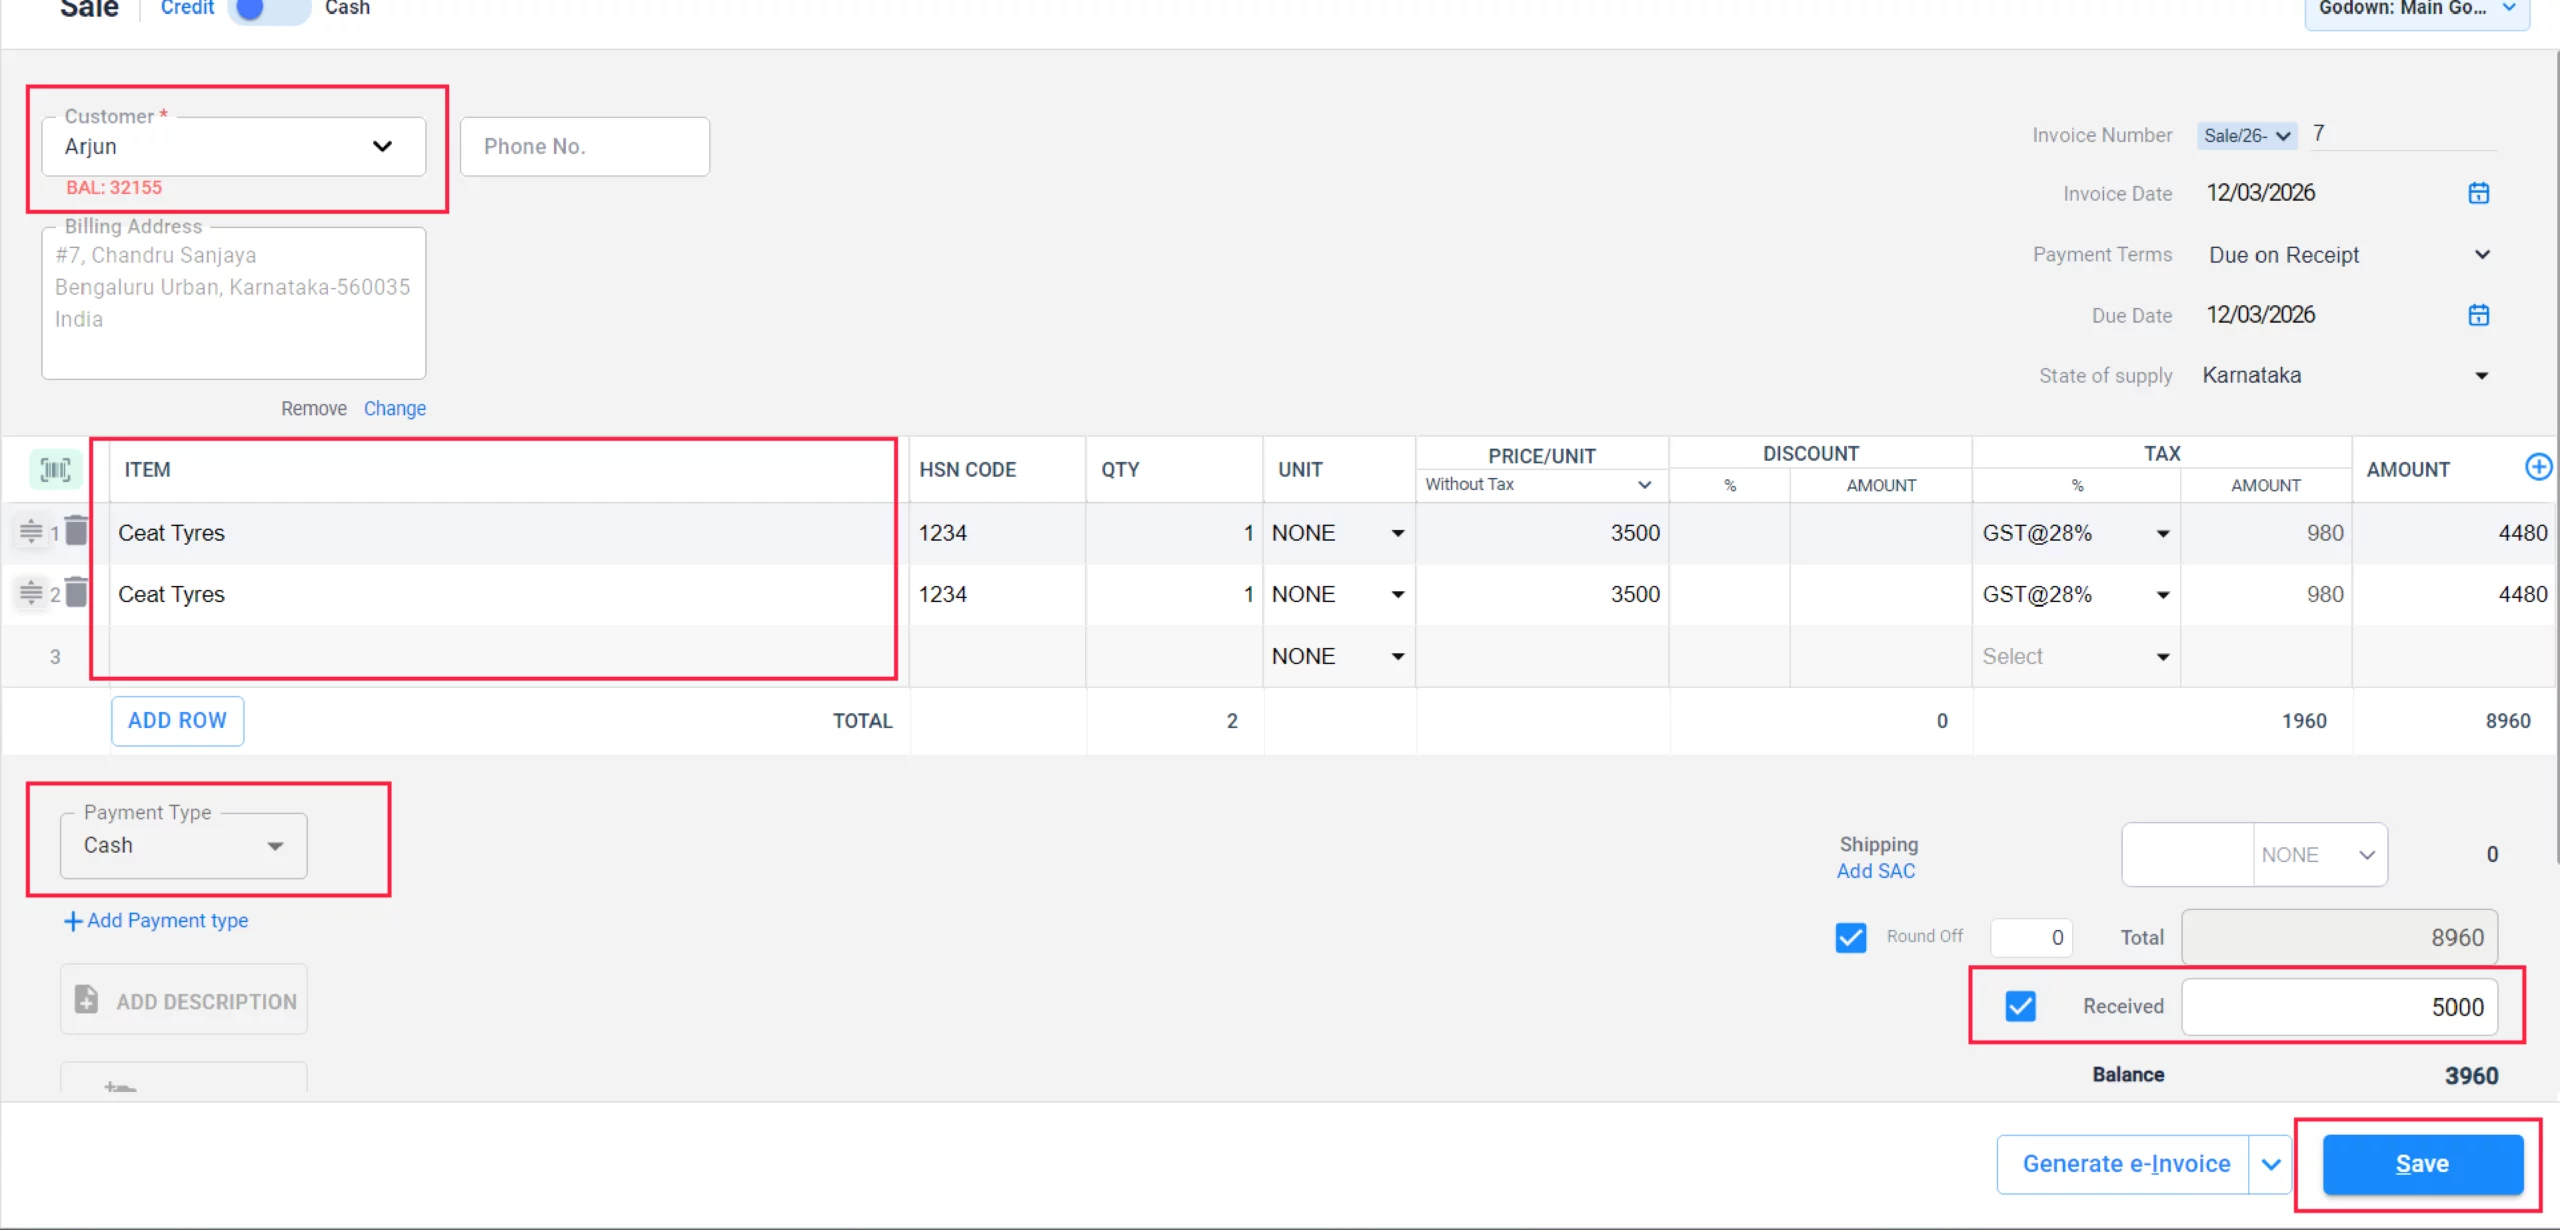
Add Sale Details & Save
Enter the Party Name, Items, and the Received Amount along with the Payment Mode (Cash/Bank/Cheque) and click Save.
03
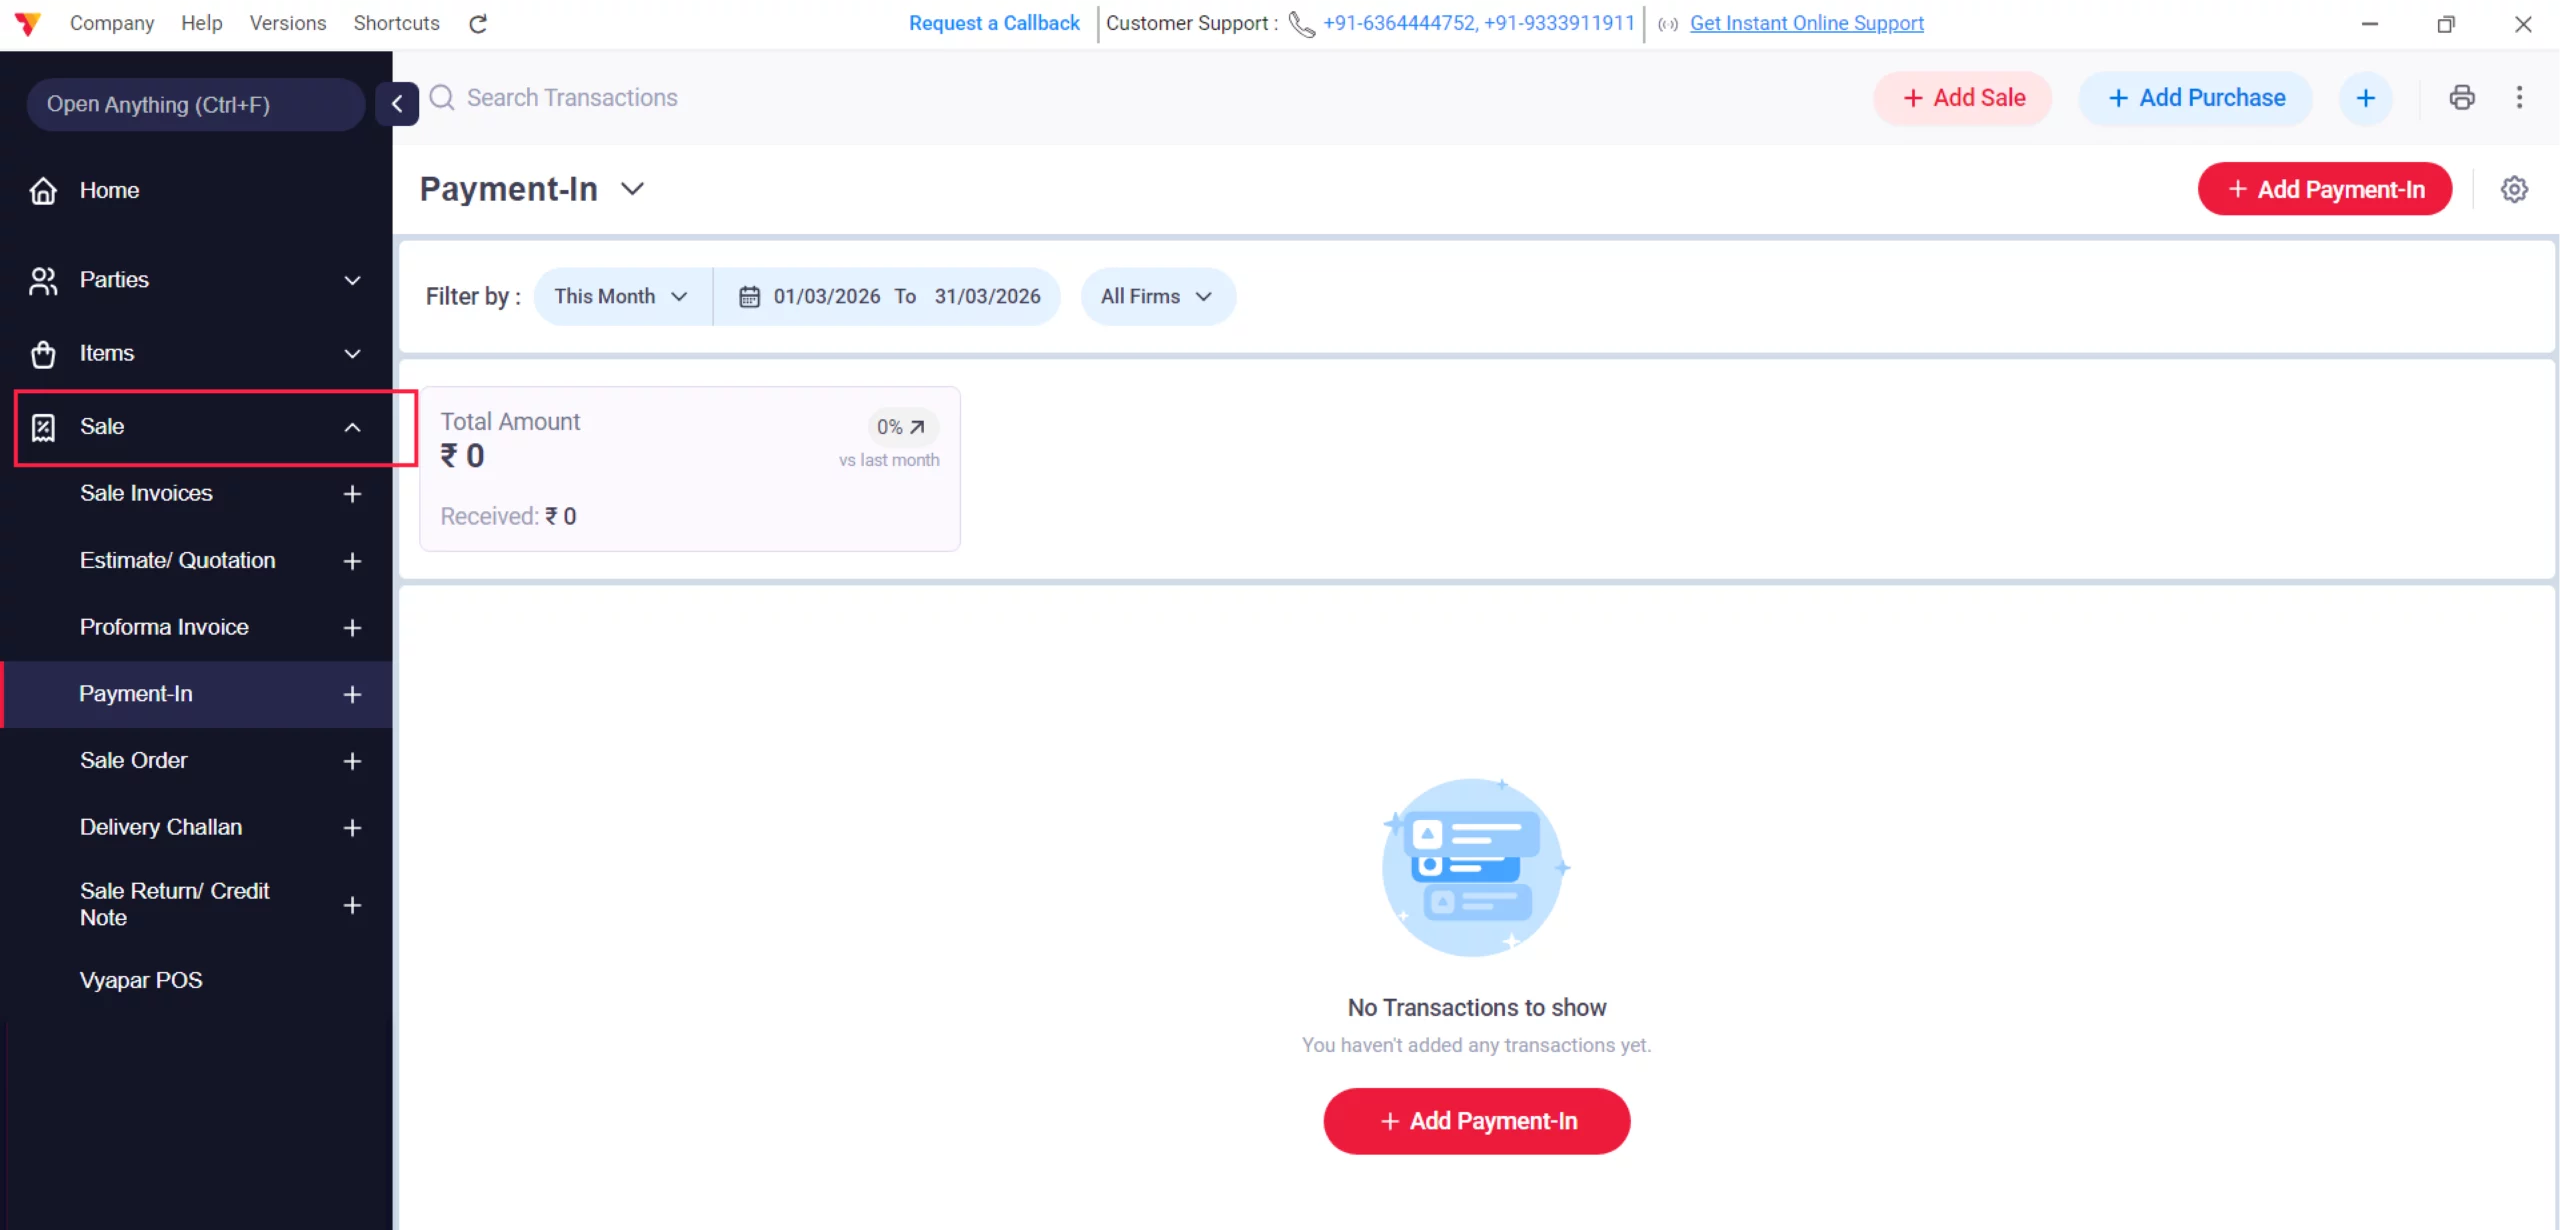
Navigate to Sale Menu
Go to the Sale section in the left sidebar to manage existing entries.
04
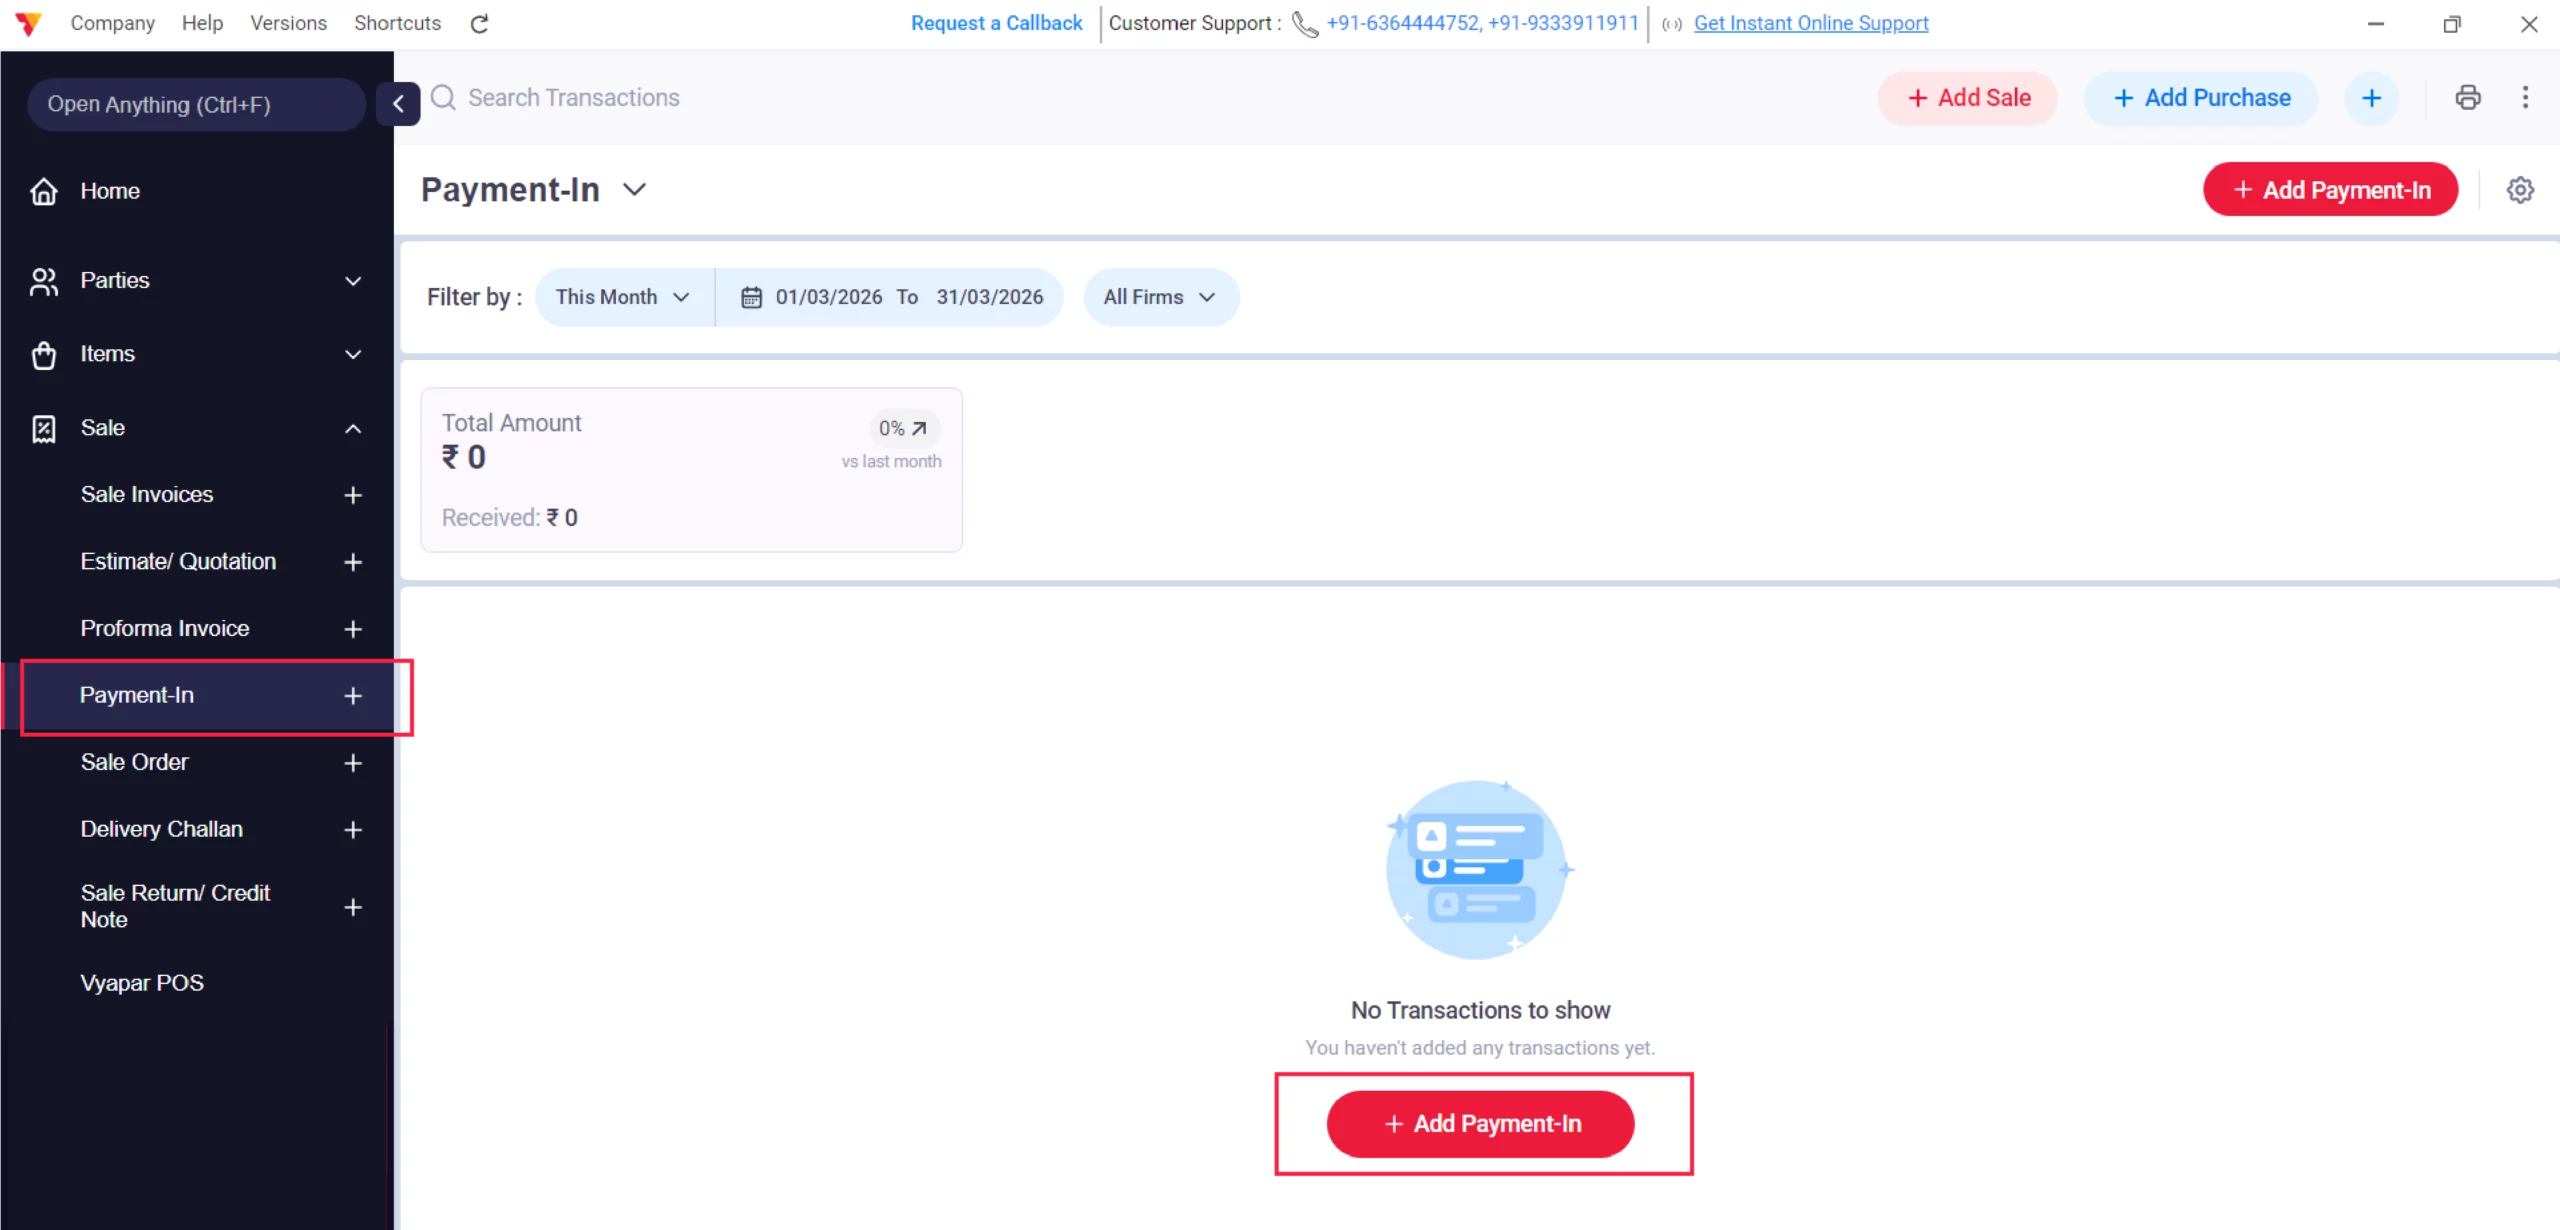
Select Payment-In
Choose the Payment-In and click on the + Add Payment-In option to record money received for previous credit sales.
05
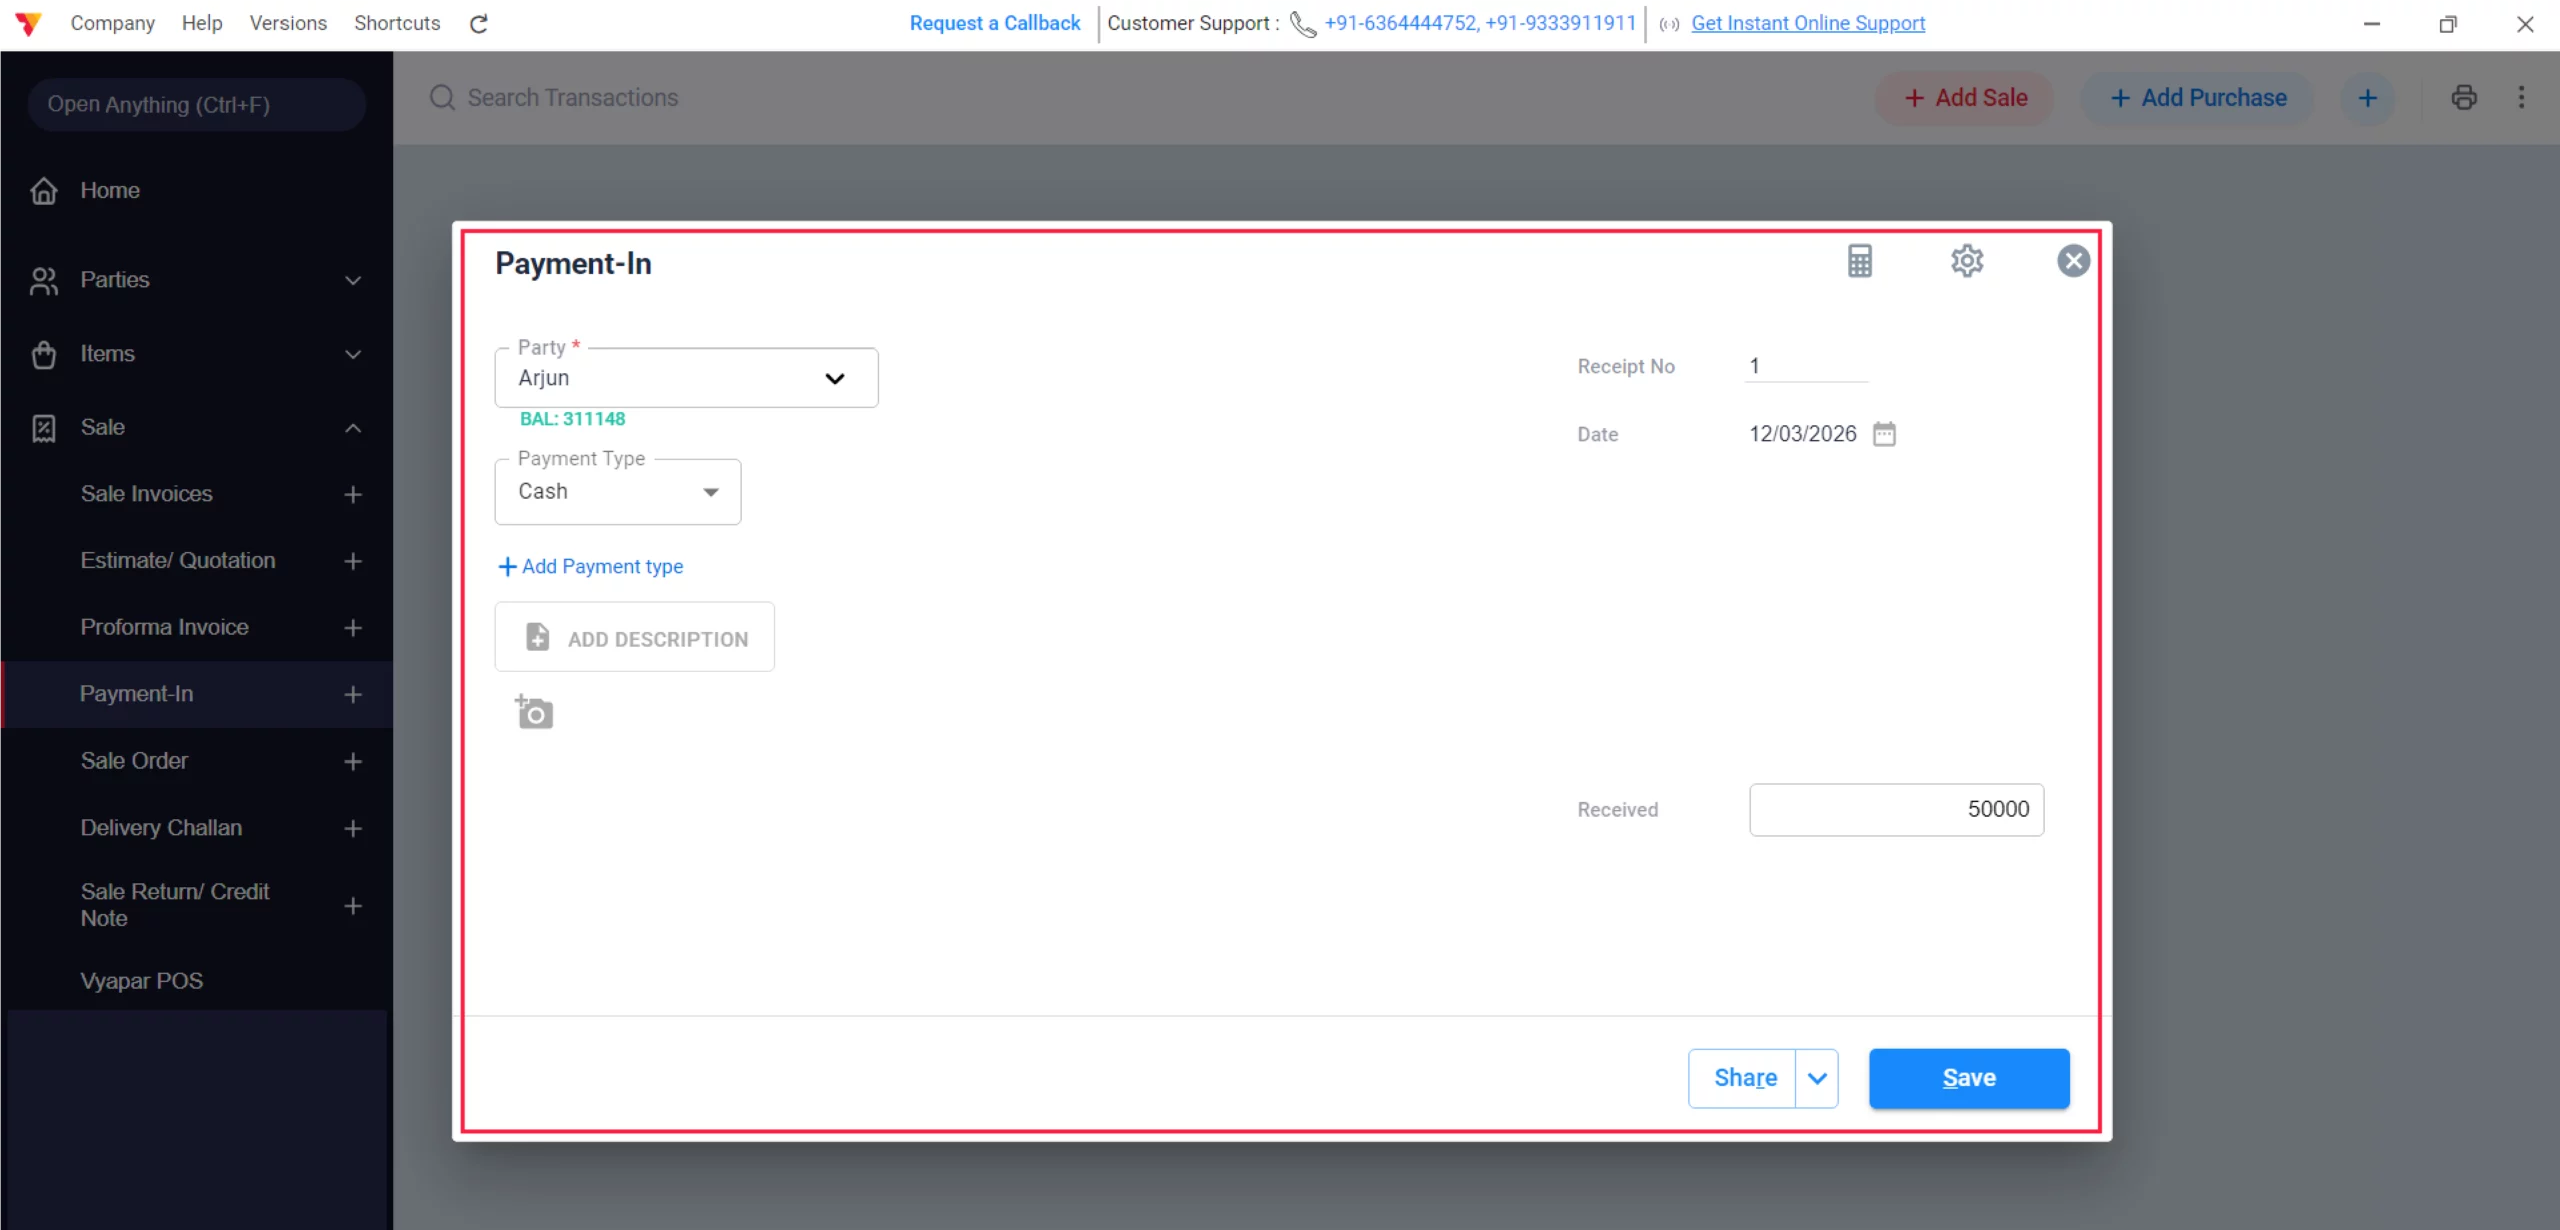
Record Payment-In & Save
Select the Customer Name, specify the Mode of Payment, and enter the Amount; click Save to instantly update the party’s ledger.
06
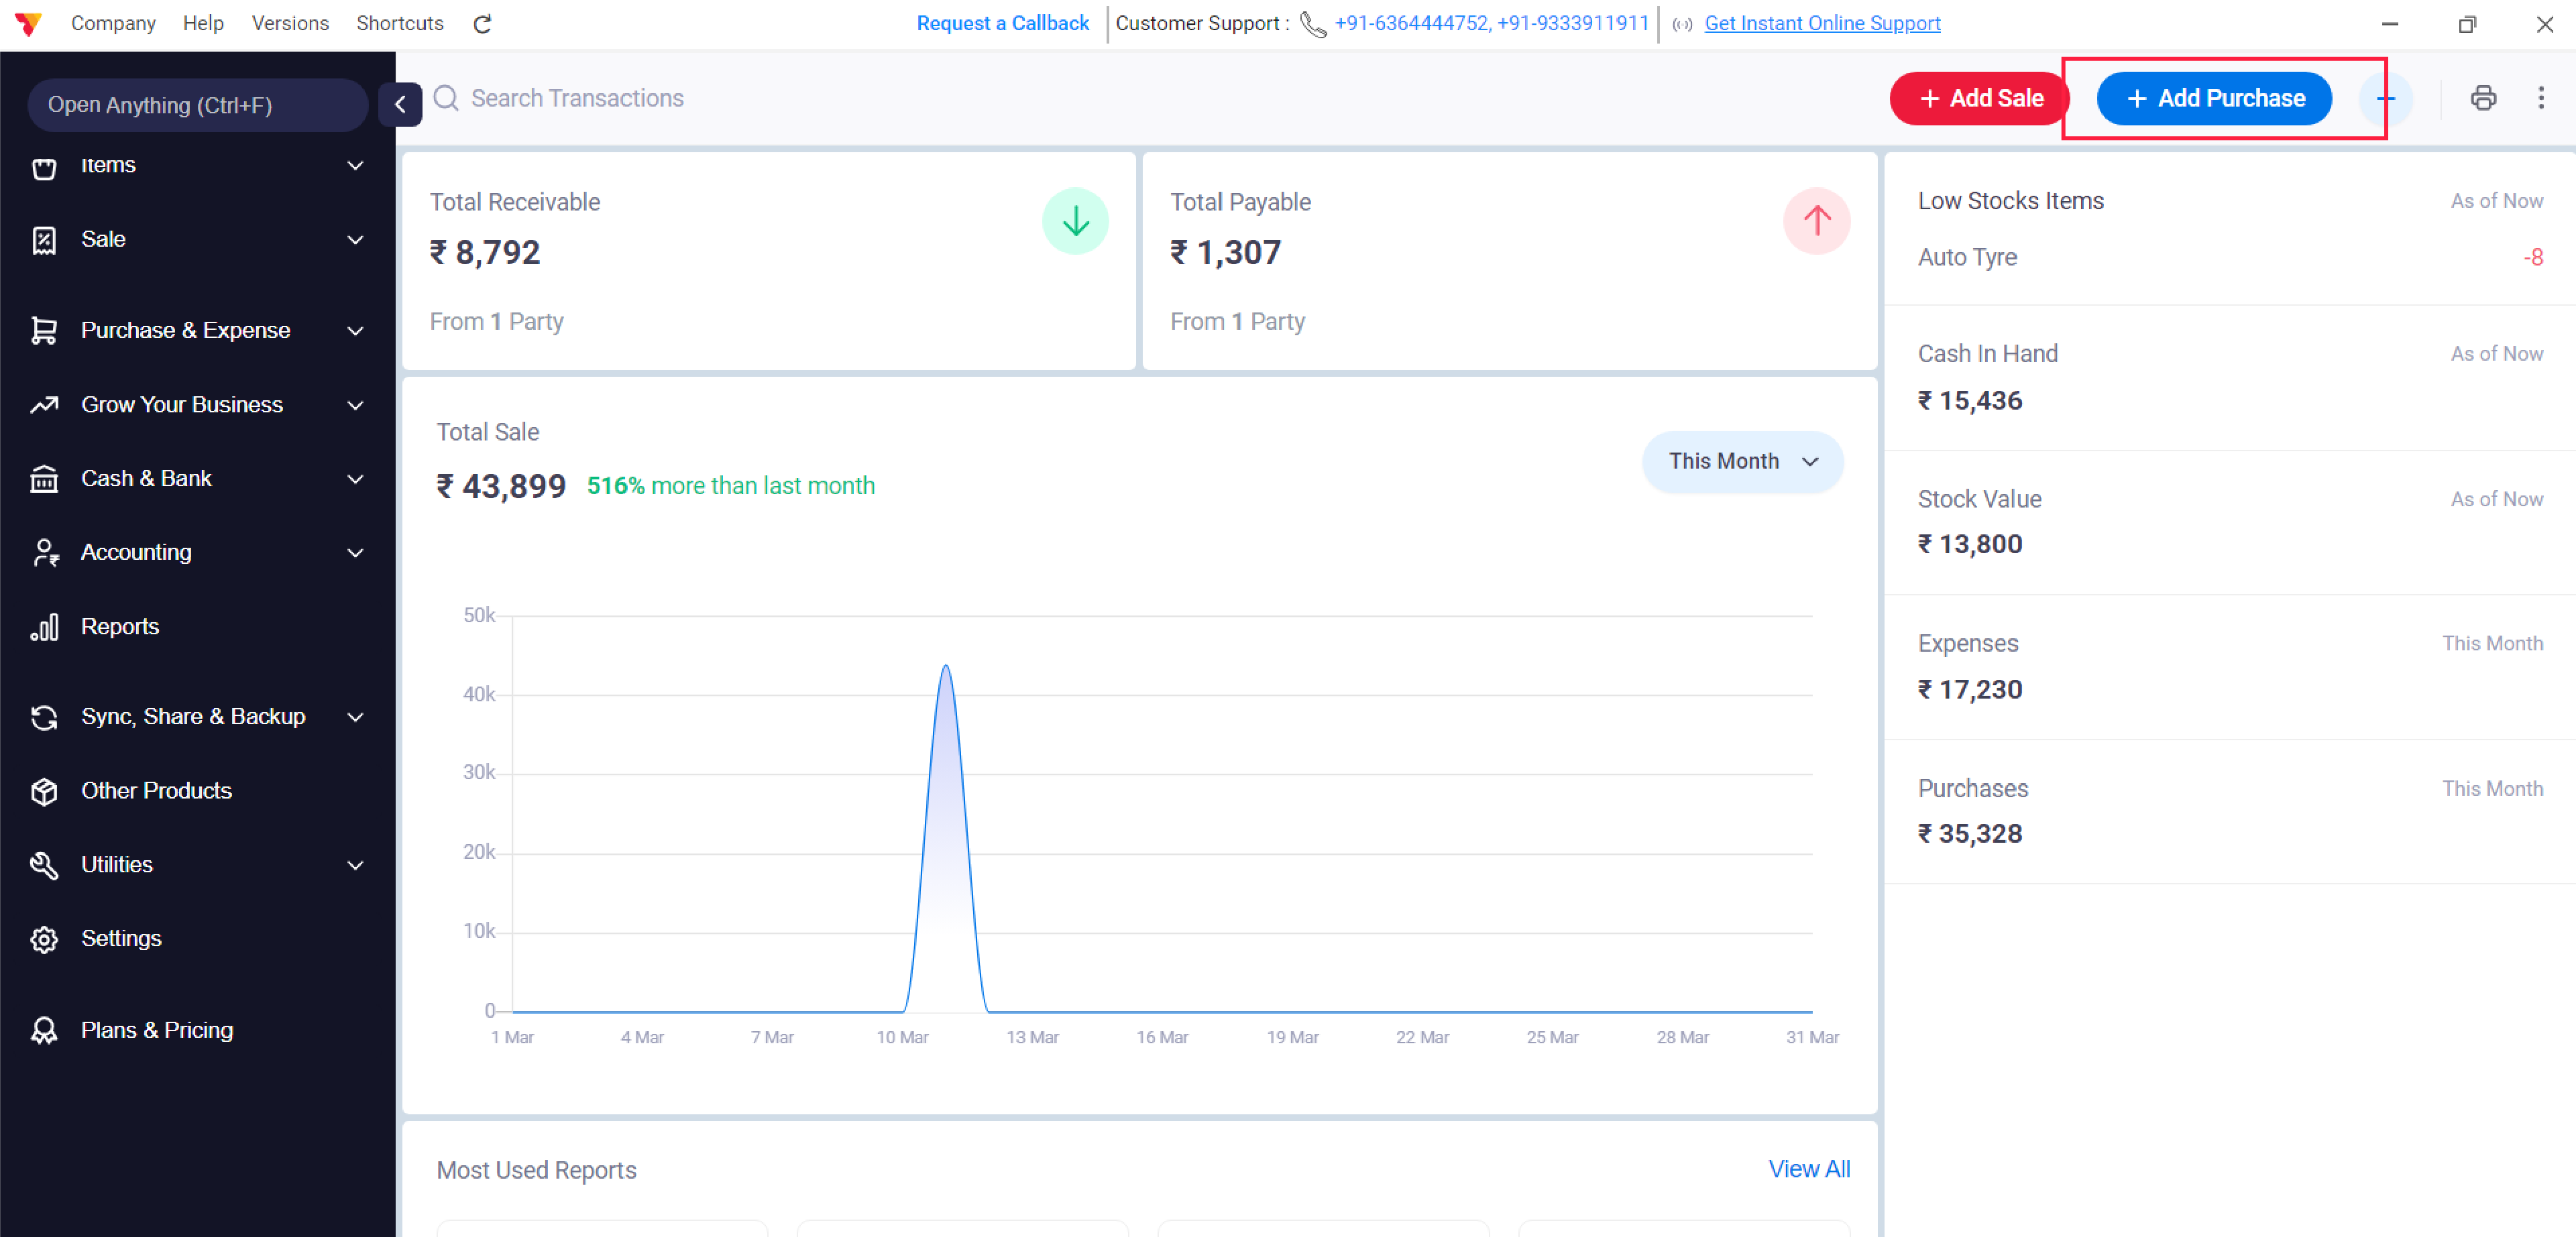
Add Purchase
Click on “+ Add Purchase” to create a sale transaction from the dashboard.
07
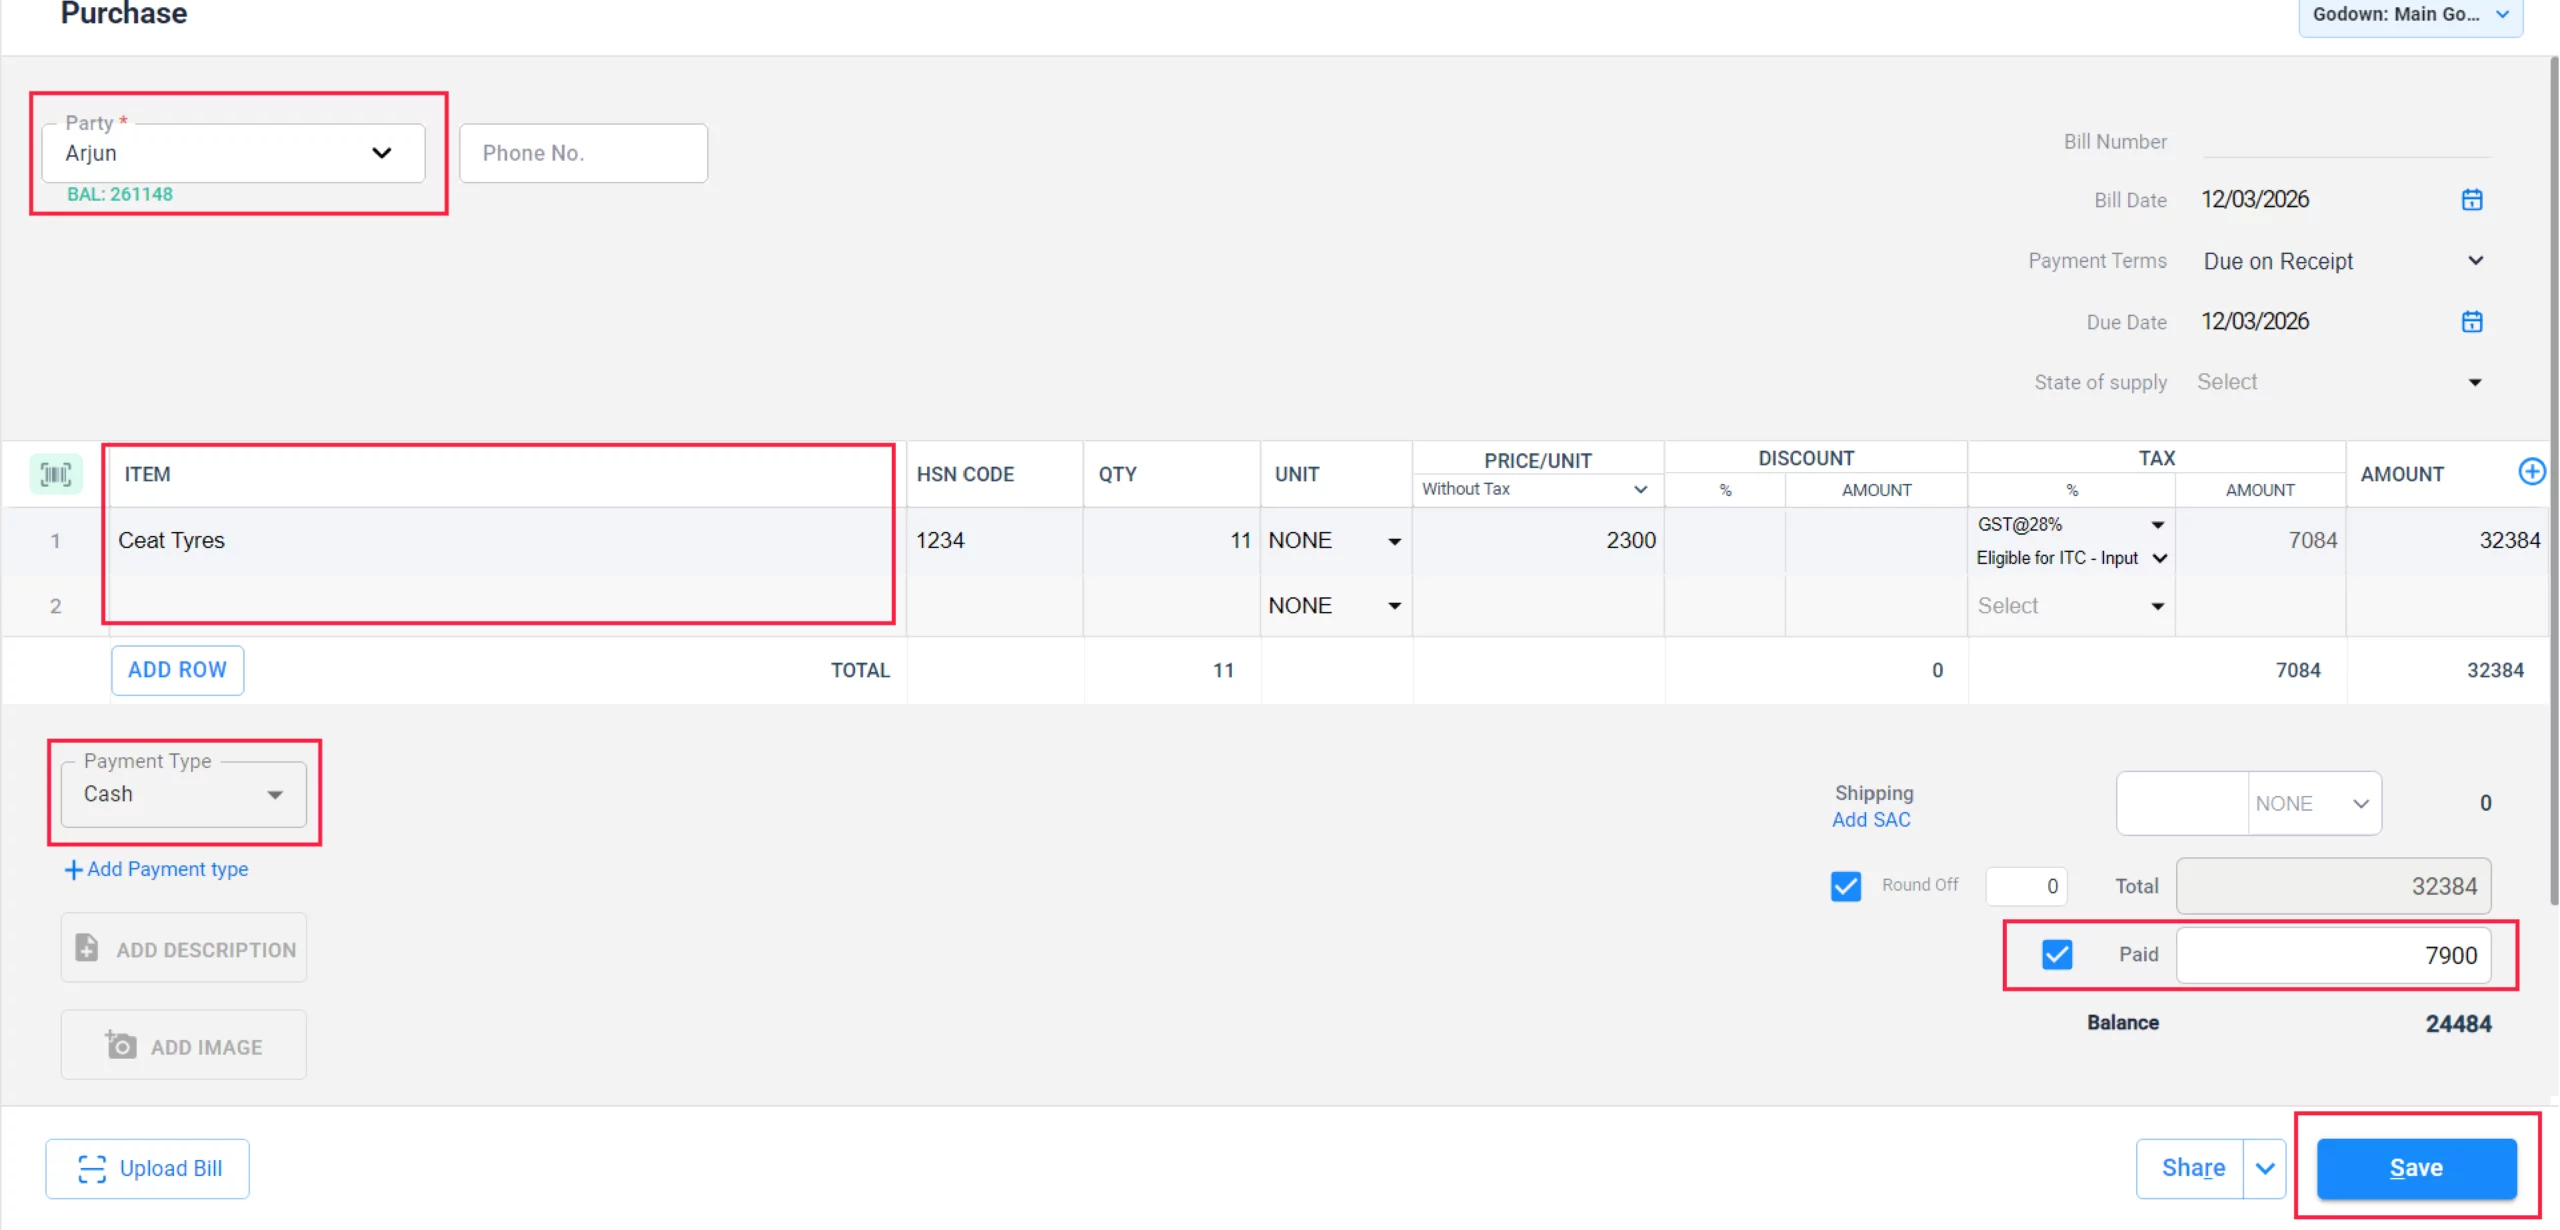
Add Purchase Details & Save
Add the Vendor (Party), Items, and the Paid Amount with its Payment Mode and click Save.
08

Navigate to Purchase
Go to the Purchase & Expense section in the main menu.
09

Select Payment-Out
Choose the Payment-Out option to settle dues with your suppliers.
10
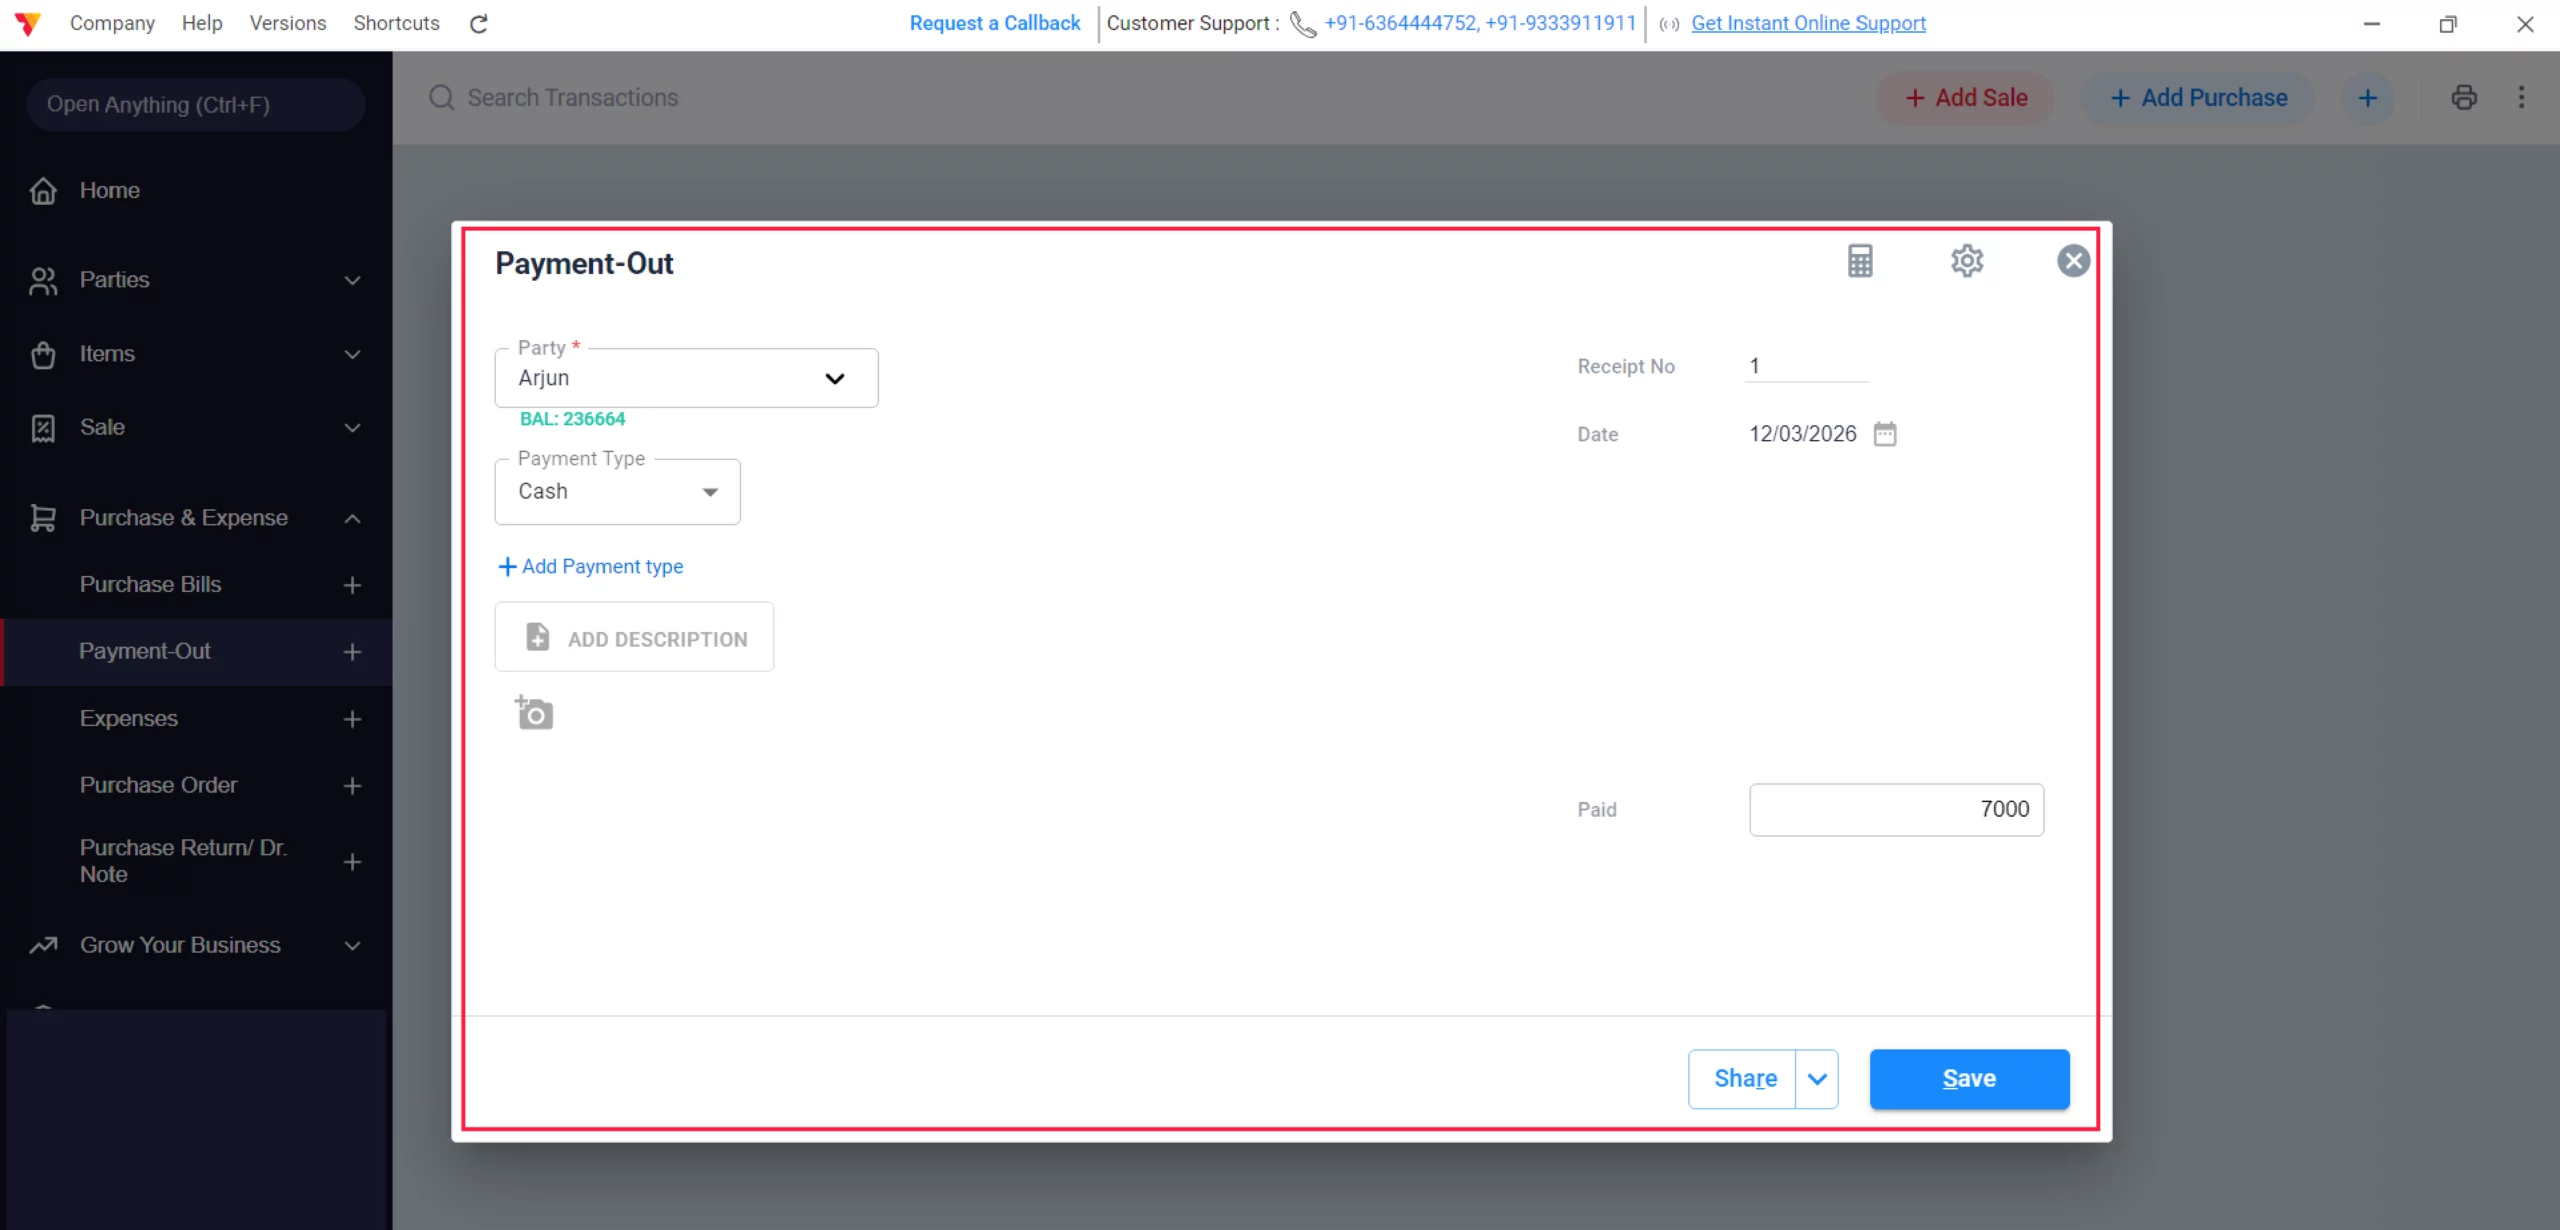
Record Payment-Out & Save
Click on “+Add Payment-Out”, select the Vendor Name, choose the Mode of Payment, enter the Amount, and click Save to update your liabilities.
11
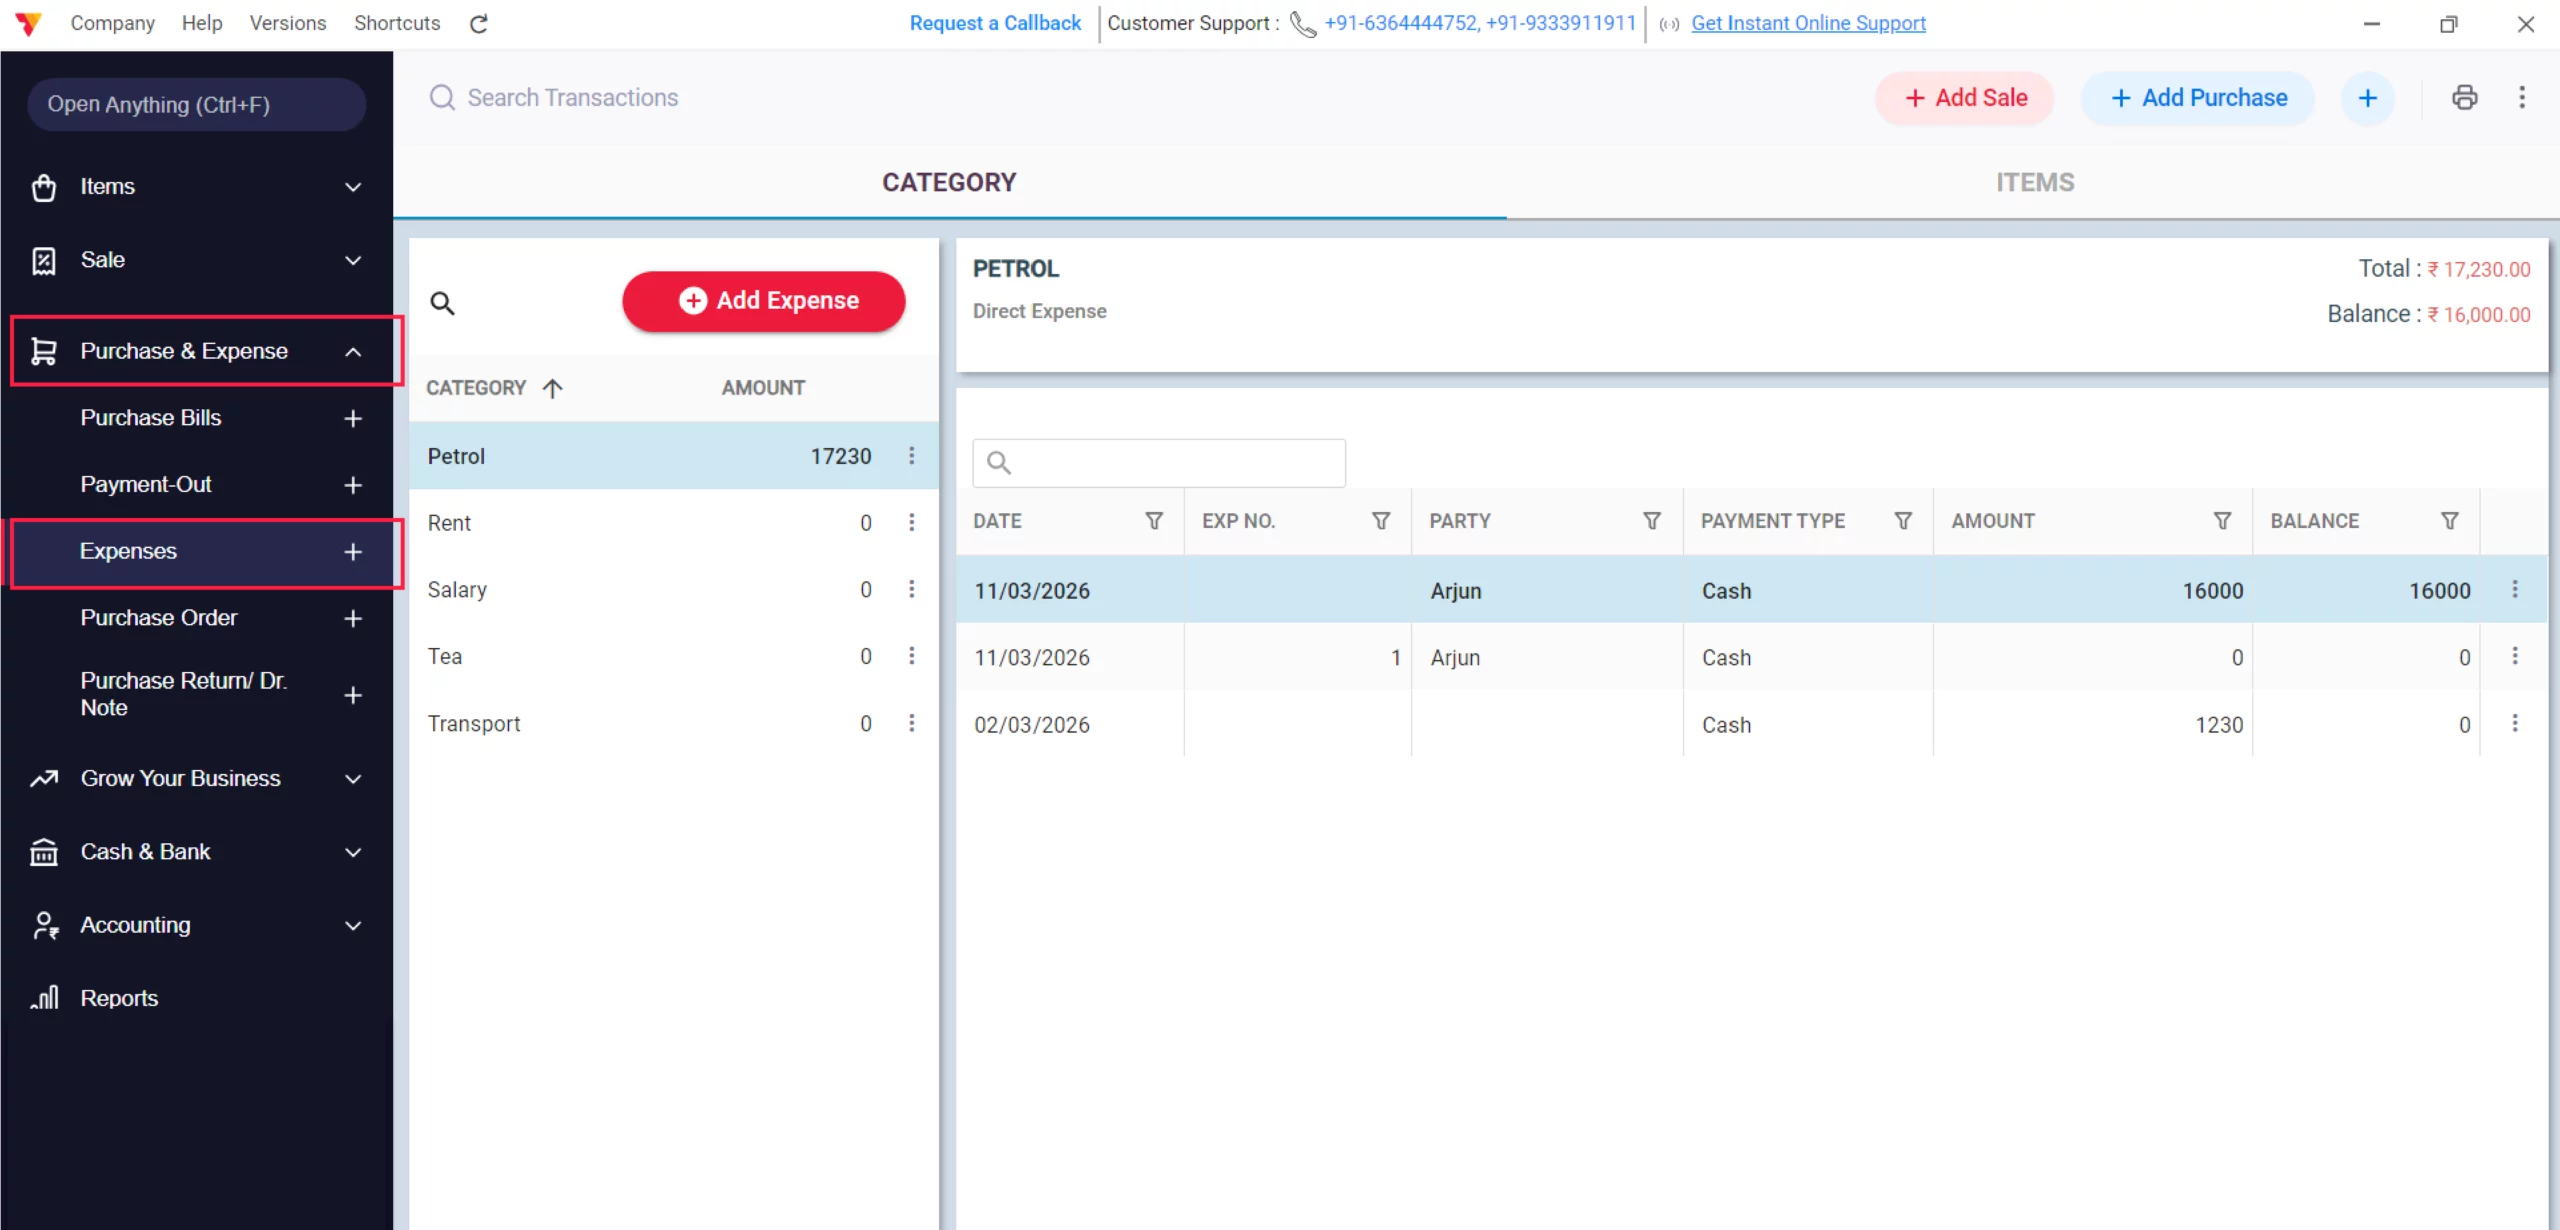
Navigate to Expense
Within the Purchase & Expense menu, click on the Expense tab.
12
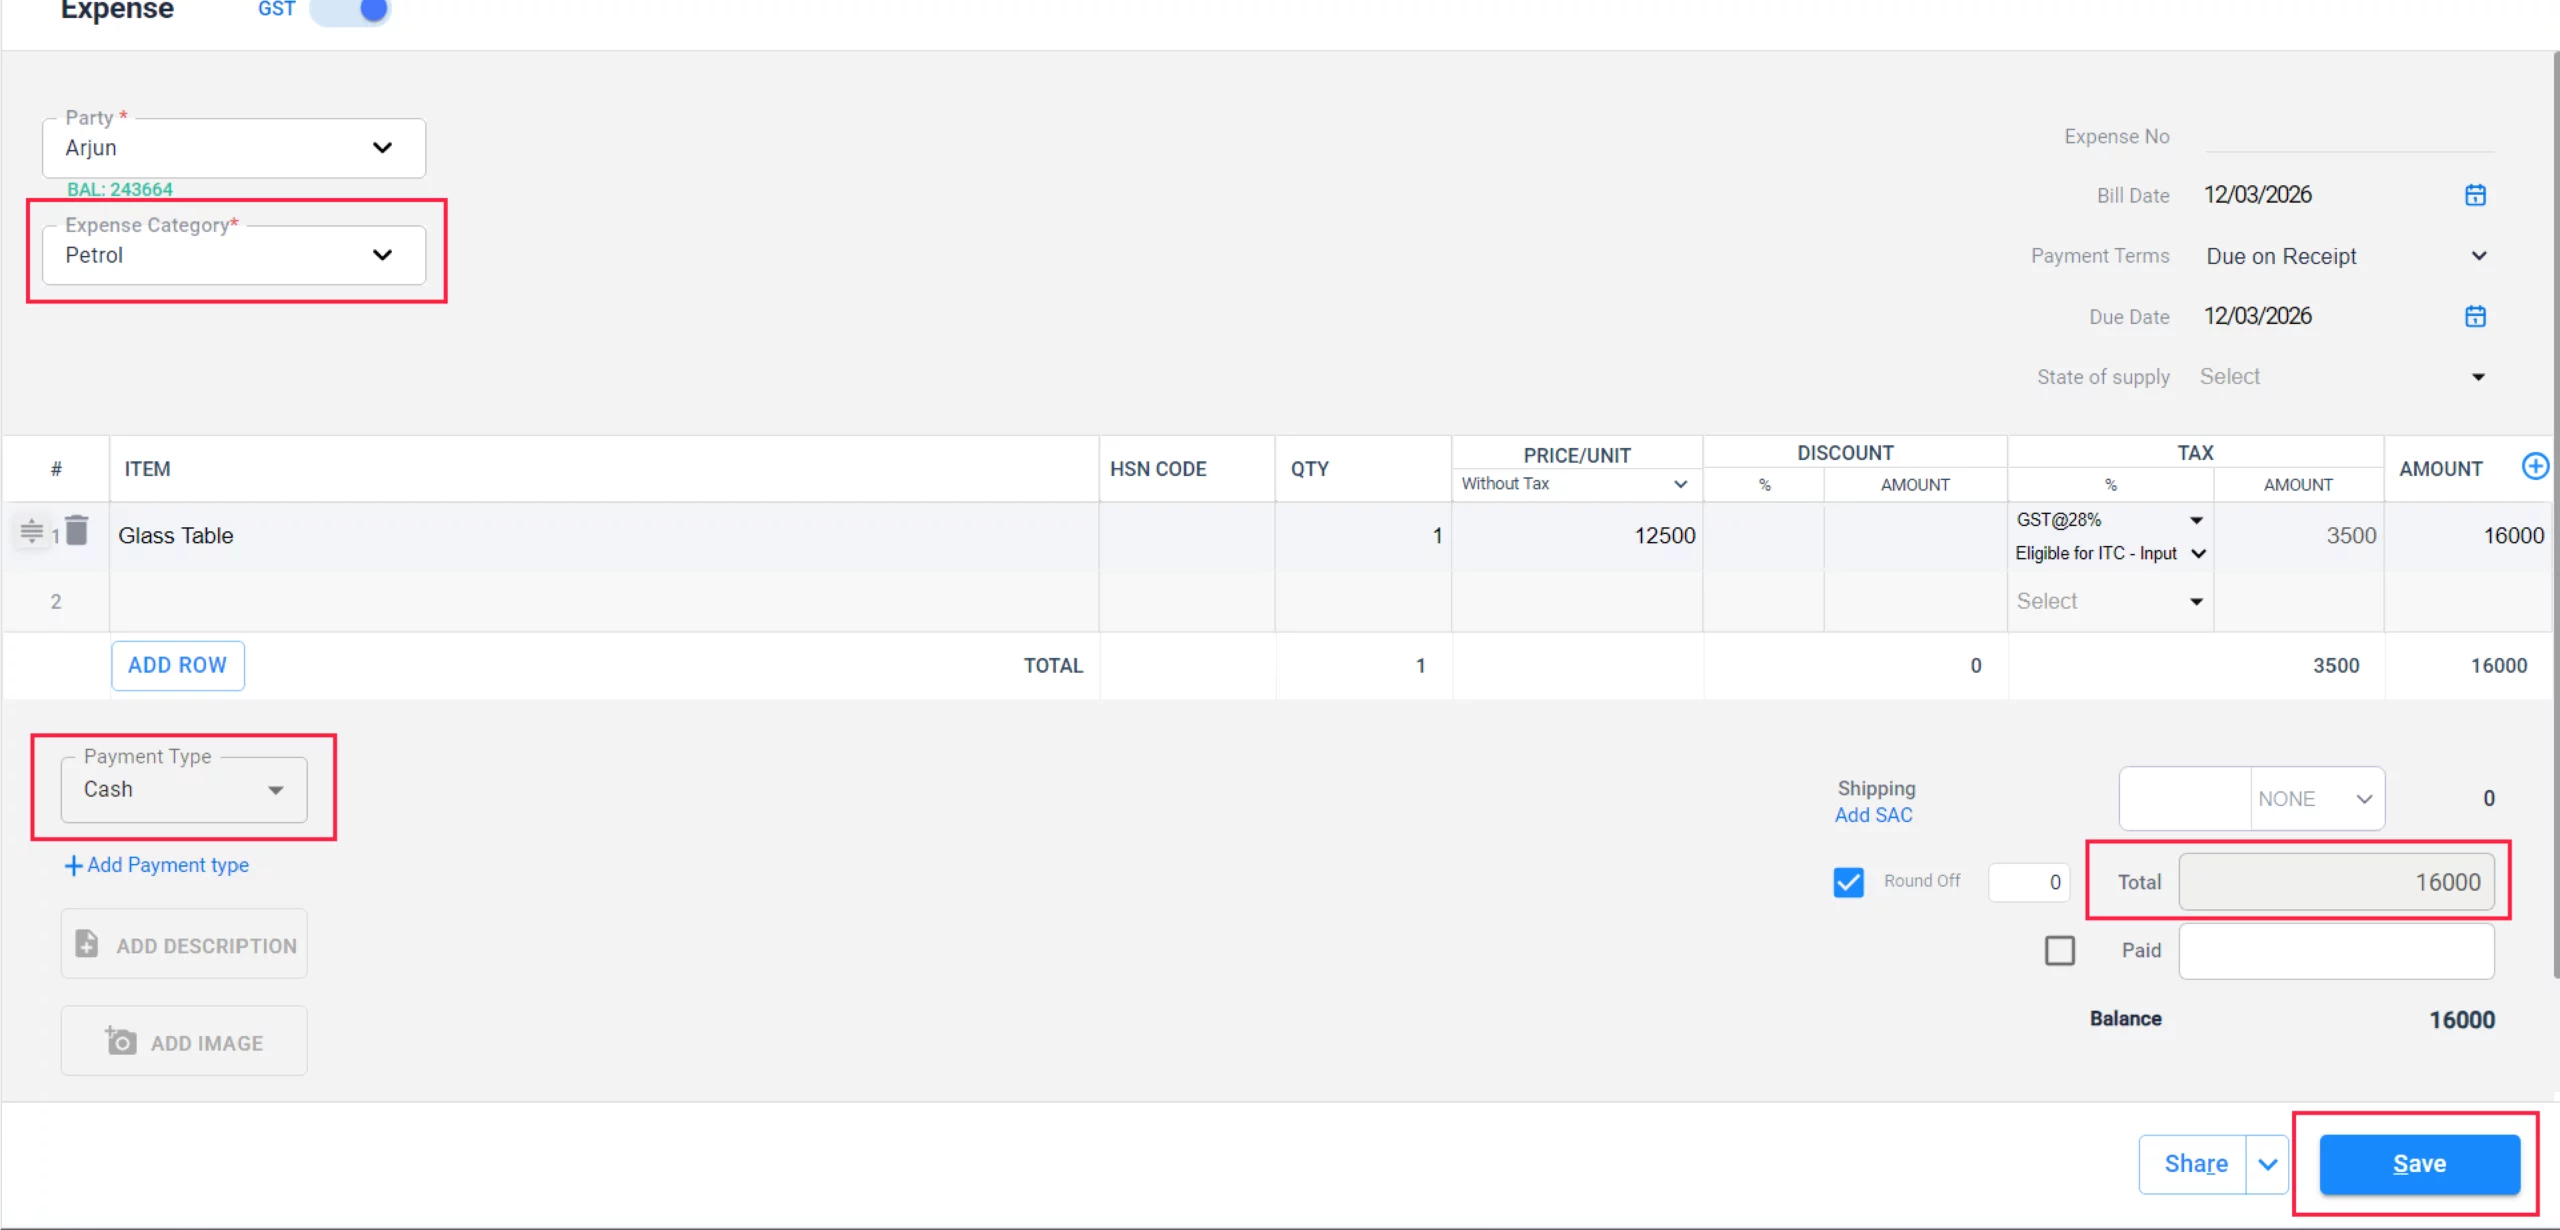
Add Expense & Save
Enter the Expense Category, the Payment Mode, and the Amount, then click Save to deduct this from your profit.
13
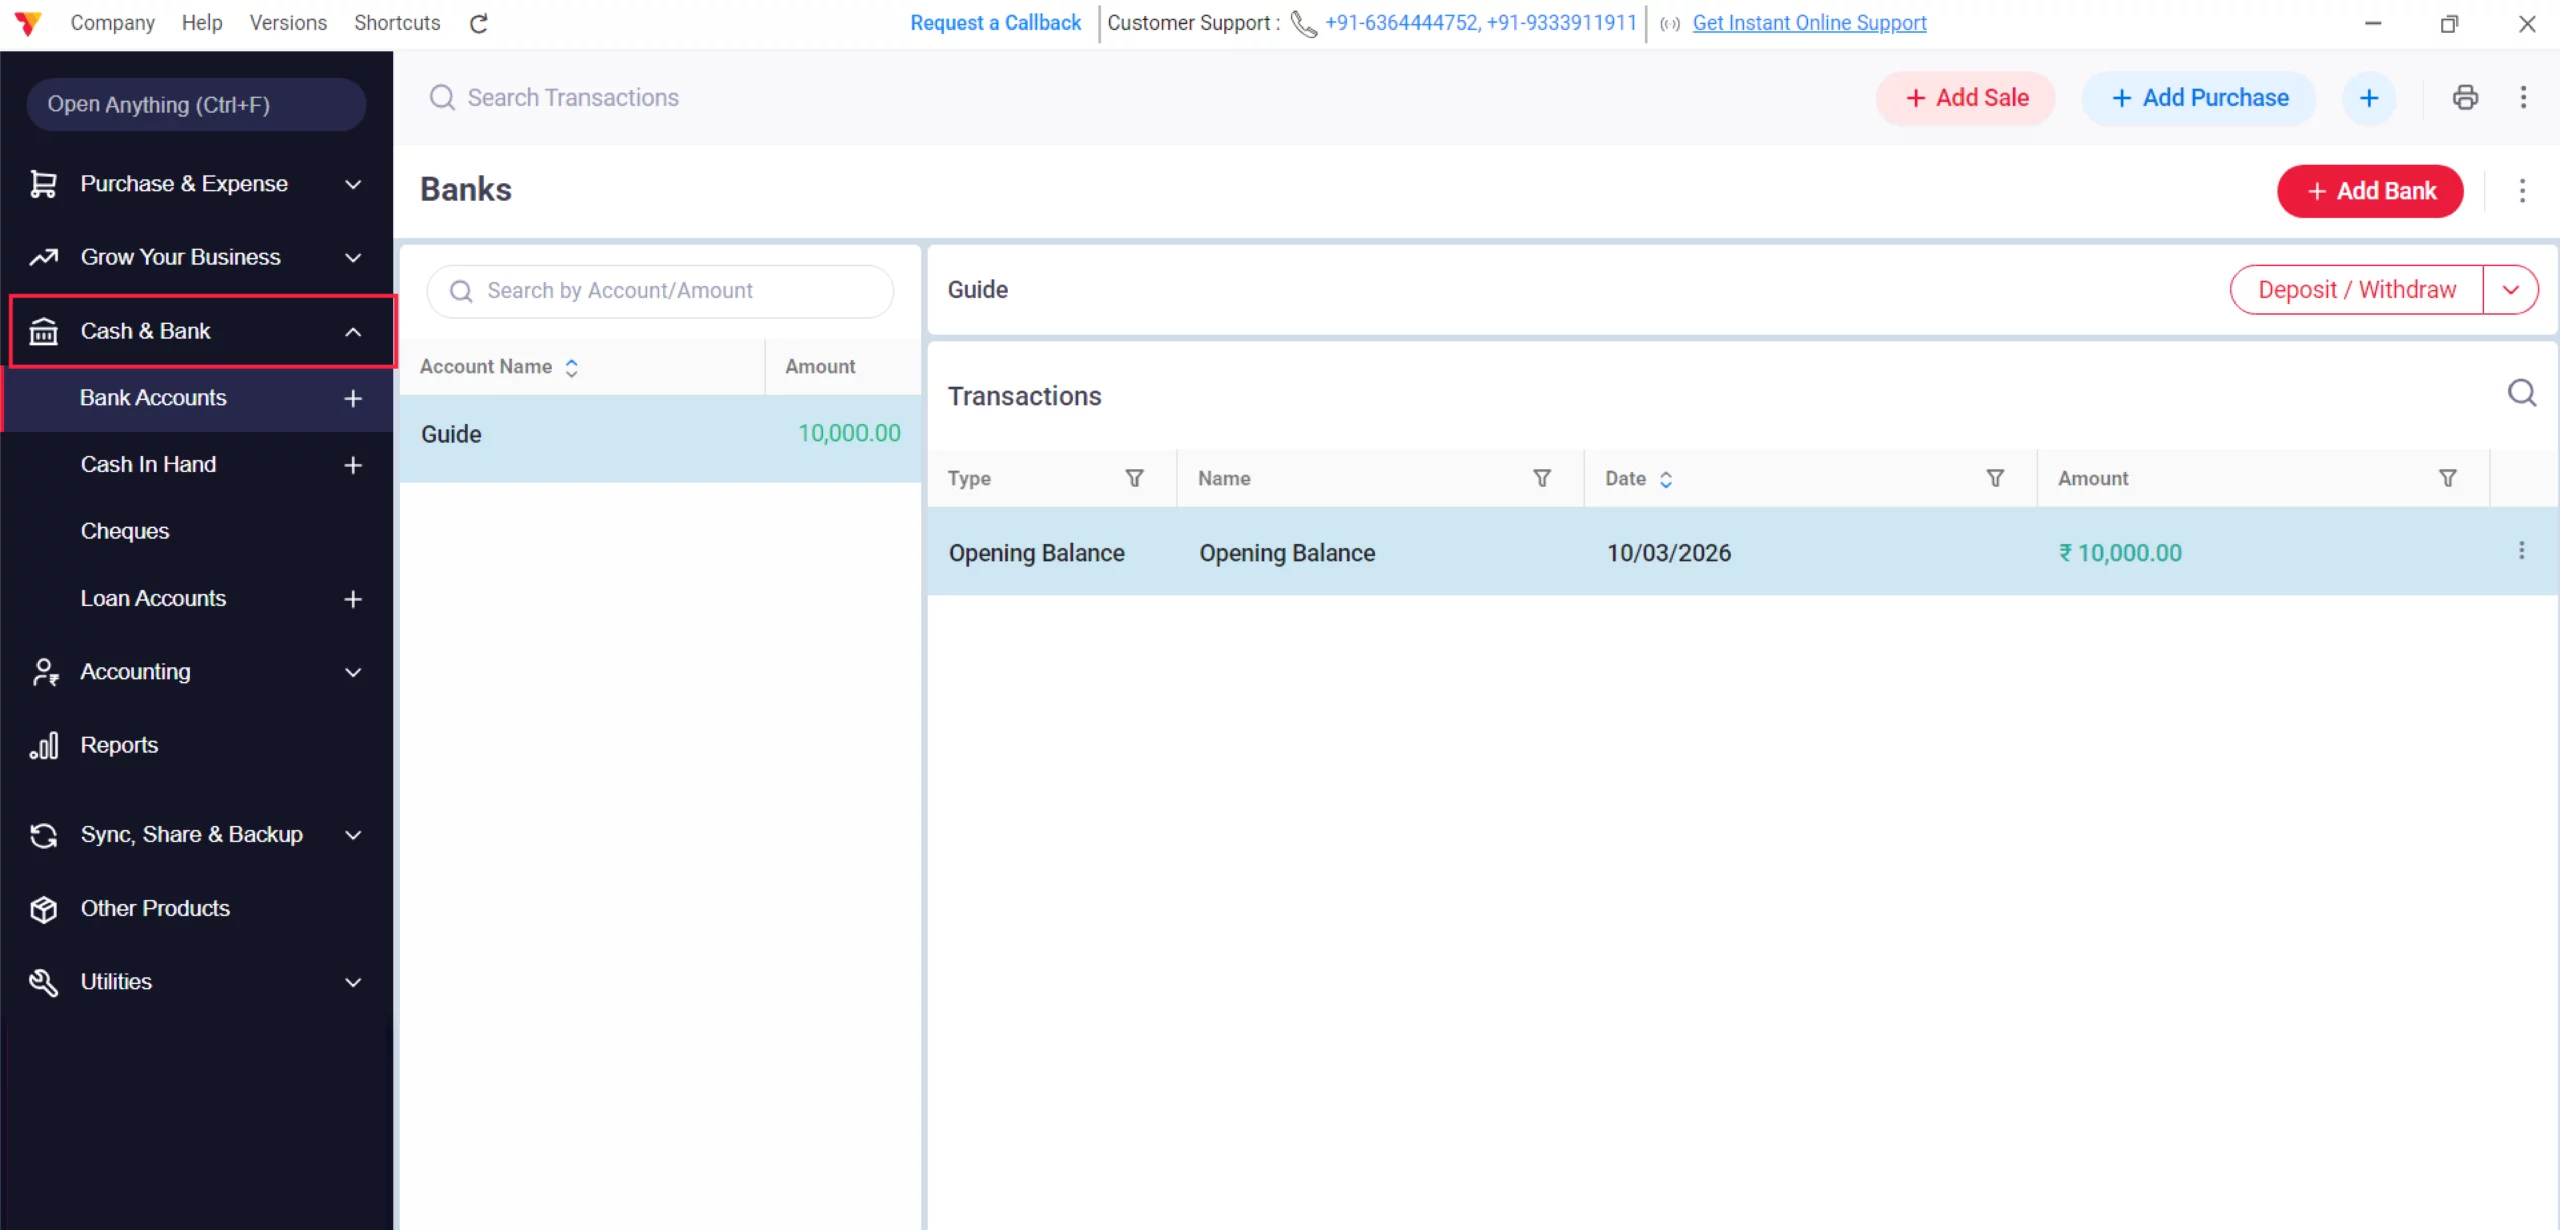
Navigate to Cash & Bank
Go to the Cash & Bank section to review your liquidity.
14

View Bank Transactions
Click on your bank accounts to see a real-time list of all digital “Money-In” and “Money-Out”.
15
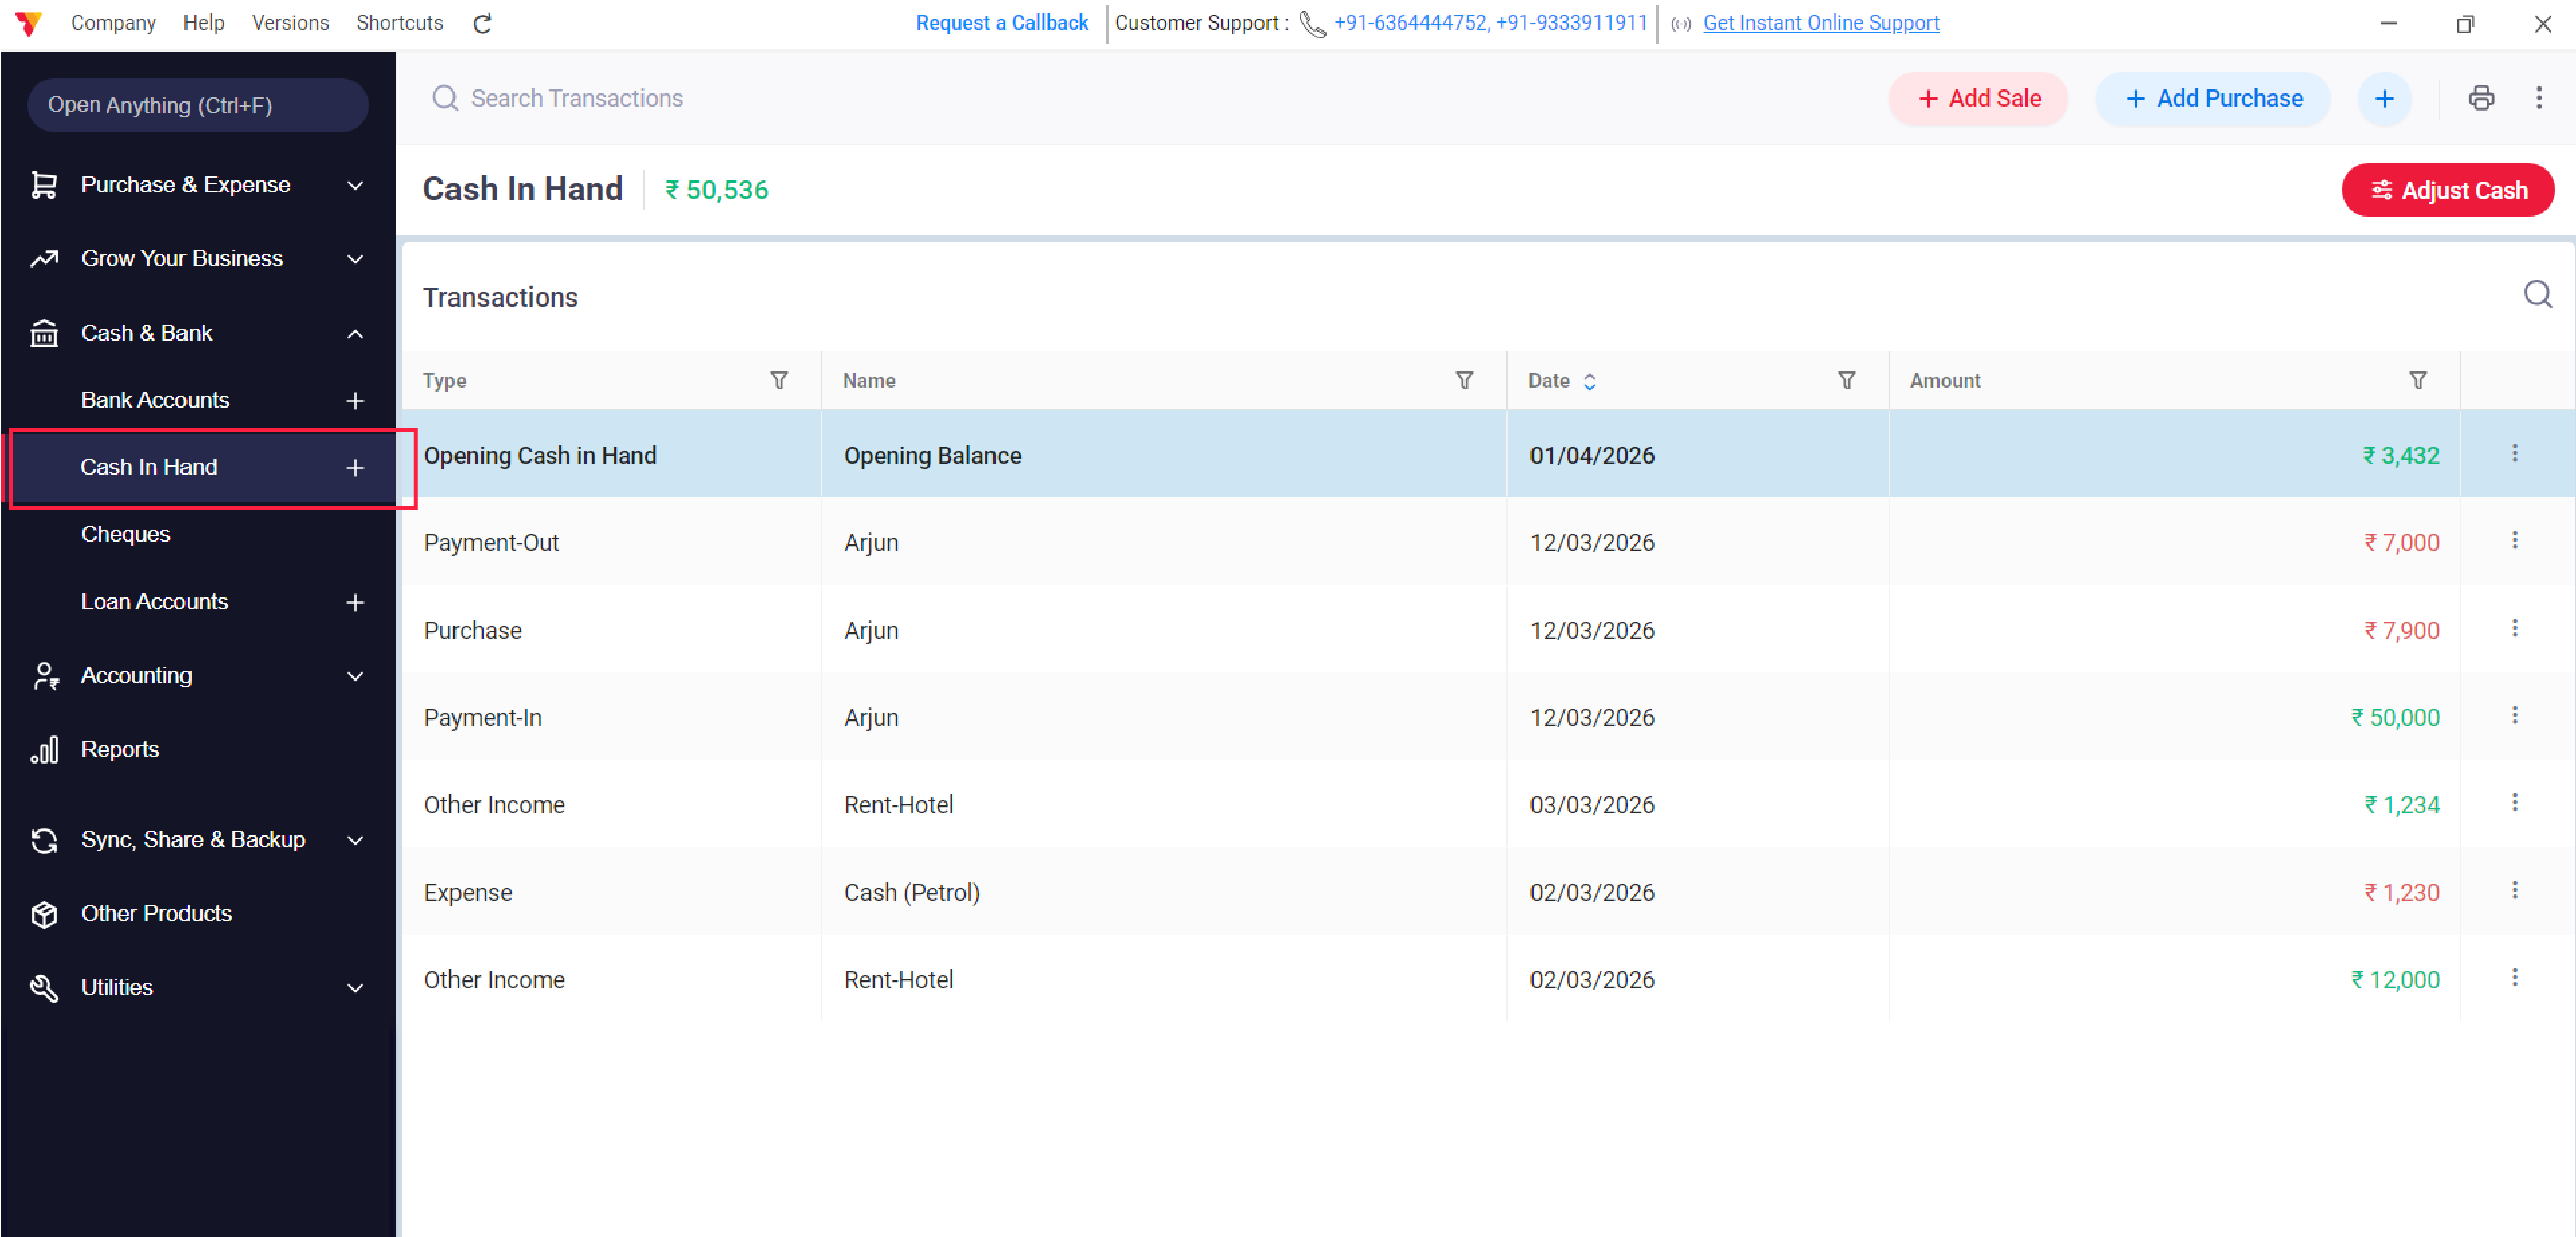
View Cash-in-Hand Transactions
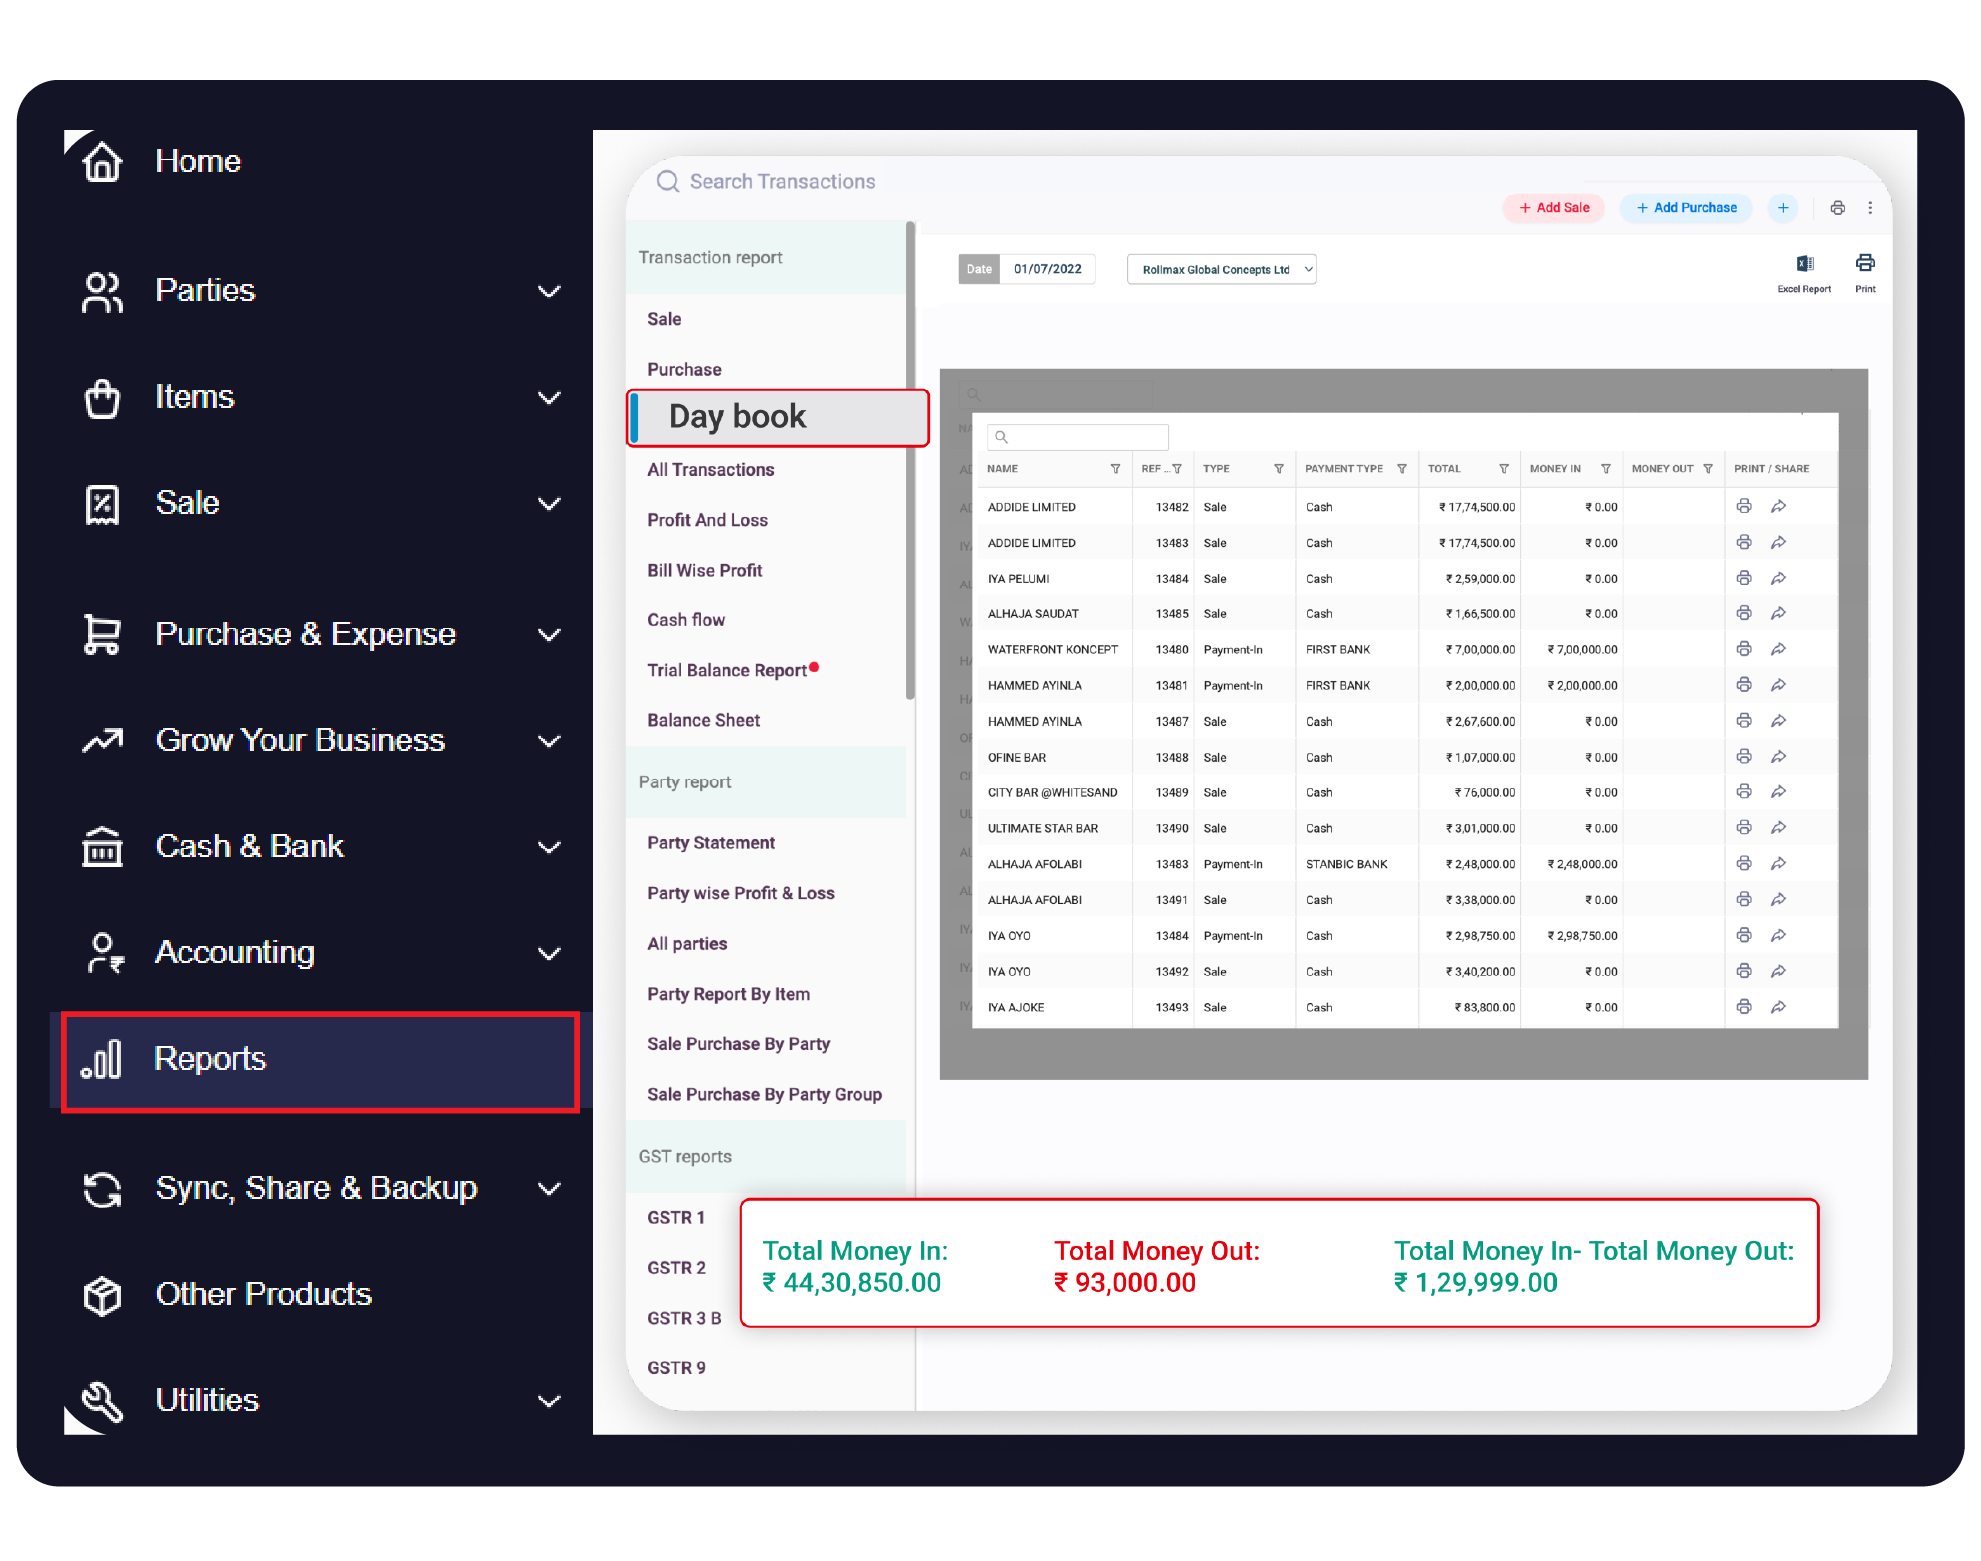
Check your cash ledger to see exactly when and how money enters or leaves your cash drawer, listed in the order it happened.
16
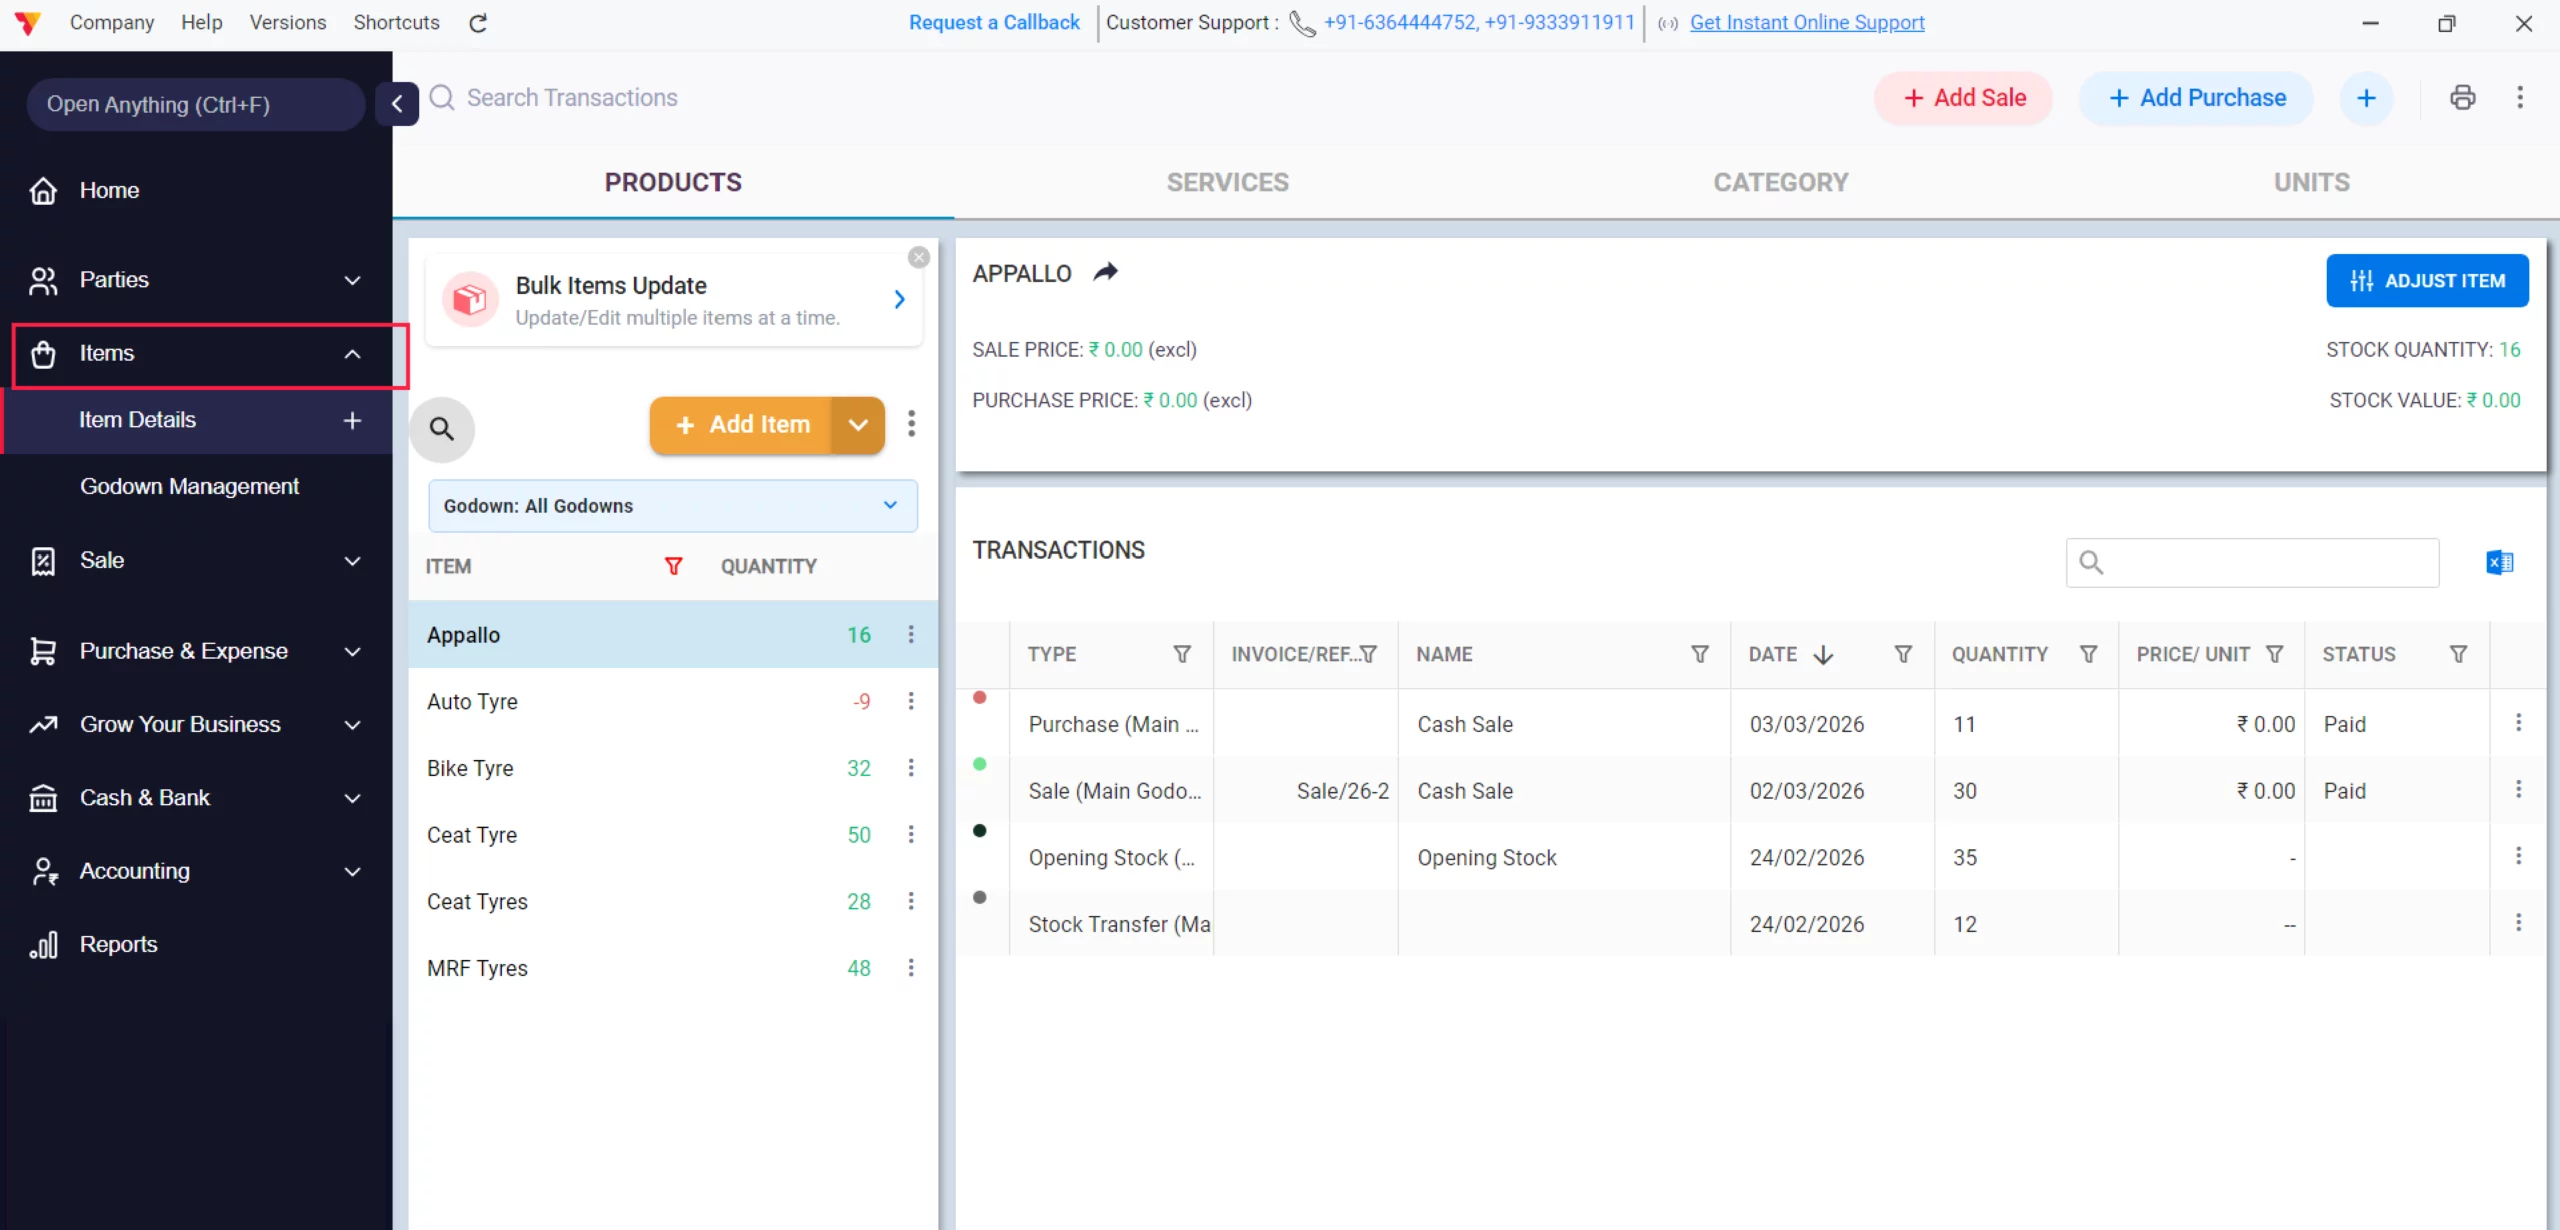
View Item Transactions
Go to the Items menu and select a product to see its complete history of sales and purchase
17
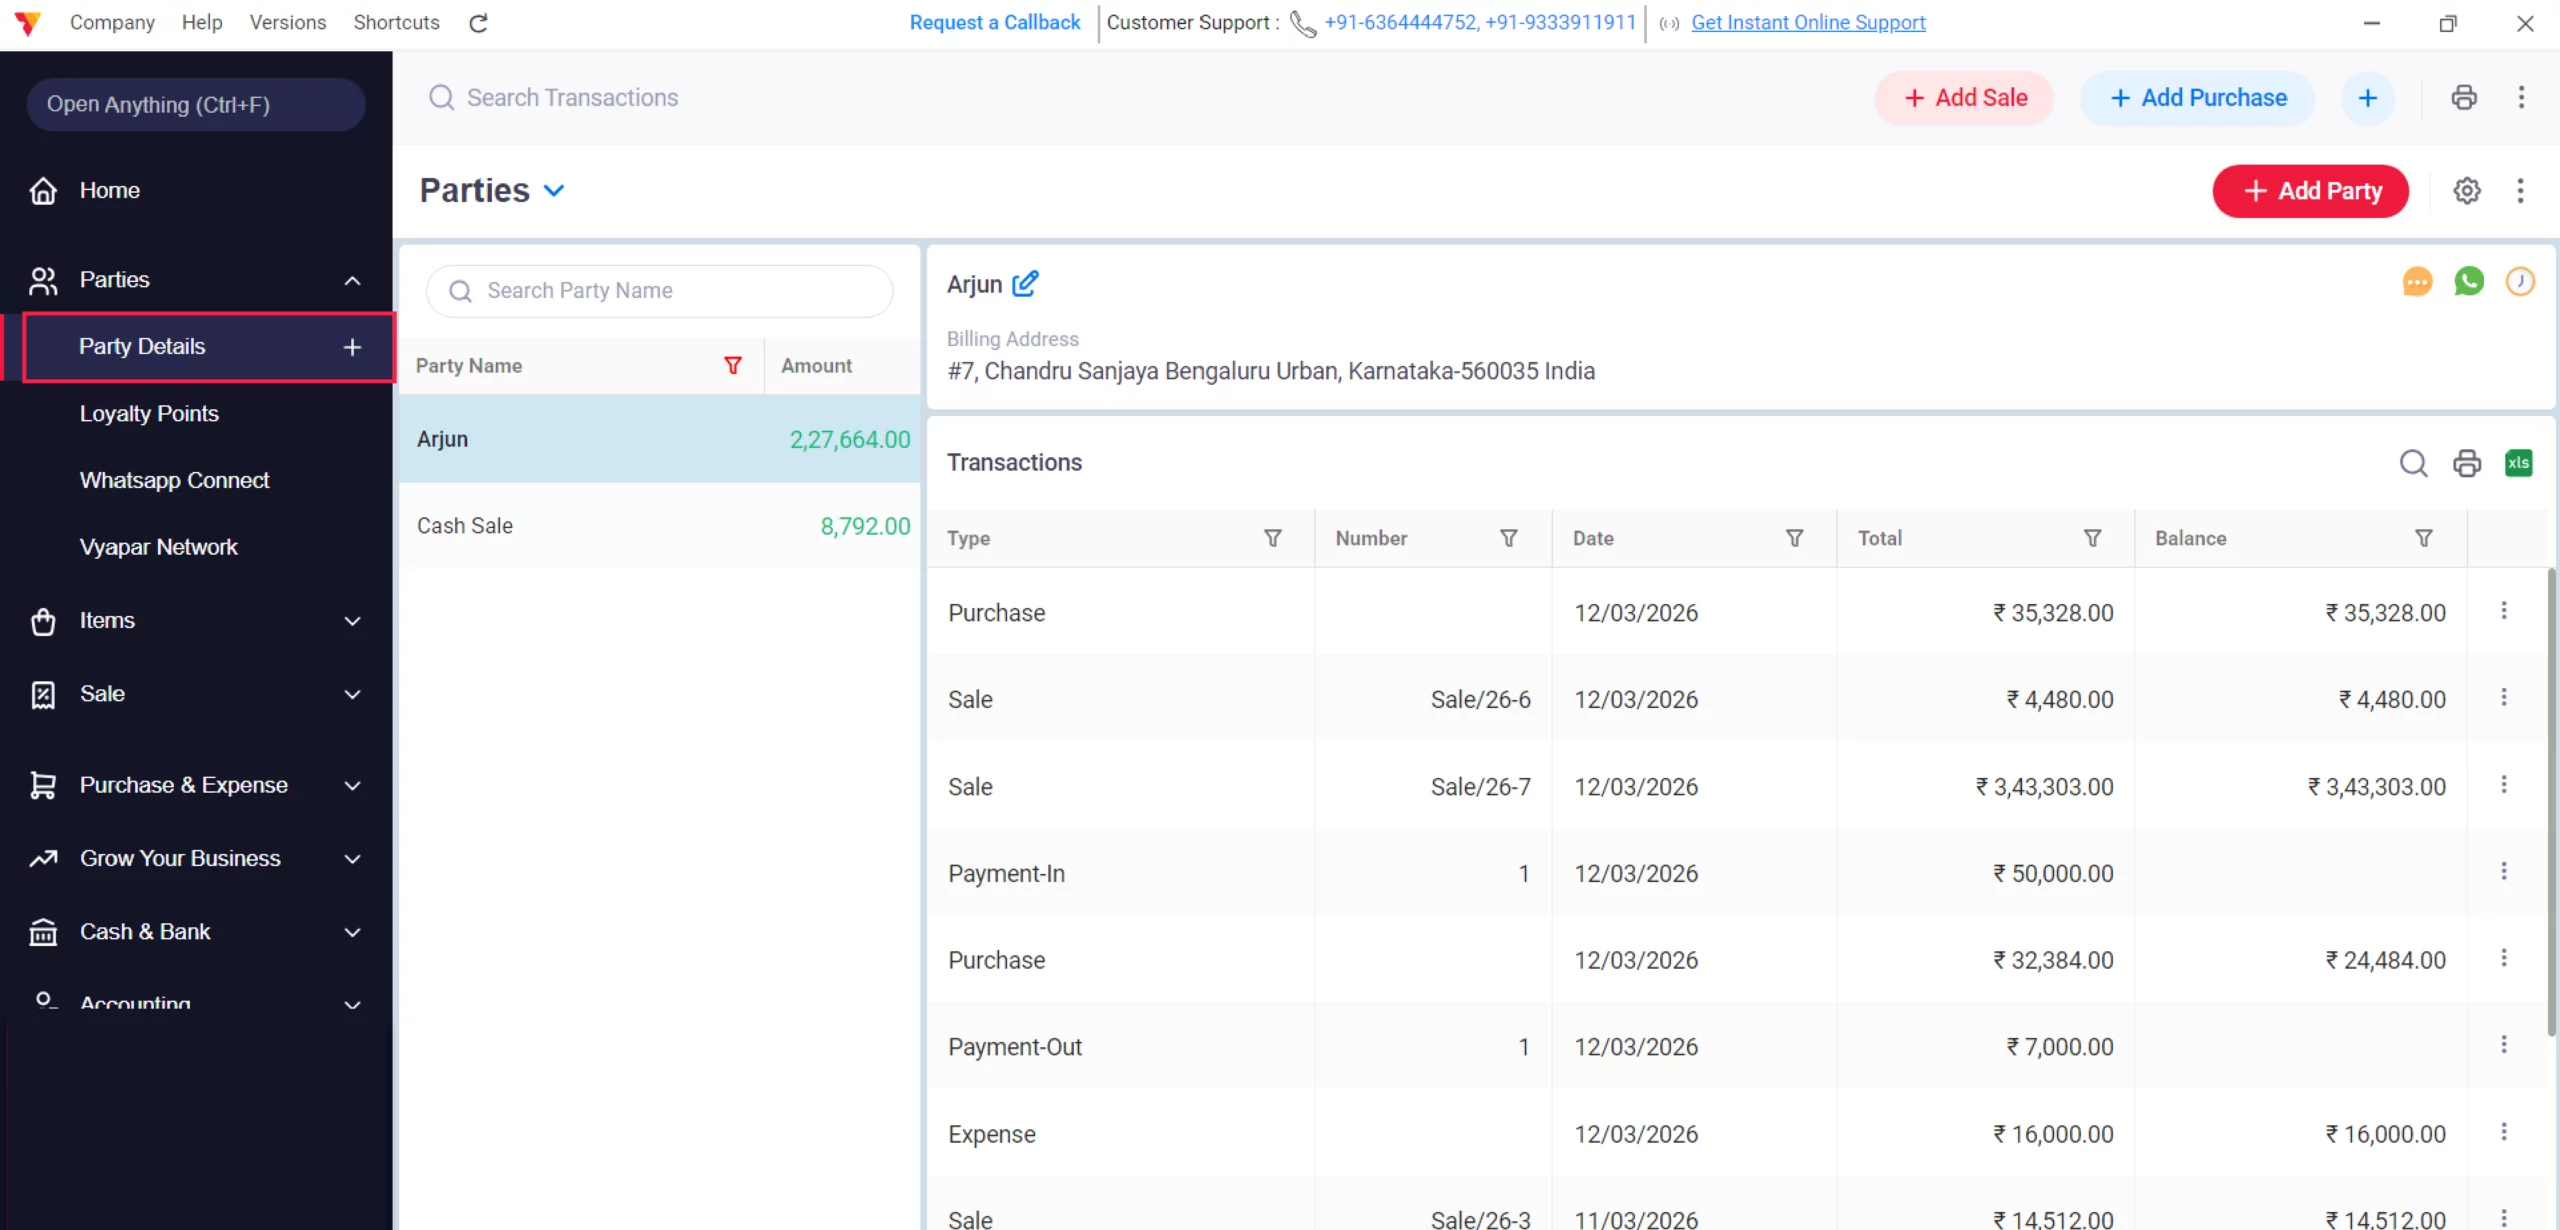
View Party Transactions
Select any Party to view their automated ledger, showing every bill and payment ever recorded for them.
18
Still stuck? Get help in minutes.
Our support team is ready to help you succeed.
![]()
![]() 24/7 Support
24/7 Support
Why Is This Important for Your Business?

Instant Reconciliation
By recording the Payment Mode in every step, your bank and cash books match your physical reality automatically.
Audit-Proof Records
Every action creates a linked trail, making it easy to track a payment back to a specific invoice
No Accounting Work Needed
You focus on the business actions (Sale, Purchase, Expense); Vyapar handles the professional bookkeeping (Ledgers, Journals, Trial Balance).
Frequently Asked Questions (FAQs)
Do I need to know accounting to use Vyapar?
No, the app handles the complex debits and credits in the background while you perform simple billing.
Can I see a summary of all my daily money movements?
Yes, the Daybook provides a complete list of every transaction, including the payment type and amount, for any given date
Does the app track bank and cash separately?
Yes, Vyapar maintains separate automated ledgers for each bank account and your physical cash drawer.
Ready to Keep More Customers?
Start loyalty management today and get 50% more repeat sales.


