How to Add Discounts in Vyapar App
Looking to boost sales with a seasonal offer or reward a loyal customer? Offering discounts is a proven way to increase customer satisfaction and close deals faster.
With Vyapar, you can apply discounts as a percentage (%) or a fixed amount with just a click, ensuring your billing remains transparent and professional.
No more manual math or calculator errors. Follow this guide to enable and apply discounts on your Desktop app.

Before You Start

Decide Your Strategy: Know whether you want to discount a single item or the entire final bill.
Party Registration: Determine if a flat amount (e.g., ₹500) or a percentage (e.g., 10%) looks more attractive to your customer..
Profit Shield: Go to Settings > Transaction Settings and enable “Show Profit while making Sale Invoice”. This lets you see your profit margin live as you add discounts.
How to Add Discounts in Vyapar App:
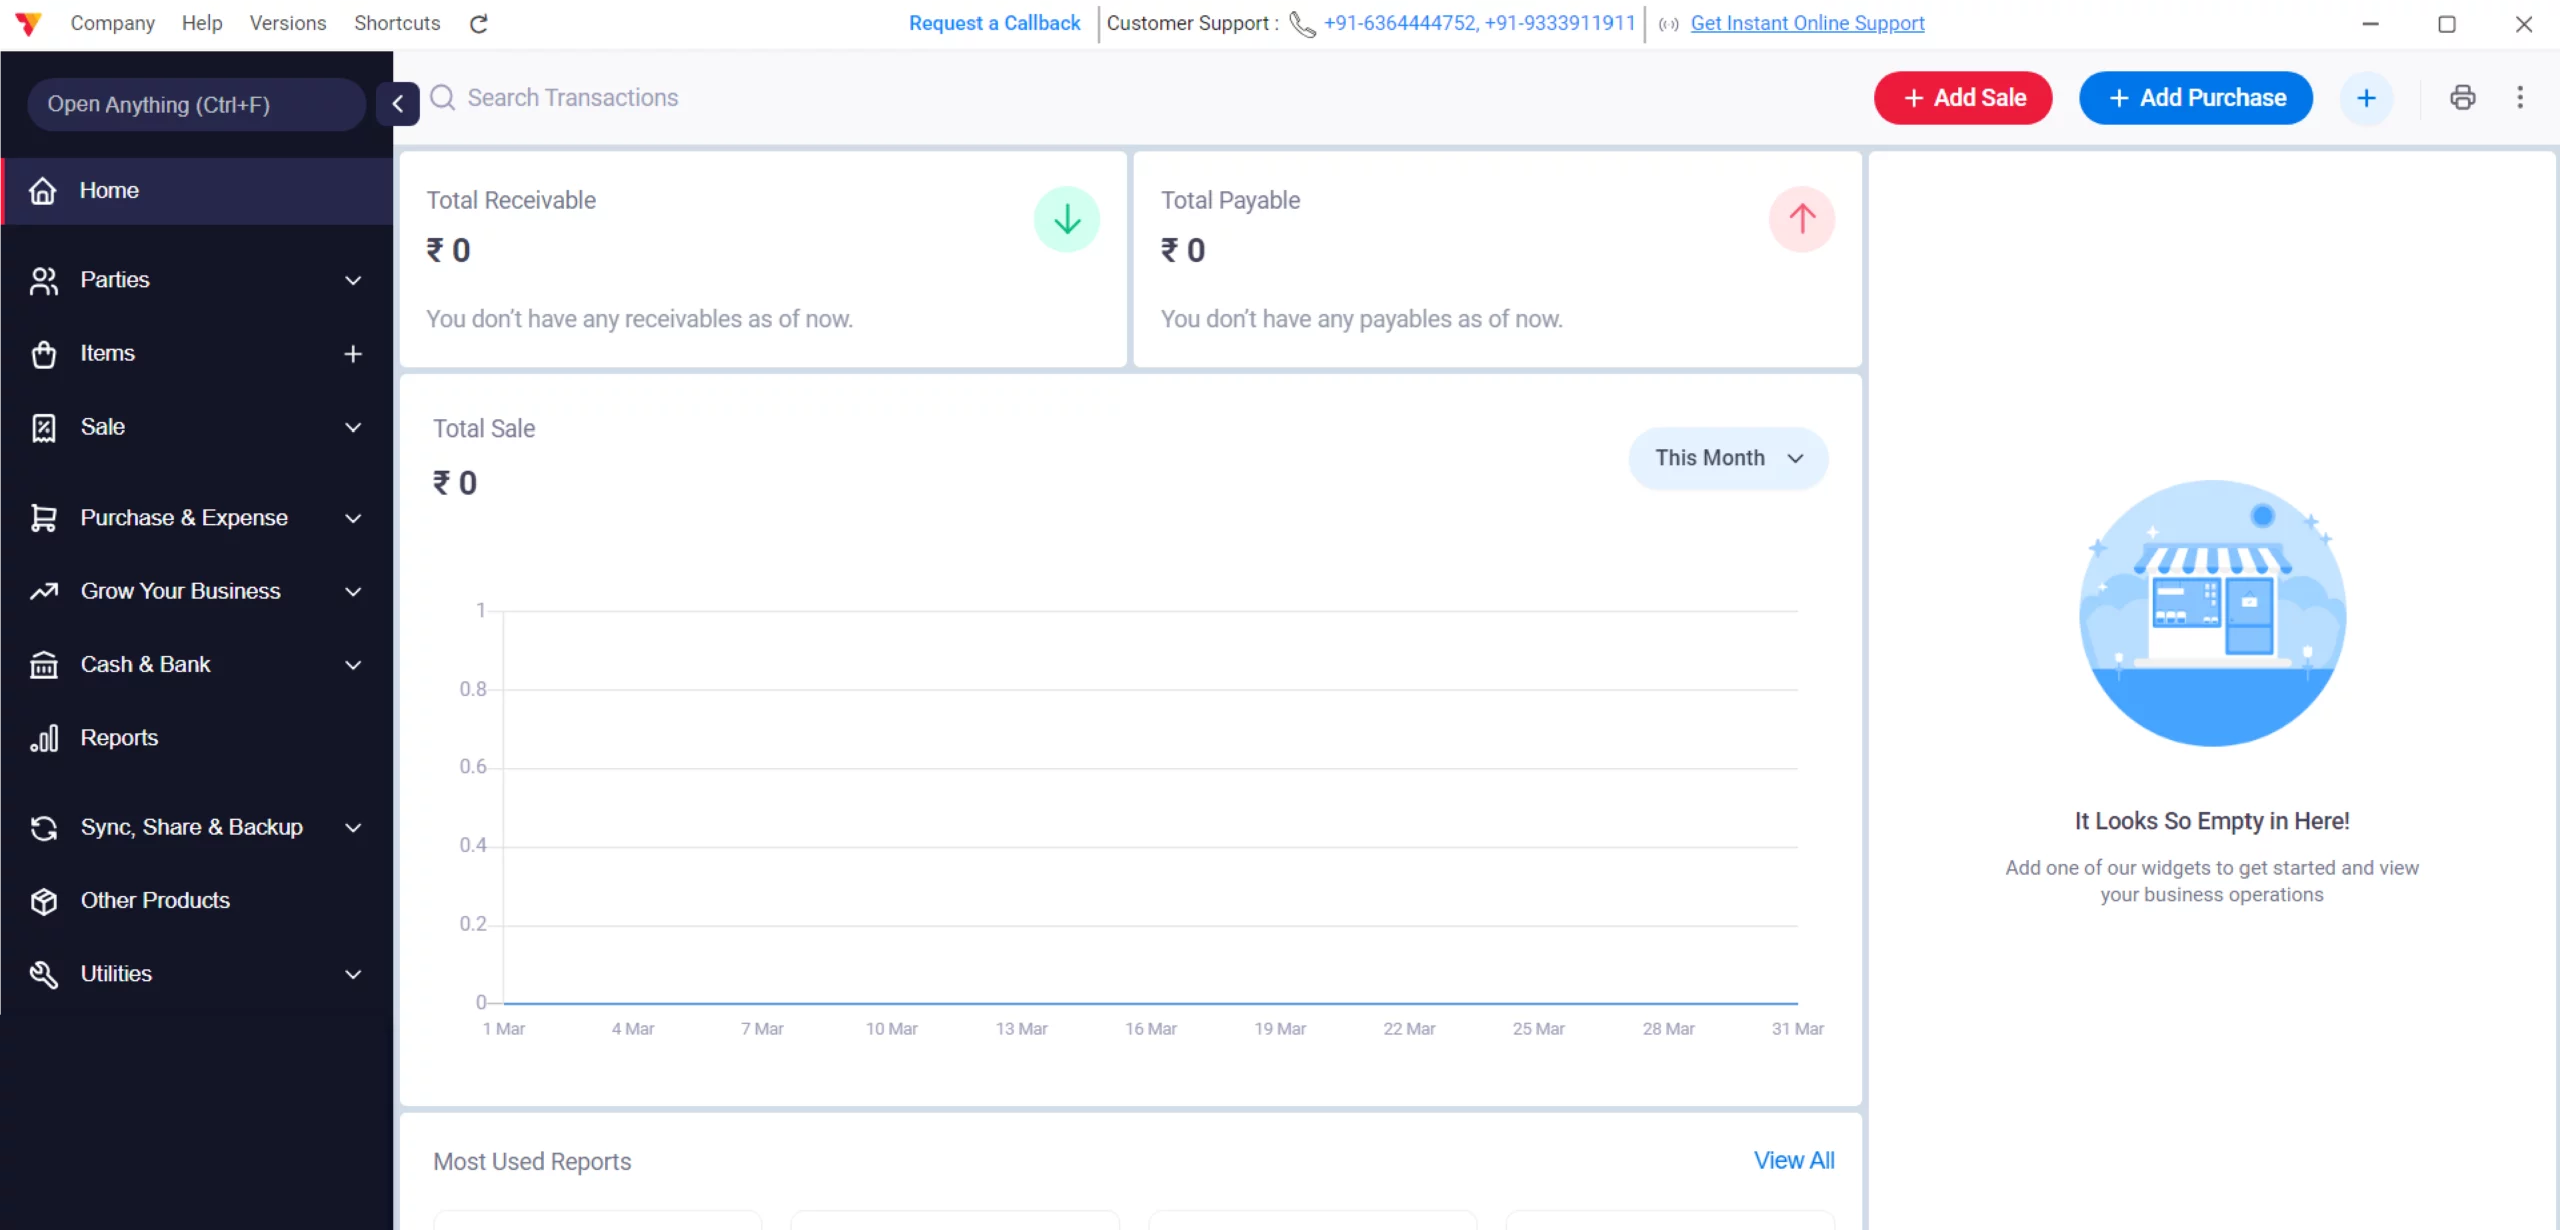
Open Vyapar App
Launch the Vyapar invoicing software on your Desktop device.
01
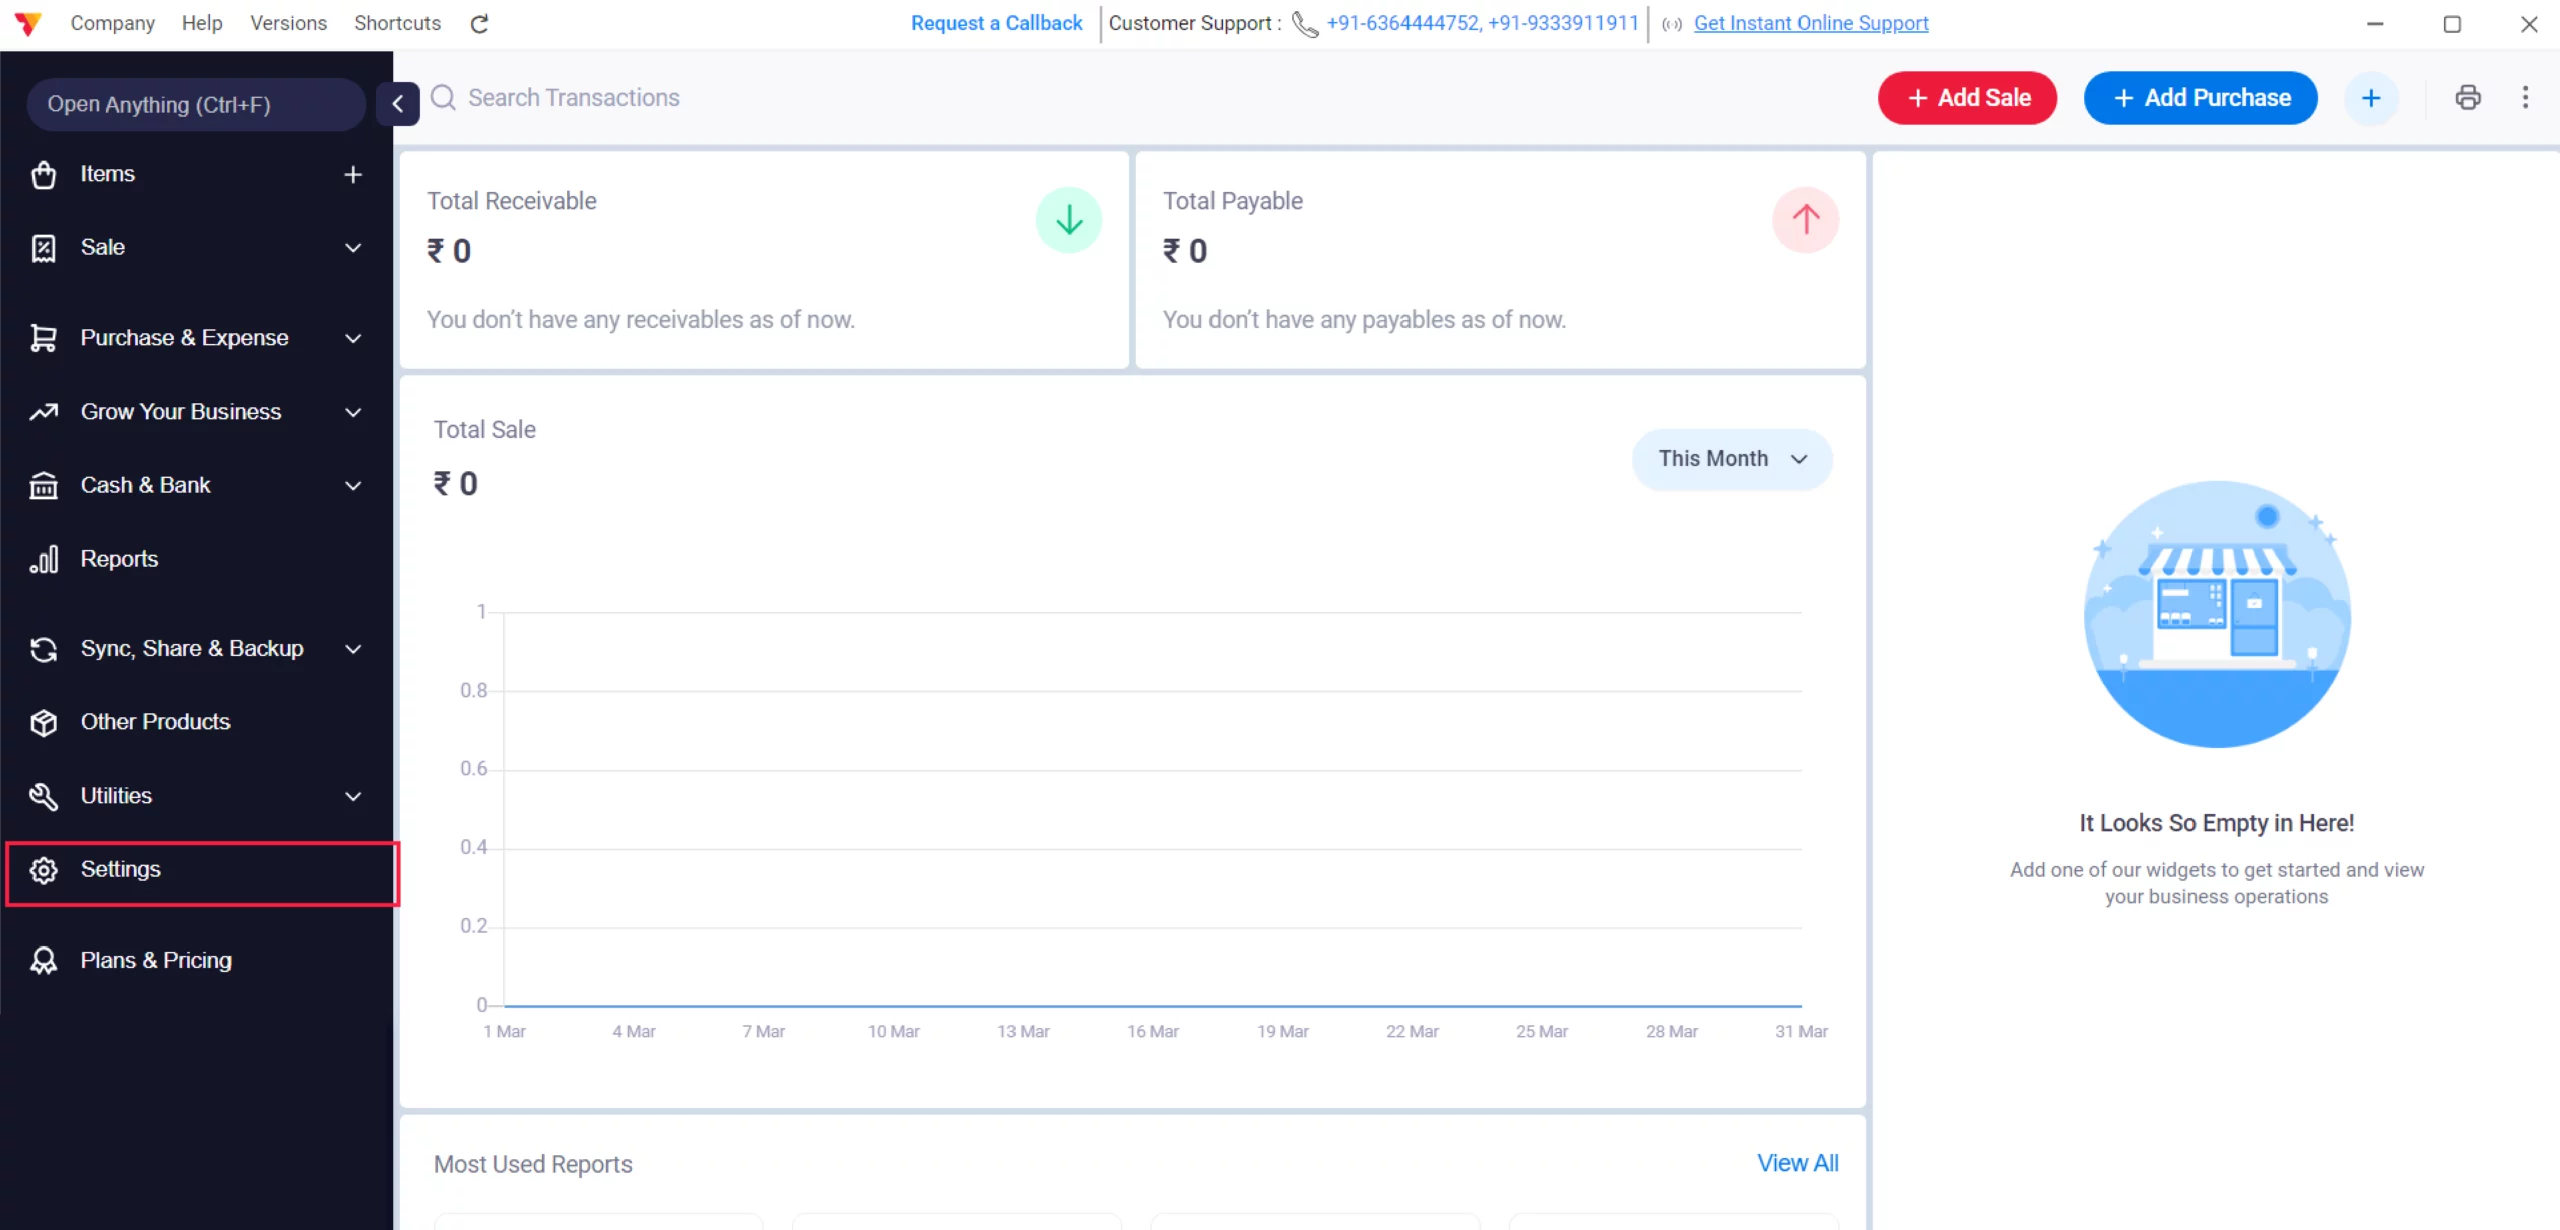
Navigate Settings
Navigate to the Left Menu, locate the Settings gear icon, and click it.
02
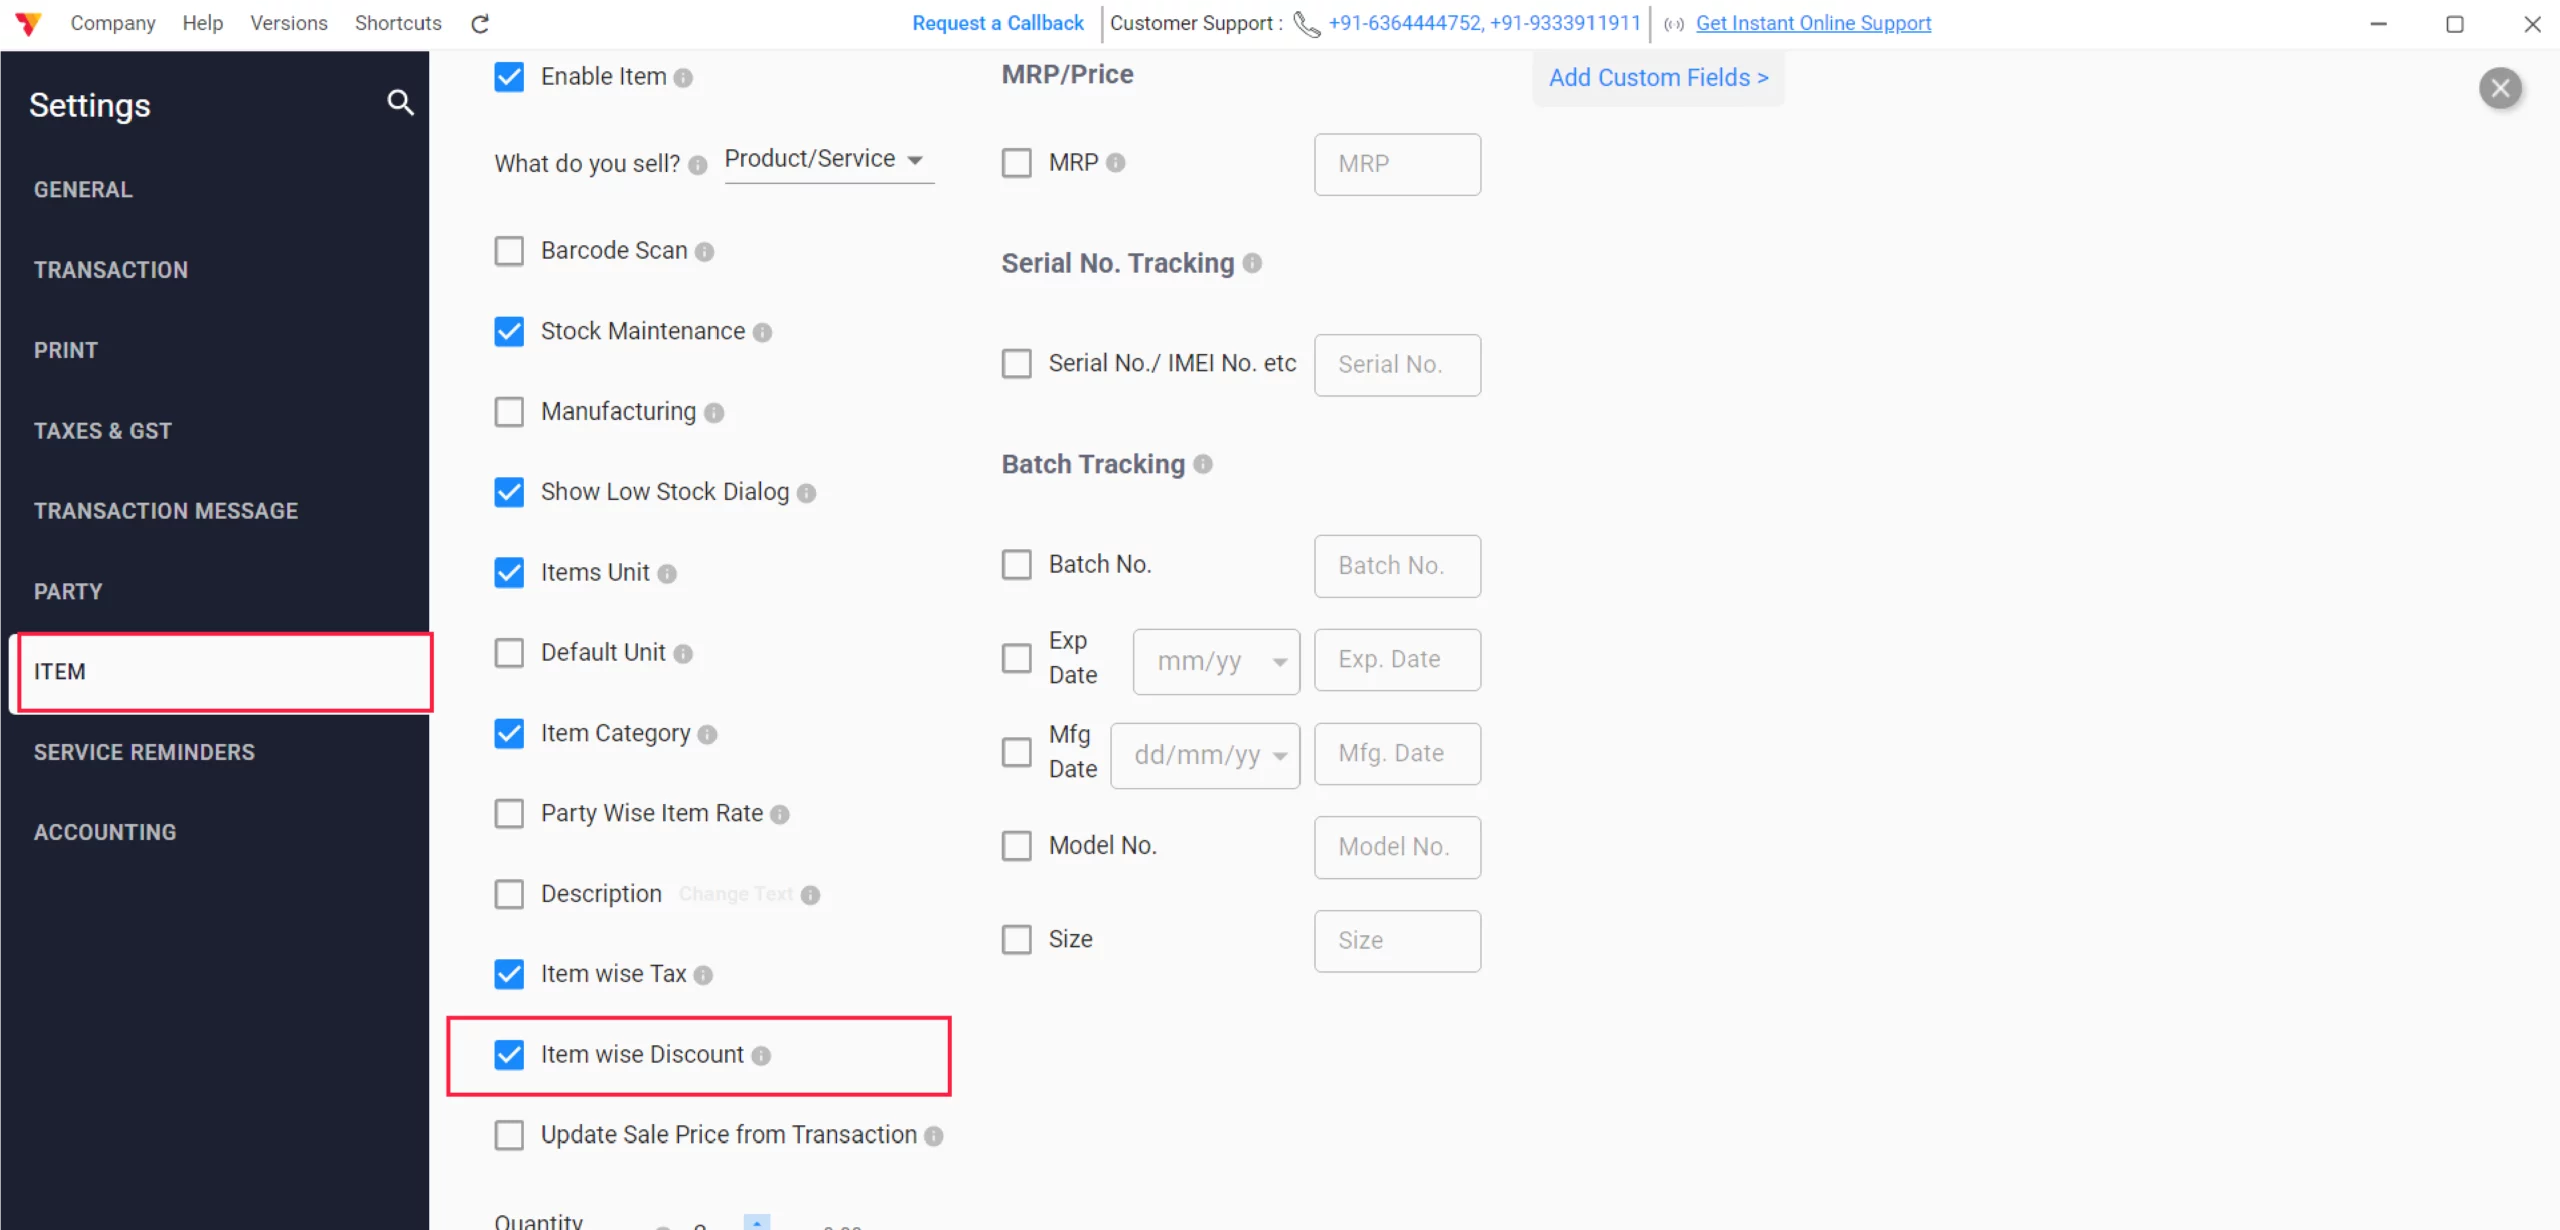
Enable Item Discount
Click on Item Settings, Enable Item-wise Discount. If you are providing different or Discount on each item.
03
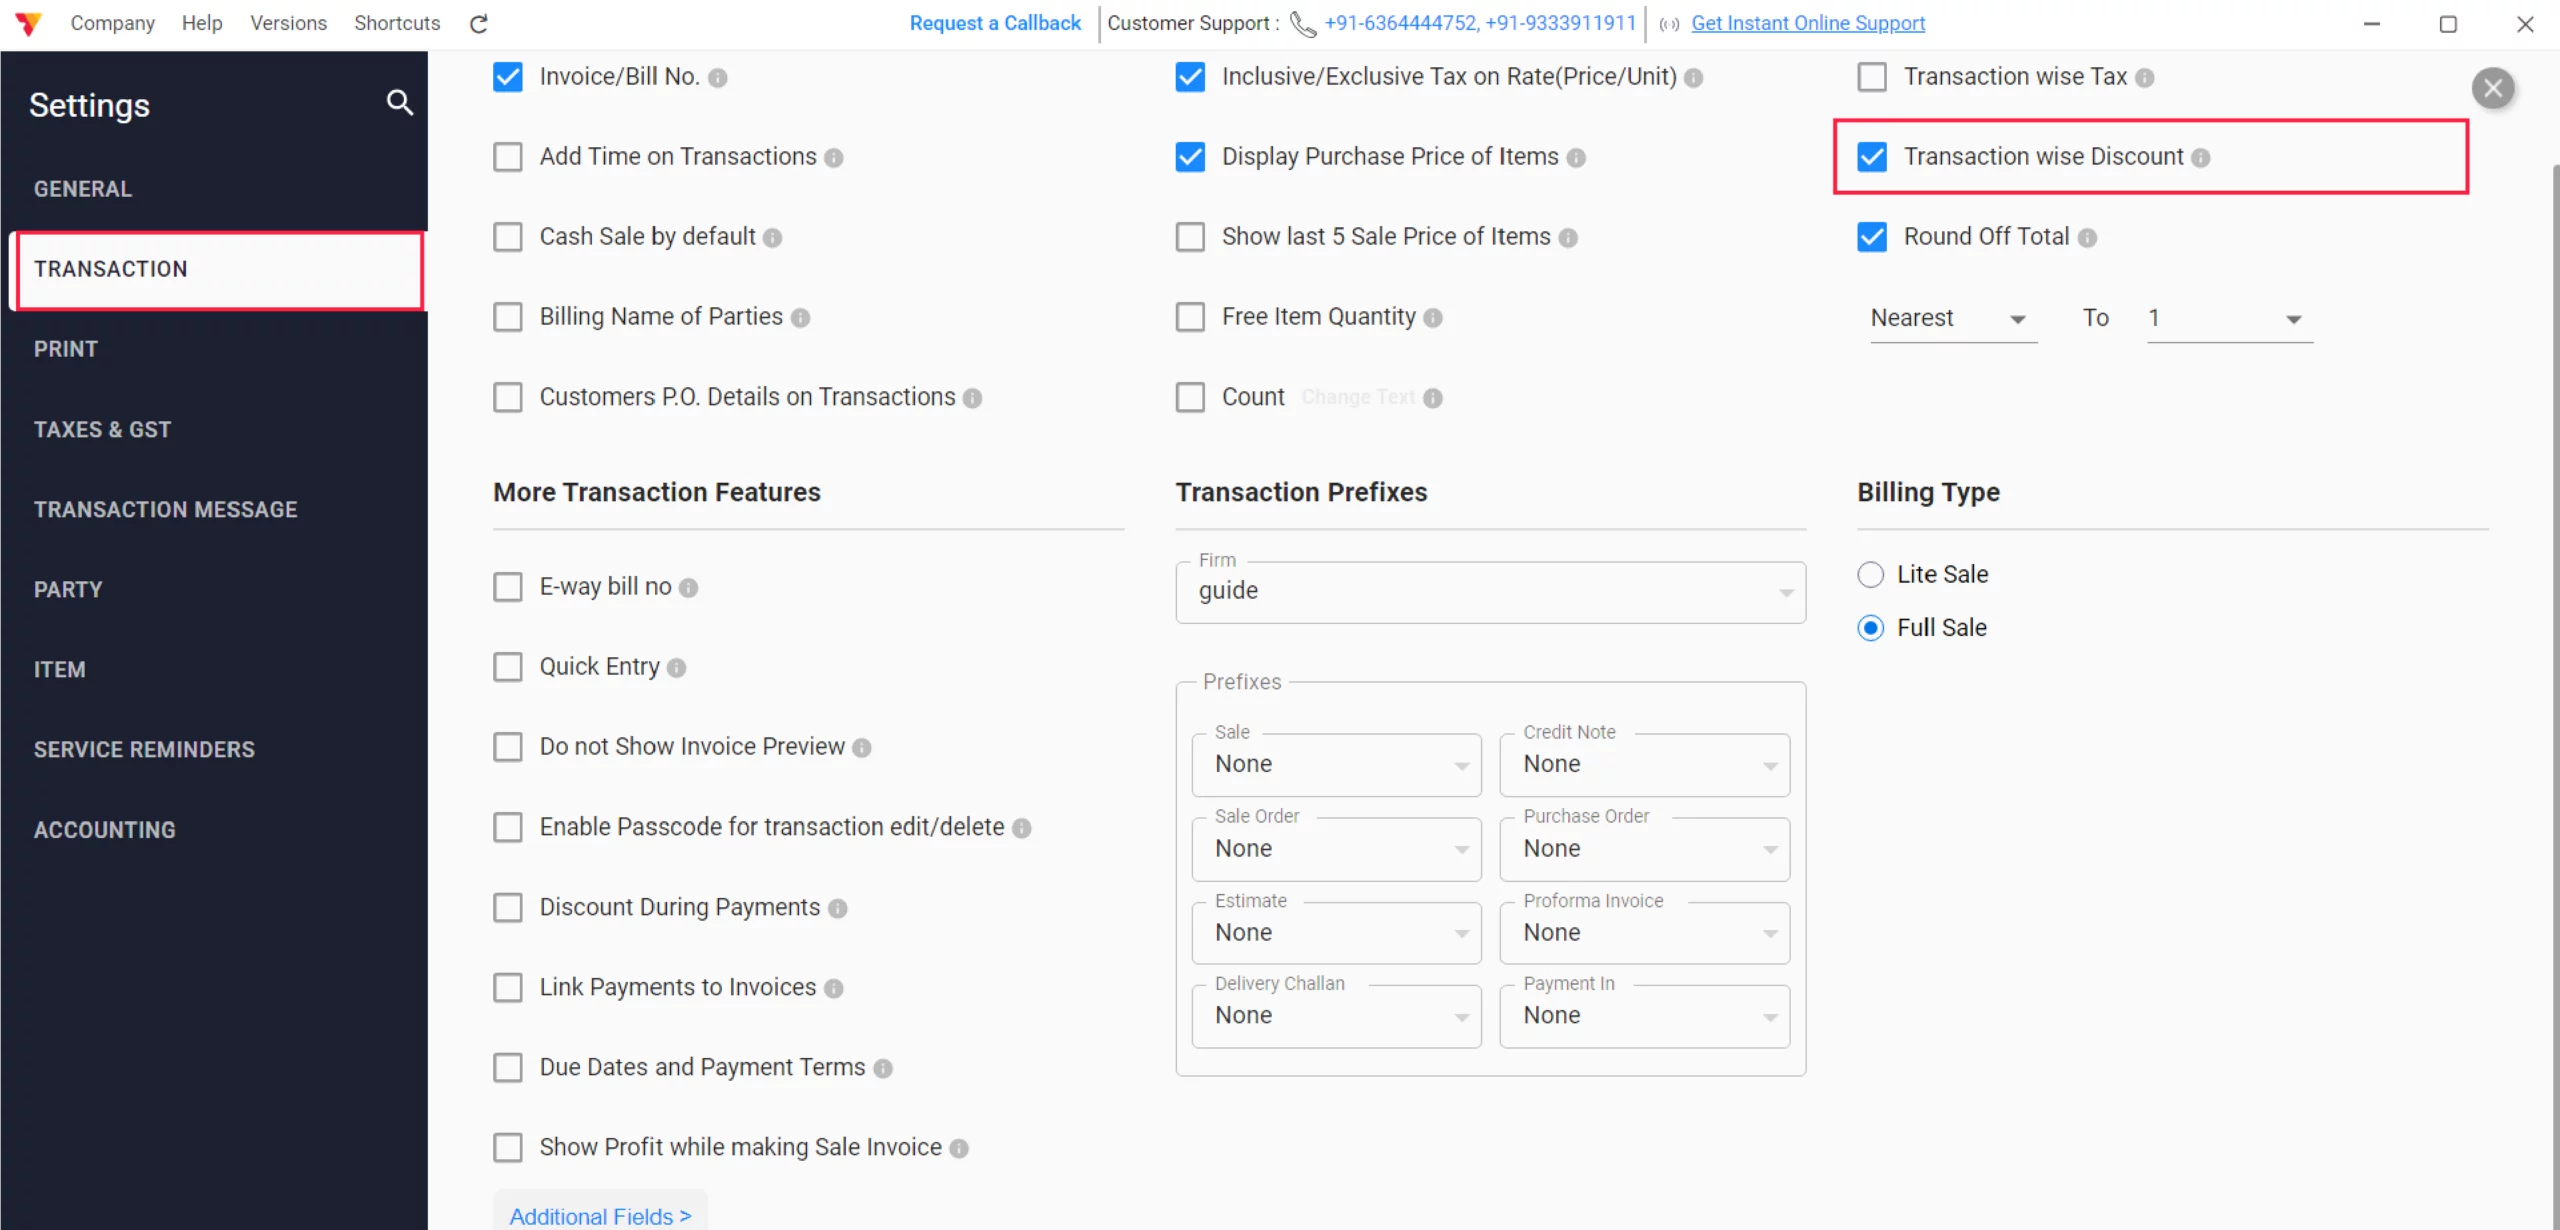
Enable Transaction Discount
Click on Transaction Settings, Enable Transaction-wise Discount. If you are providing a discount on the whole transaction and click on the close button.
04
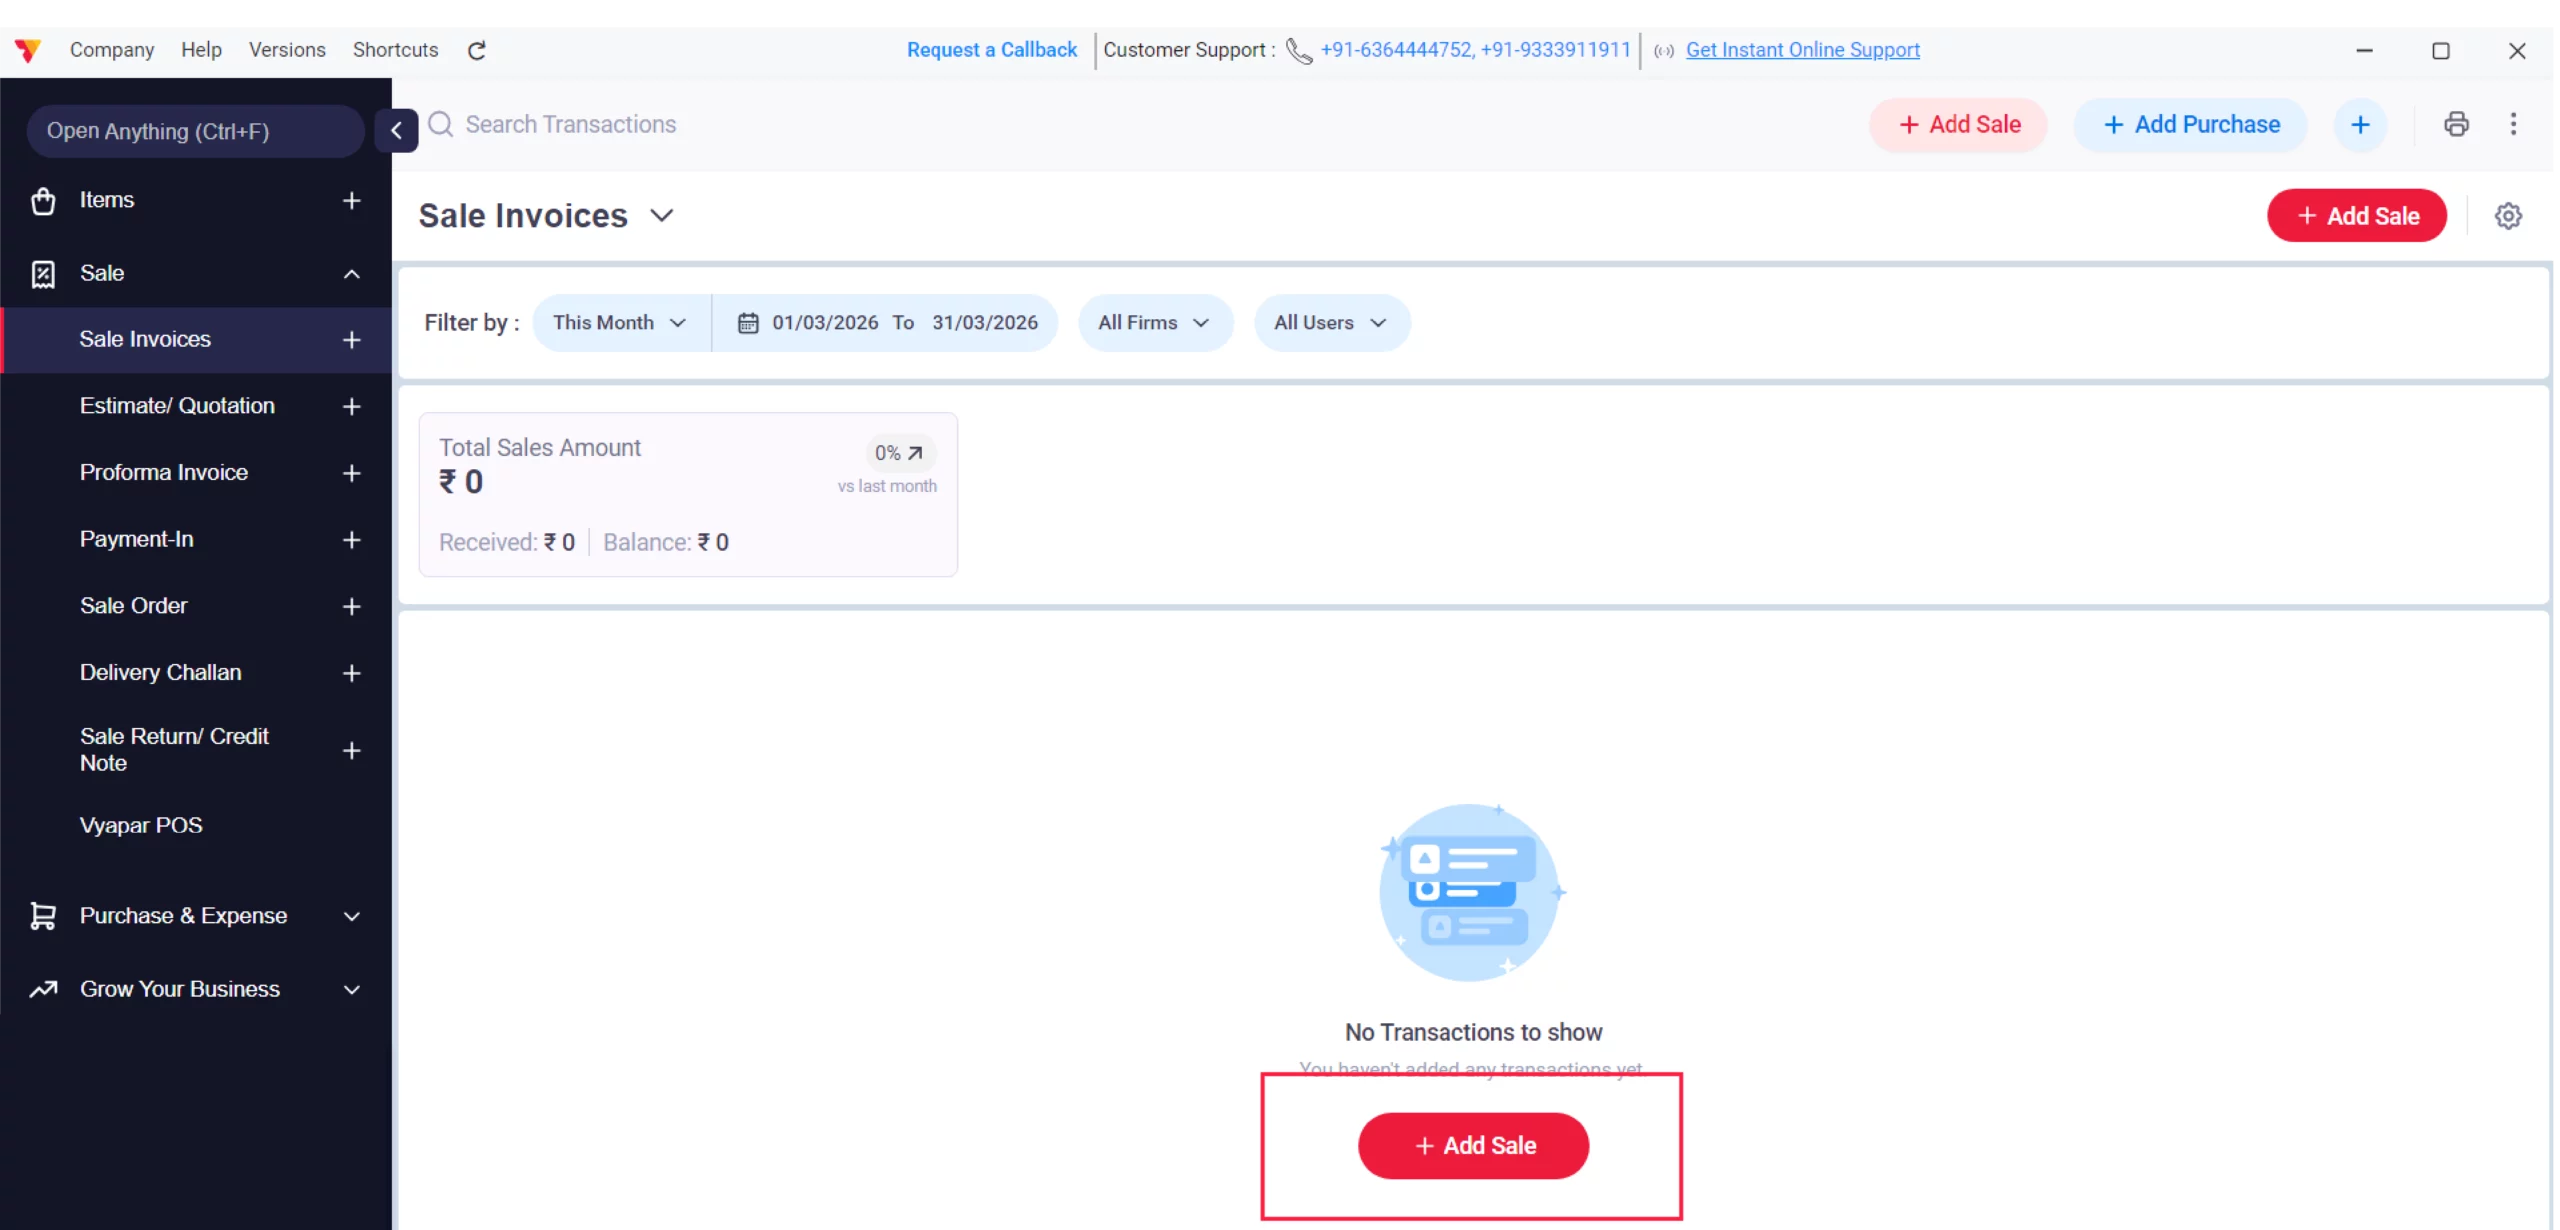
Navigate to “Add Sale”
Click on “+Add Sale” from the dashboard or navigate to the left menu, click on Sale, select Sale Invoices, and then click on “+ Add Sale”.
05
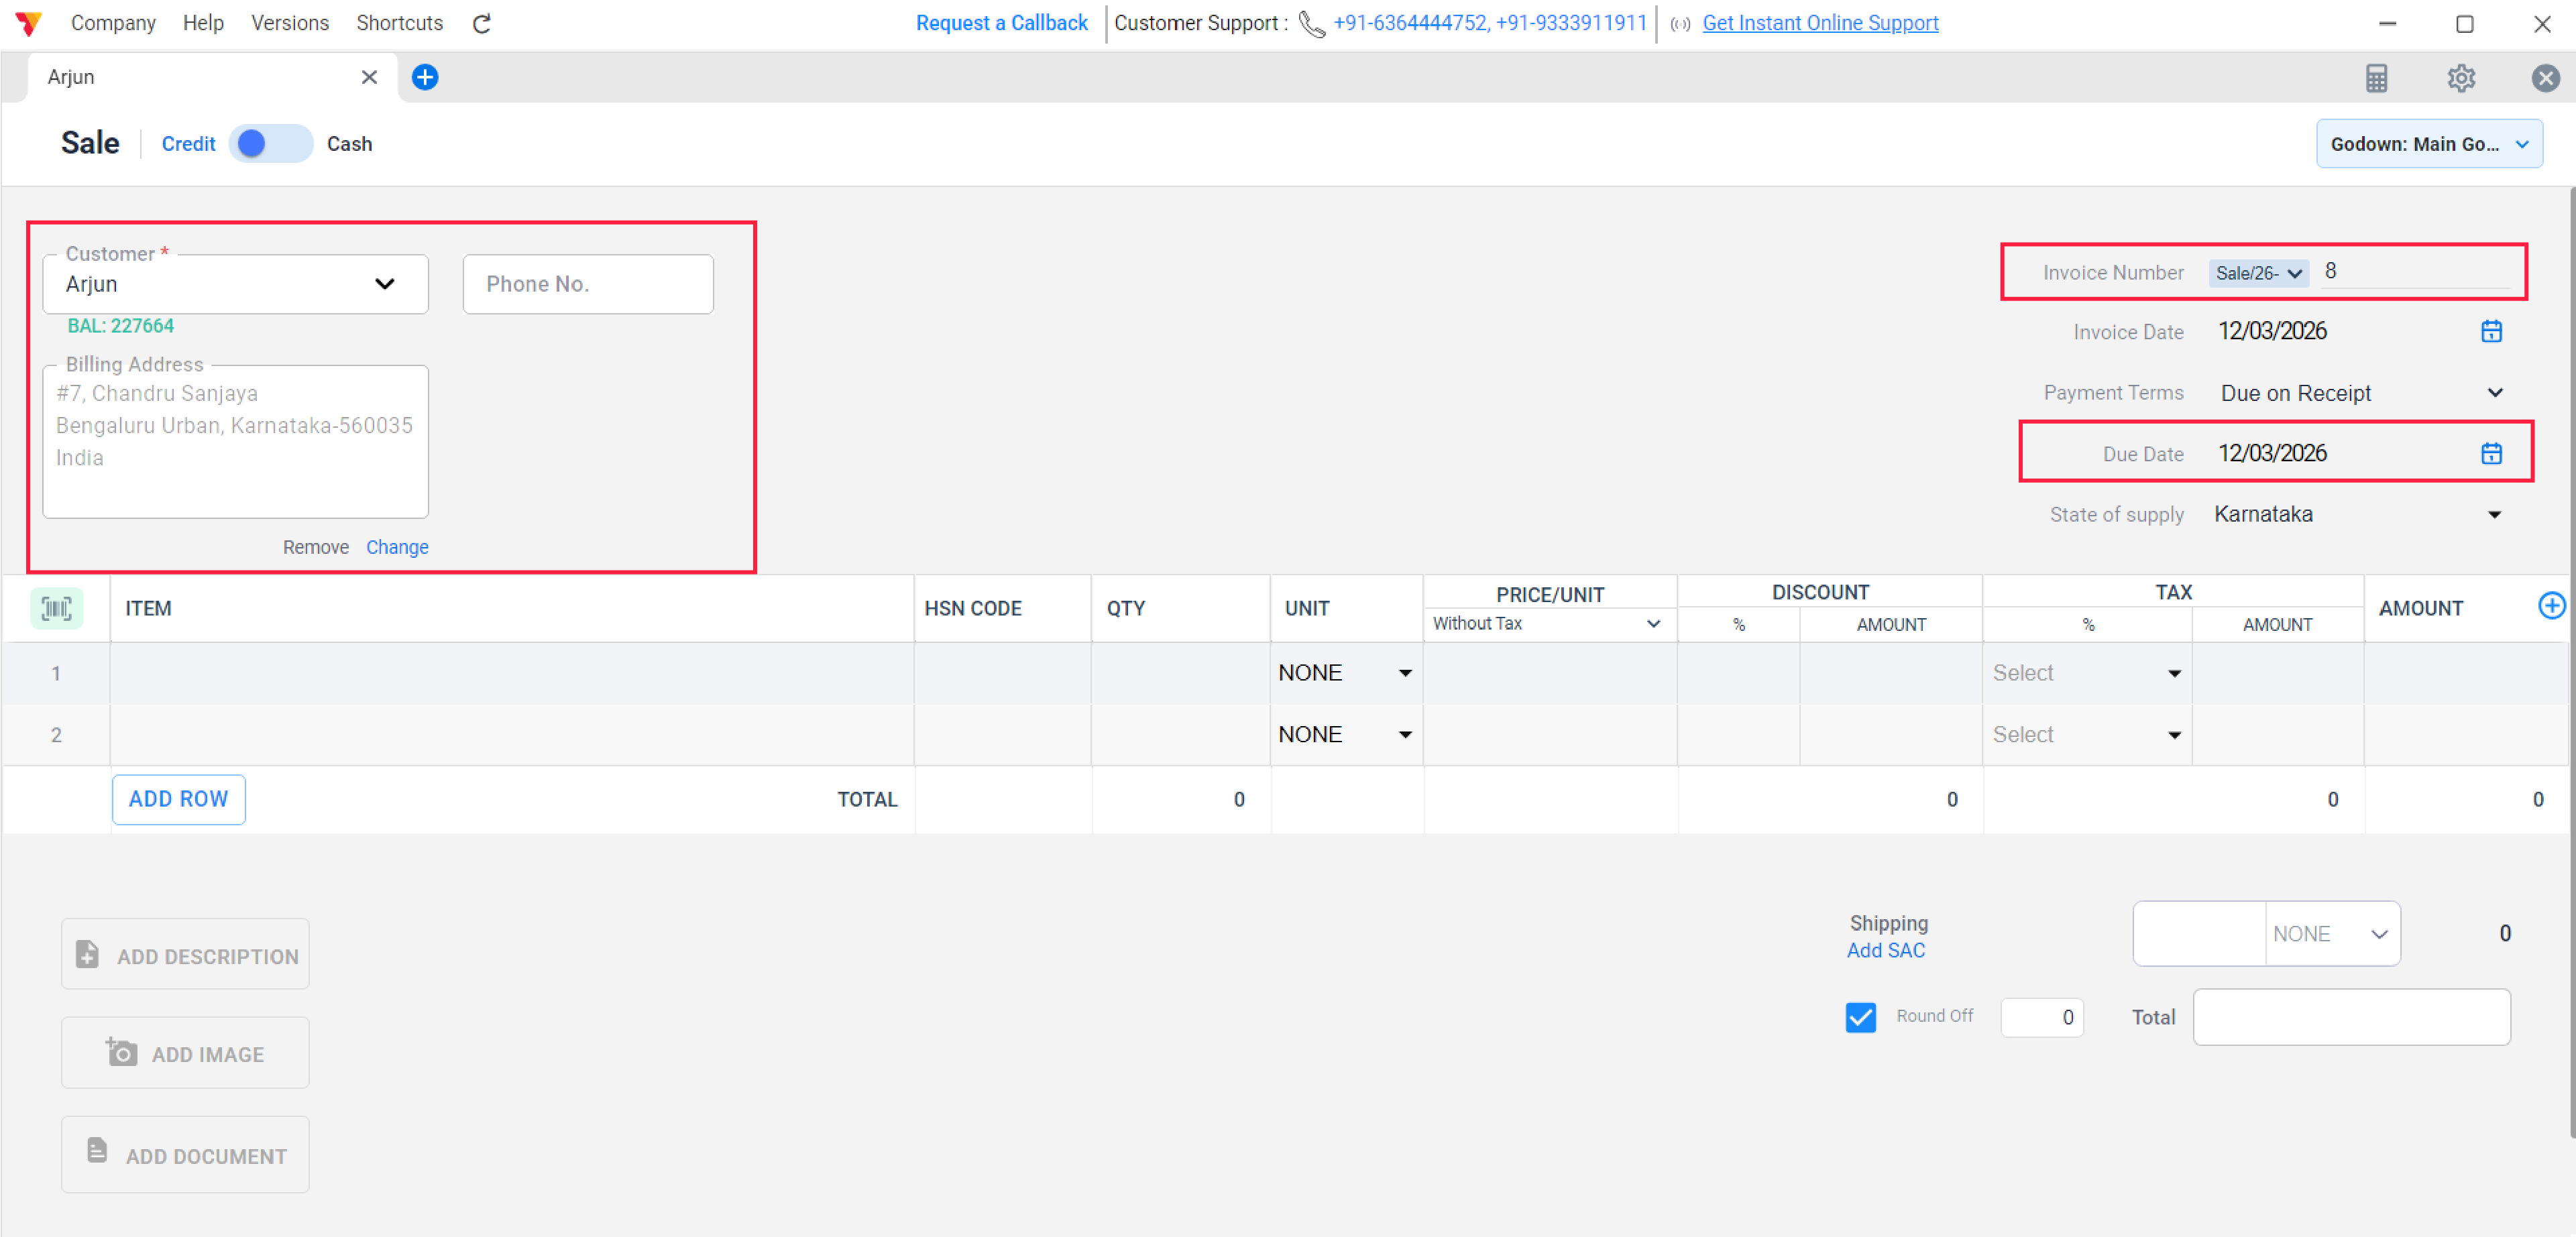
Add Party & Invoice Details
On the sale creation dashboard, add your party details or select an existing party. Enter other invoice-related details like the Due Date and Invoice Number.
06
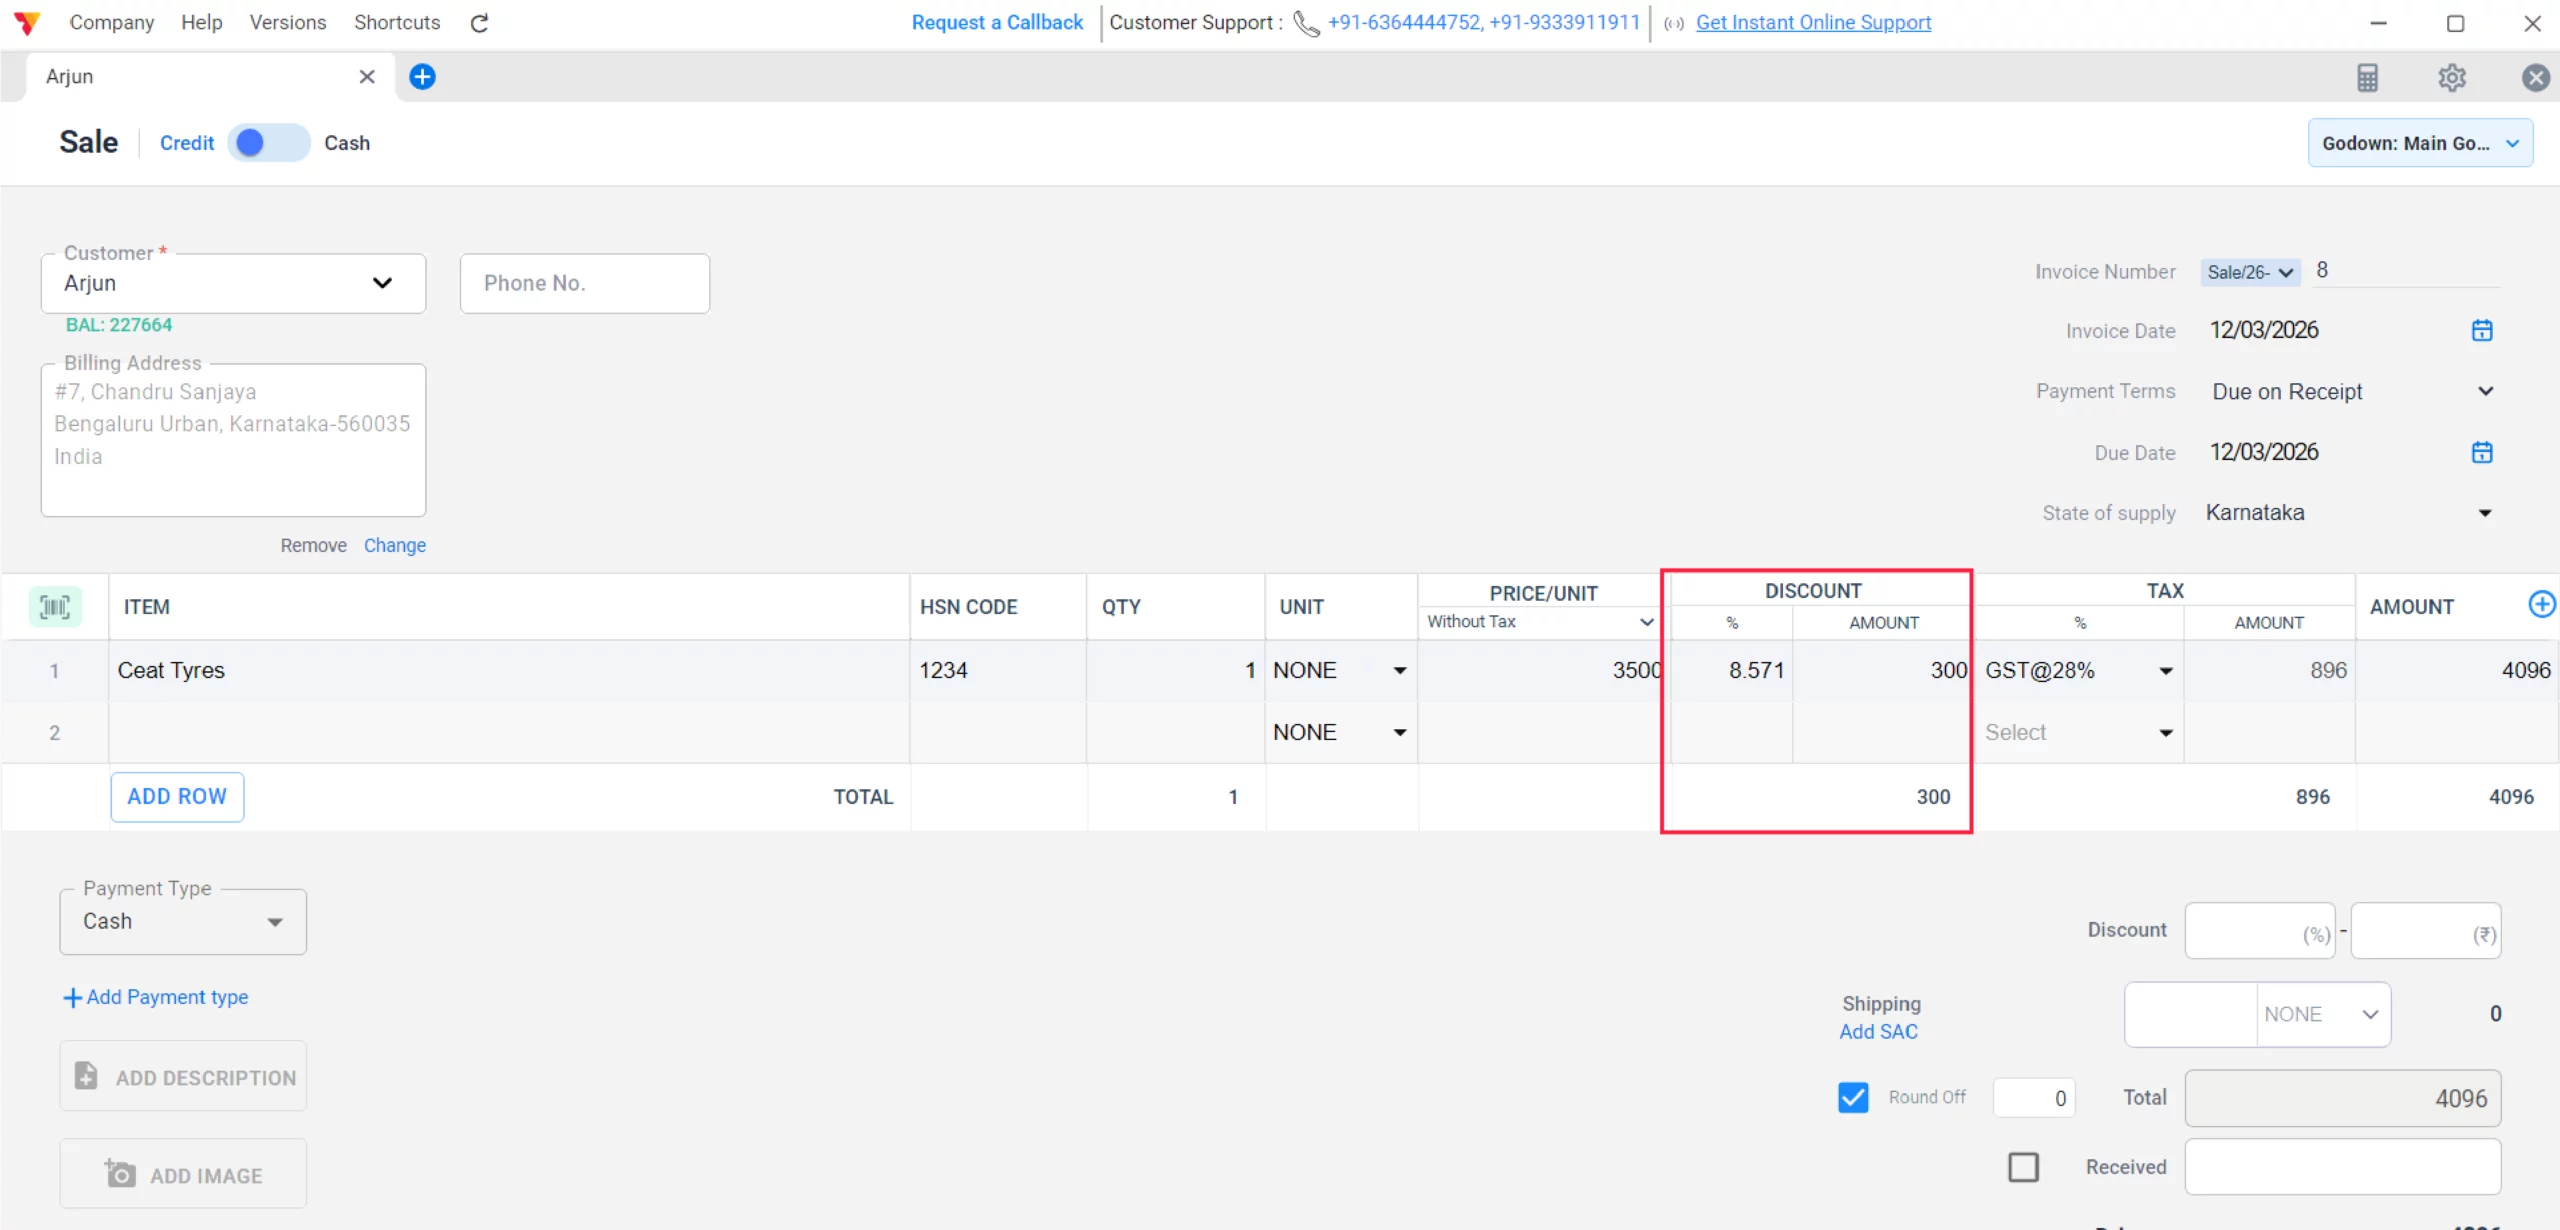
Add Item details with item-wise discount
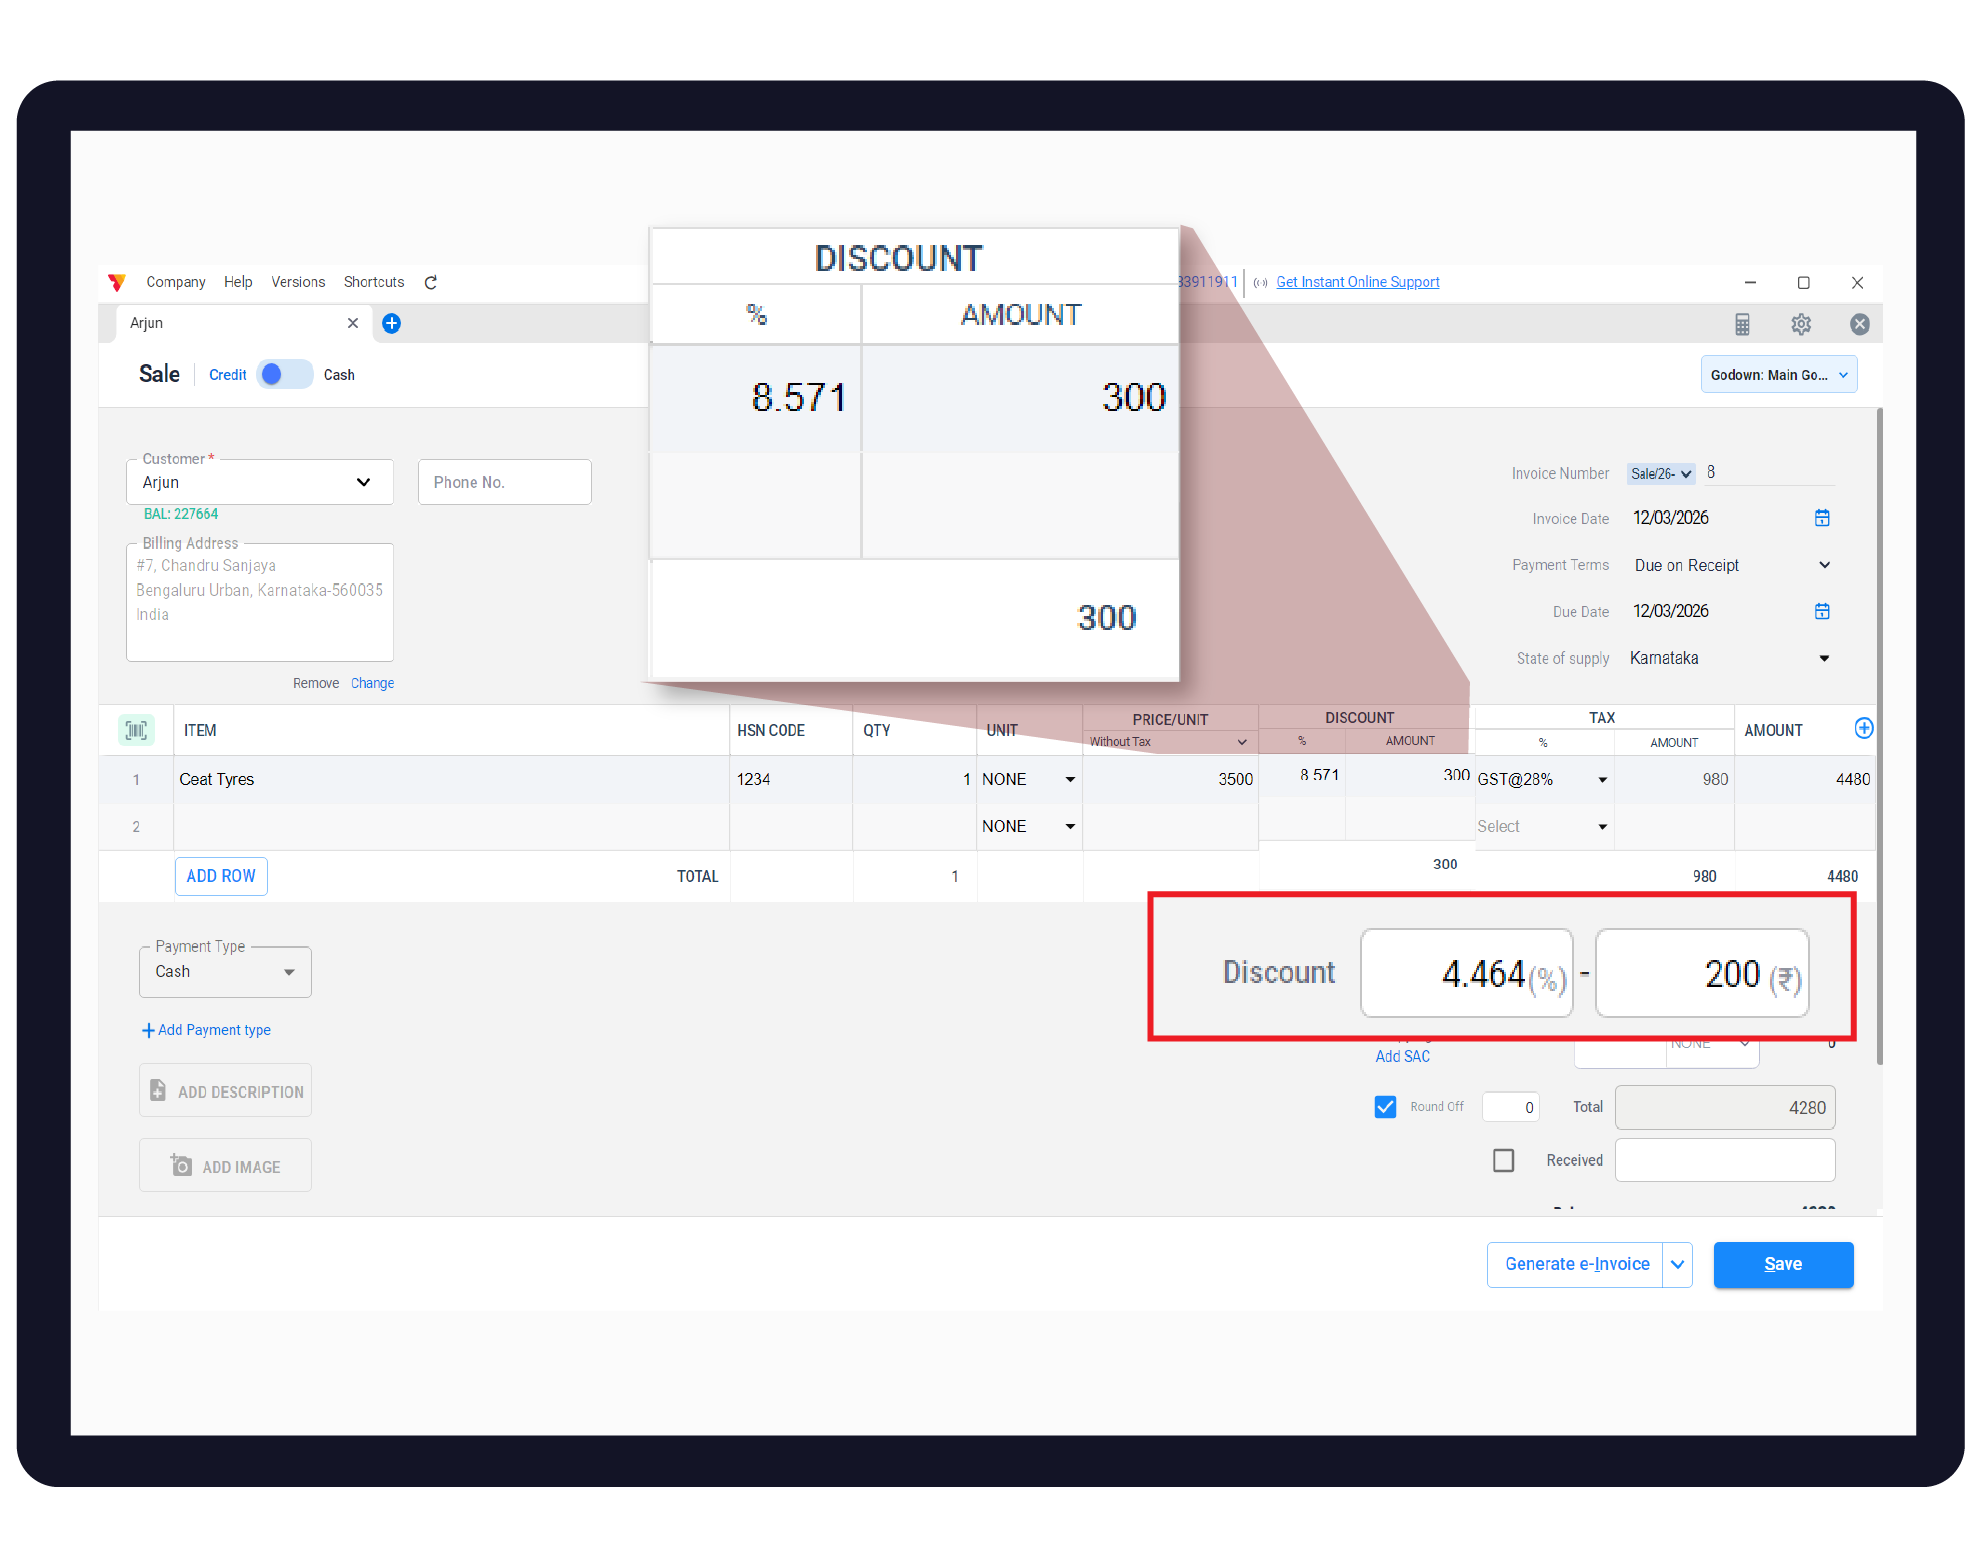
If you plan to add discounts to specific items, locate the Discount section within the Item Table. You can enter the value and switch between % or Amount for each product.
07/A
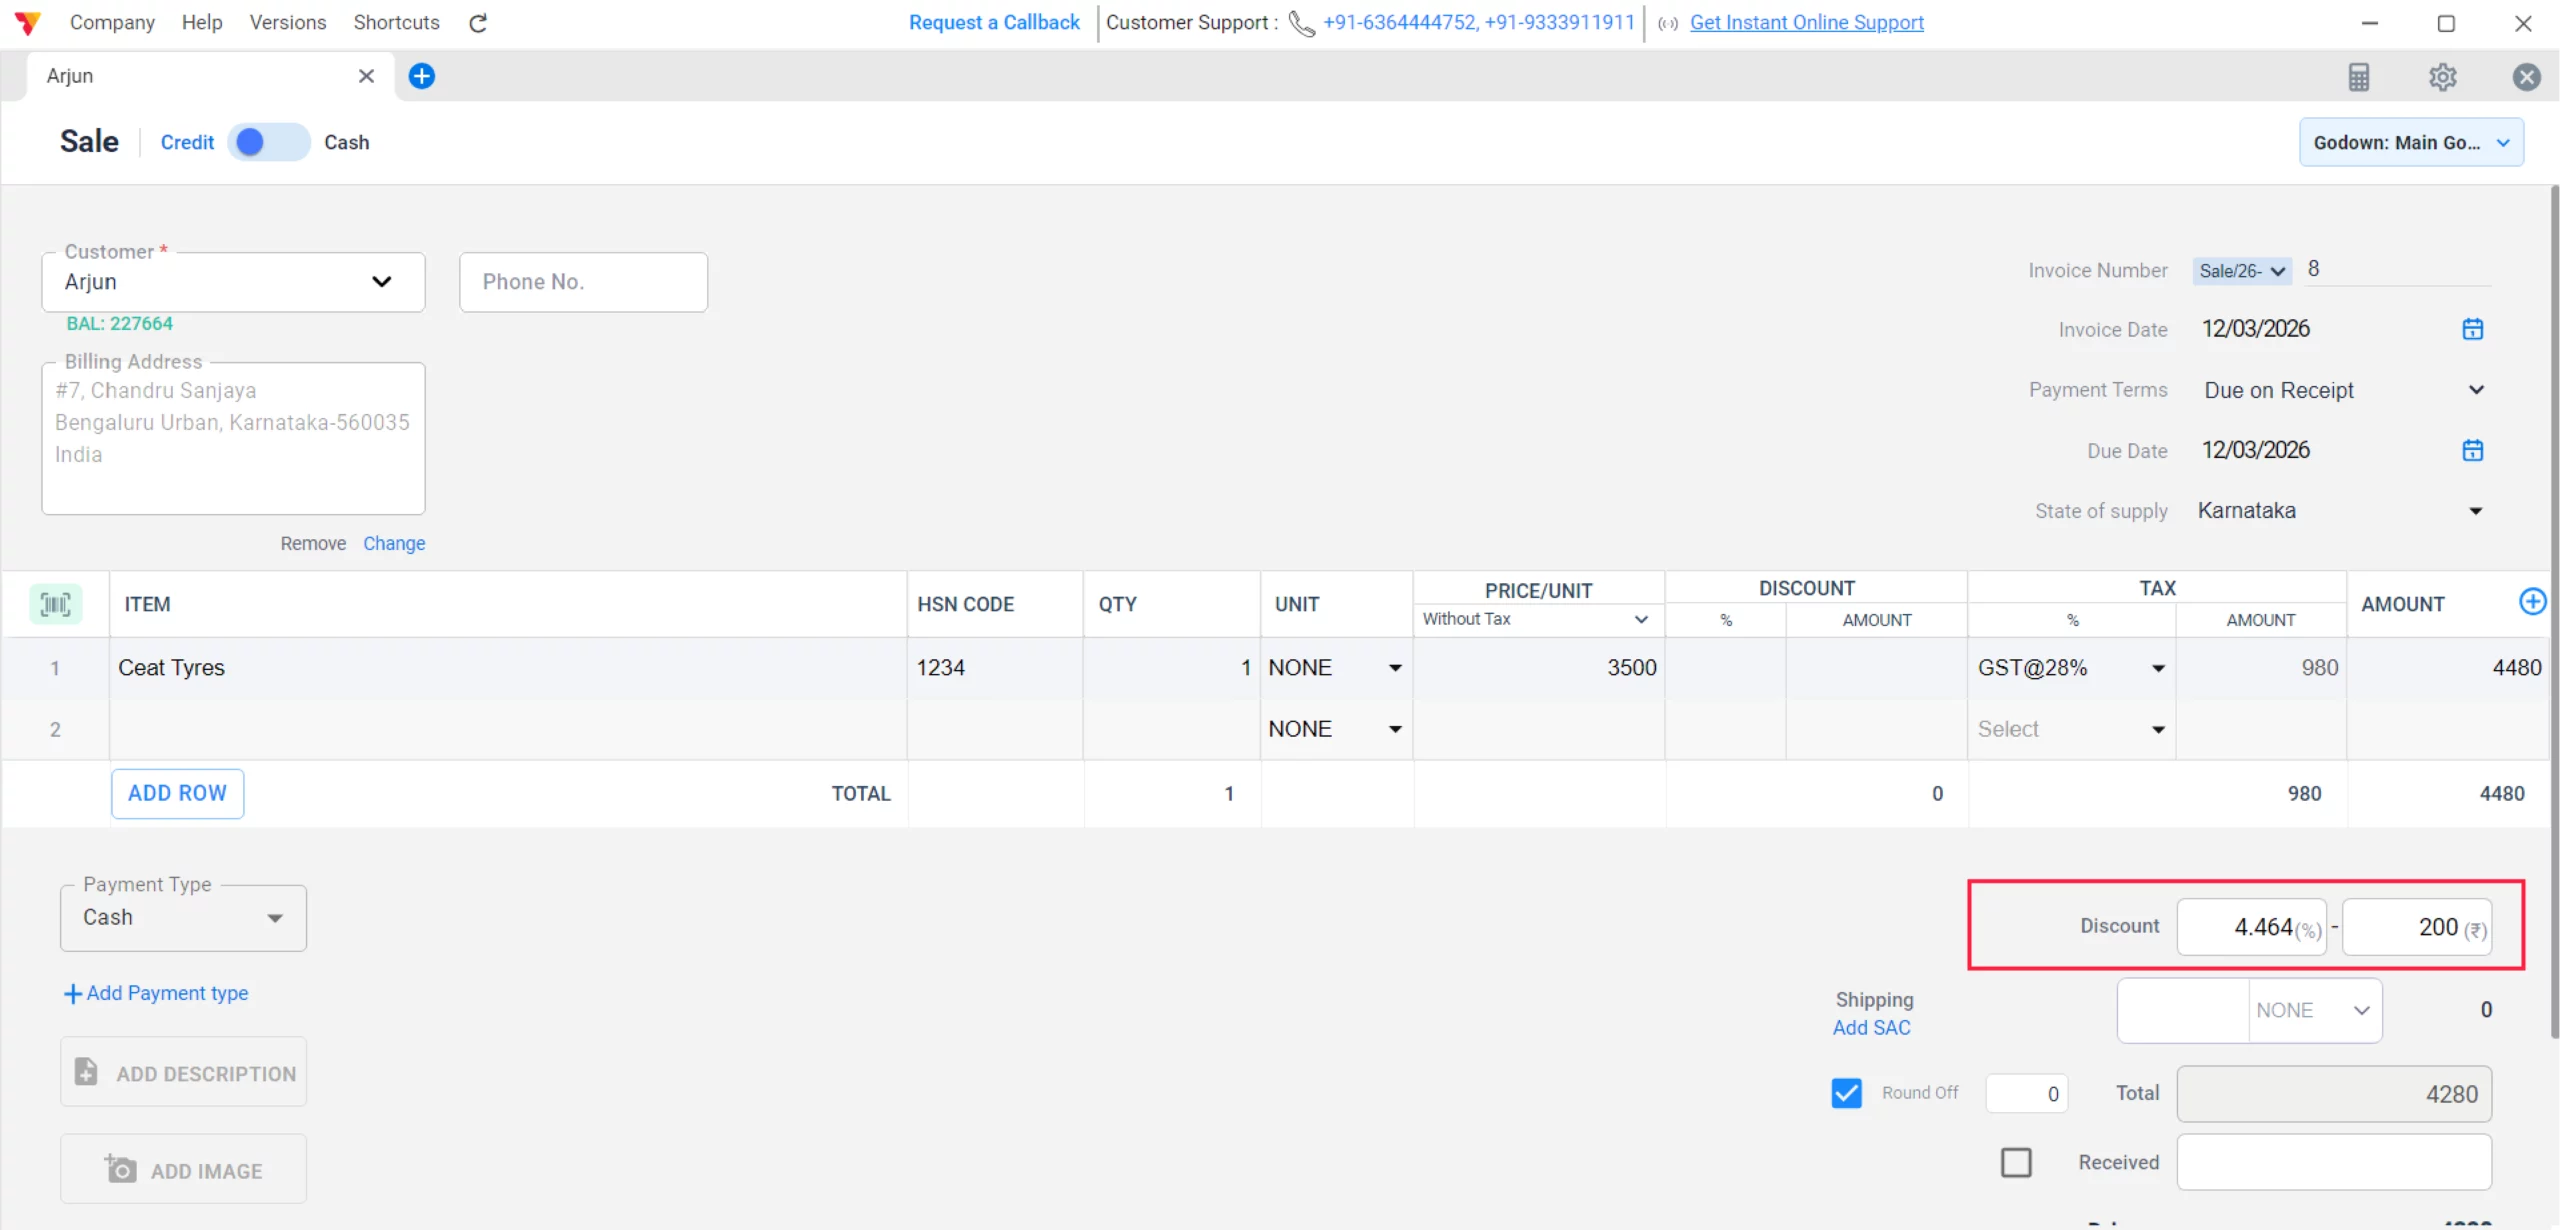
Transaction-wise discount
If you want to give a discount on the entire bill, go to the Discount section located just below the right side of the item table. Here, you can apply the discount to the total value either by % or by amount.
07/B
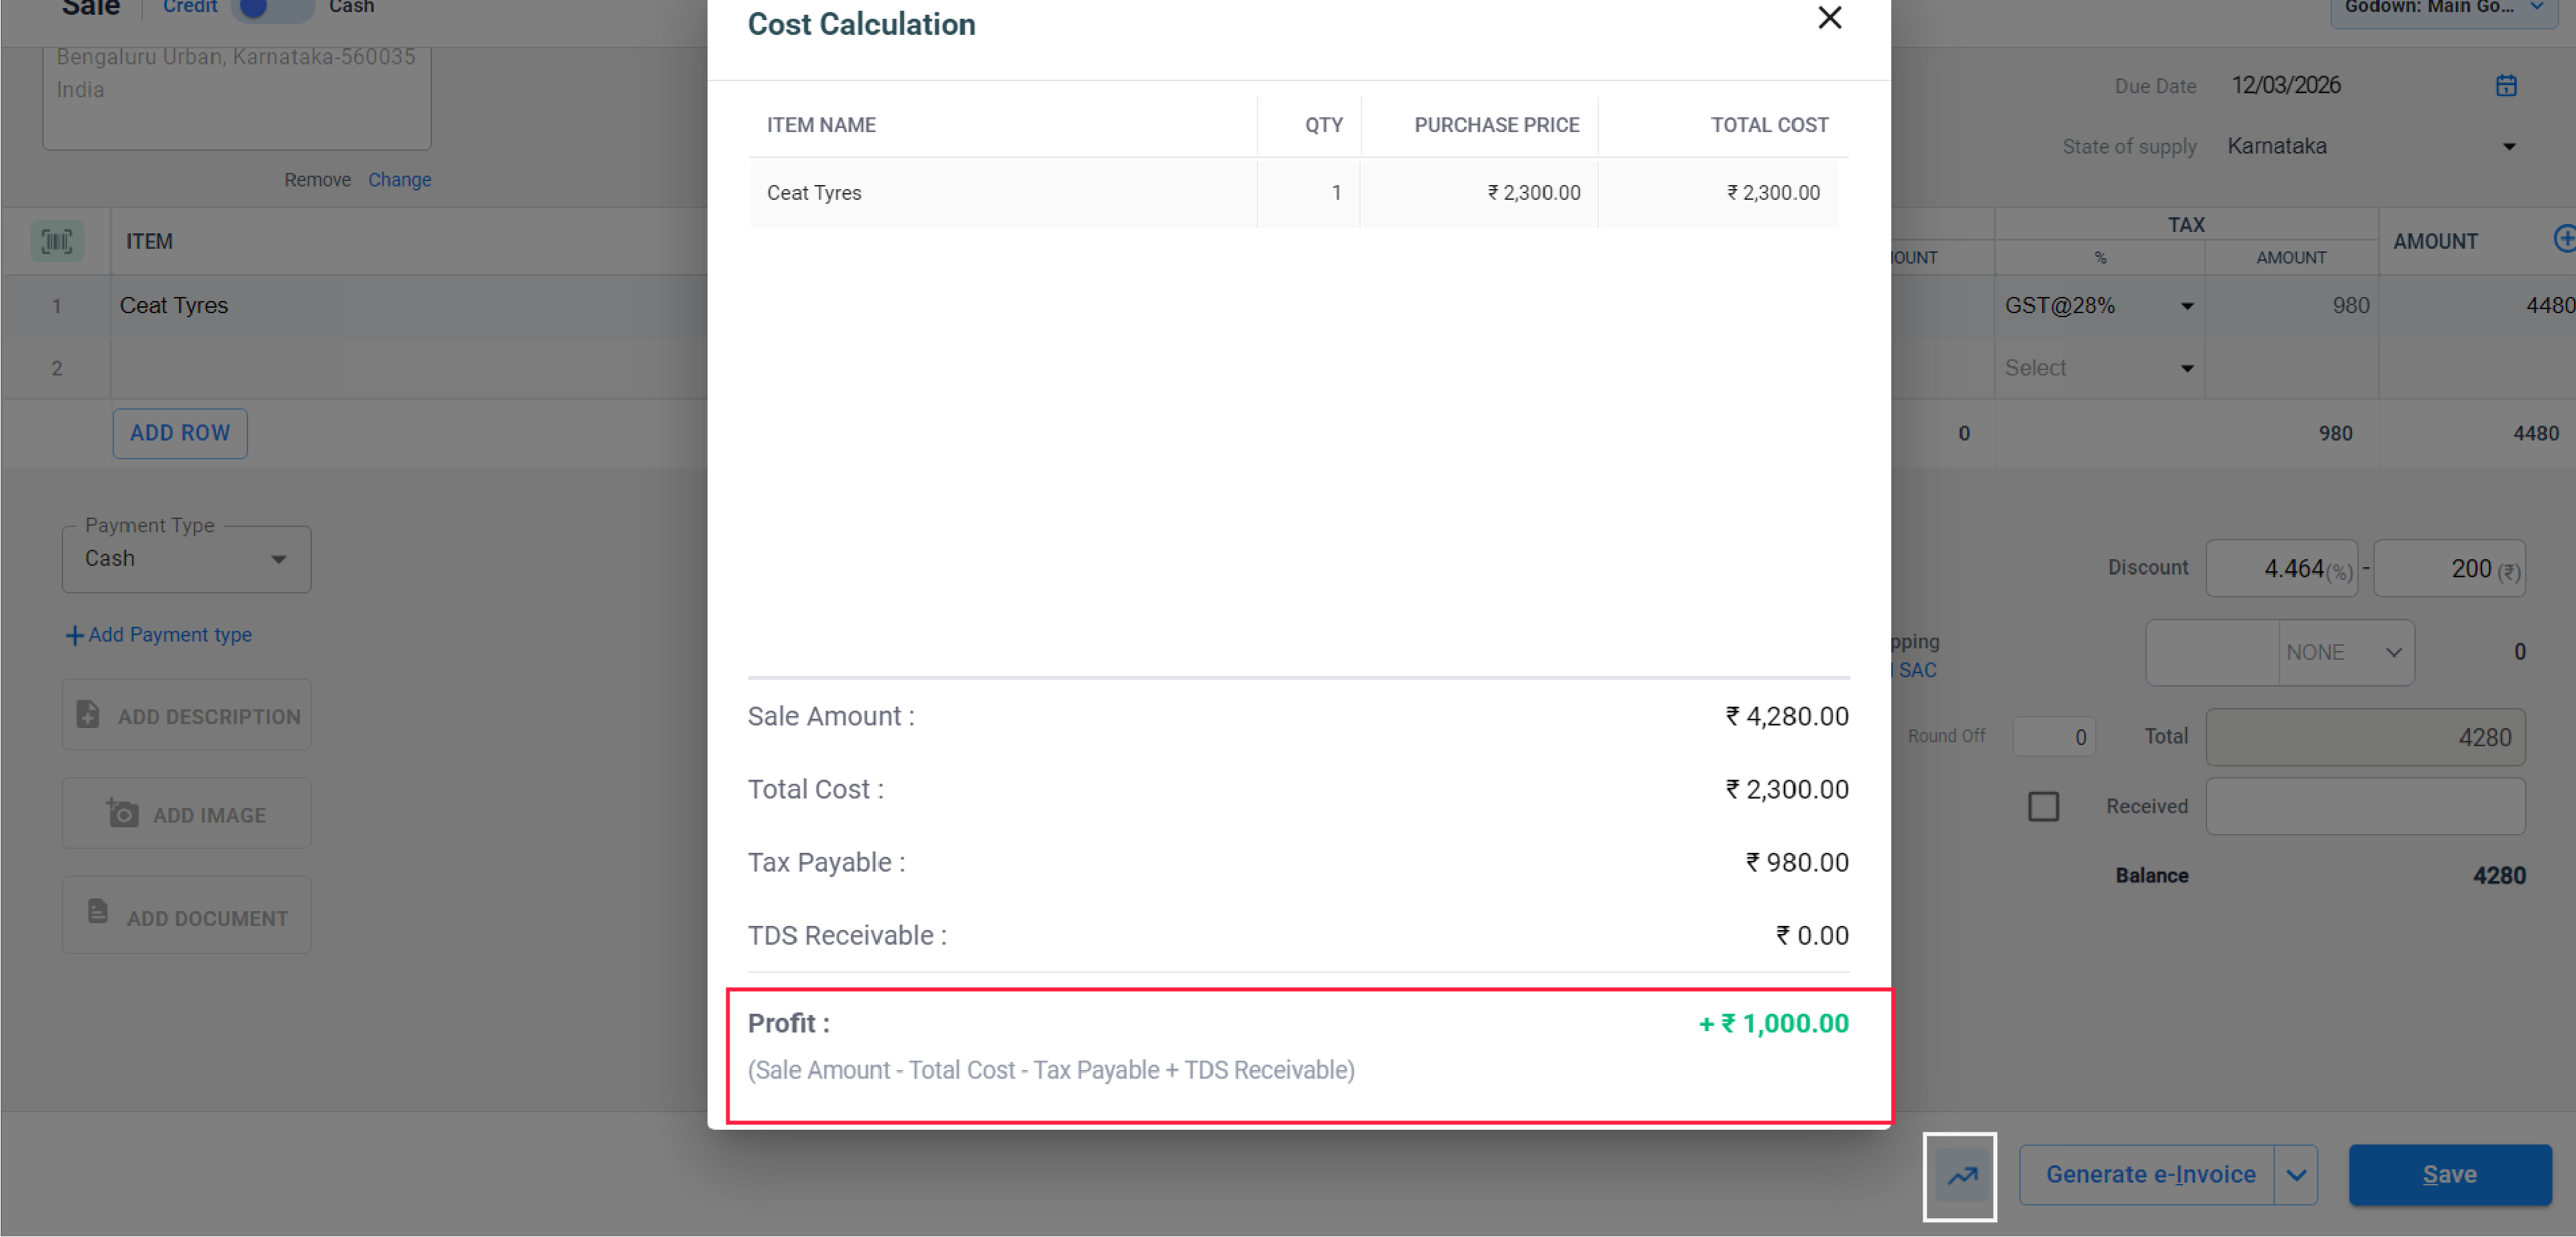
Check Profit
Before finalising, look at the Profit indicator on the screen. This ensures that the discount you’ve provided hasn’t pushed the transaction into a loss. Verify and close it.
08
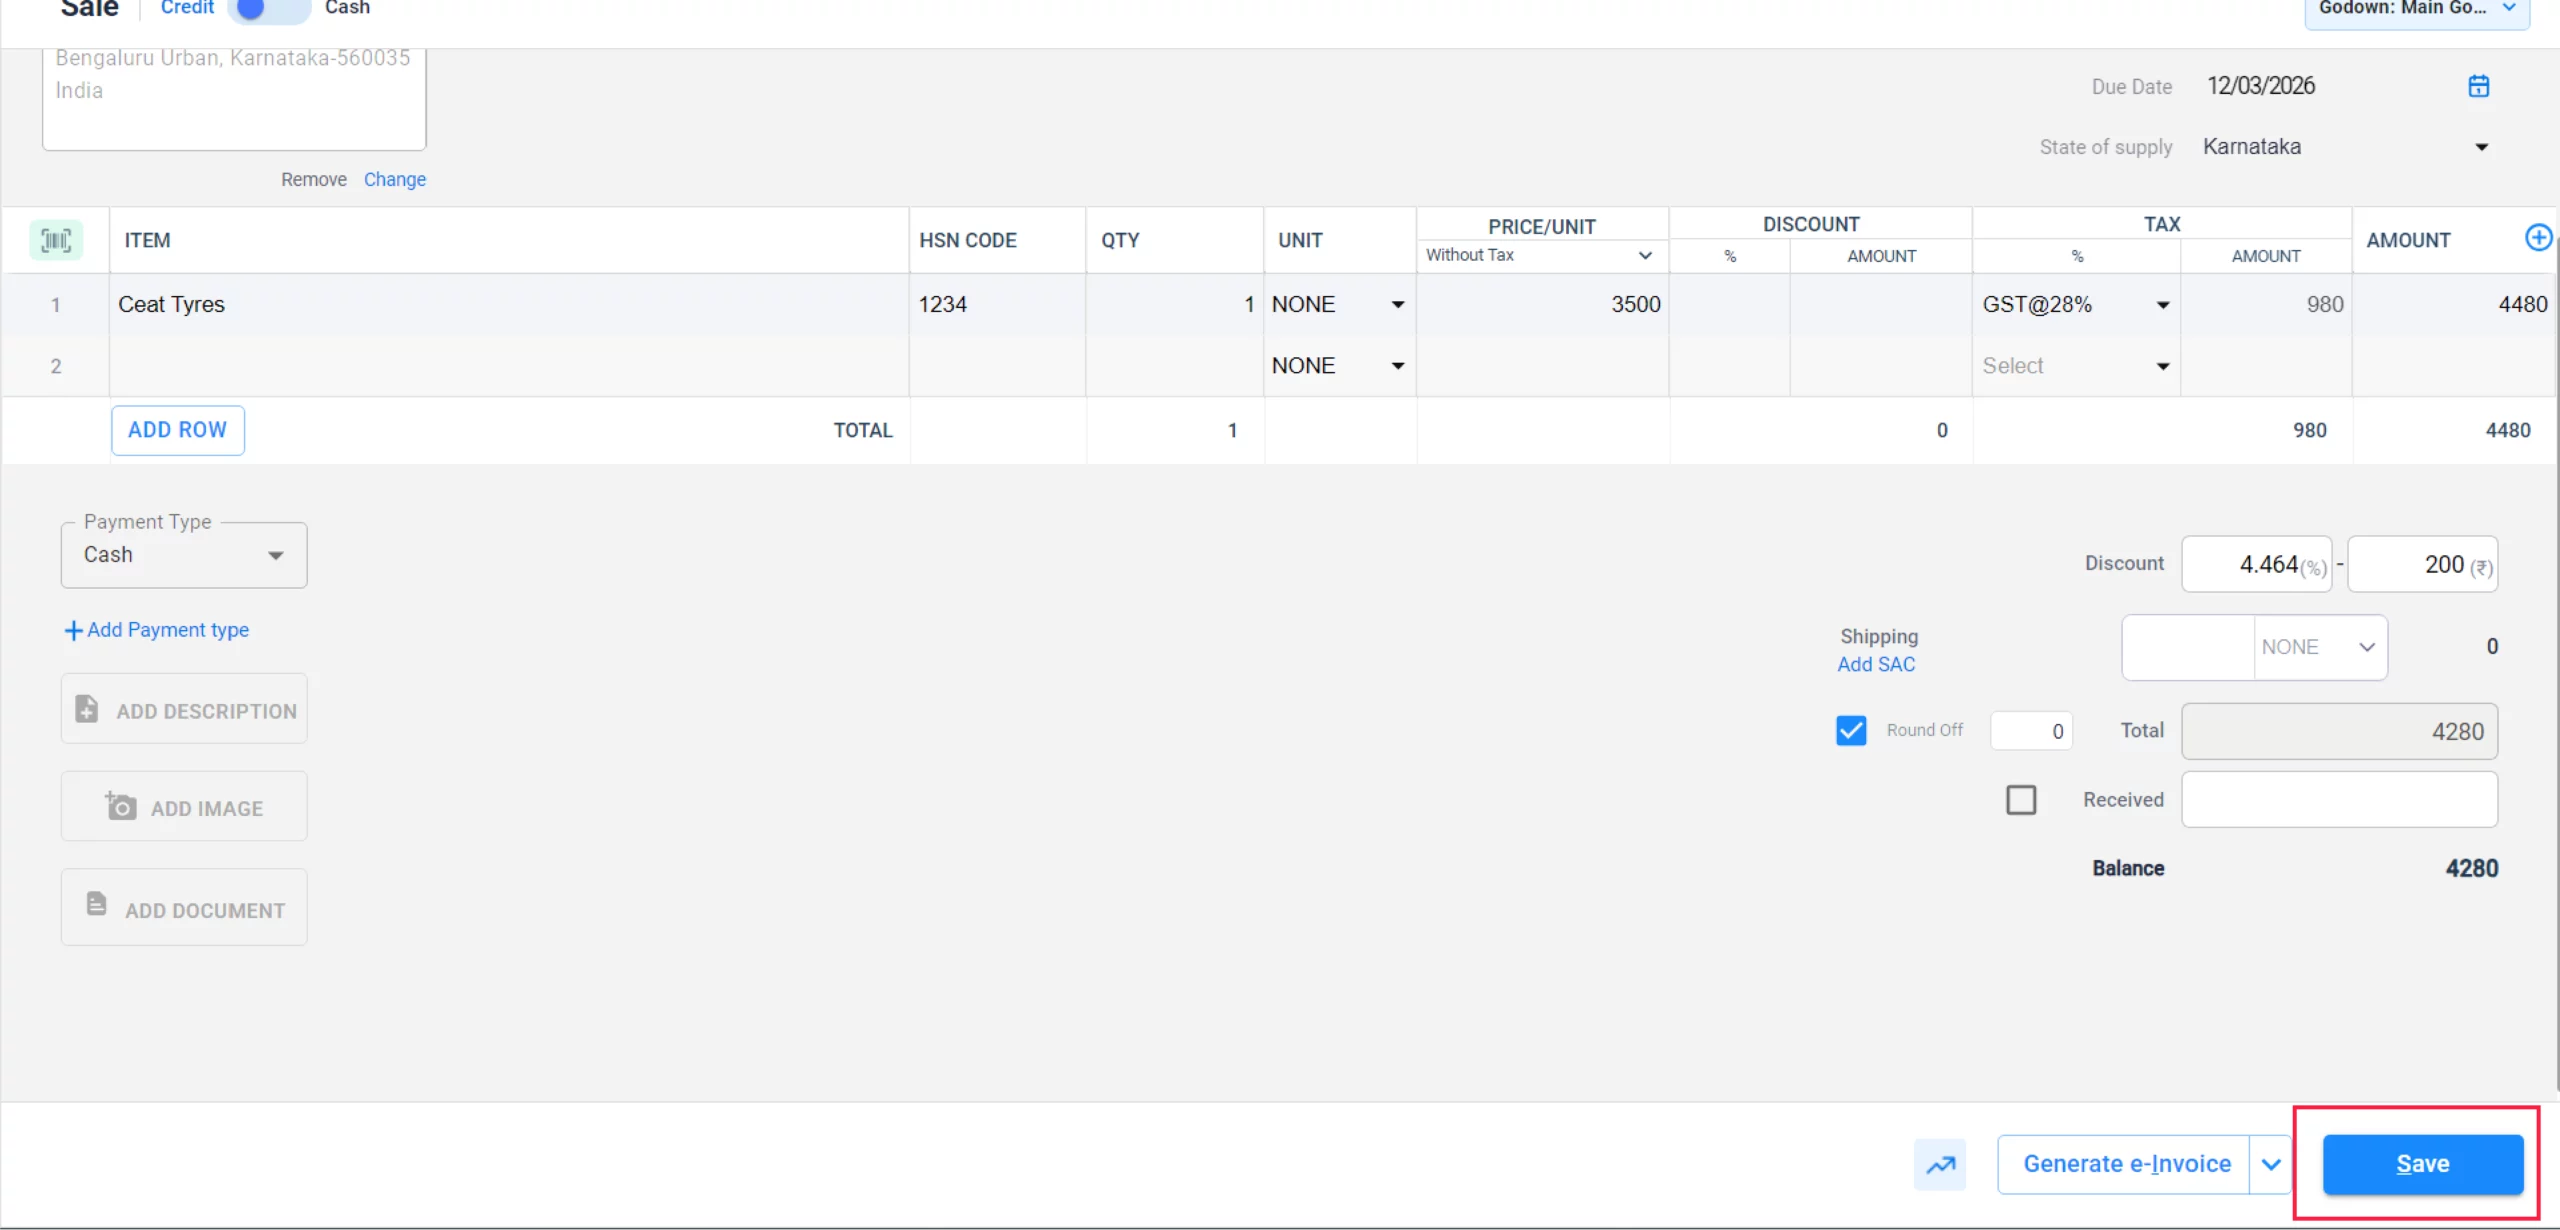
Save Transaction
After verifying your profit margin, click on the “Save” button to complete the transaction and generate your invoice.
09
Still stuck? Get help in minutes.
Our support team is ready to help you succeed.
![]()
![]() 24/7 Support
24/7 Support
Why Is This Important for Your Business?
Managing discounts digitally helps maintain healthy margins while keeping customers happy:

Error-Free Billing
The app automatically recalculates GST and totals after the discount is applied, preventing manual entry mistakes.
Live Profit Tracking
By seeing your profit live, you can negotiate with customers confidently without dipping below your cost price
Customer Loyalty
Clear, professional invoices showing “Savings” or “Discount” build trust and encourage repeat business.
Frequently Asked Questions (FAQs)
Can I apply both an item-wise and a transaction-wise discount?
Yes. Vyapar allows you to apply discounts to individual items first and then apply a final “round-off” or additional discount on the total bill.
Will the GST be calculated before or after the discount?
In a standard Tax Invoice, GST is calculated on the discounted value (taxable value) of the item, ensuring legal compliance with GST rules.
Can I set a default discount for a specific customer?
Yes. You can set a default discount percentage in the Party Settings for specific customers so it applies automatically every time you bill them.
Ready to Keep More Customers?
Start loyalty management today and get 50% more repeat sales.


