How to Add Due Dates on Invoices in Vyapar App
Setting a Due Date on your invoices is the first step toward professional debt collection. By defining exactly when a payment is expected, you enable Vyapar to automatically track the Overdue status of unpaid bills, helping you identify which customers need a payment reminder.

Before You Start

Transaction Type: Due dates are primarily used for Sale and Purchase transactions.
Credit Sales: This feature is essential for credit transactions where payment is not received immediately at the time of sale.
Feature Activation: The Due Date field must be enabled in your transaction settings for it to appear on the invoice screen
Step-by-Step Guide to Add Due Dates:
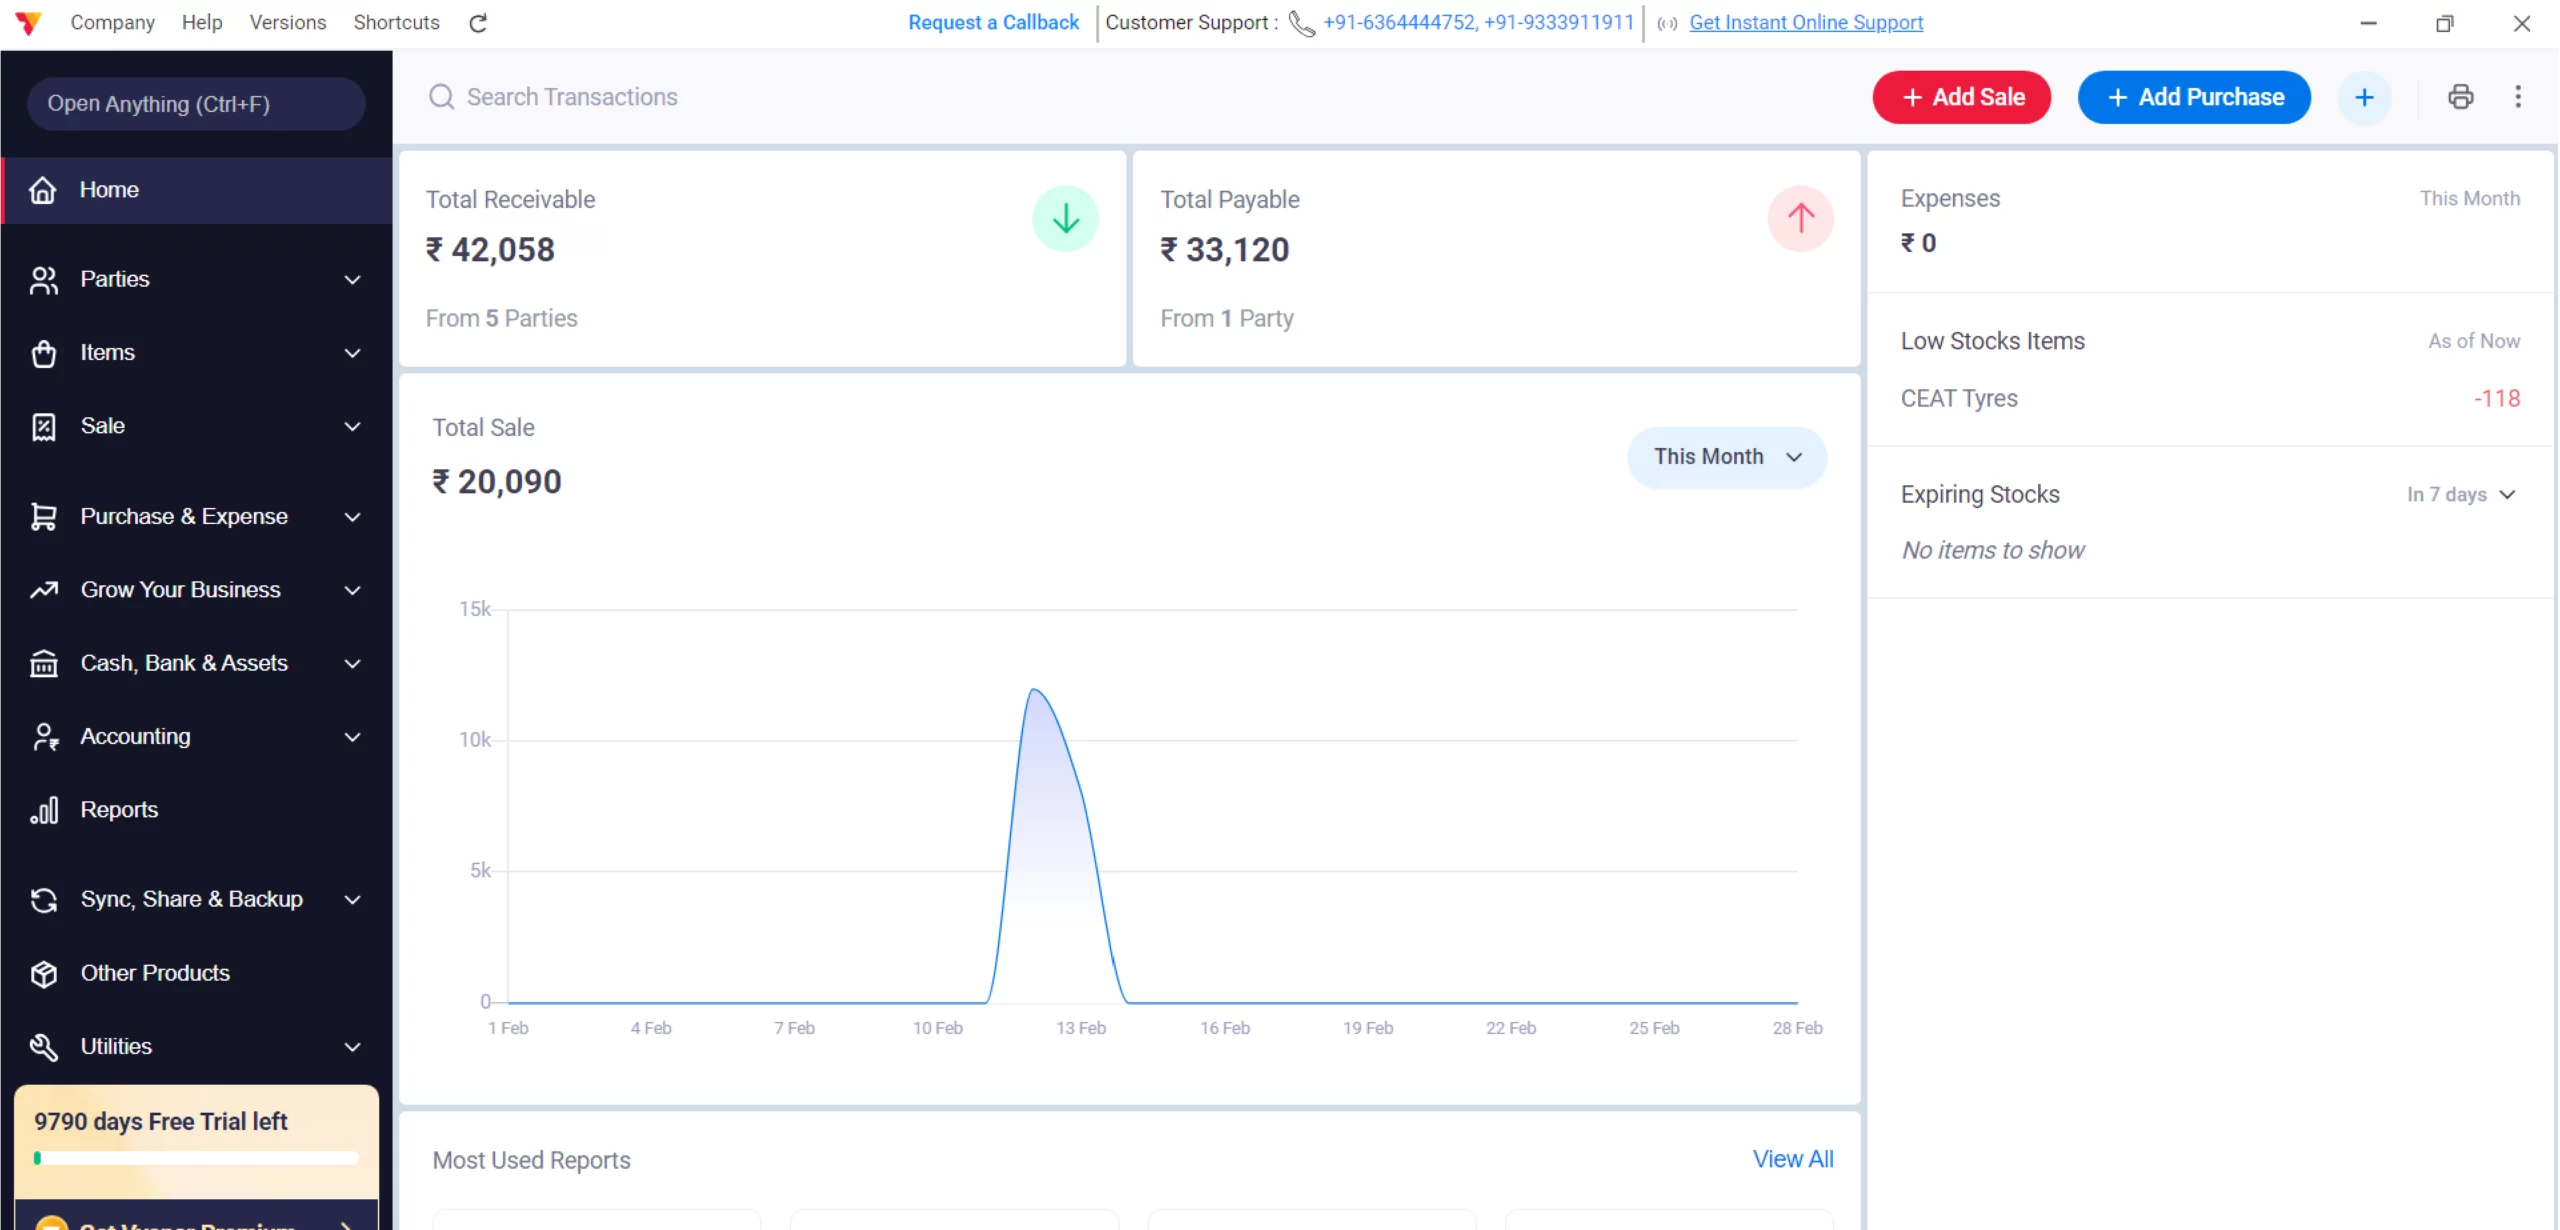
Open Vyapar App
Launch the Vyapar invoicing software on your Desktop device.
01
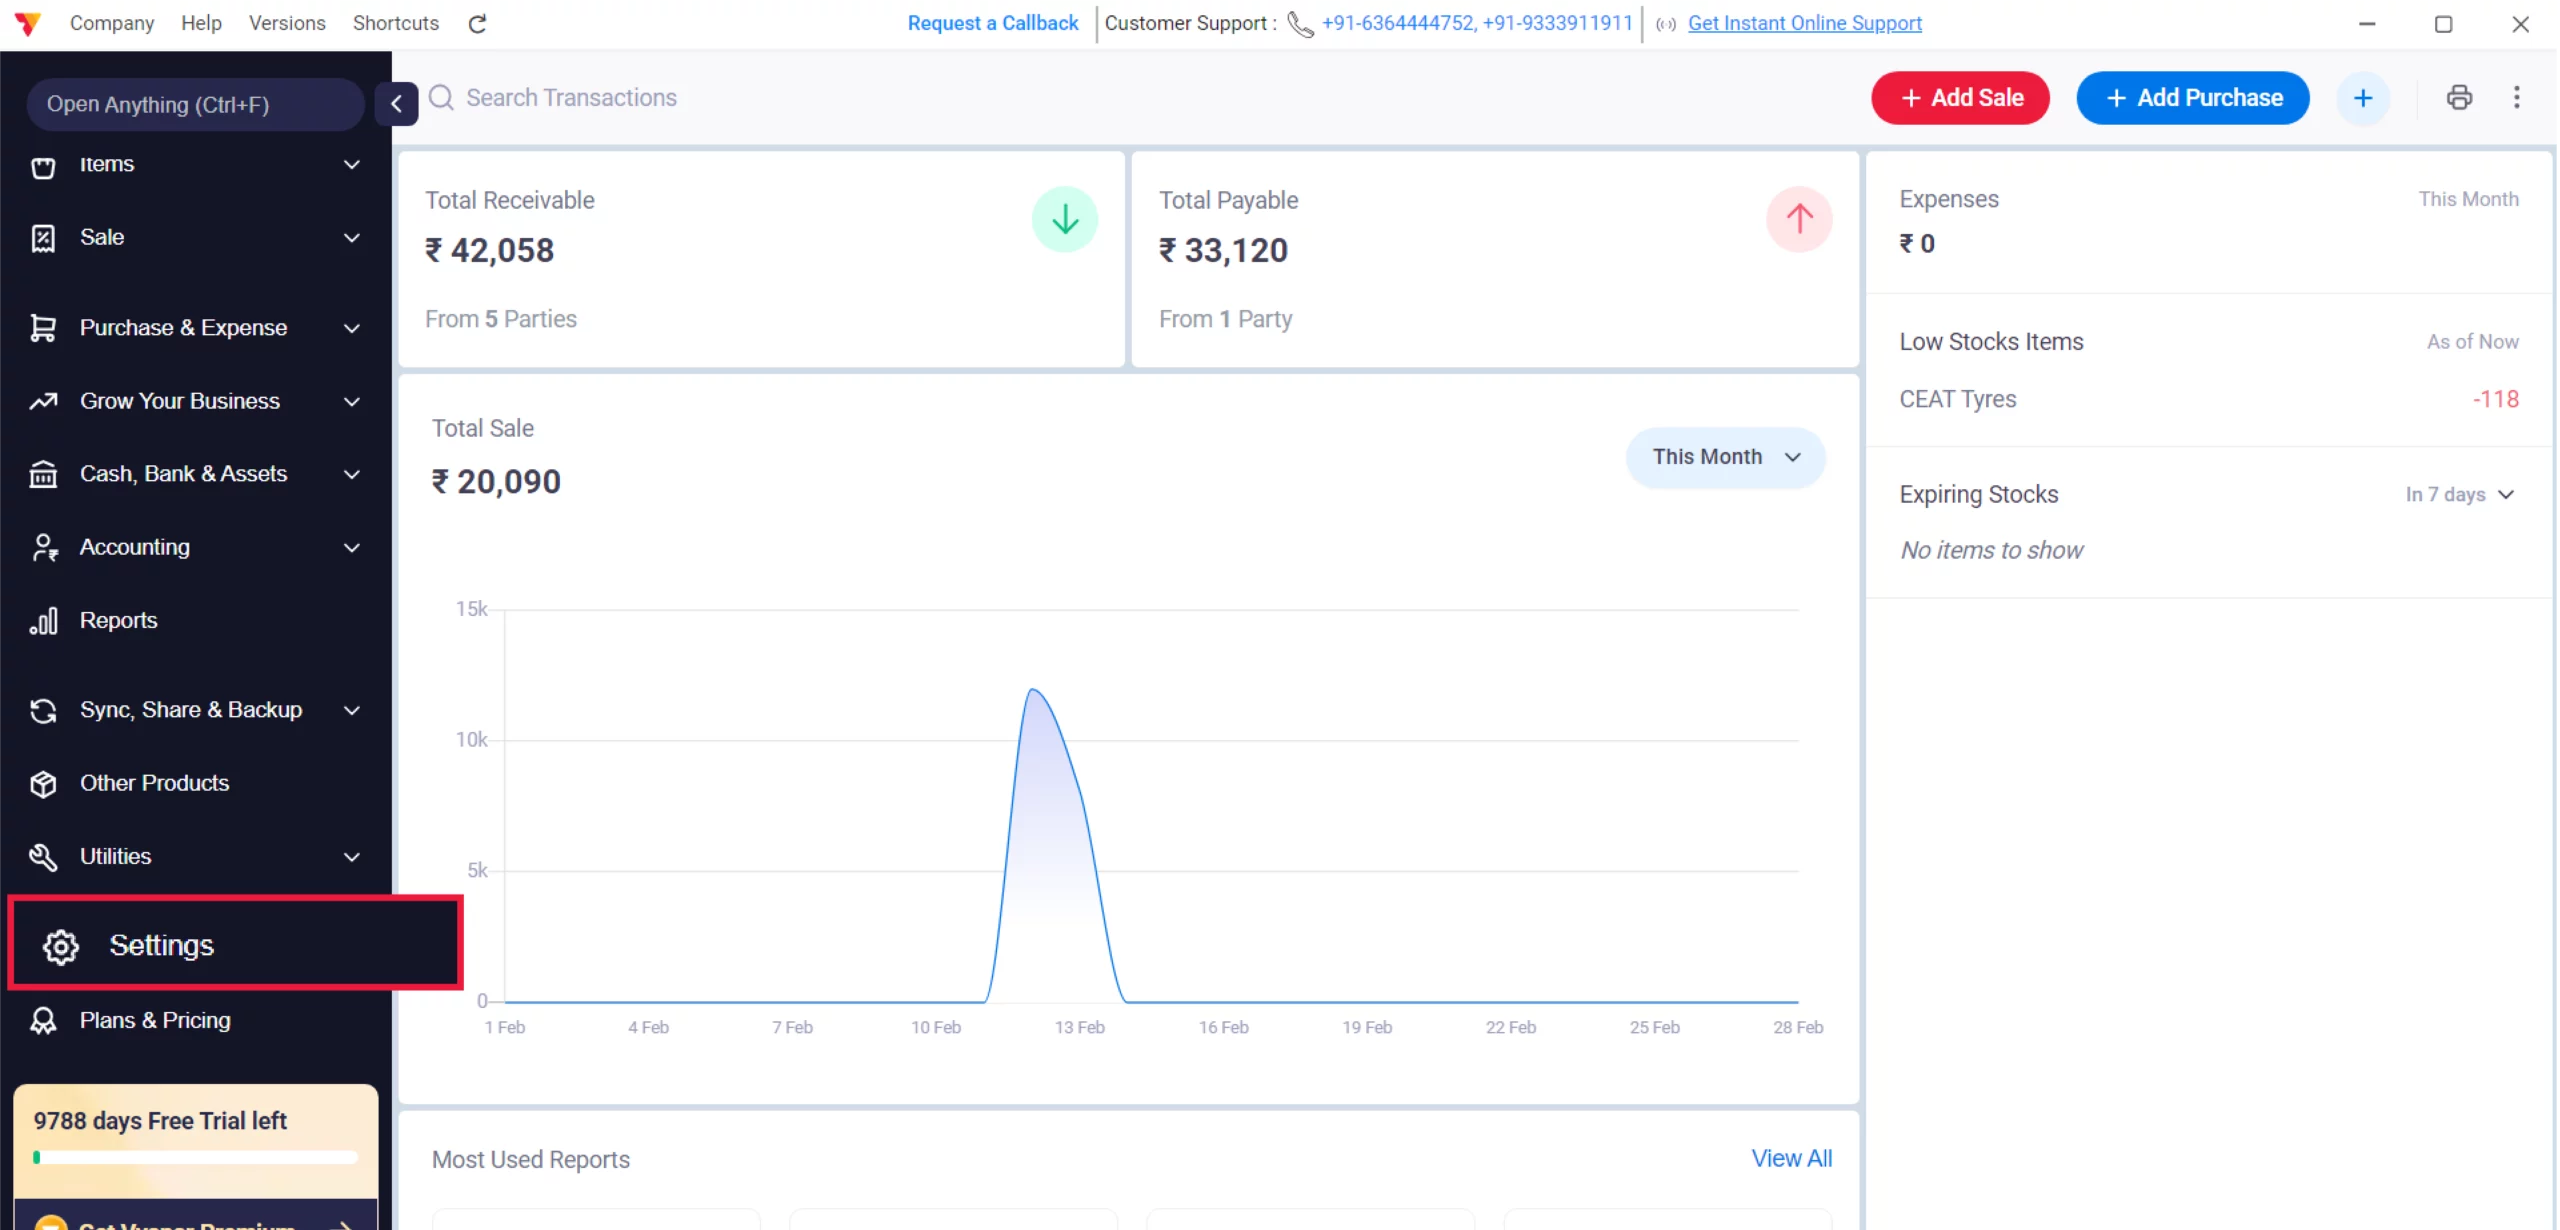
Access Settings
Navigate to the Left Menu, locate the Settings with the gear icon, and click it.
02
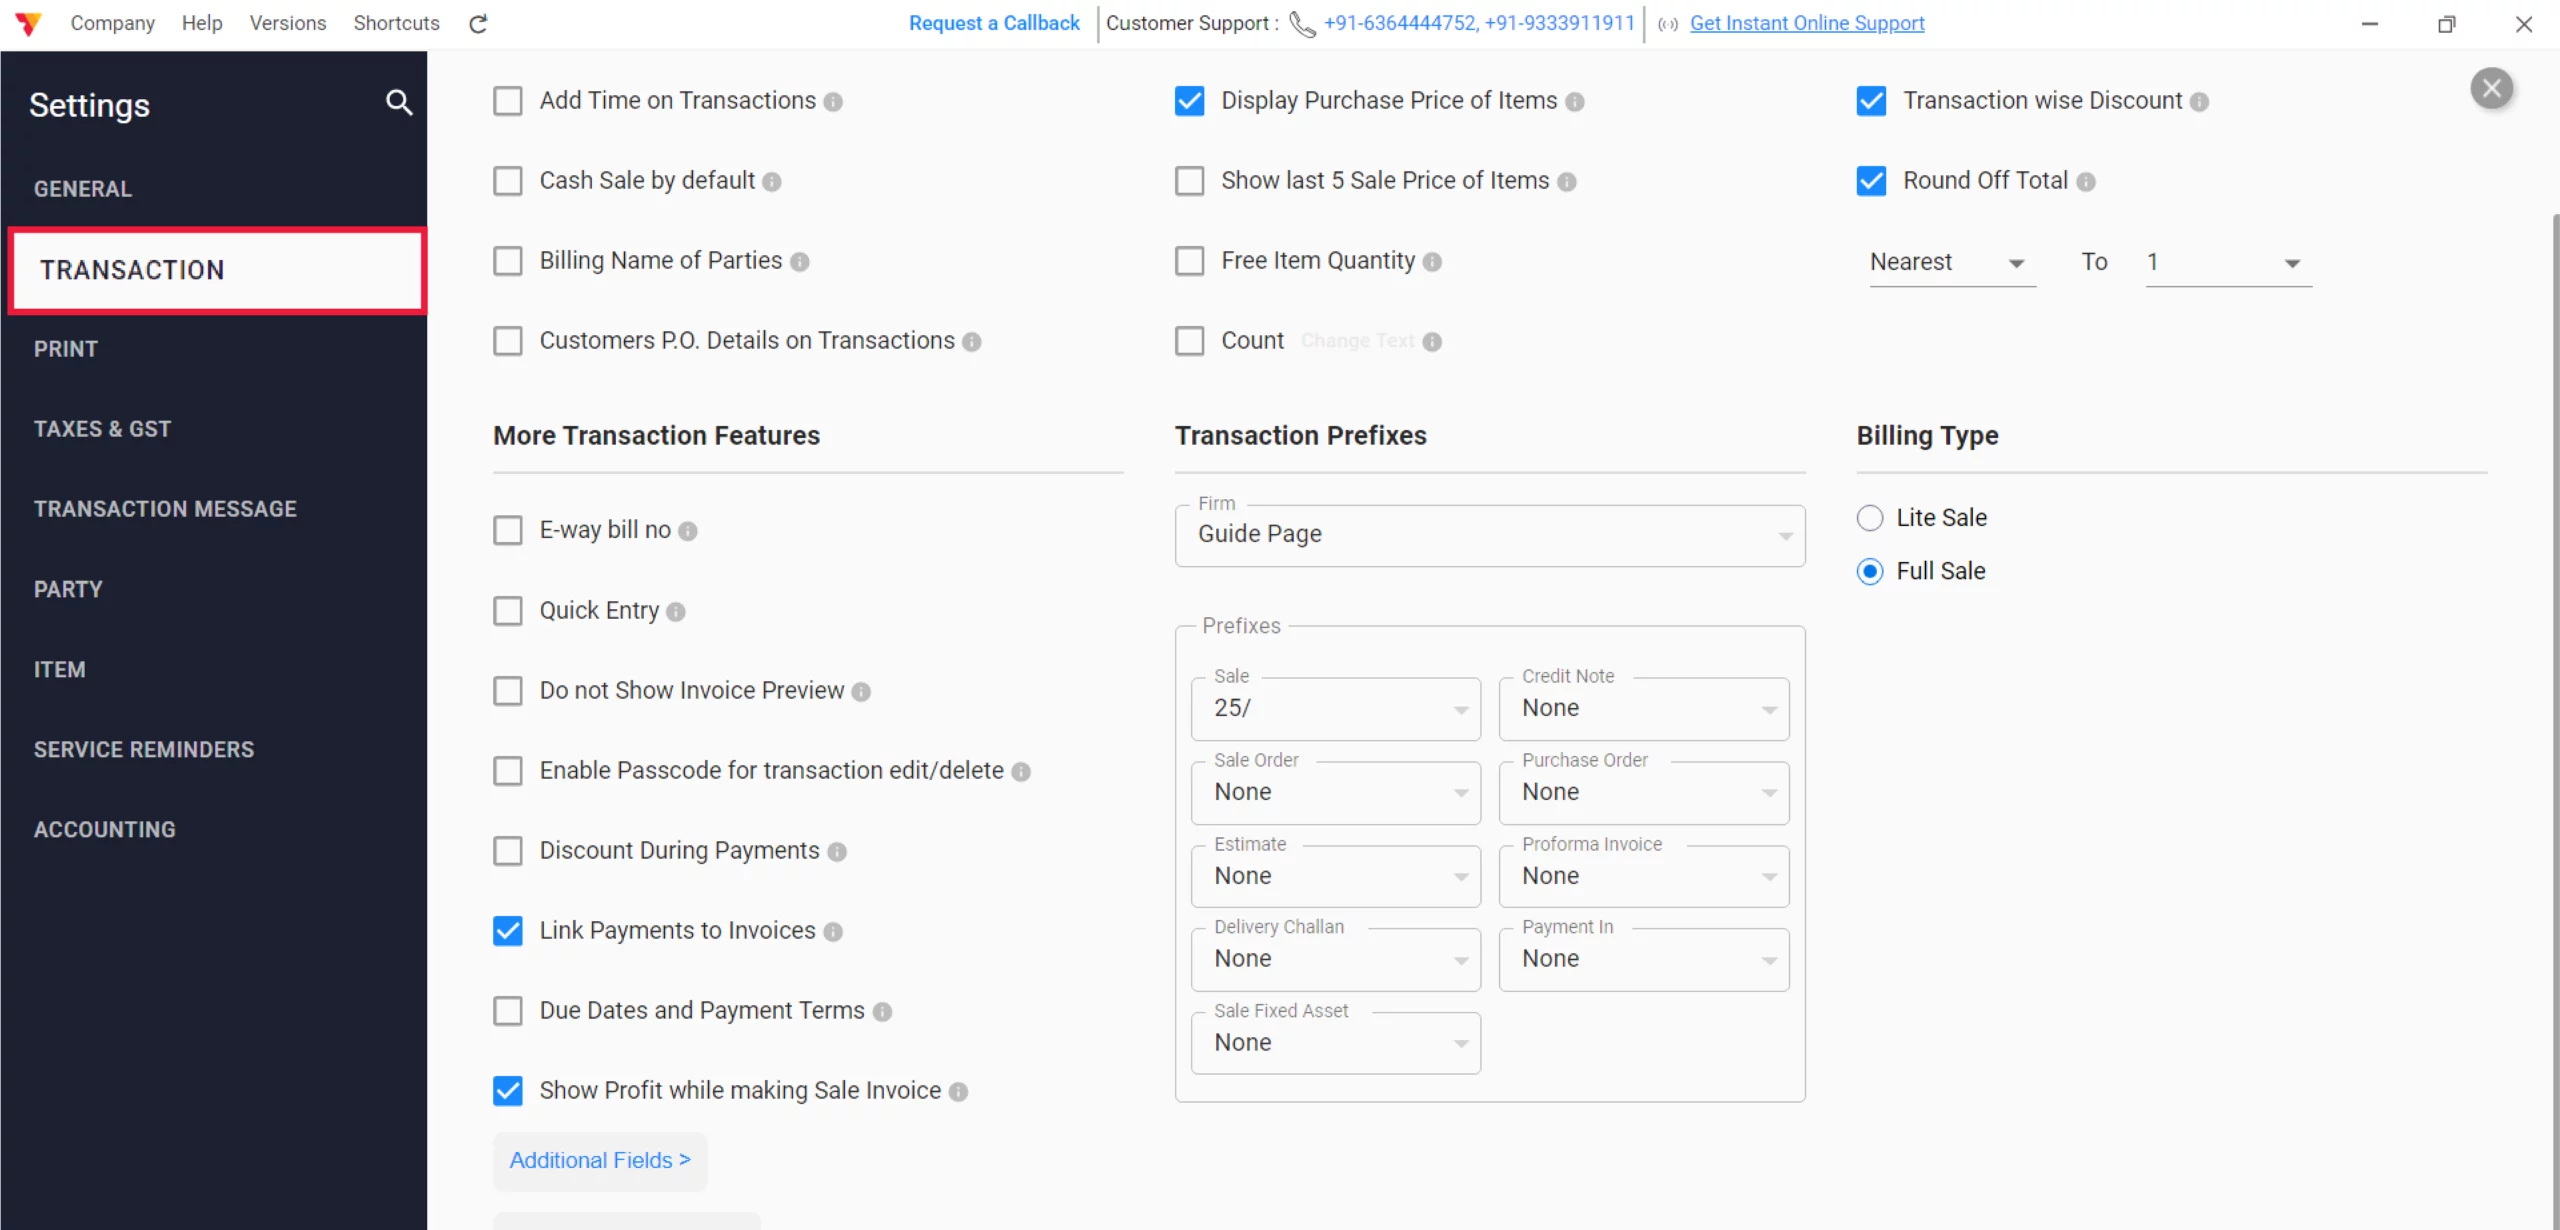
Select Transaction Settings
From the left-hand sidebar in the Settings window, click on the TRANSACTION tab.
03
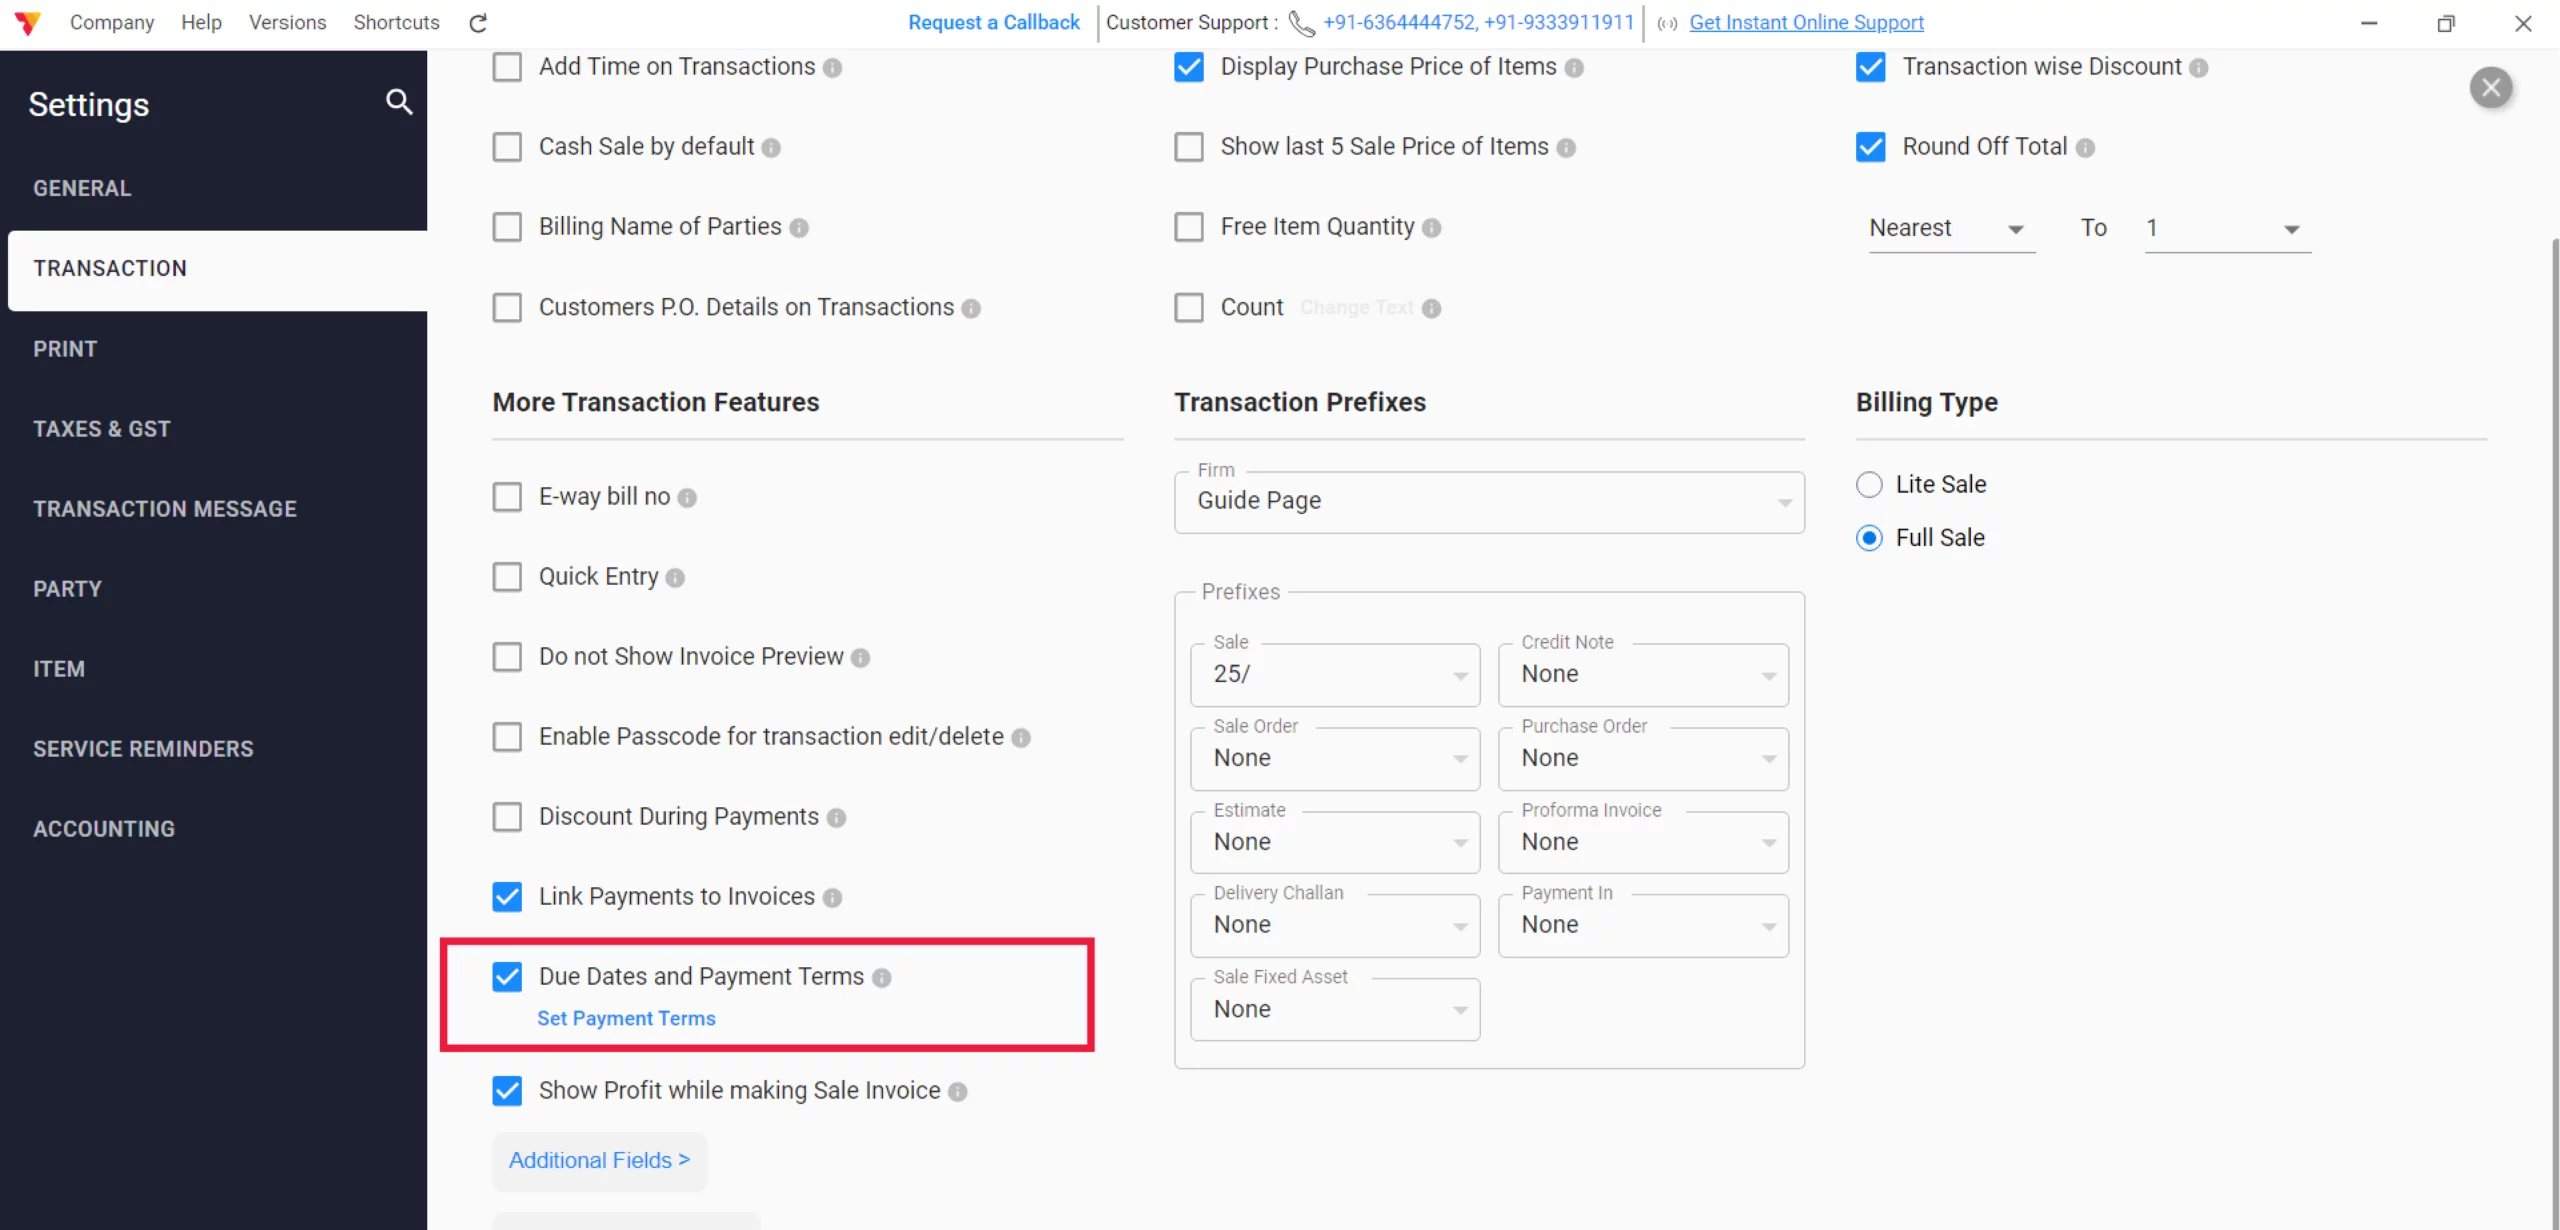
Enable Due Date
Locate the “Due Date & Payment Terms” checkbox and select it to activate the field on all your transaction screens, and click on “Set Payment Terms”.
04
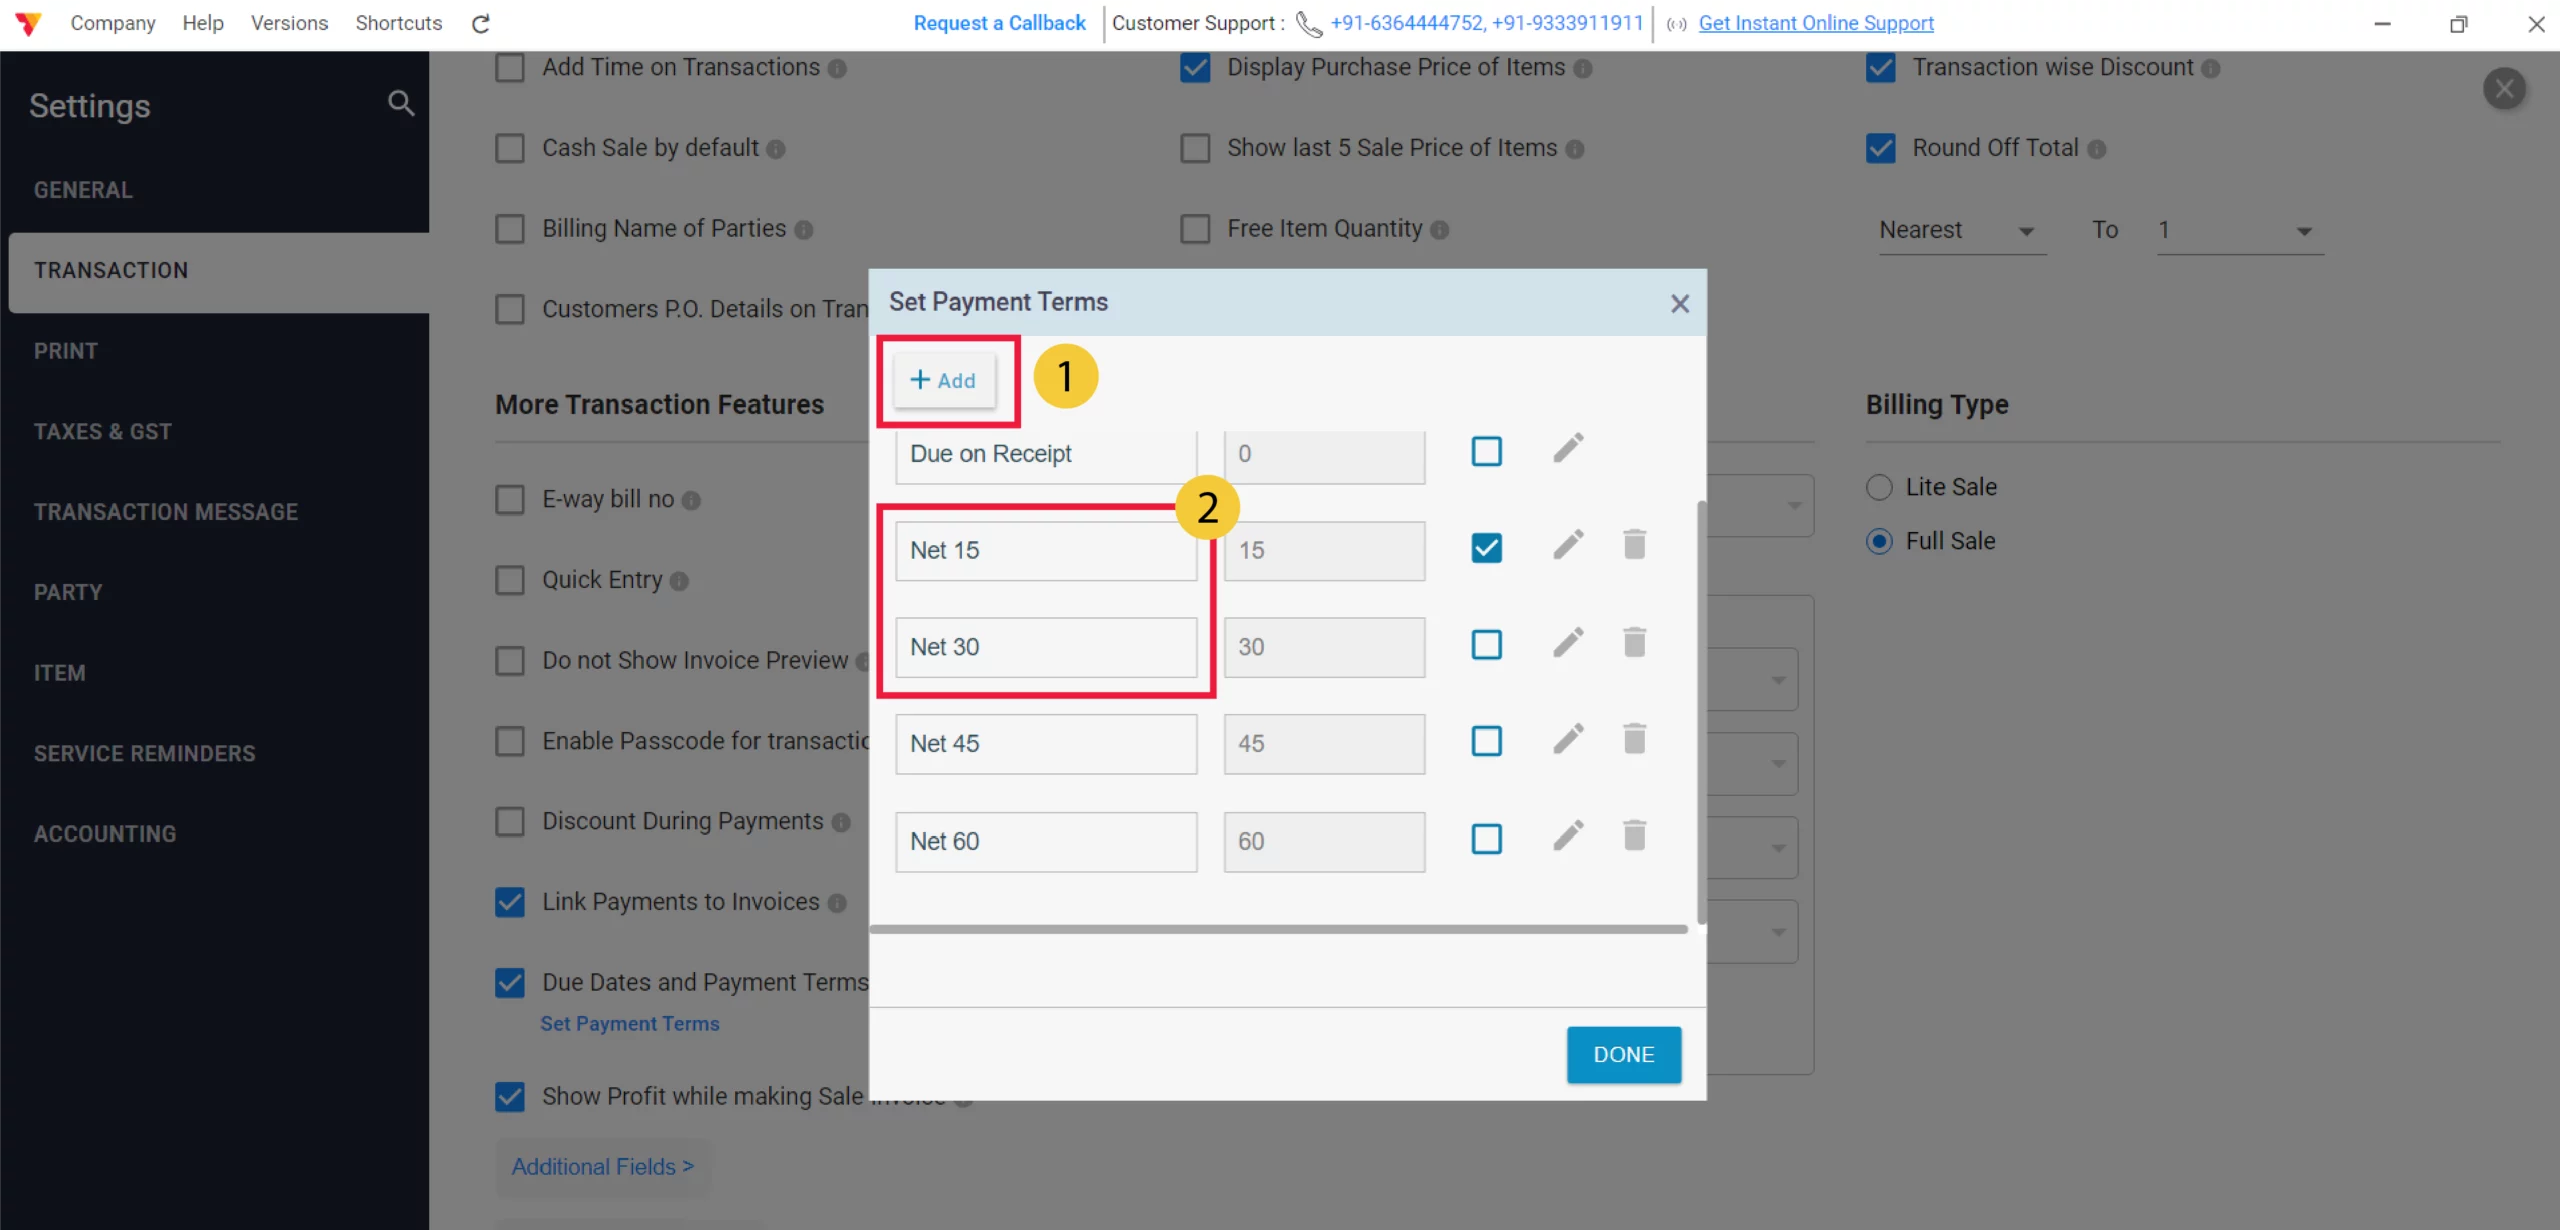
Set Default Due Dates
After clicking “Set Payment Terms”, a pop-up window appears where you can add or edit terms like Net 15 or Net 30. Select your preferred term as the default and click on Done. This due date will now update automatically based on the invoice date.
05

Create a New Sale
Go to the main dashboard and click the + Add Sale button.
06
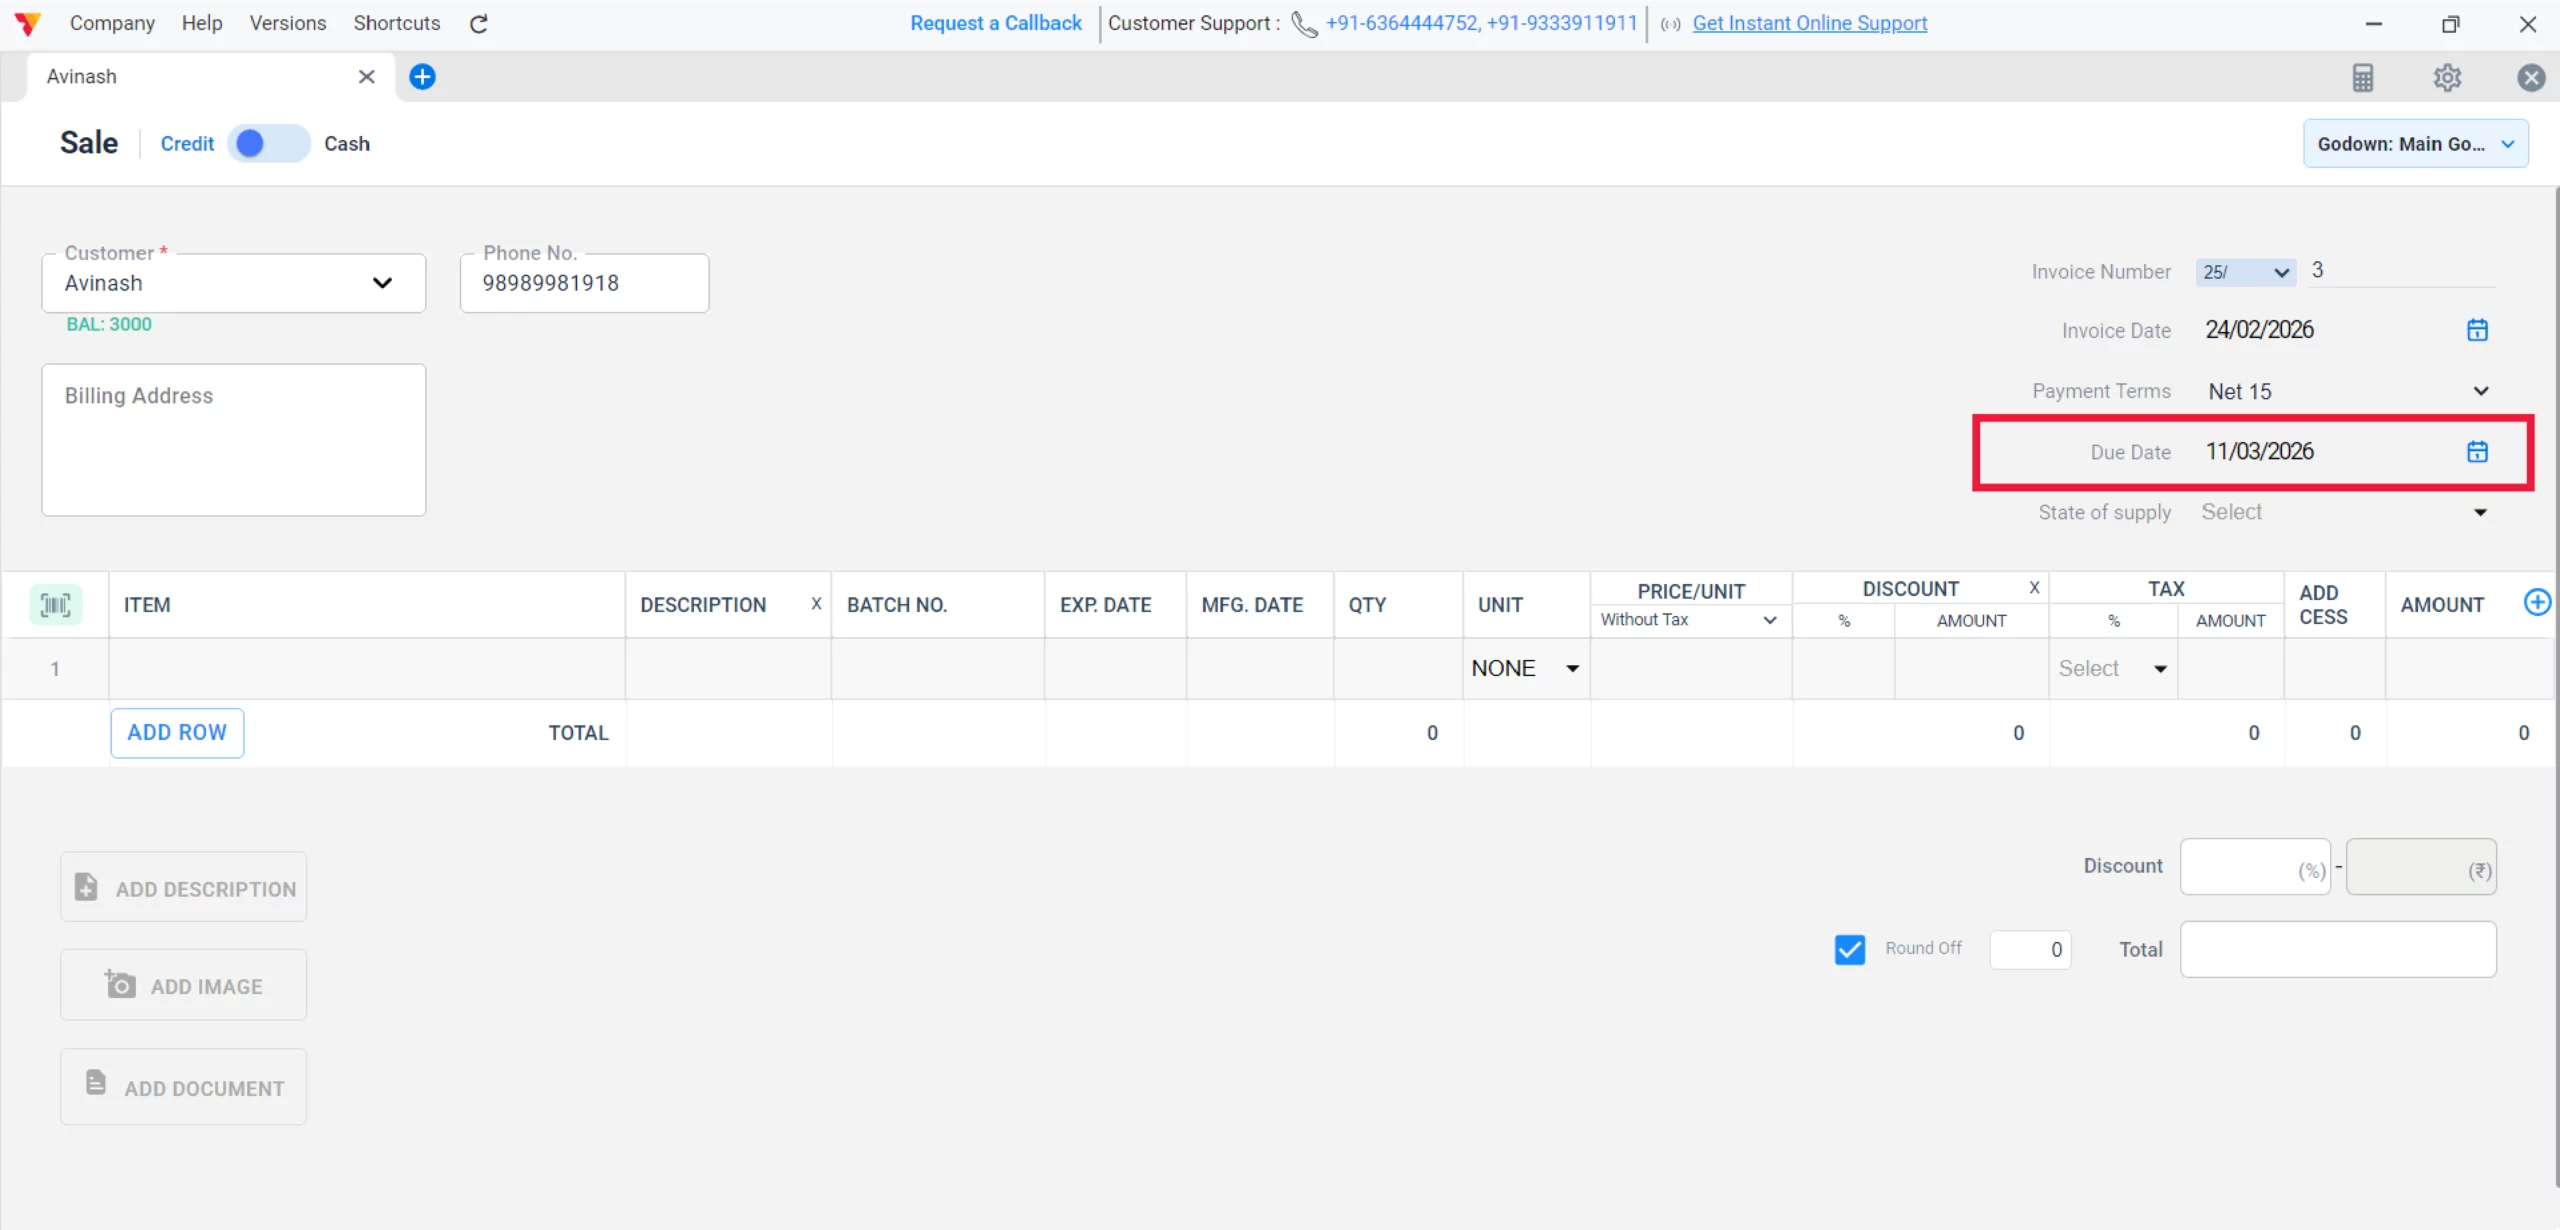
Locate Due Date Field
On the Sale invoice screen, you will now see a Due Date field (usually near the invoice date).
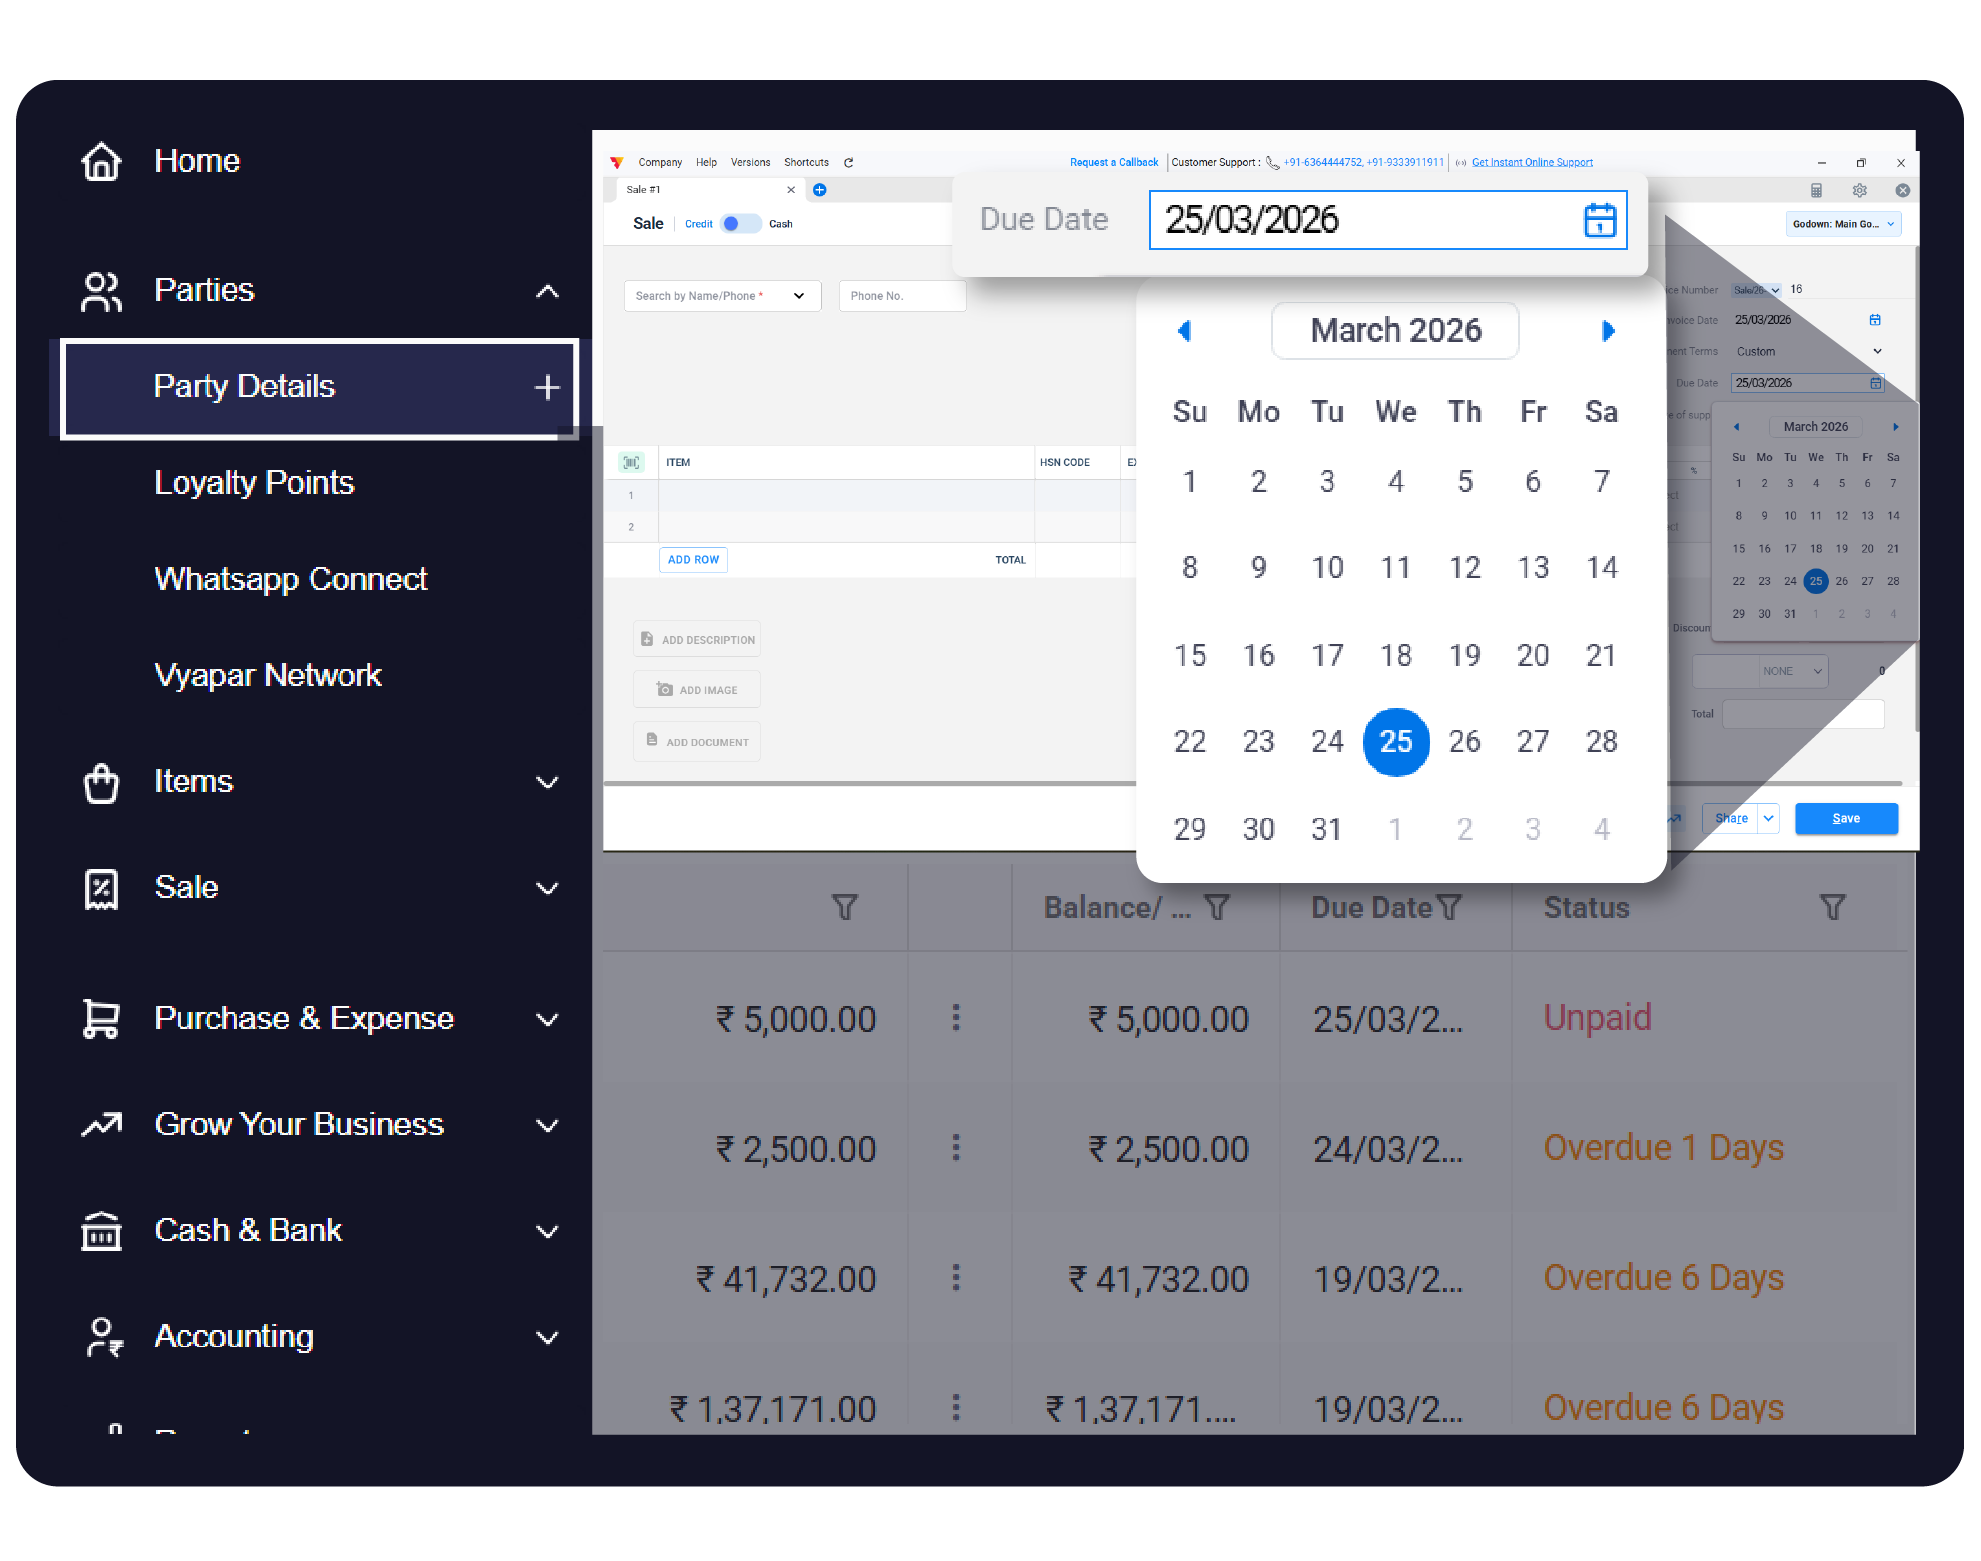
07
Set the Date
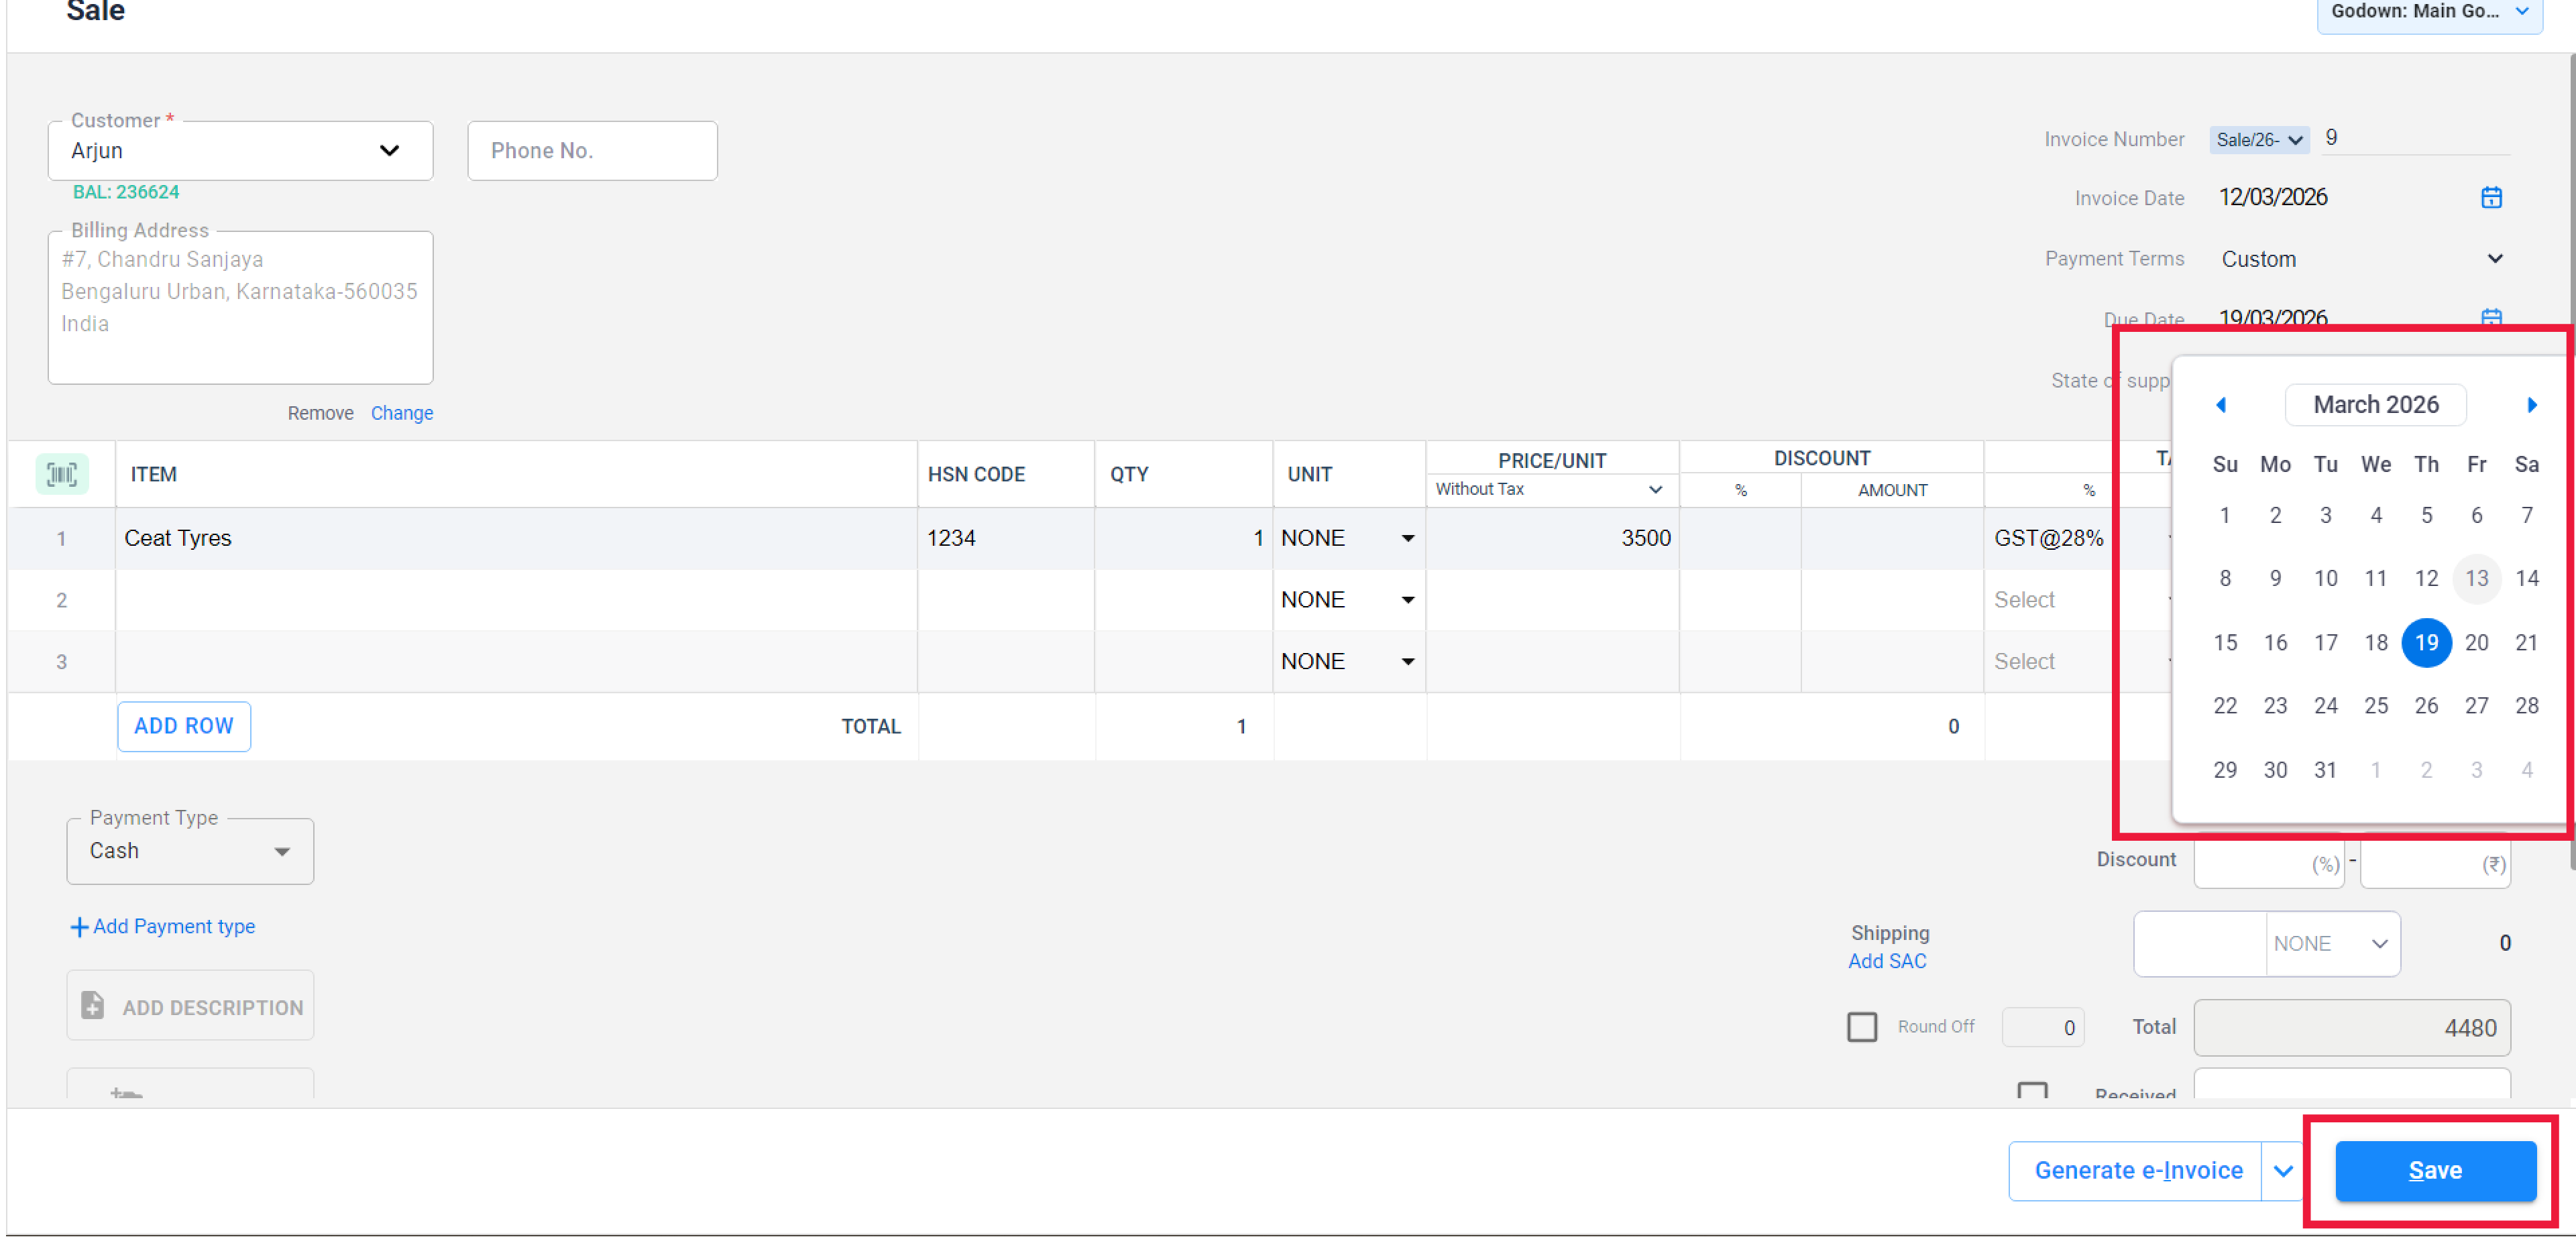
Click on the calendar icon and select the date by which you expect to receive the payment.
( Automatically updated, if you have added “set payment terms”)
08
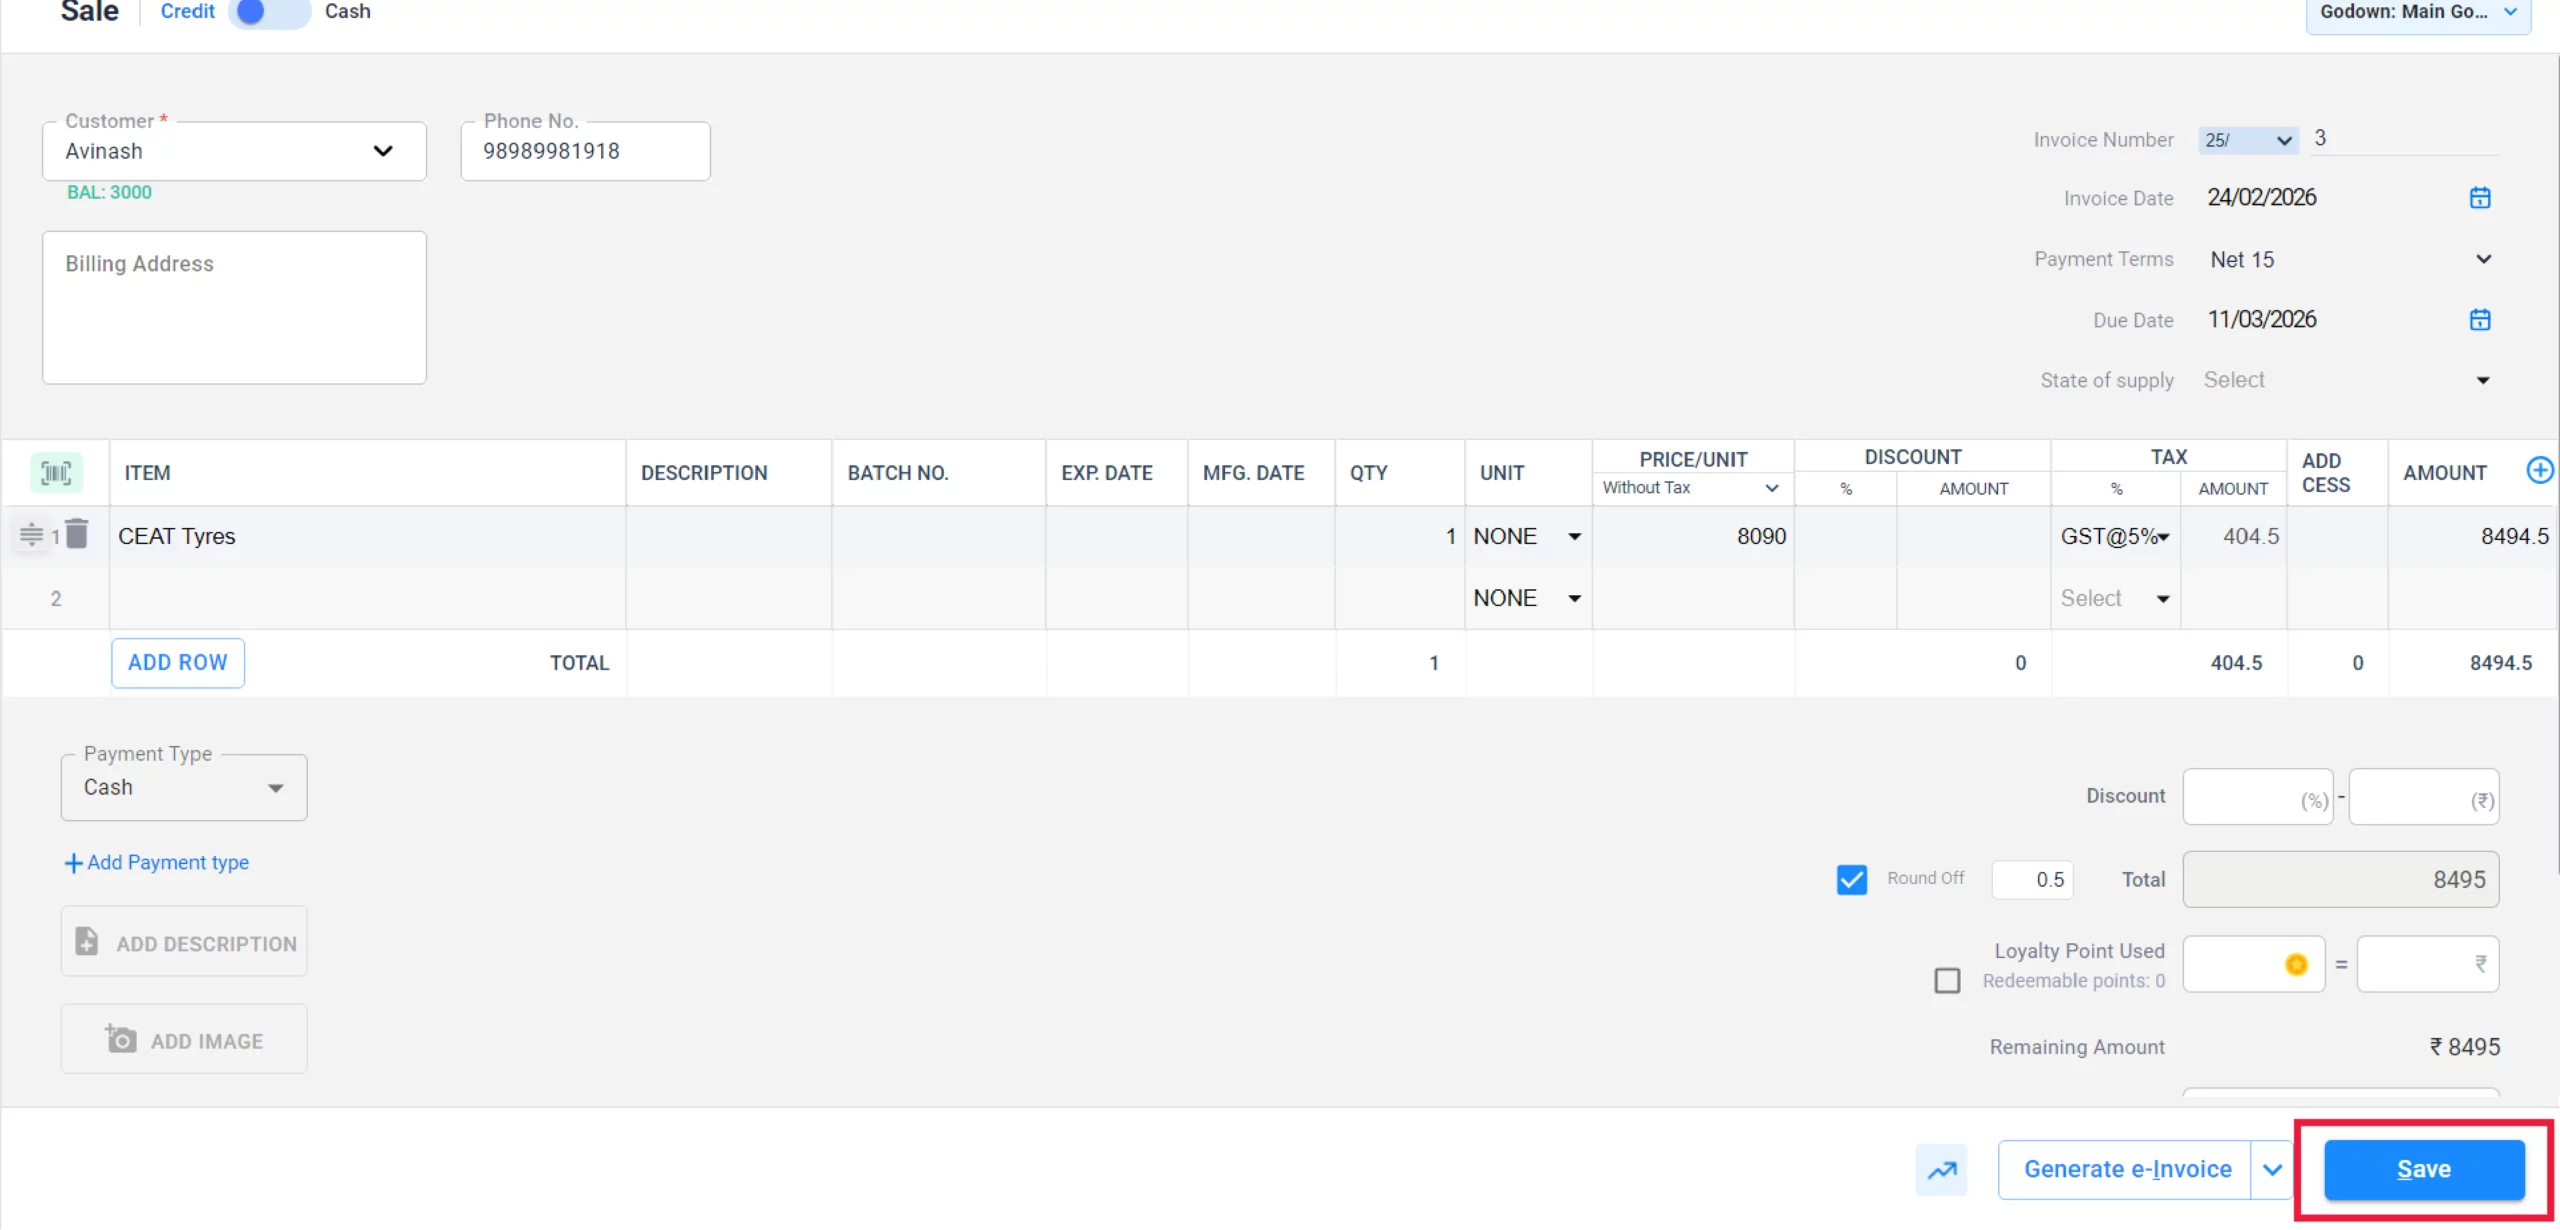
Save the Invoice
Provide a brief description for the entry and click the Save button to finalise.
09
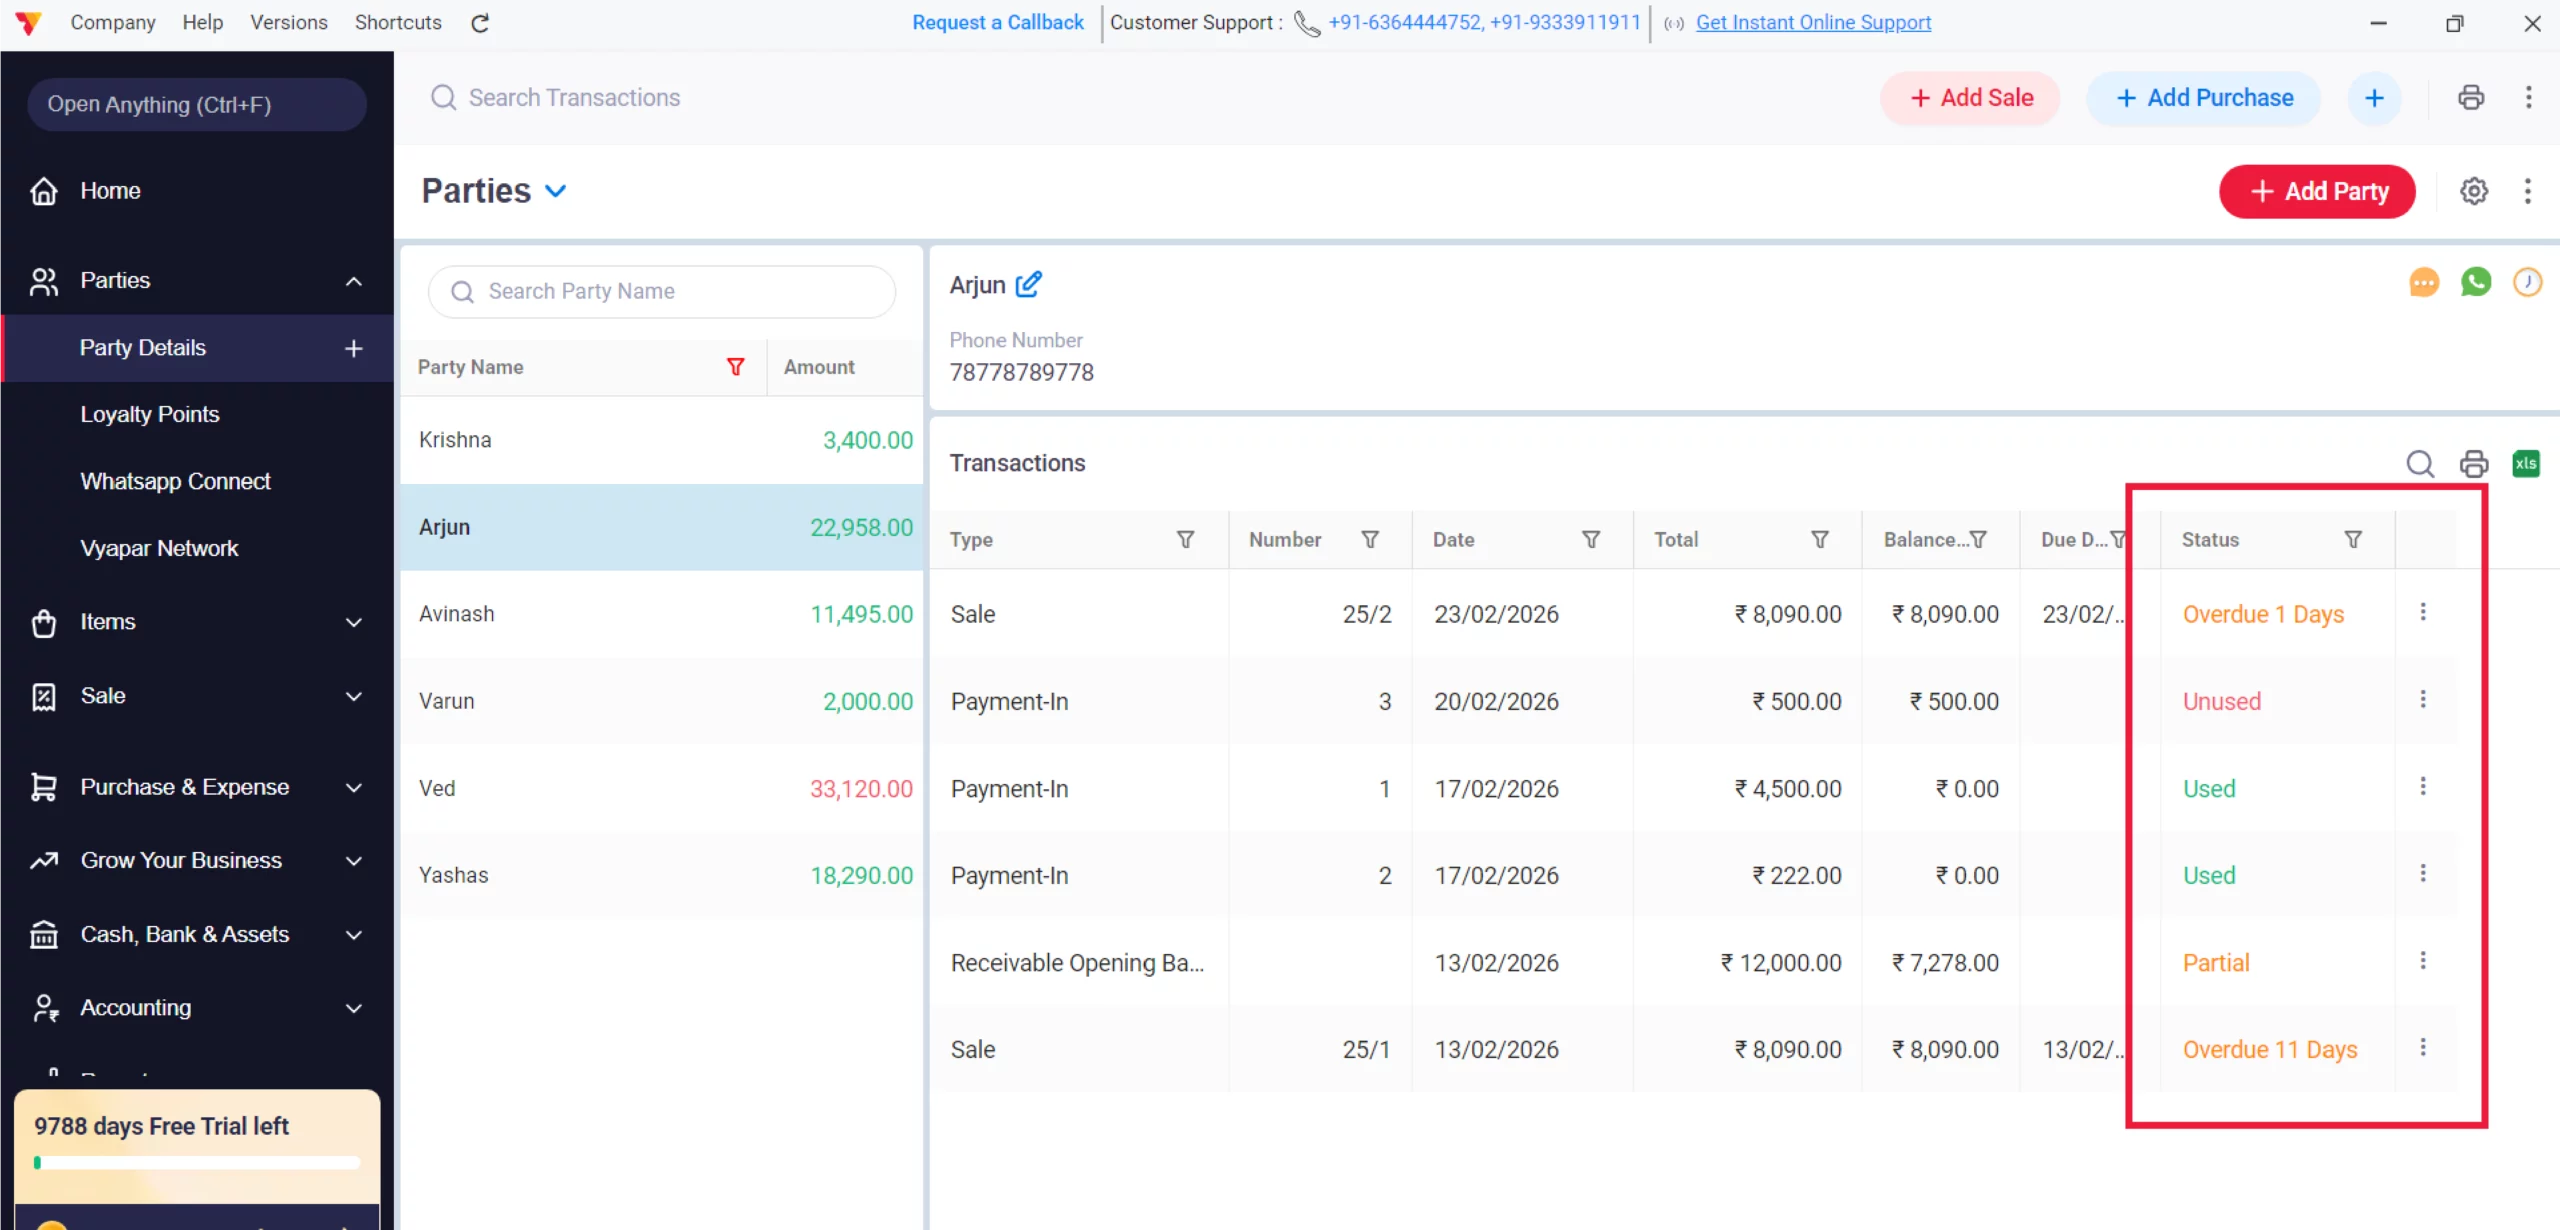
Track Due Dates
Vyapar will now track the status of this bill based on the date you provided. View Dues while creating sales, parties, and Transaction reports
10
Still stuck? Get help in minutes.
Our support team is ready to help you succeed.
![]()
![]() 24/7 Support
24/7 Support
Why Is This Important for Your Business?
Adding due dates changes how you view your business’s financial health:

Automated Status Tracking
Once the due date passes, the transaction status automatically changes from Unpaid to Overdue, making it visible on the party details screen.
Accurate Ageing Reports
Due dates allow you to generate Ageing Reports, showing you exactly how many days a payment has been delayed.
Effective Reminders
You can now send Payment Reminders with a specific reference to the overdue date, increasing the urgency for the customer to pay their Payable balance.
Frequently Asked Questions (FAQs)
Can I set a default due date for all invoices?
Yes. In the TRANSACTION settings, you can often define a default credit period (e.g., 15 days) that automatically calculates the due date from the invoice date.
Will the due date print on the invoice?
Yes. Once enabled, the due date will be visible on the printed or digital PDF invoice shared with your customer.
What happens if I don’t add a due date?
The invoice will simply show as Unpaid or Partial. You will not see the “Overdue” status, which is necessary for effective debt tracking.
Ready to Beat Every Deadline?
Set up smart due-date alerts today to reduce missed tasks by 50%.


