How to Customize Your Invoice in Vyapar App
A professional invoice is a reflection of your brand. Vyapar provides extensive customization options, allowing you to choose from multiple themes.
Add your business logo, and include custom fields to ensure your bills meet your specific business needs.

Before You Start

Complete Business Profile (Logo & GSTIN): Ensure your Business Name, Address, and Contact Info are updated, your Business Logo is uploaded, and your GSTIN Number is active in the profile settings so they can be toggled on for your layouts.
Hardware Readiness: Identify whether you will be using a Regular (Laser/Inkjet) printer for A4/A5 sheets or a Thermal Receipt printer (2-inch or 3-inch), as each requires a separate customisation setup in Vyapar invoicing software.
Transaction Setups: Enable specific features such as Batch Numbers, Expiry Dates, or Serial Numbers in your item settings first if you want these “Additional Item Details” to be displayed on your invoice table.
Step-by-Step Guide to Customizing Your Invoice:
Open Vyapar App
Launch the app on your Desktop device.
01
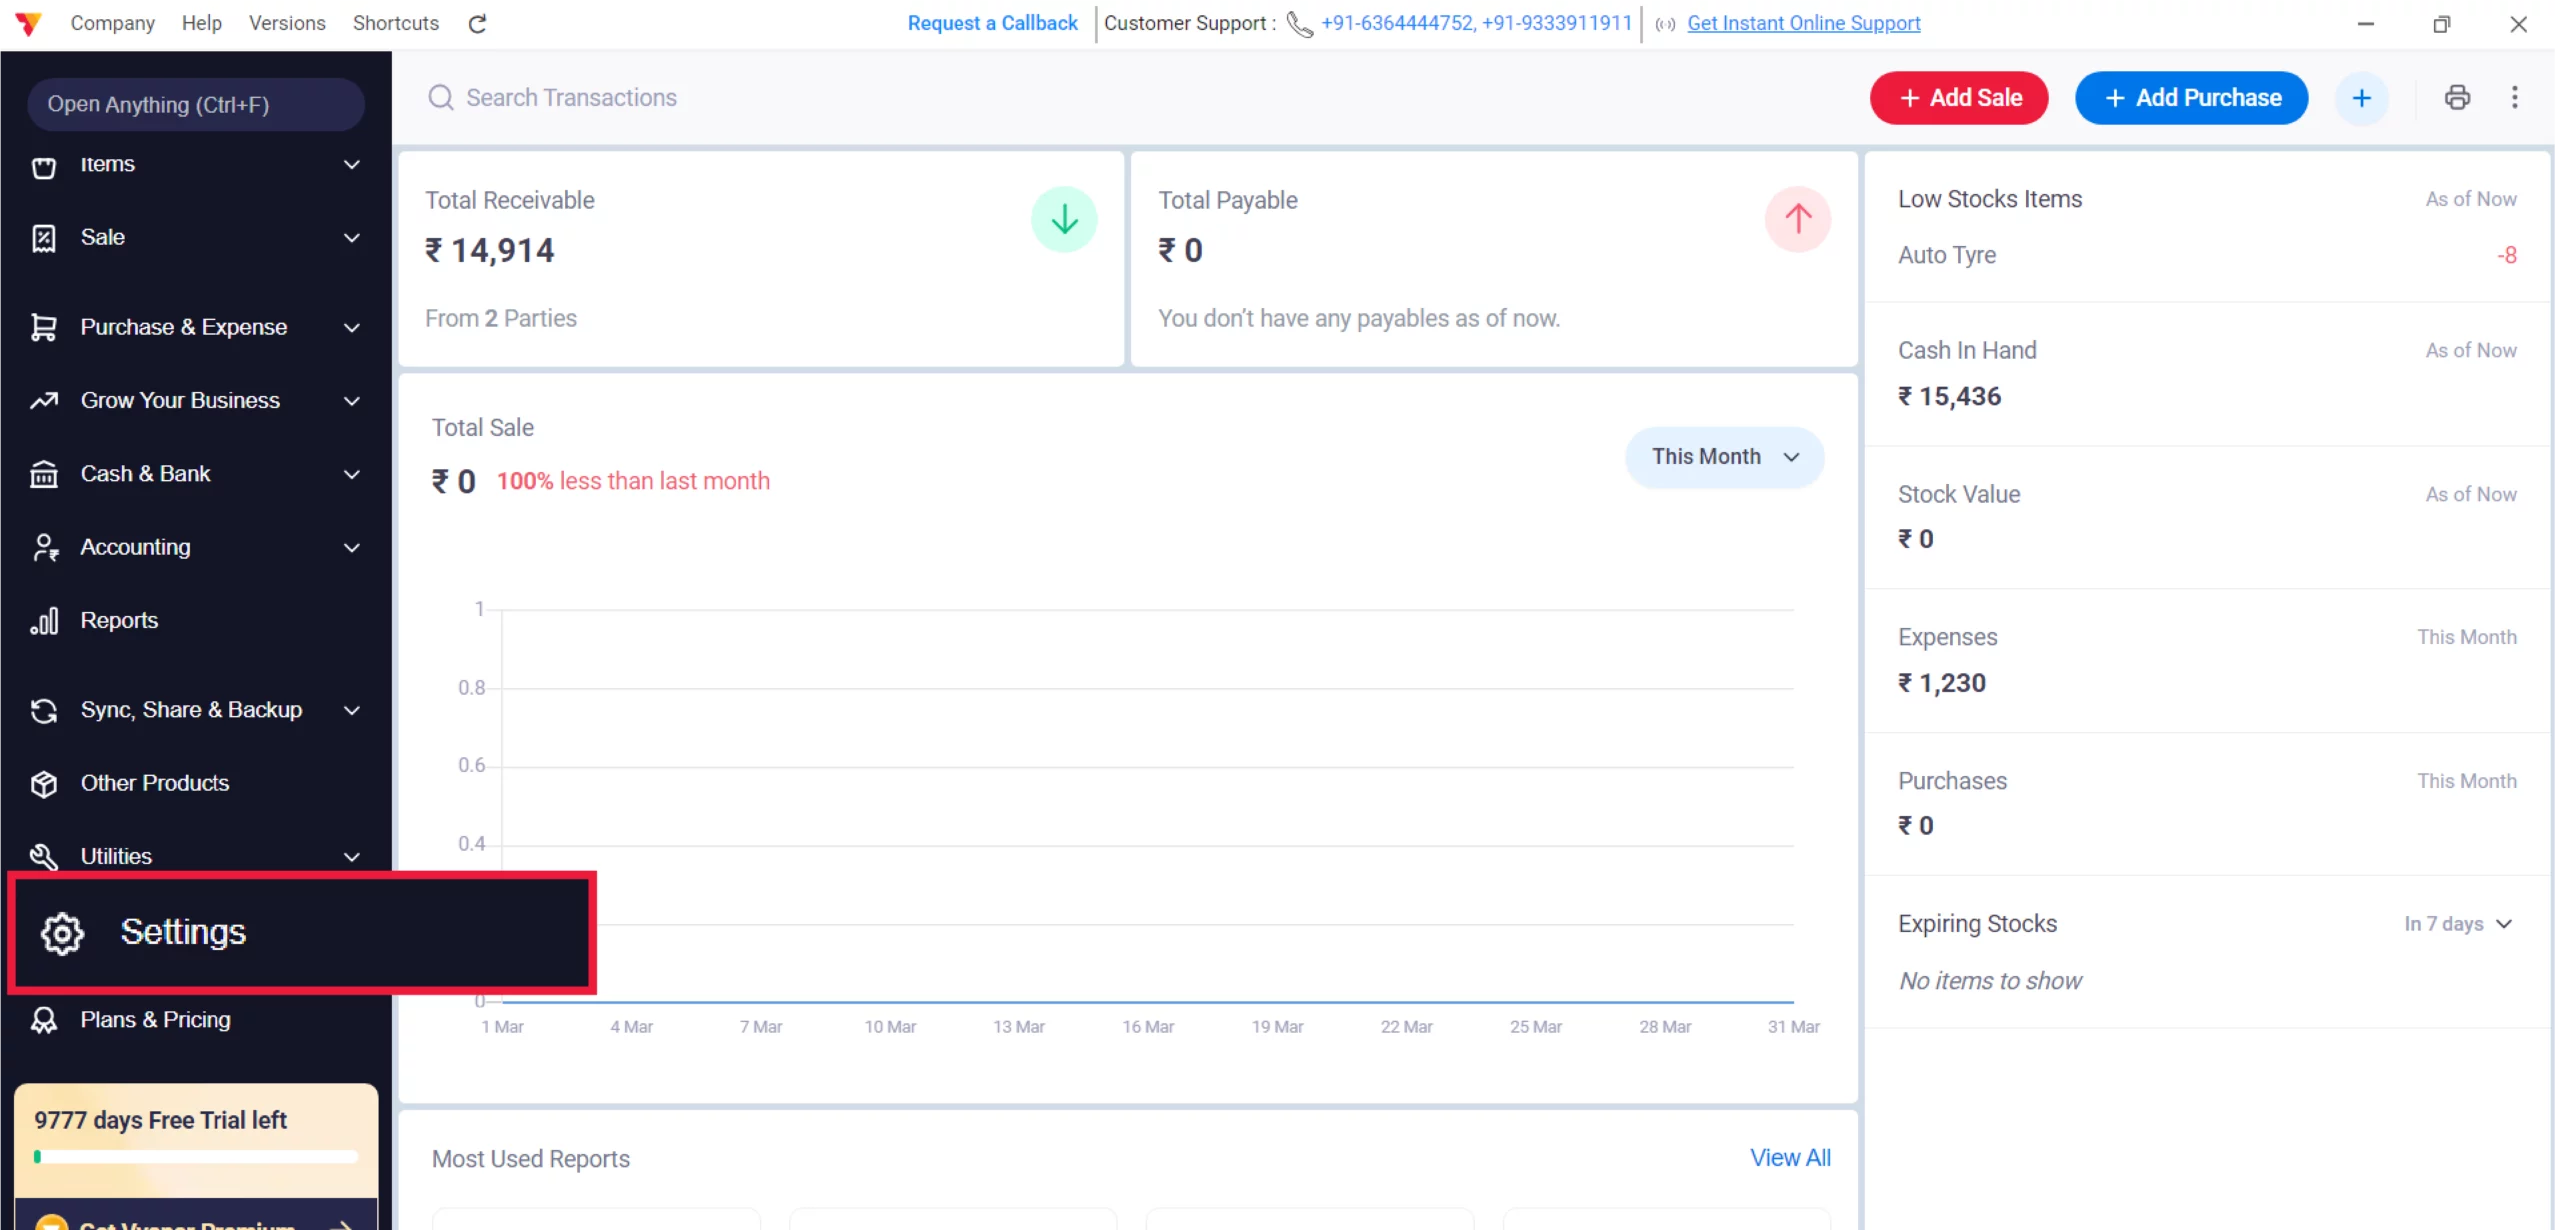
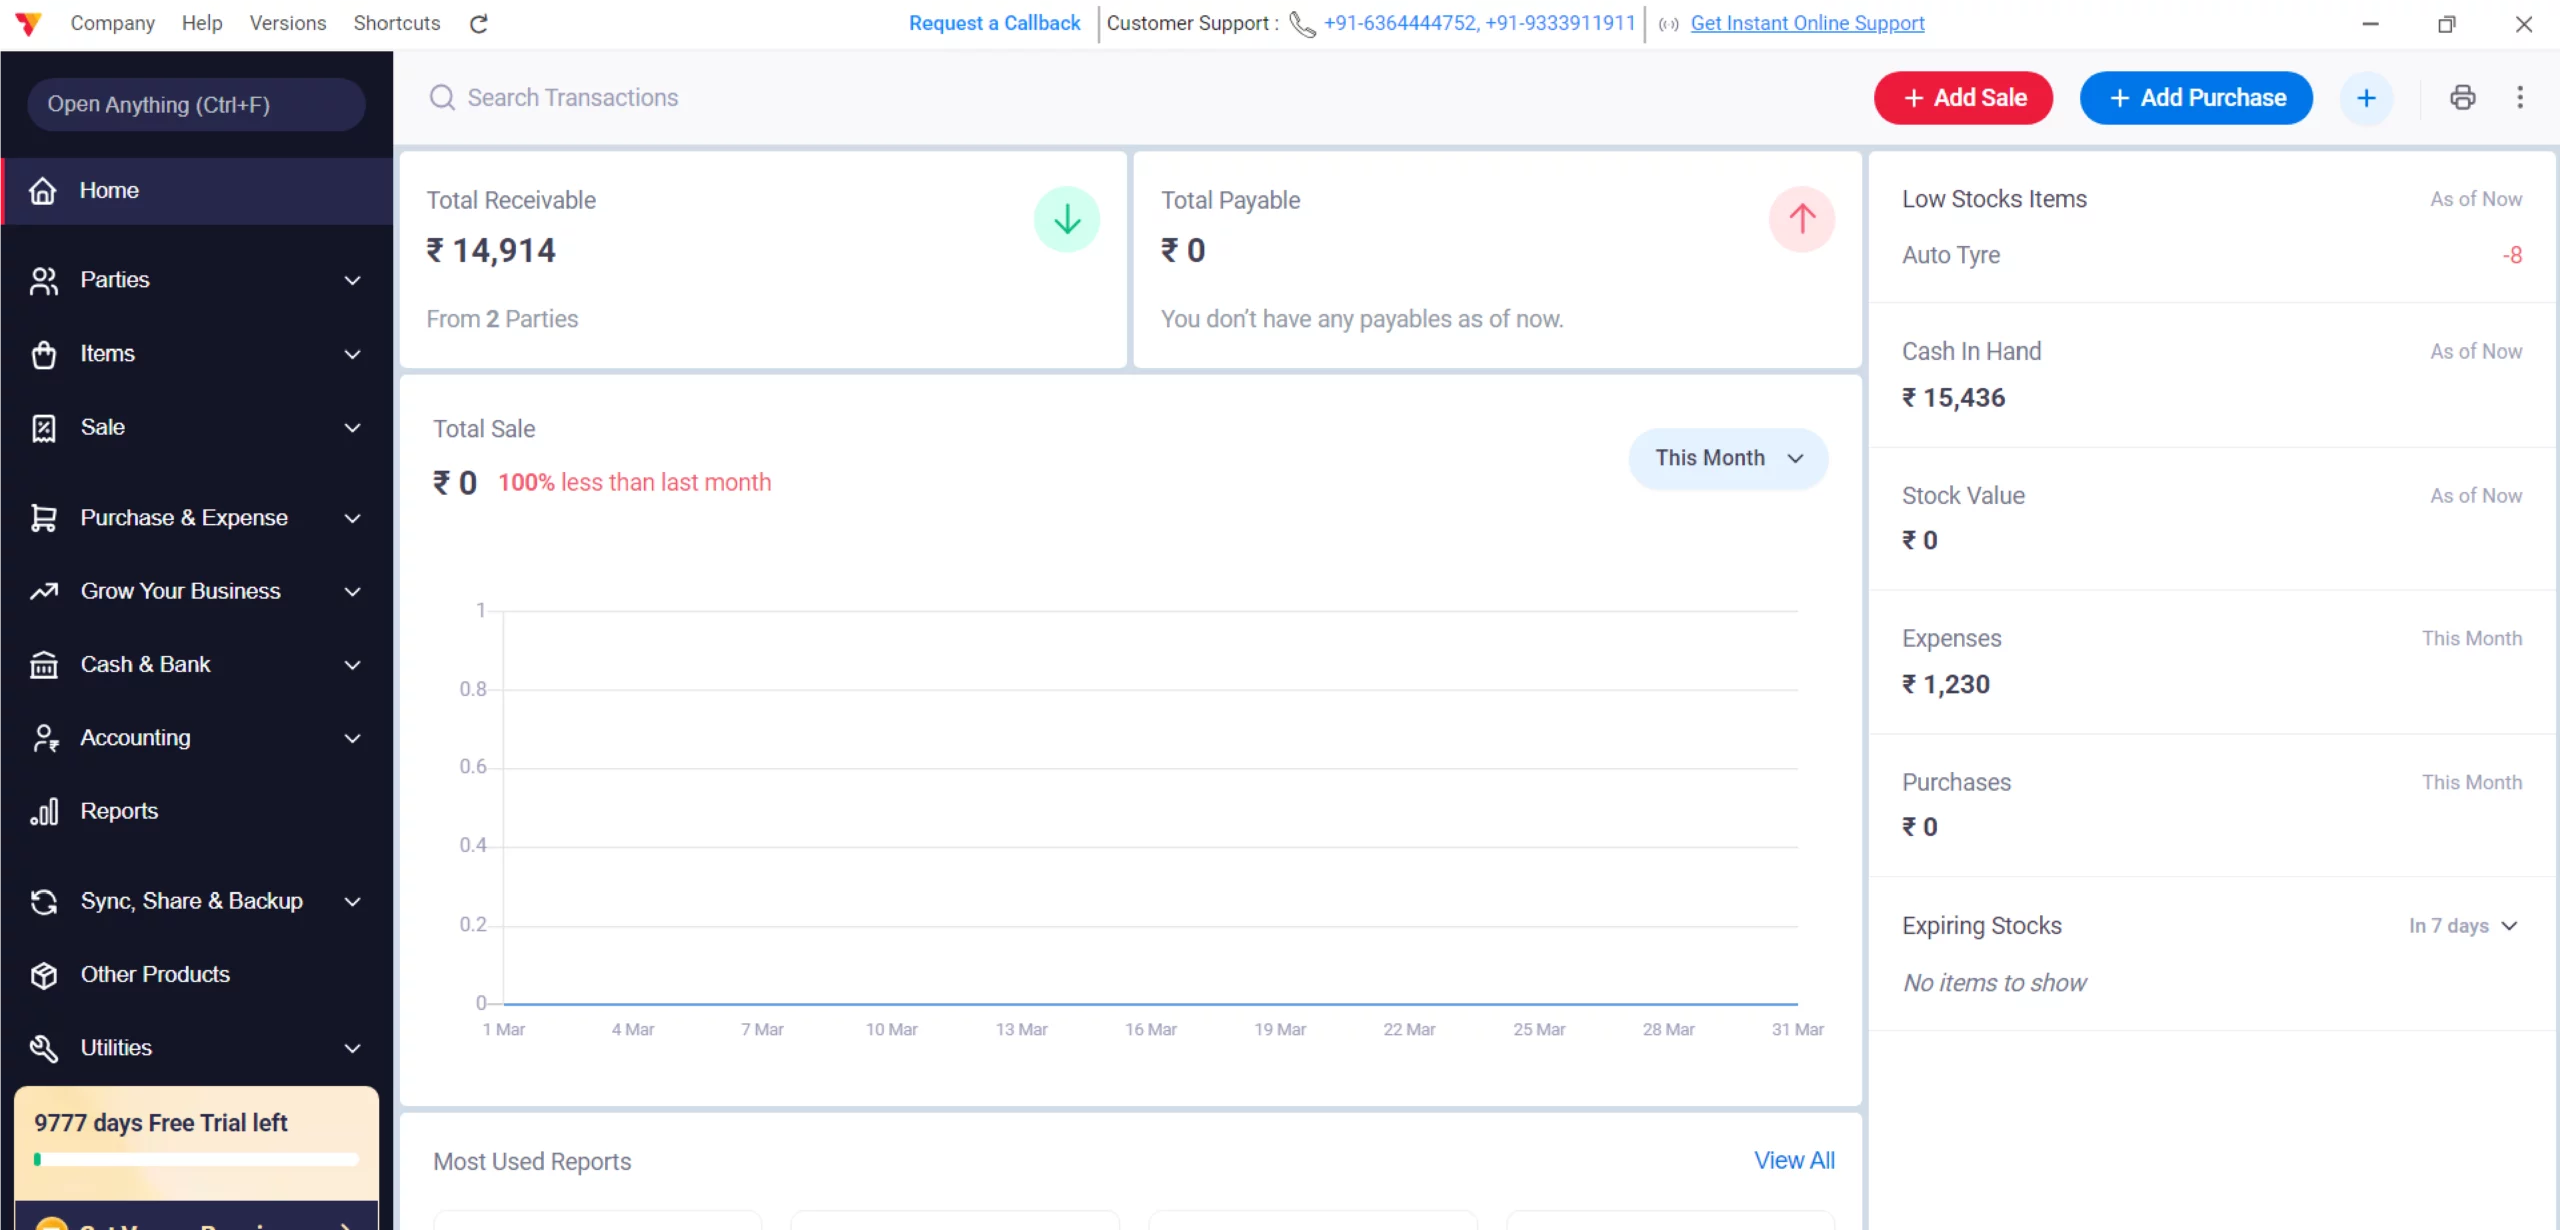
Access Settings
Click the Settings gear icon in the bottom left-hand corner of the side menu.
02
Navigate to Print
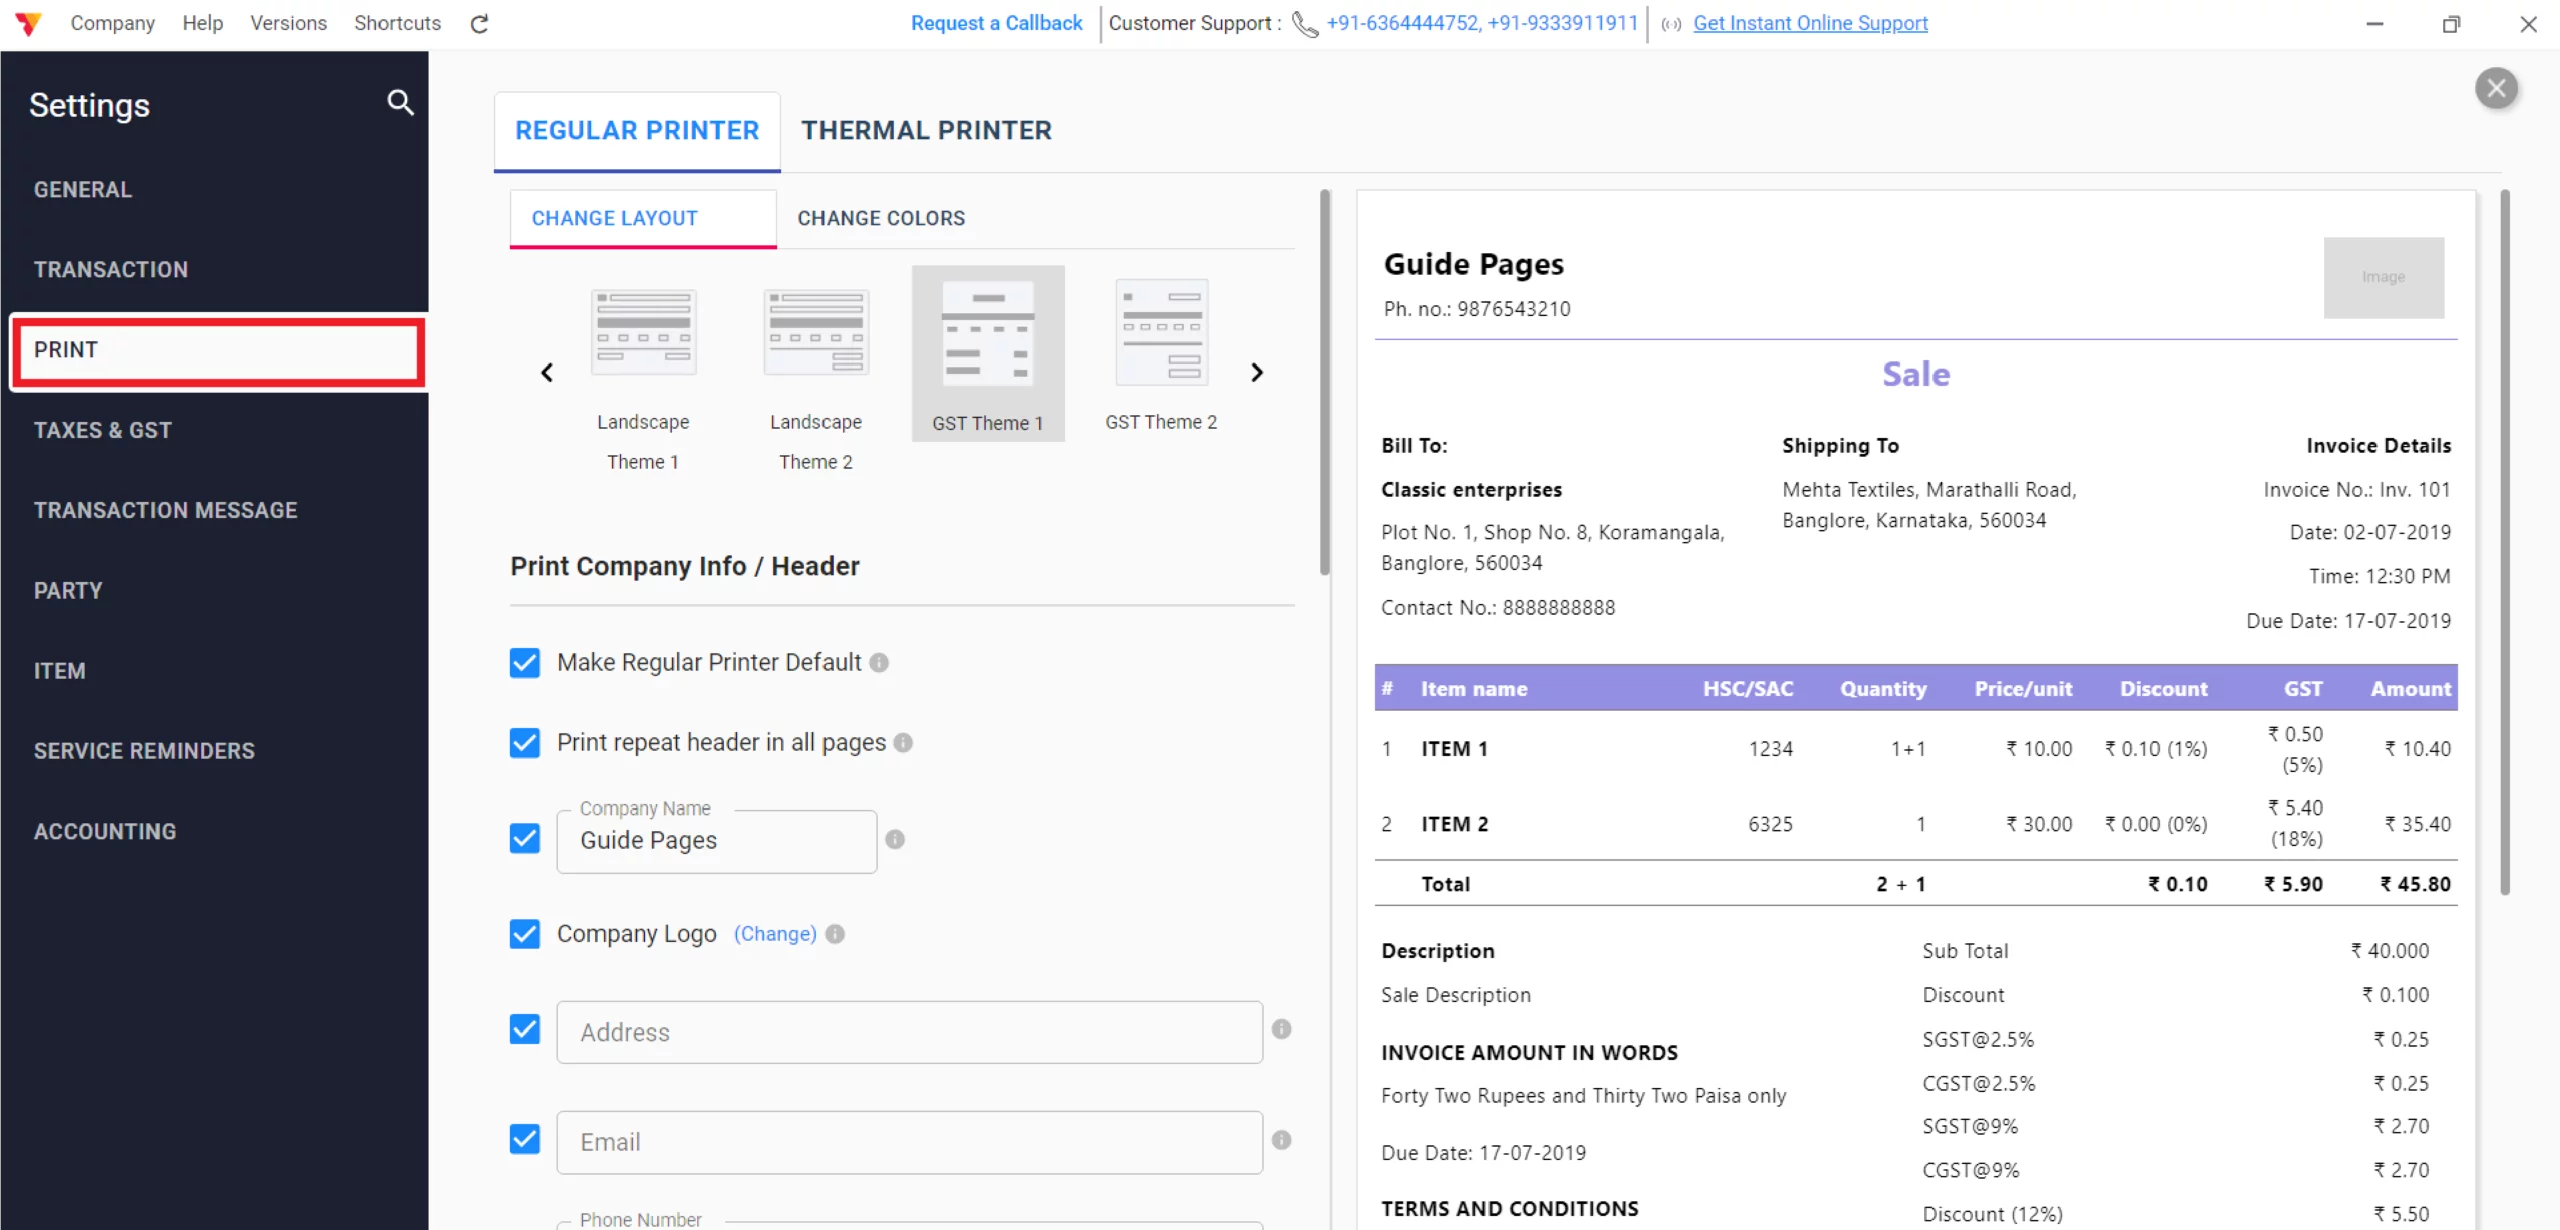
Select the PRINT tab from the settings sidebar to open the layout editor.
03
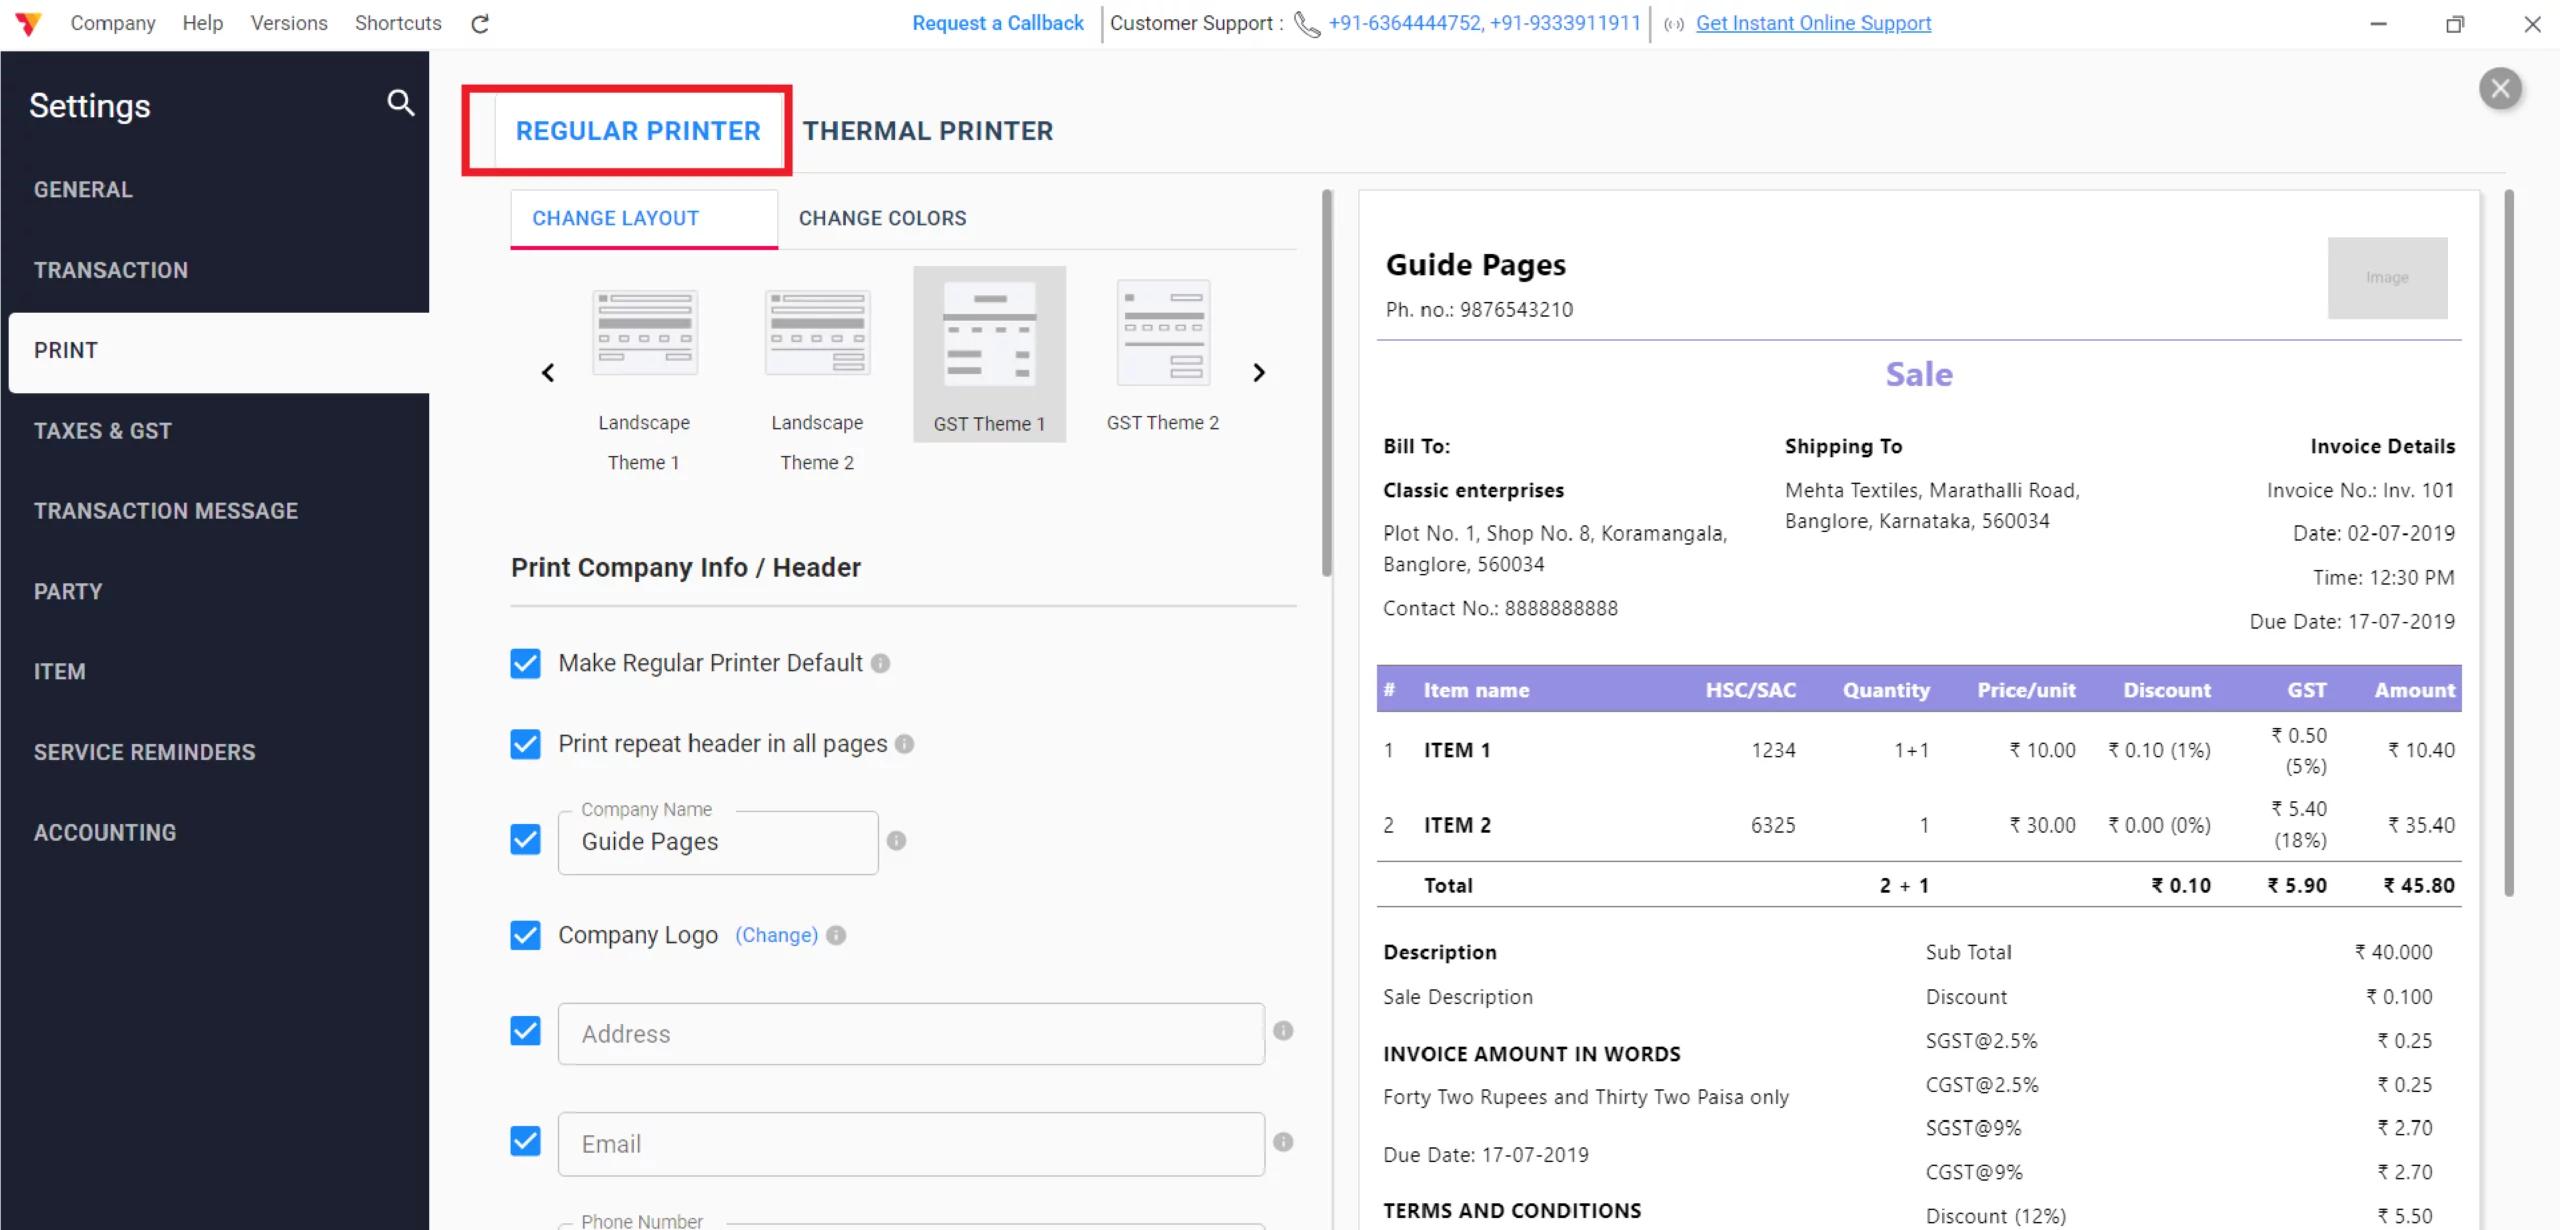
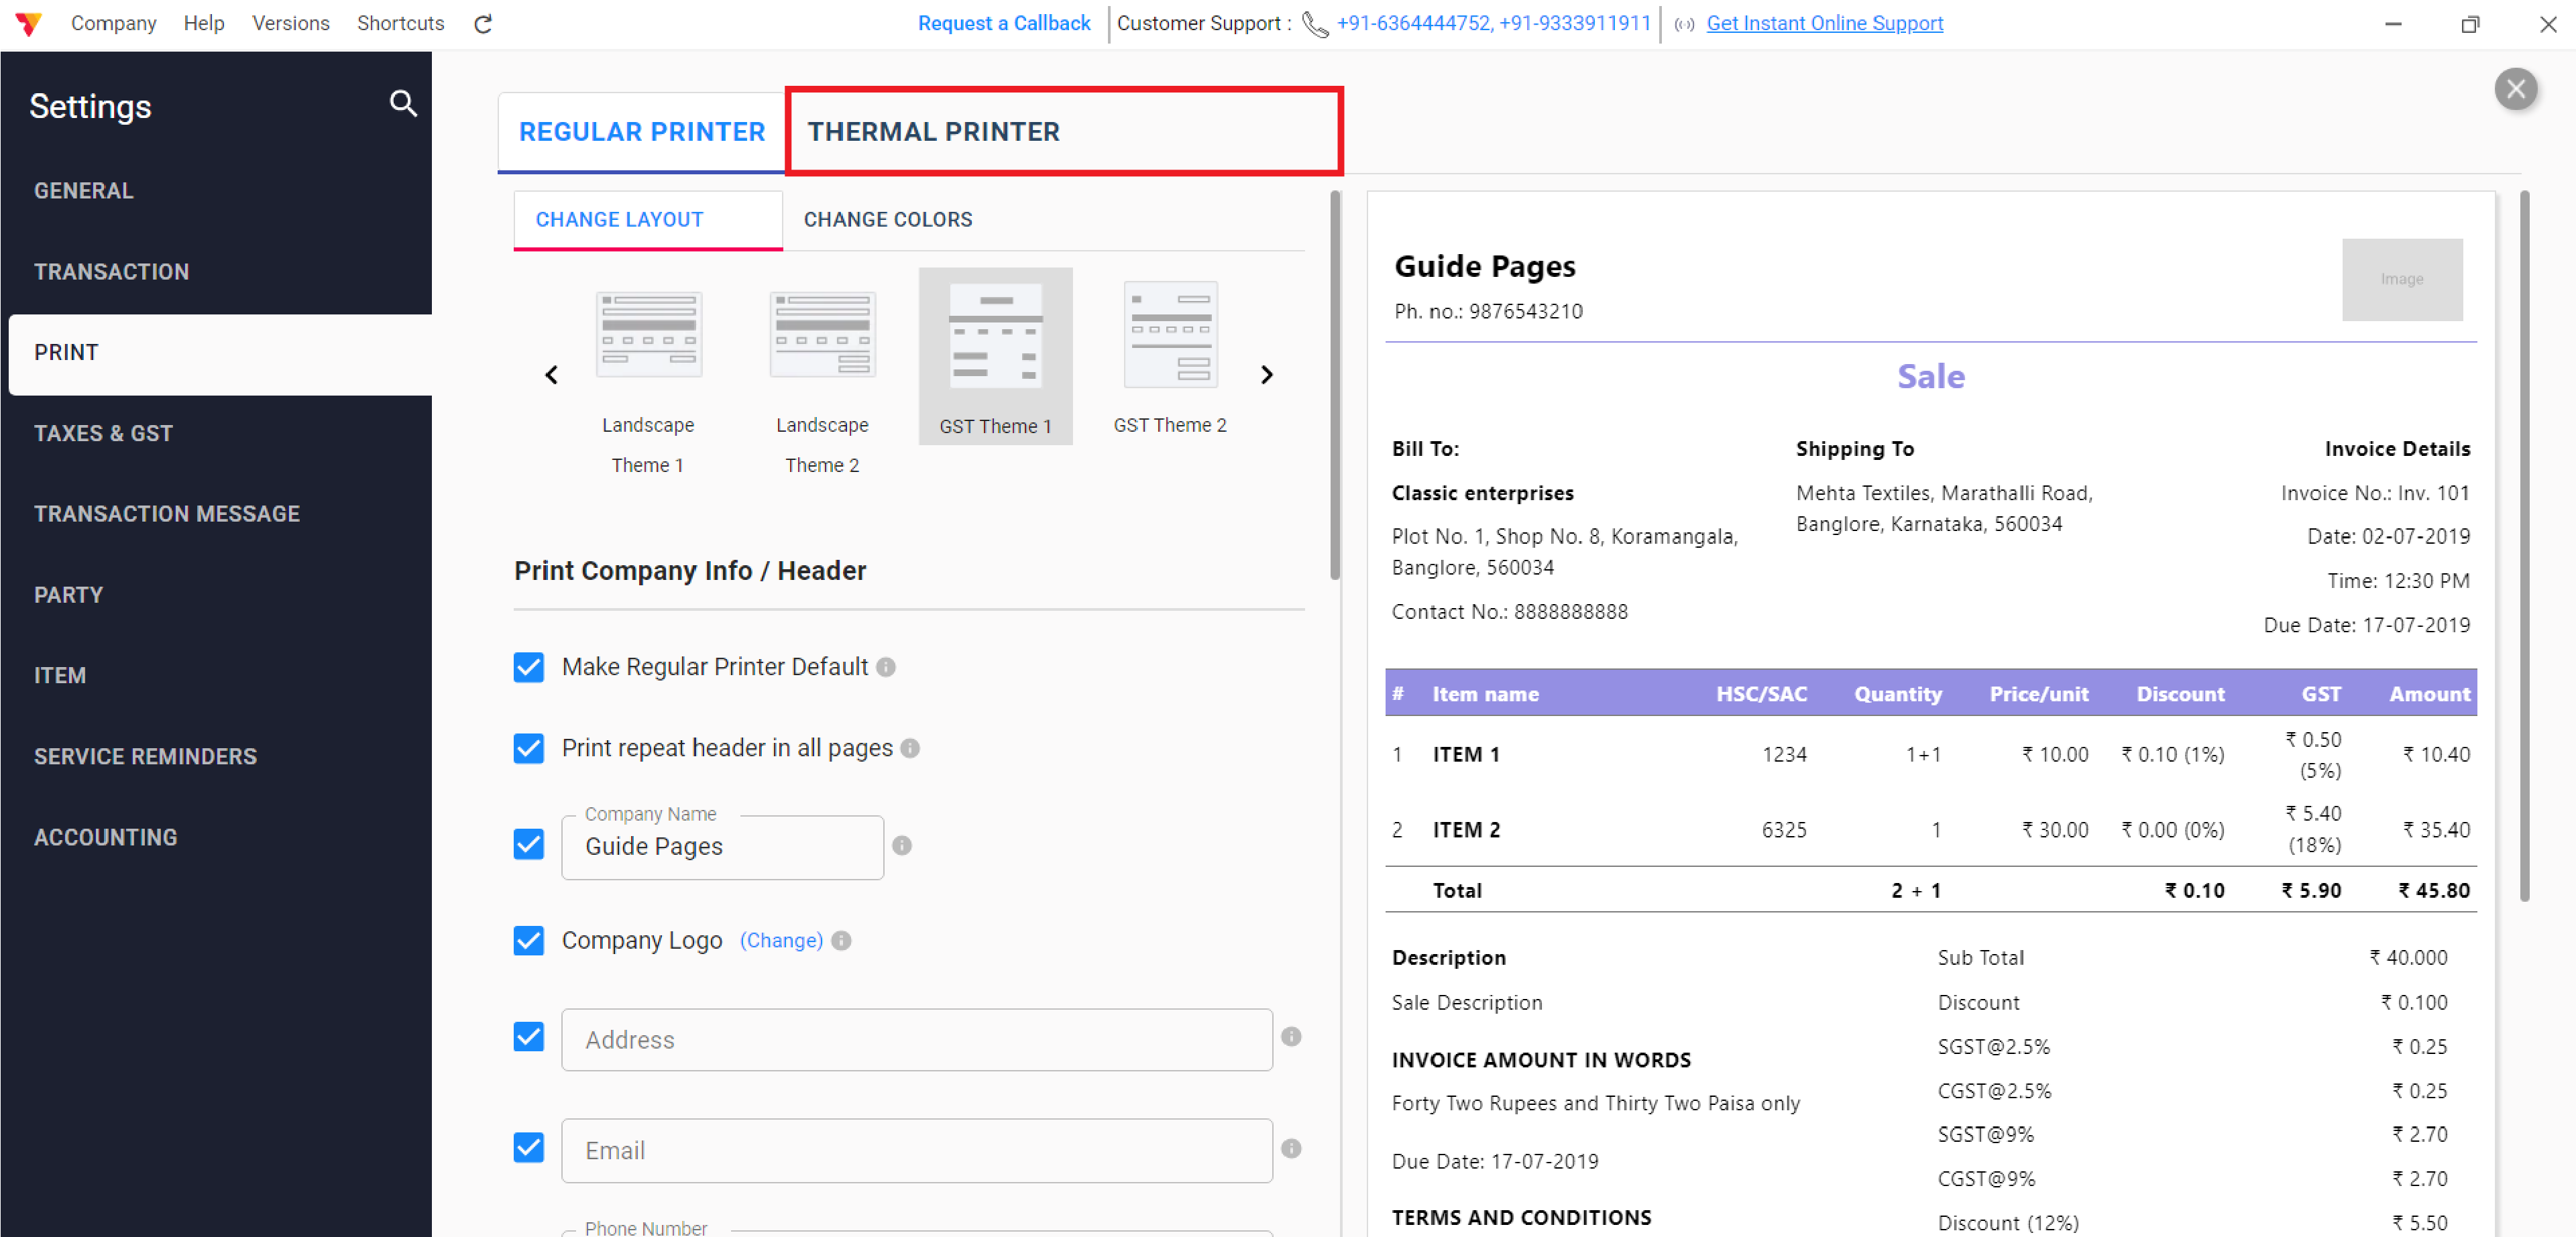
Choose Your Printer Type
Select the REGULAR PRINTER tab for full-page billing (A4/A5) or the THERMAL PRINTER tab for receipt customization.
04
Scenario A: Customizing Regular Layouts (A4 / A5)
Best for professional GST invoices, quotations, and official business records.
5/A
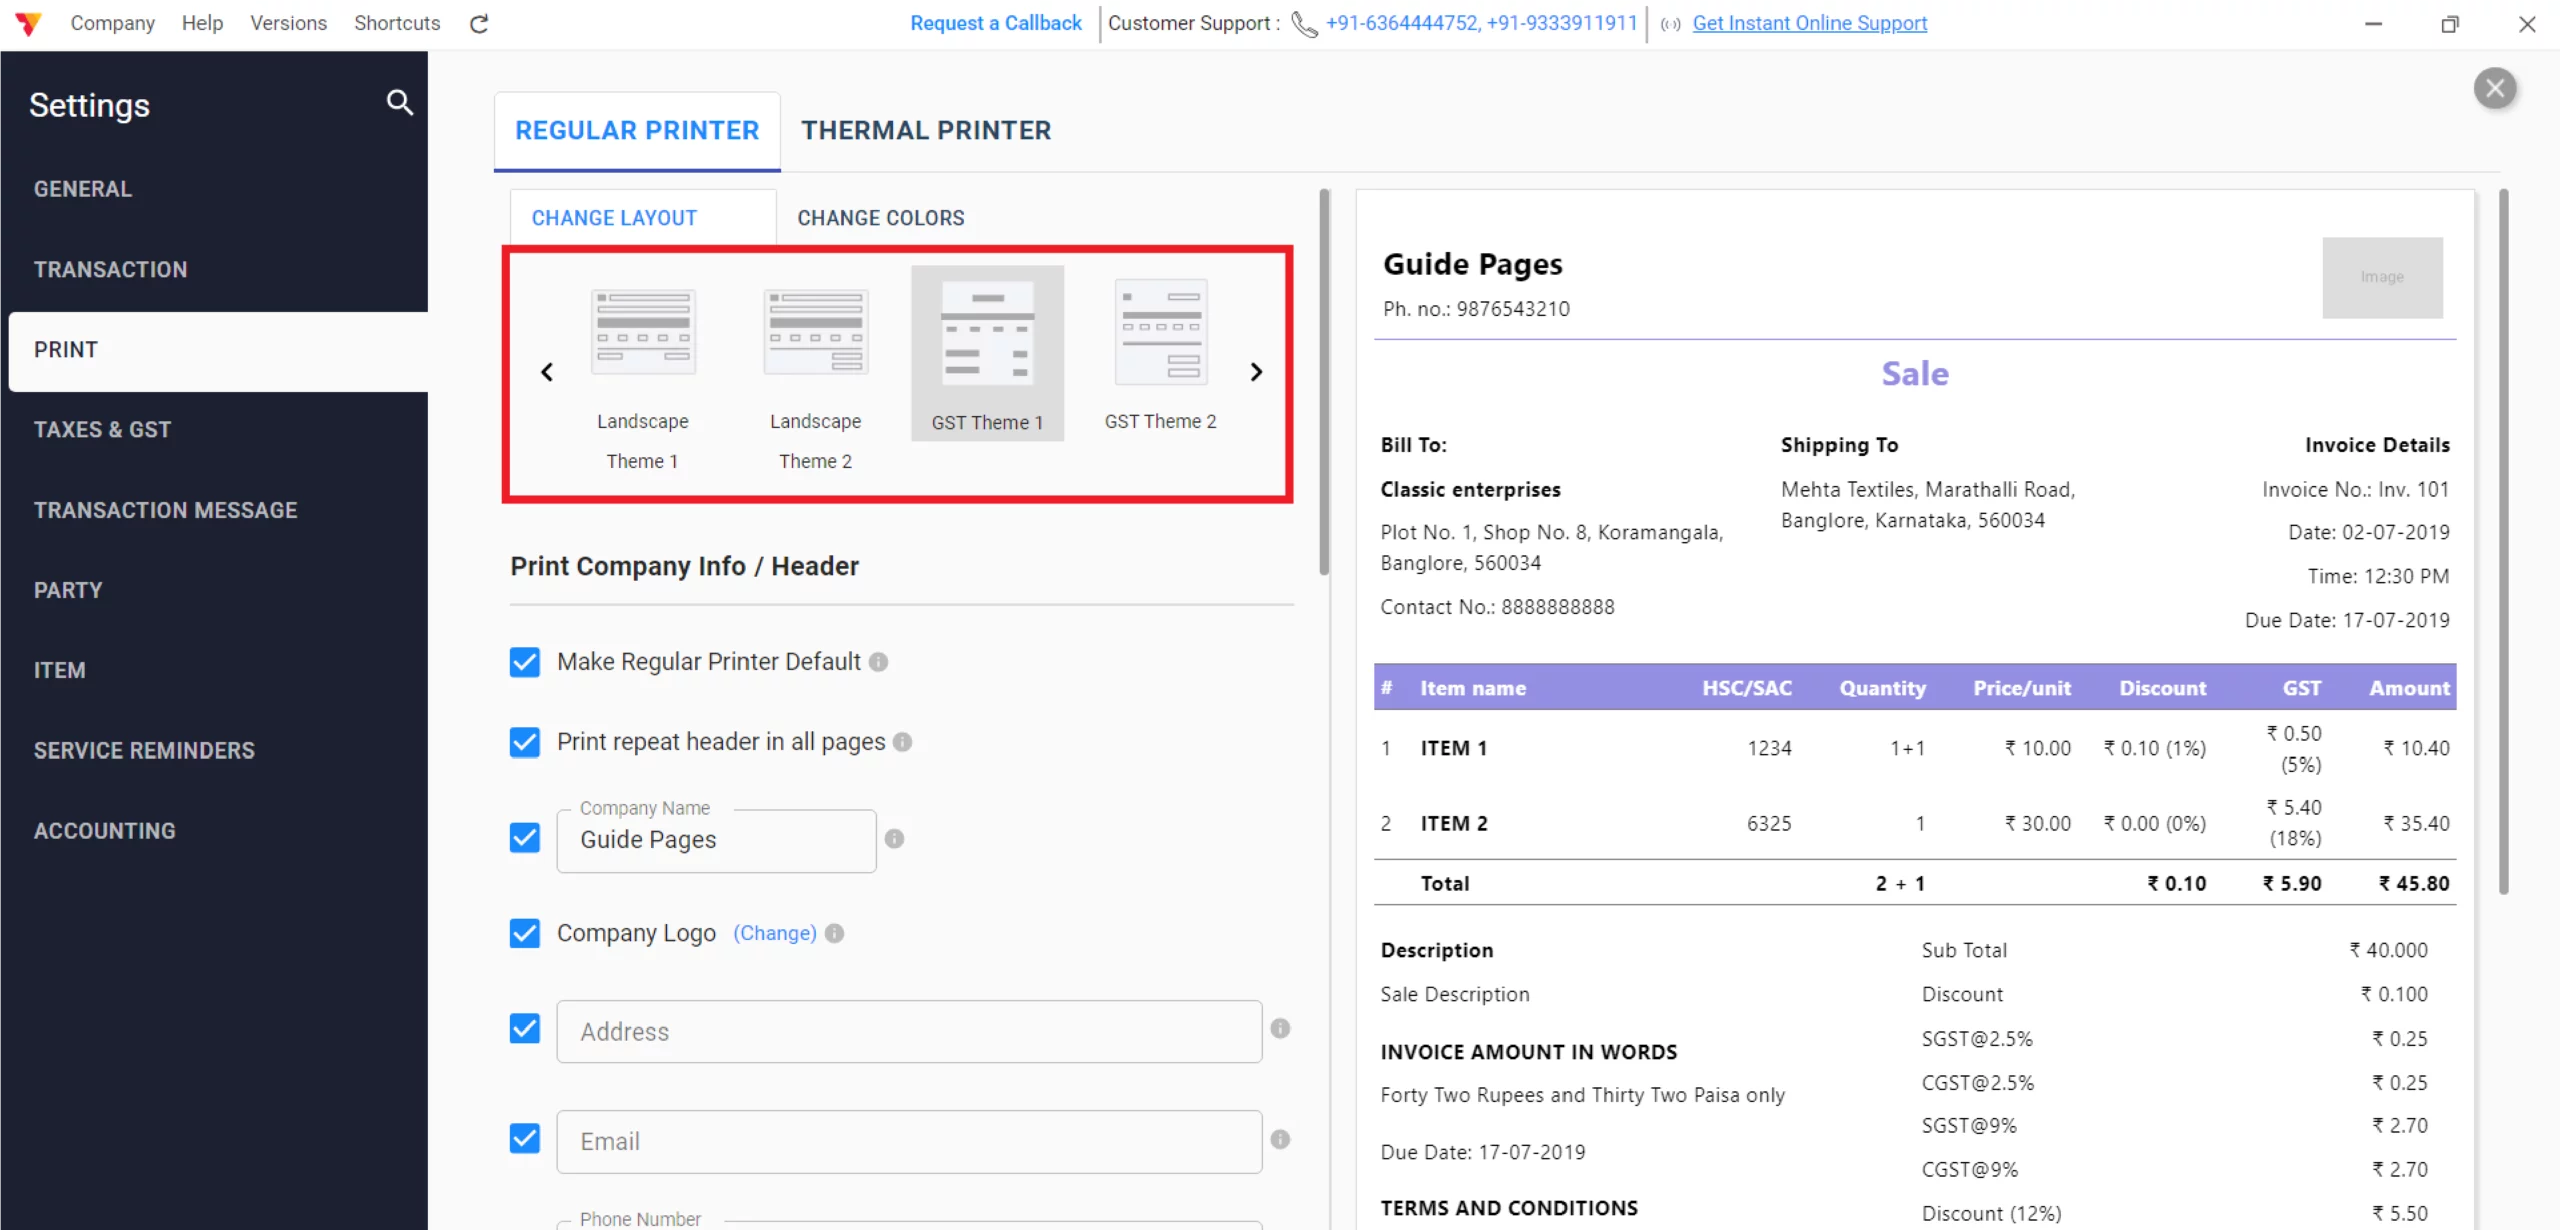
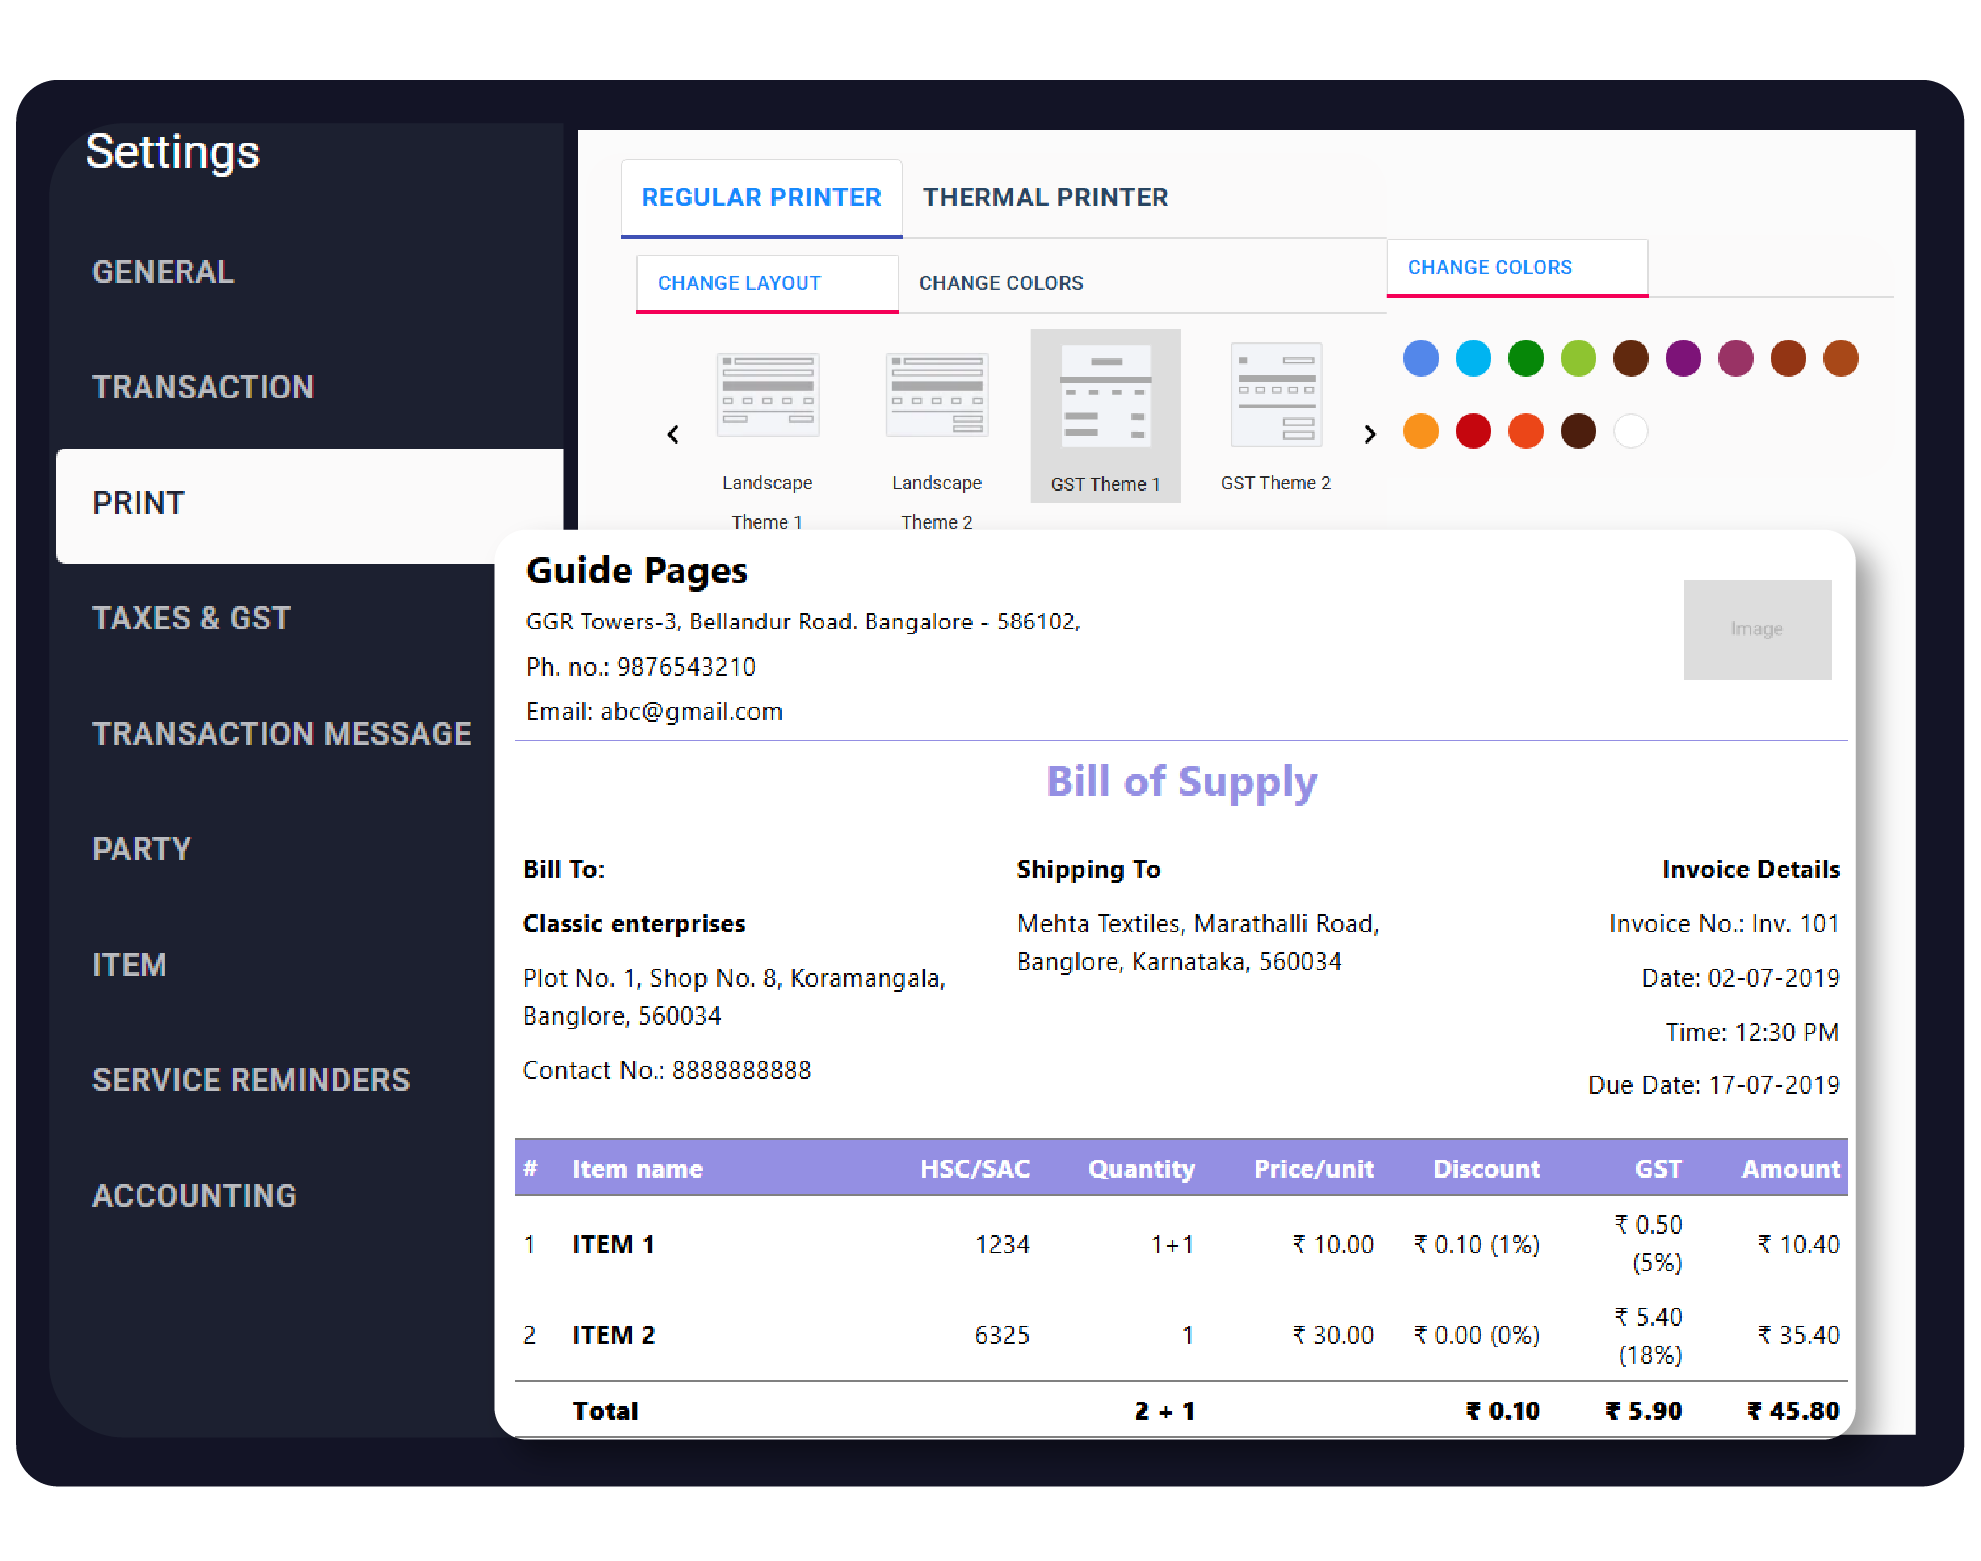
Select a Theme
Under CHANGE LAYOUT, scroll through and select a theme (e.g., GST Theme 1) that fits your business style.
6/A
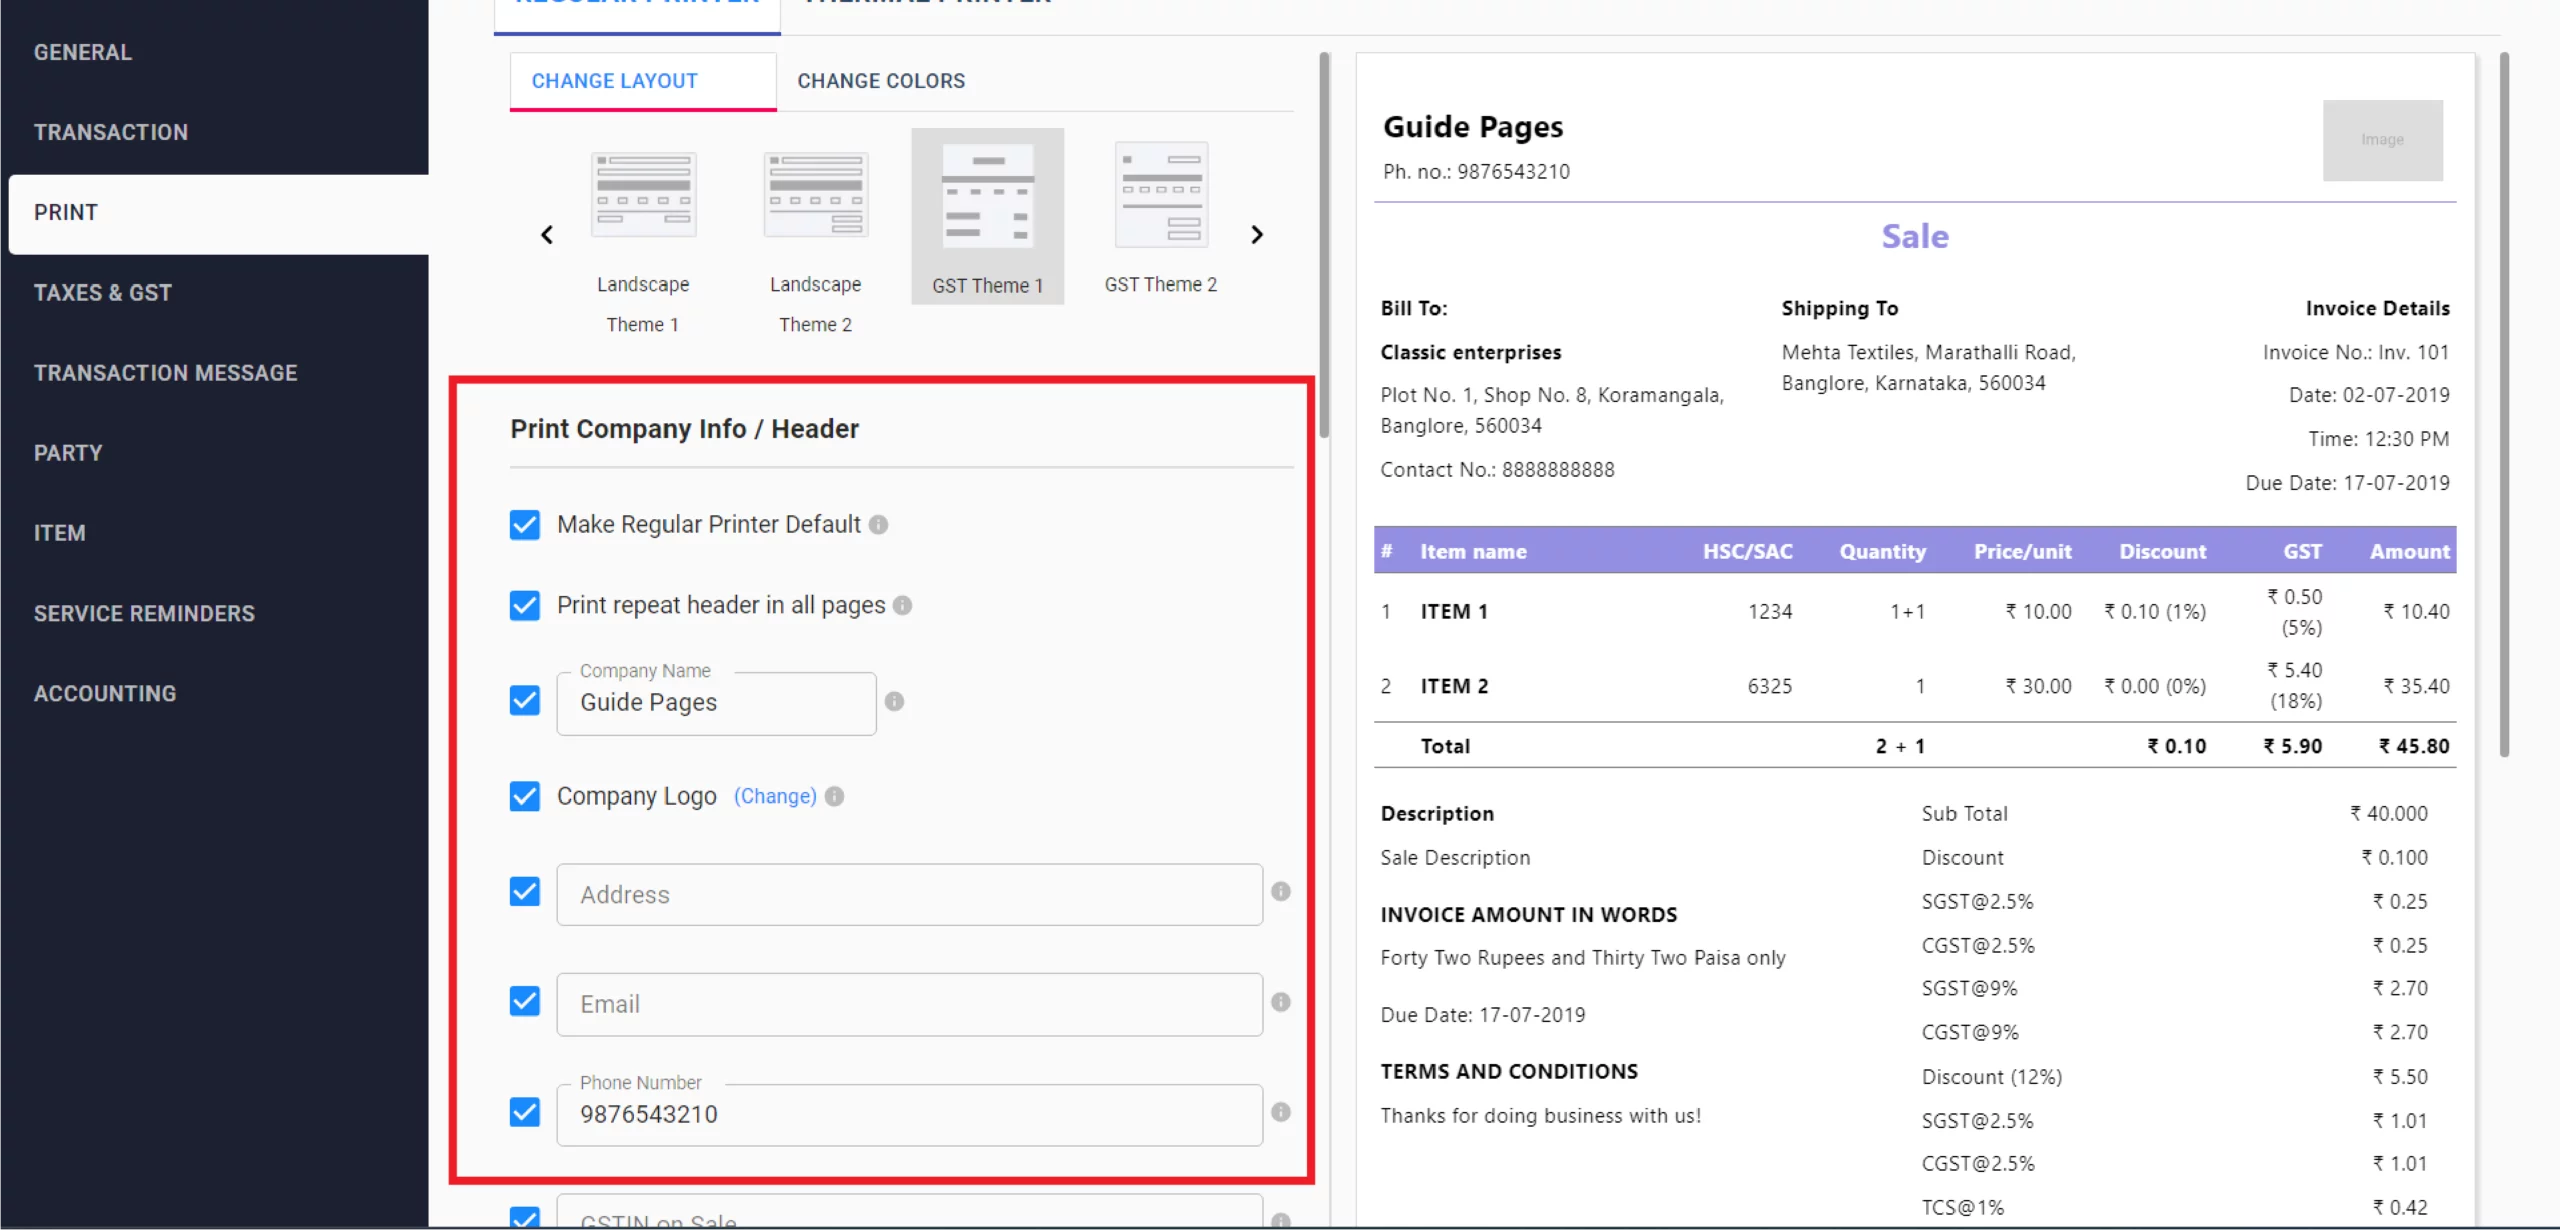
Printer Configuration
Enable these two in case of
Make the regular printer the default if you regularly use this printing method
Print the repeat header on all pages if you sell multiple products.
7/A
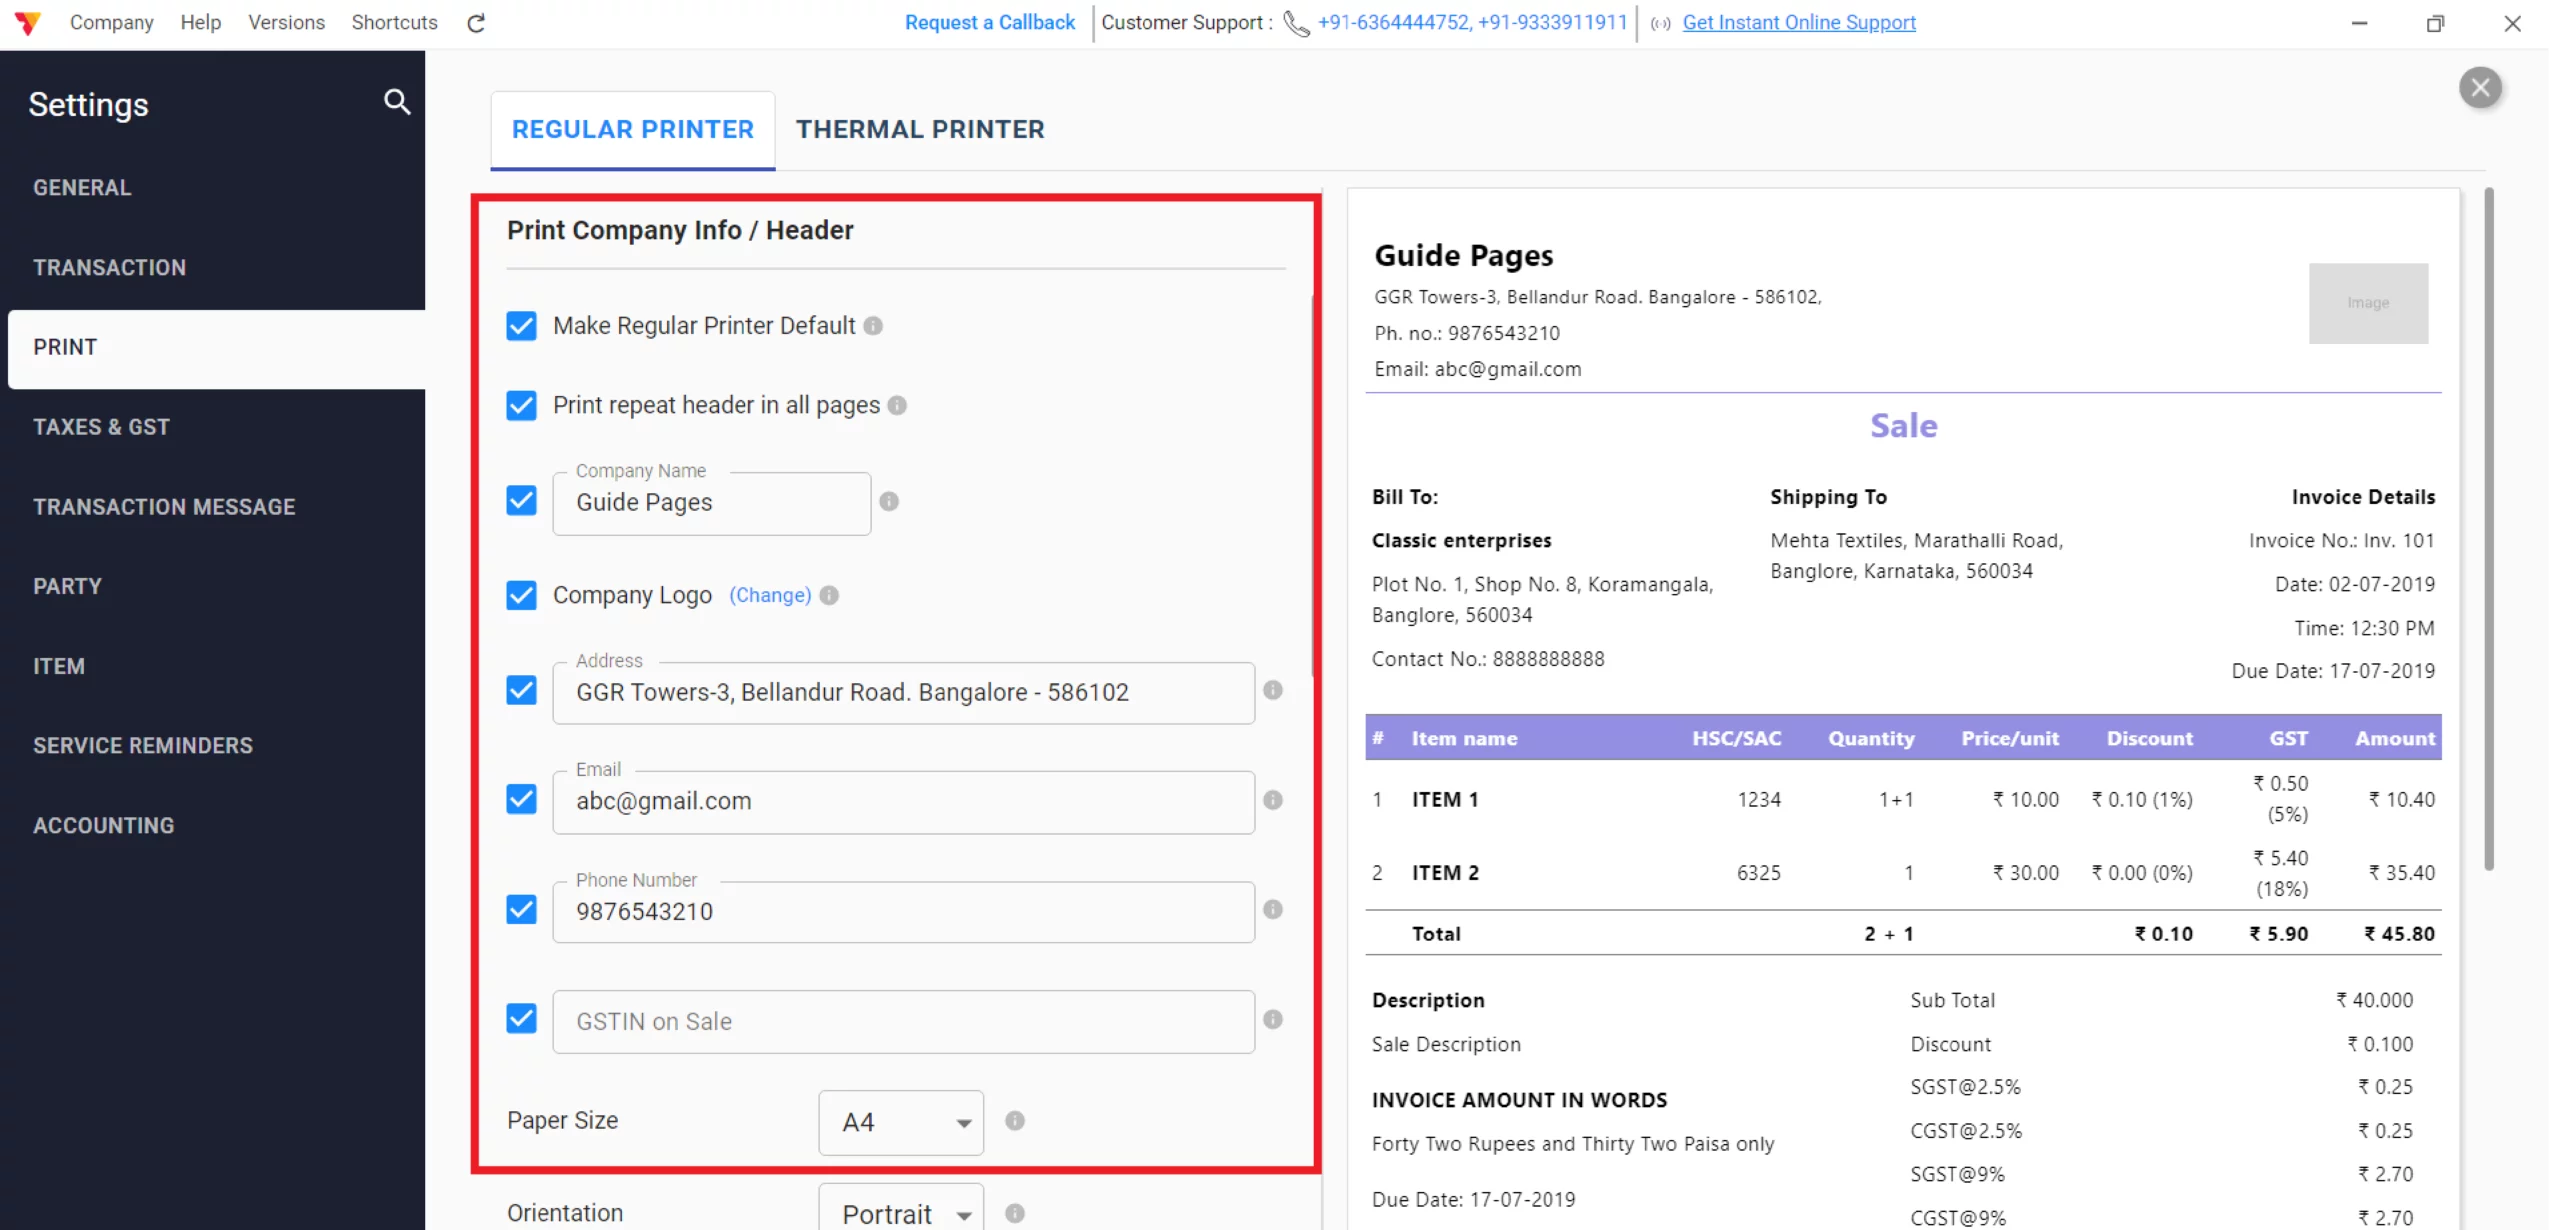
Configure Company Info
Check the boxes to display your Company Name, Logo, GSTIN, Address, and Phone Number, and Email in the header.
8/A
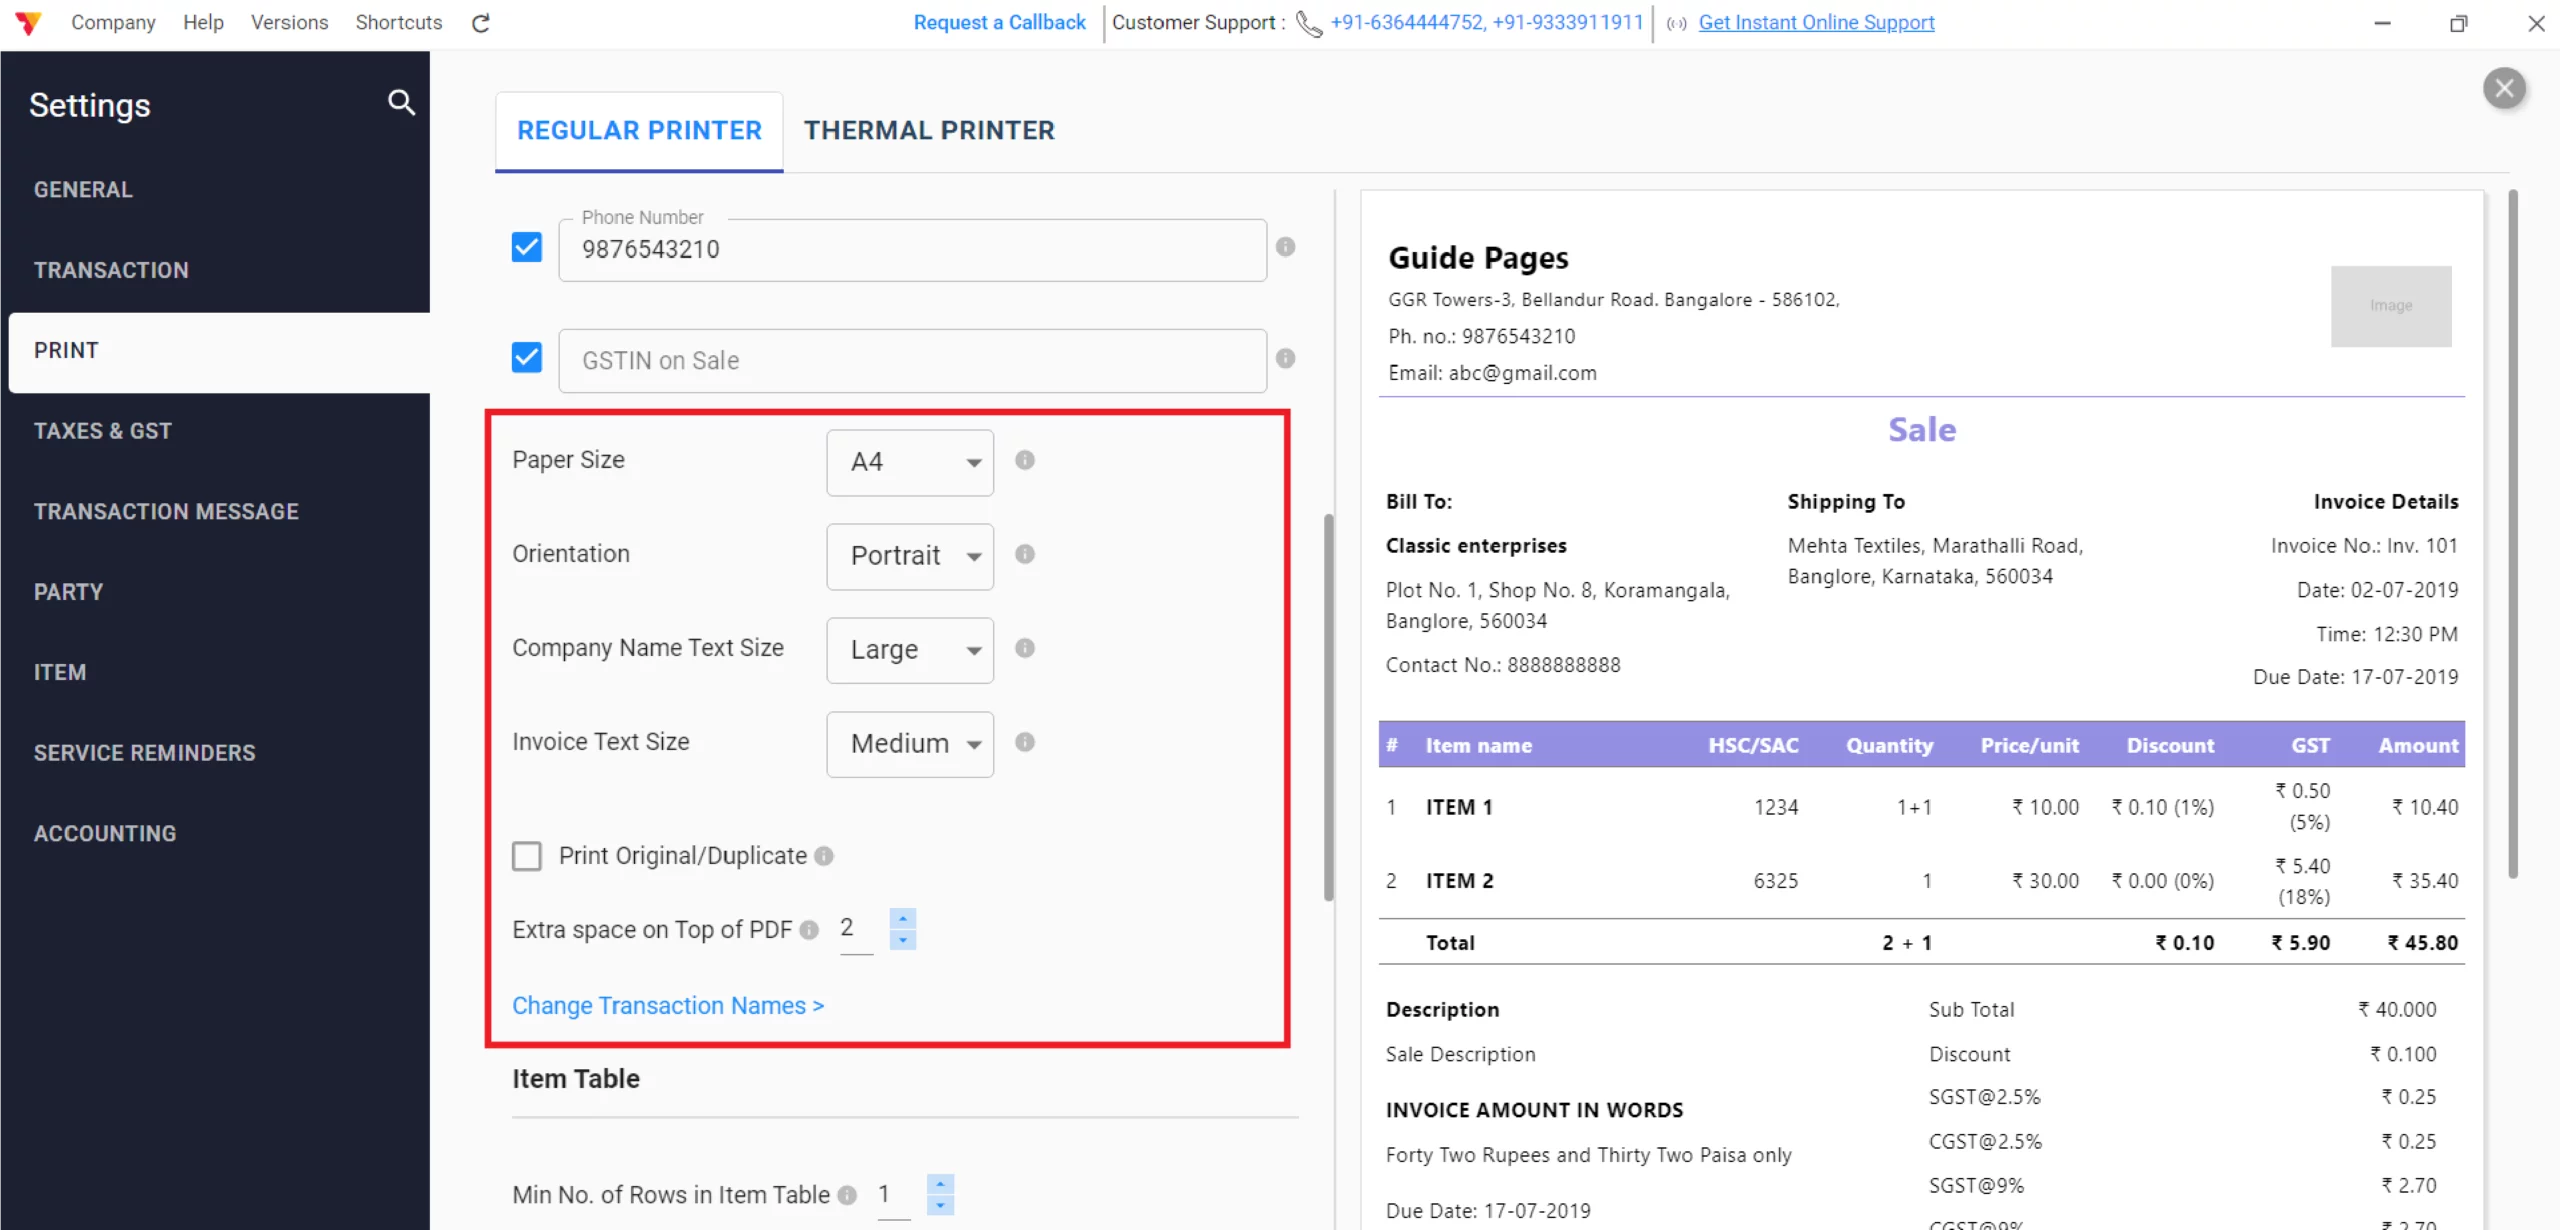
Customize Page & Header
Check the boxes to display your Company Name, Logo, GSTIN, Address, and Phone Number, and Email in theSelect the Paper Size (A4/A5), Print Orientation, Company Name Text Size, and Invoice Text Size from the dropdown menus. Adjust the “Extra space on Top of PDF, if you already have a header and disable company info”; and enable “Print Original/Duplicate” to ensure the document is clear, punctual, and organised. header.
9/A
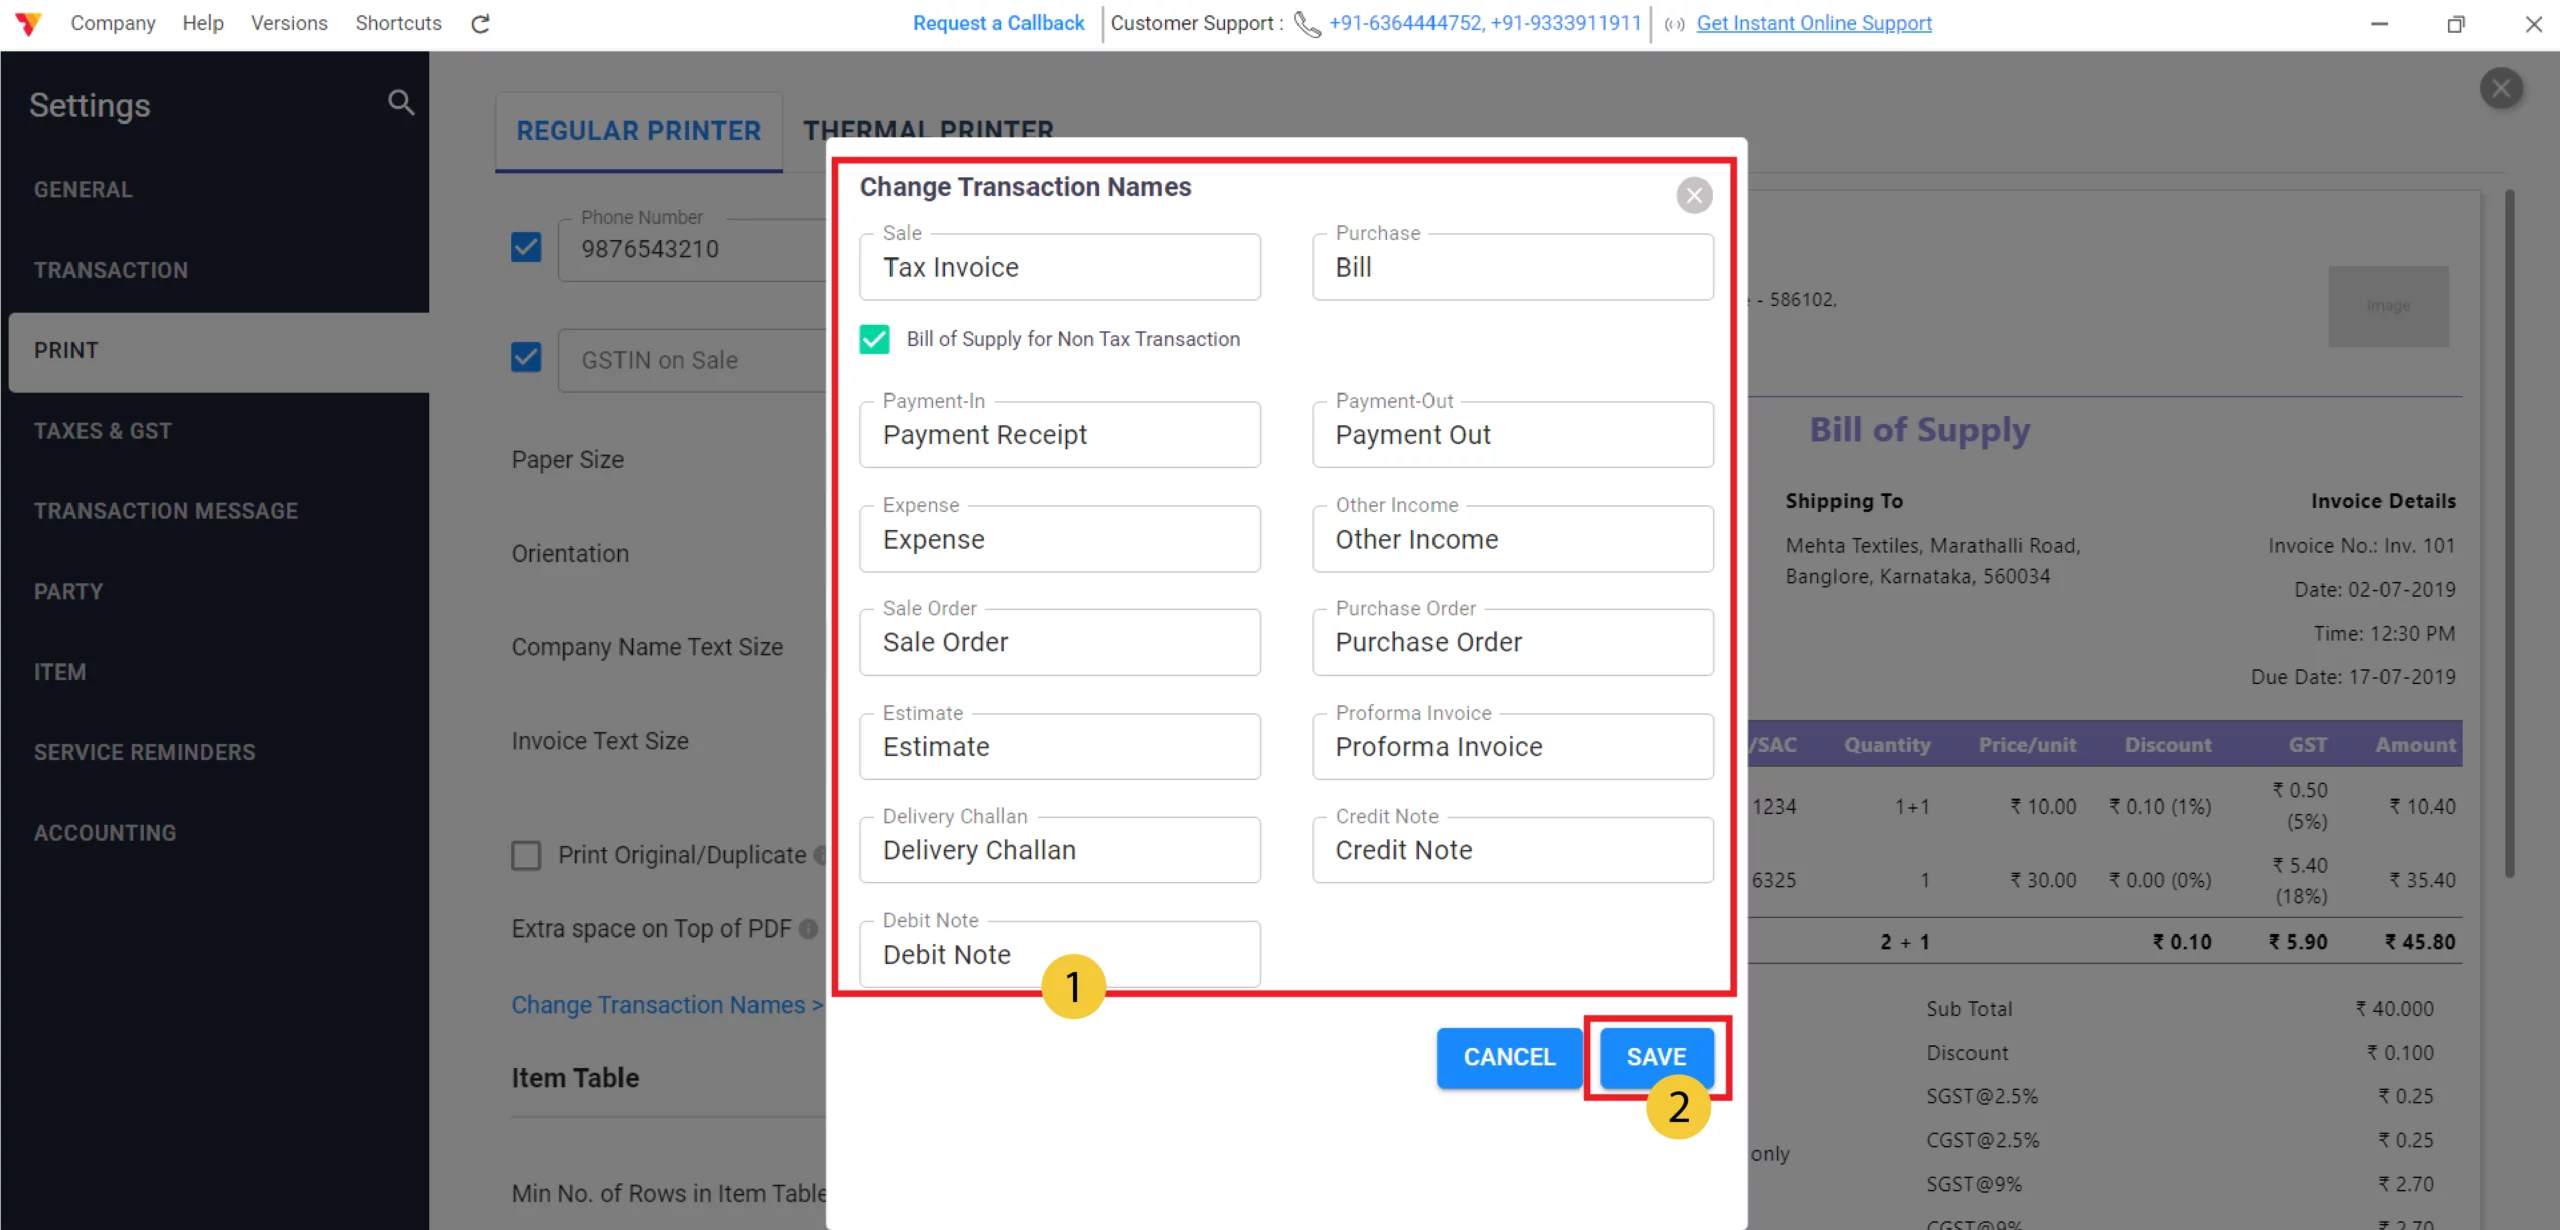
Change Transaction Name
Click on “Change Transaction Names” to customize the labels for your documents, such as changing “Sale” to “Tax Invoice” or “Estimate” to “Quotation,” and click “Save” to apply these titles.
10/A
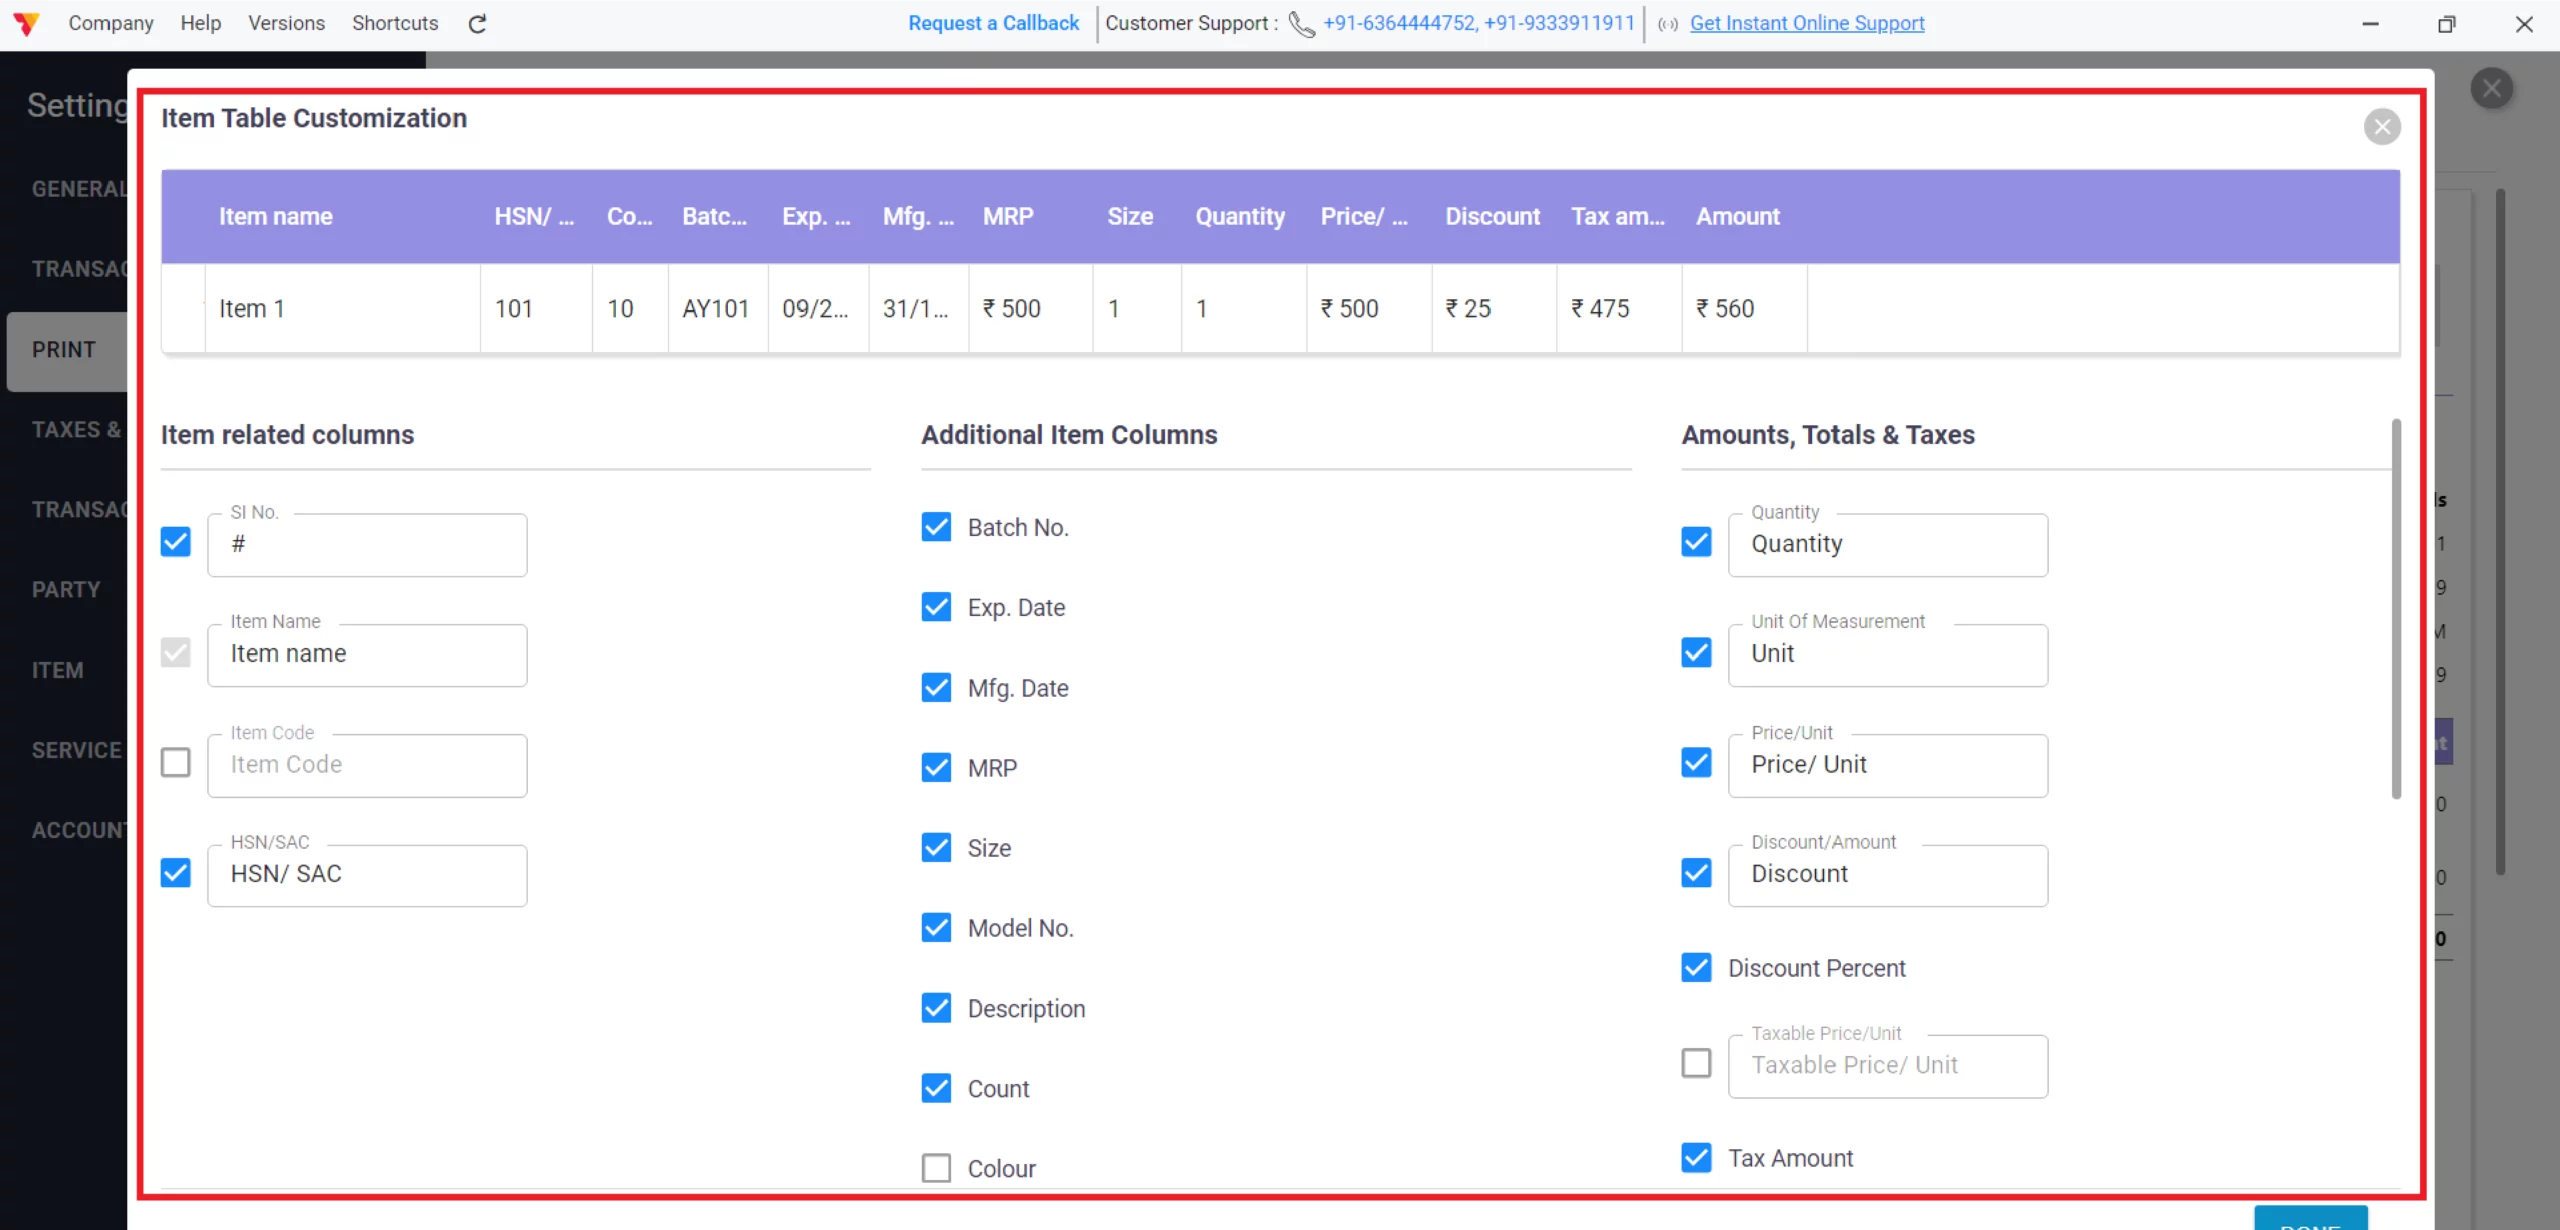
Customize the Item Table
Click on “Item Table Customization” to check in specific columns like HSN/SAC Code, MRP, and Tax Details, and adjust individual column widths by dragging the field borders in the preview to fit your business needs.
Tip: Set Min no of Rows in Item Table (Like for one item, how many empty rows are needed)
11/A
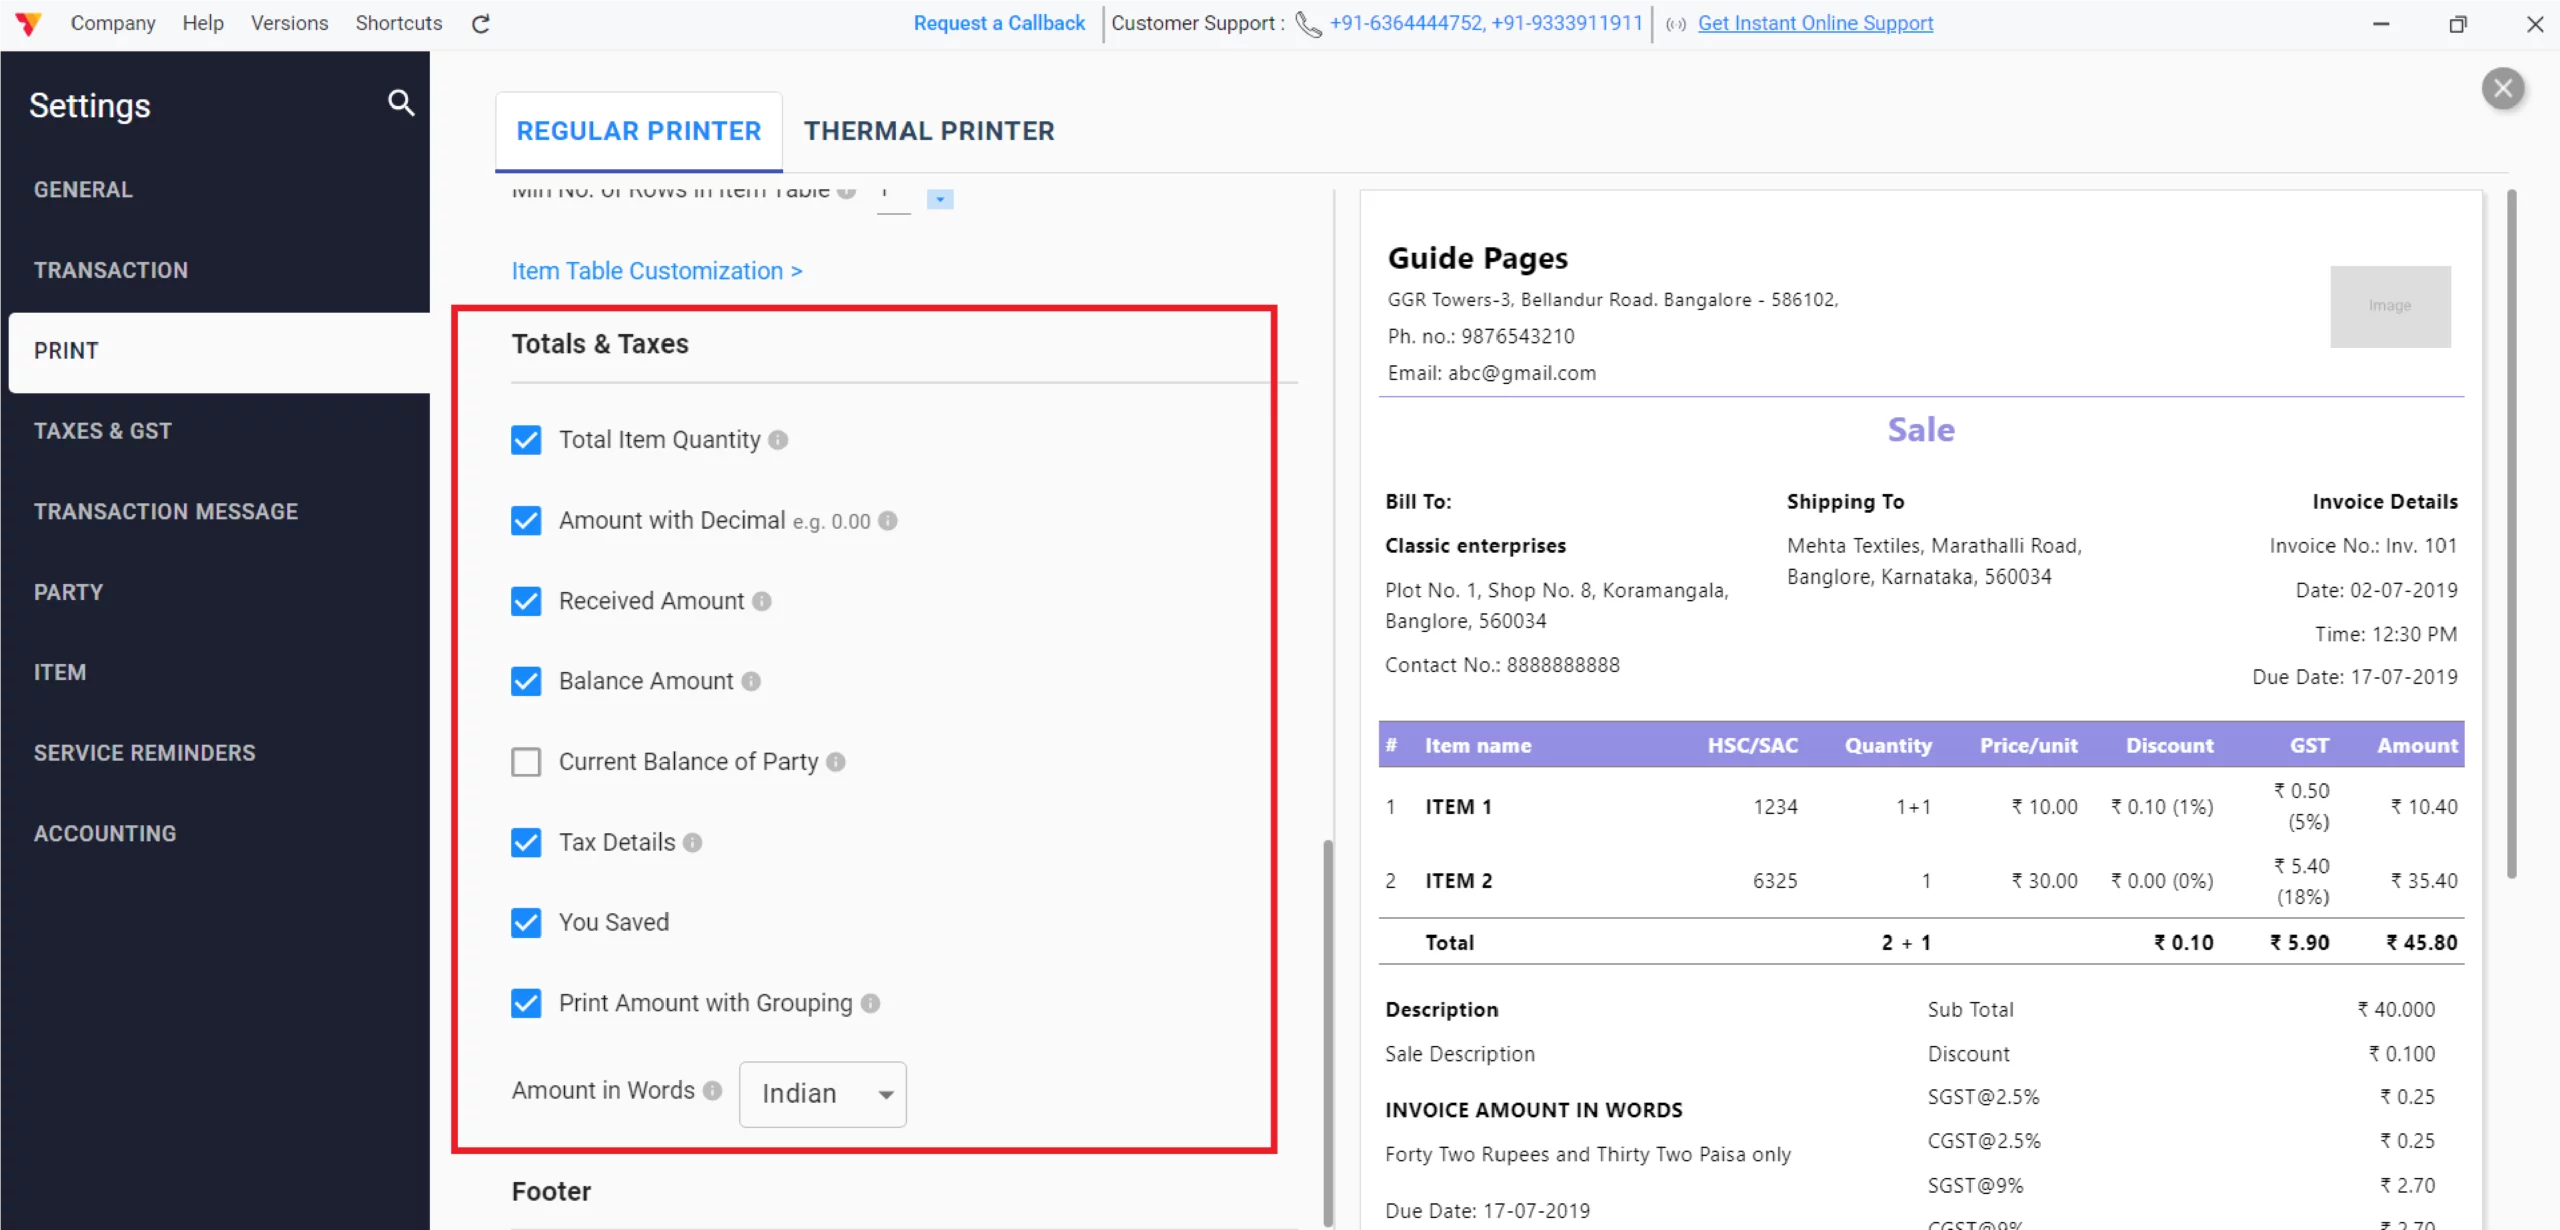
Customize Totals & Taxes
For a clear summary of your transaction, check the boxes for Total Item Quantity, Received Amount, Balance Amount, Tax Details, and You Saved, and choose between Indian or English for your “Amount in Words” format.
Tip: Select “Indian” and enable “Print Amount with Grouping” so your figures display in the Indian numbering system (e.g., 20,00,000) rather than the international format (e.g., 2,000,000).
12/A
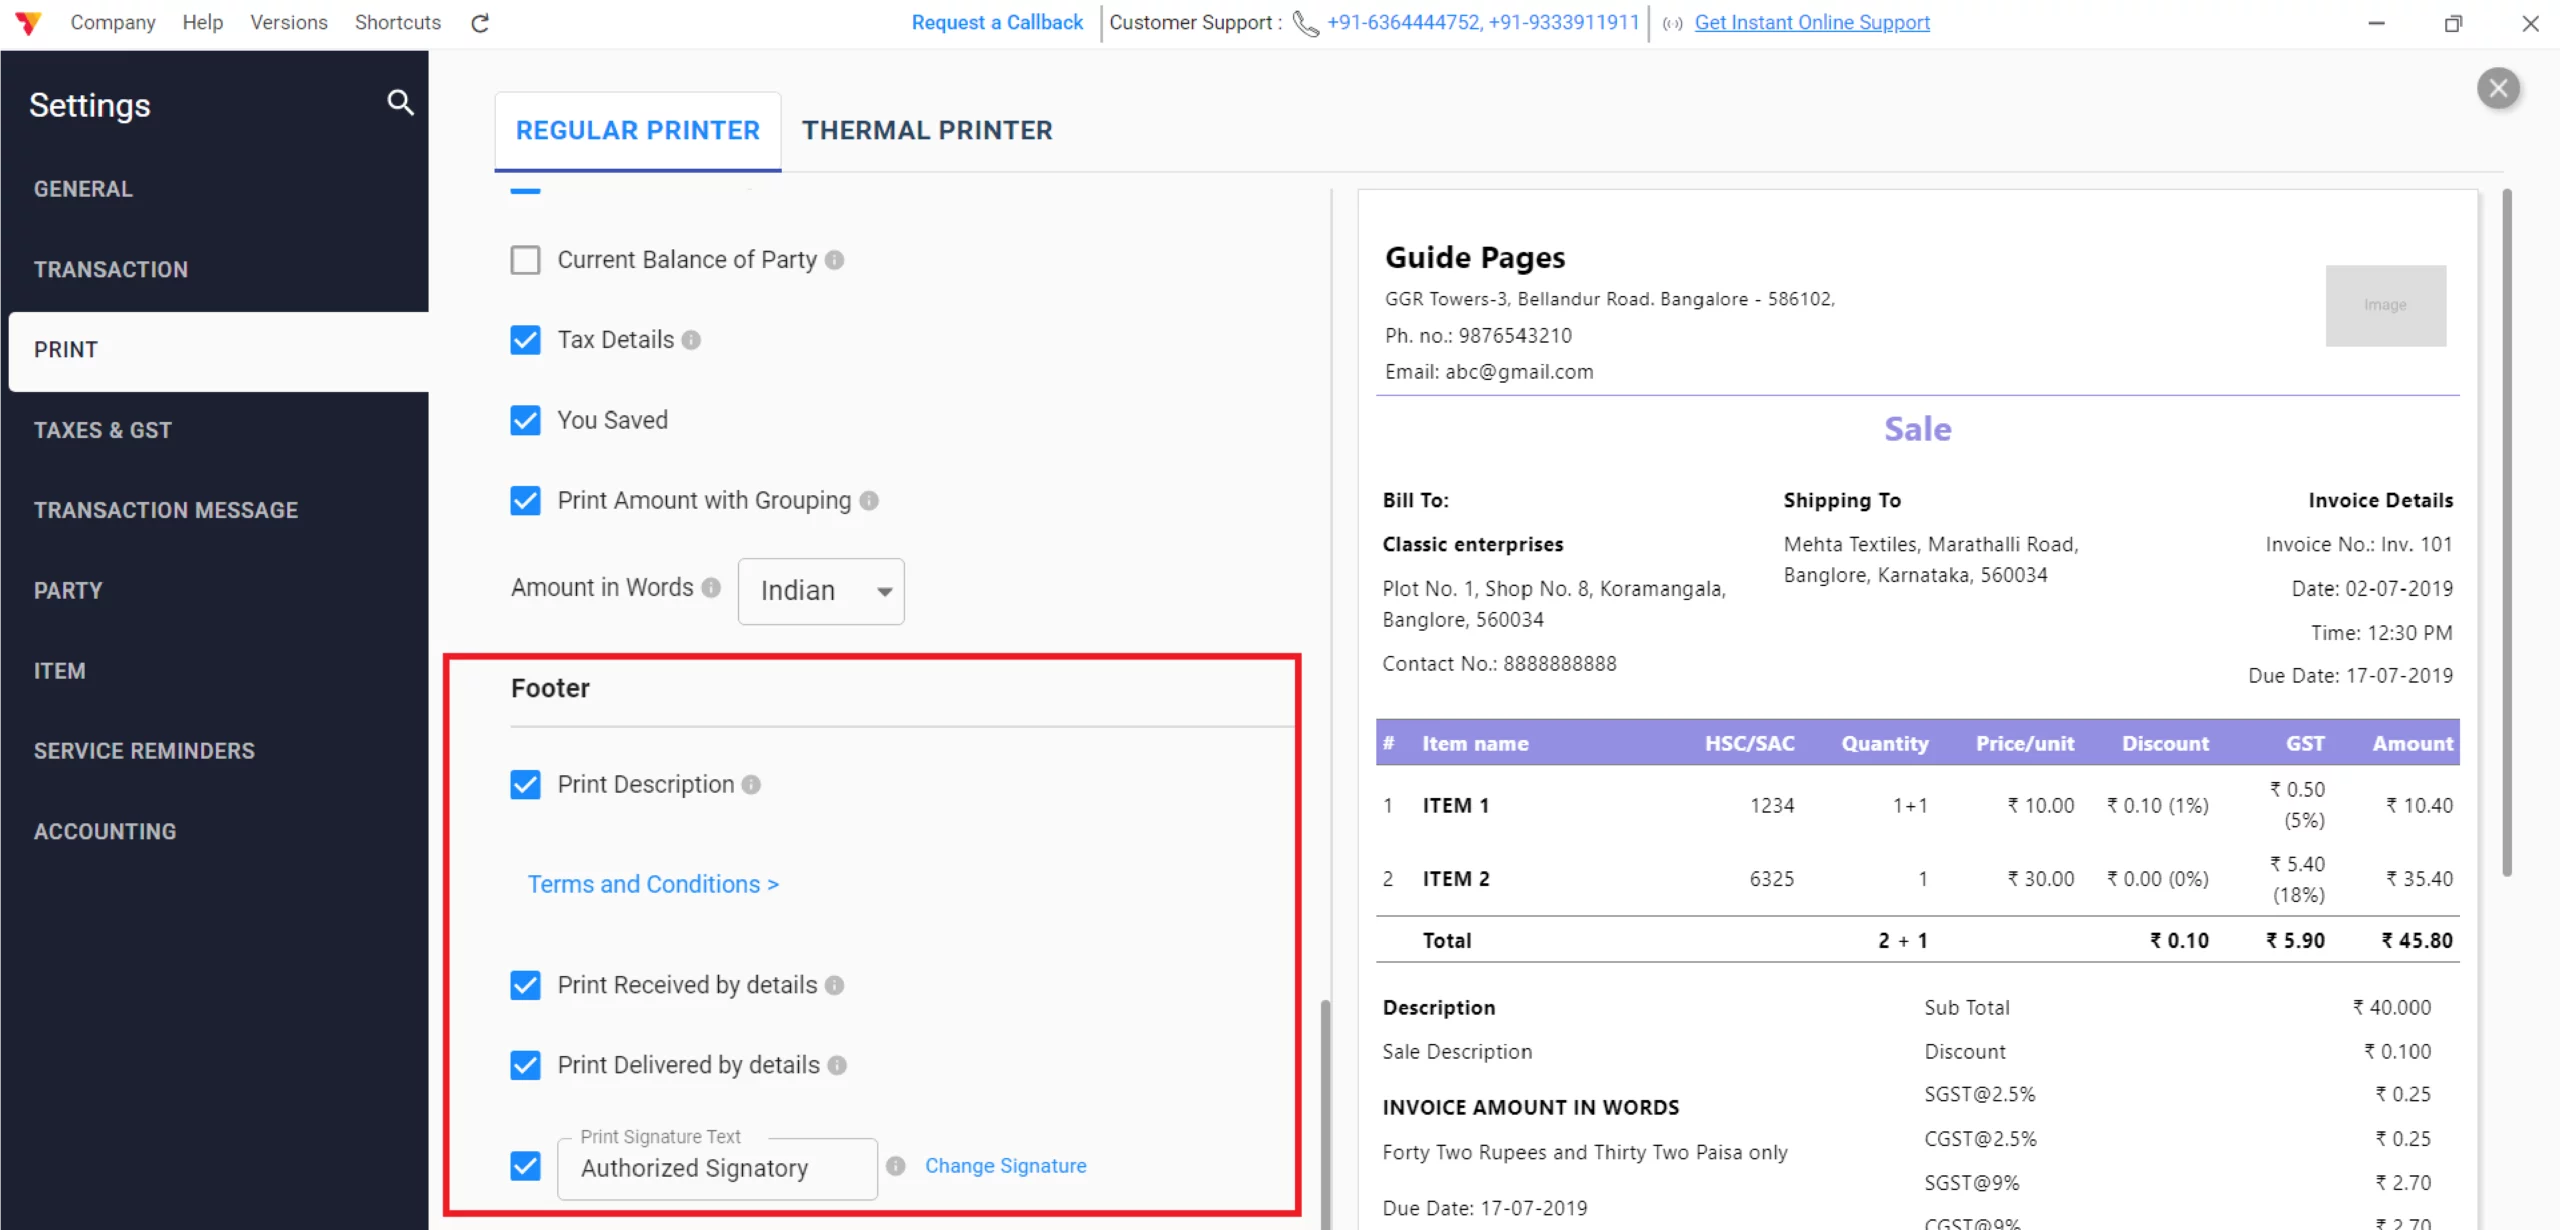
Finalize the Footer
For a better closing, add your Transaction Description, set your Business Terms & Conditions, and enable the Payment Mode and Acknowledgement & Authorized Signatory fields to suit your specific business requirements.
13/A

Save & Close
Review the live preview on the right side of the screen and close the settings window to automatically apply and save your new professional invoice design.
14/A
Scenario B: Customizing Thermal Layouts (2-inch to 4-inch)
Best for high-speed retail billing, compact receipts, and quick counter transactions.
5/B
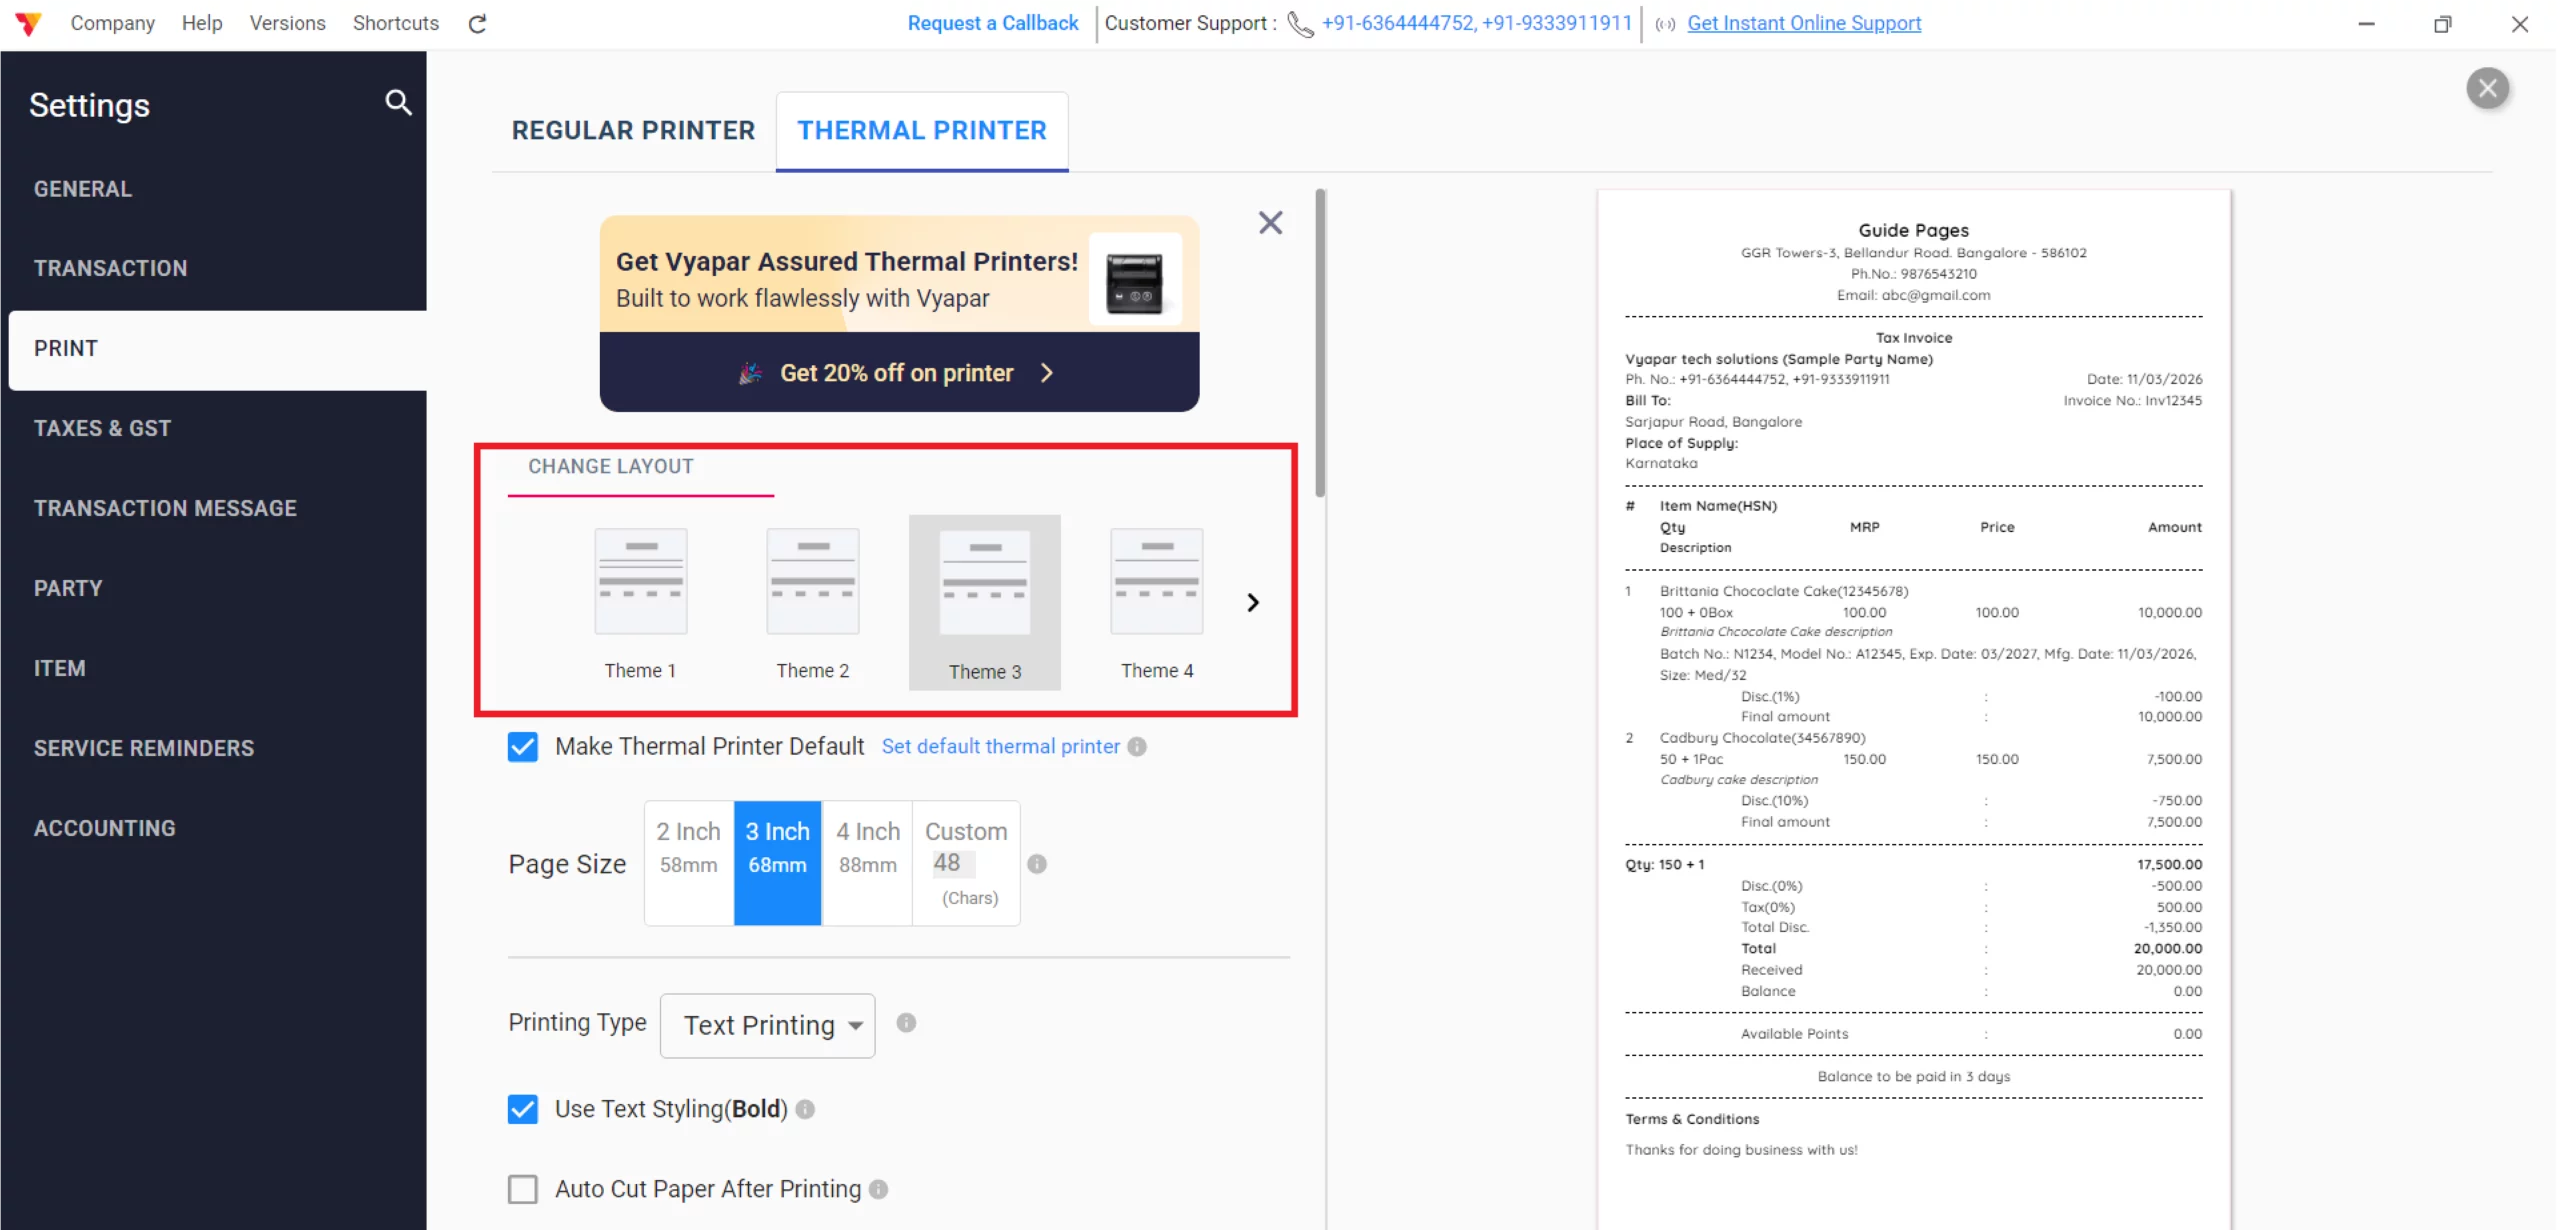
Select a Theme
Under the CHANGE LAYOUT section, scroll through and select a compact theme (e.g., Theme 1 to Theme 4) specifically designed for narrow thermal paper.
Tip: If you regularly use the Thermal Printer, check to make the Thermal Printer the default.
6/B
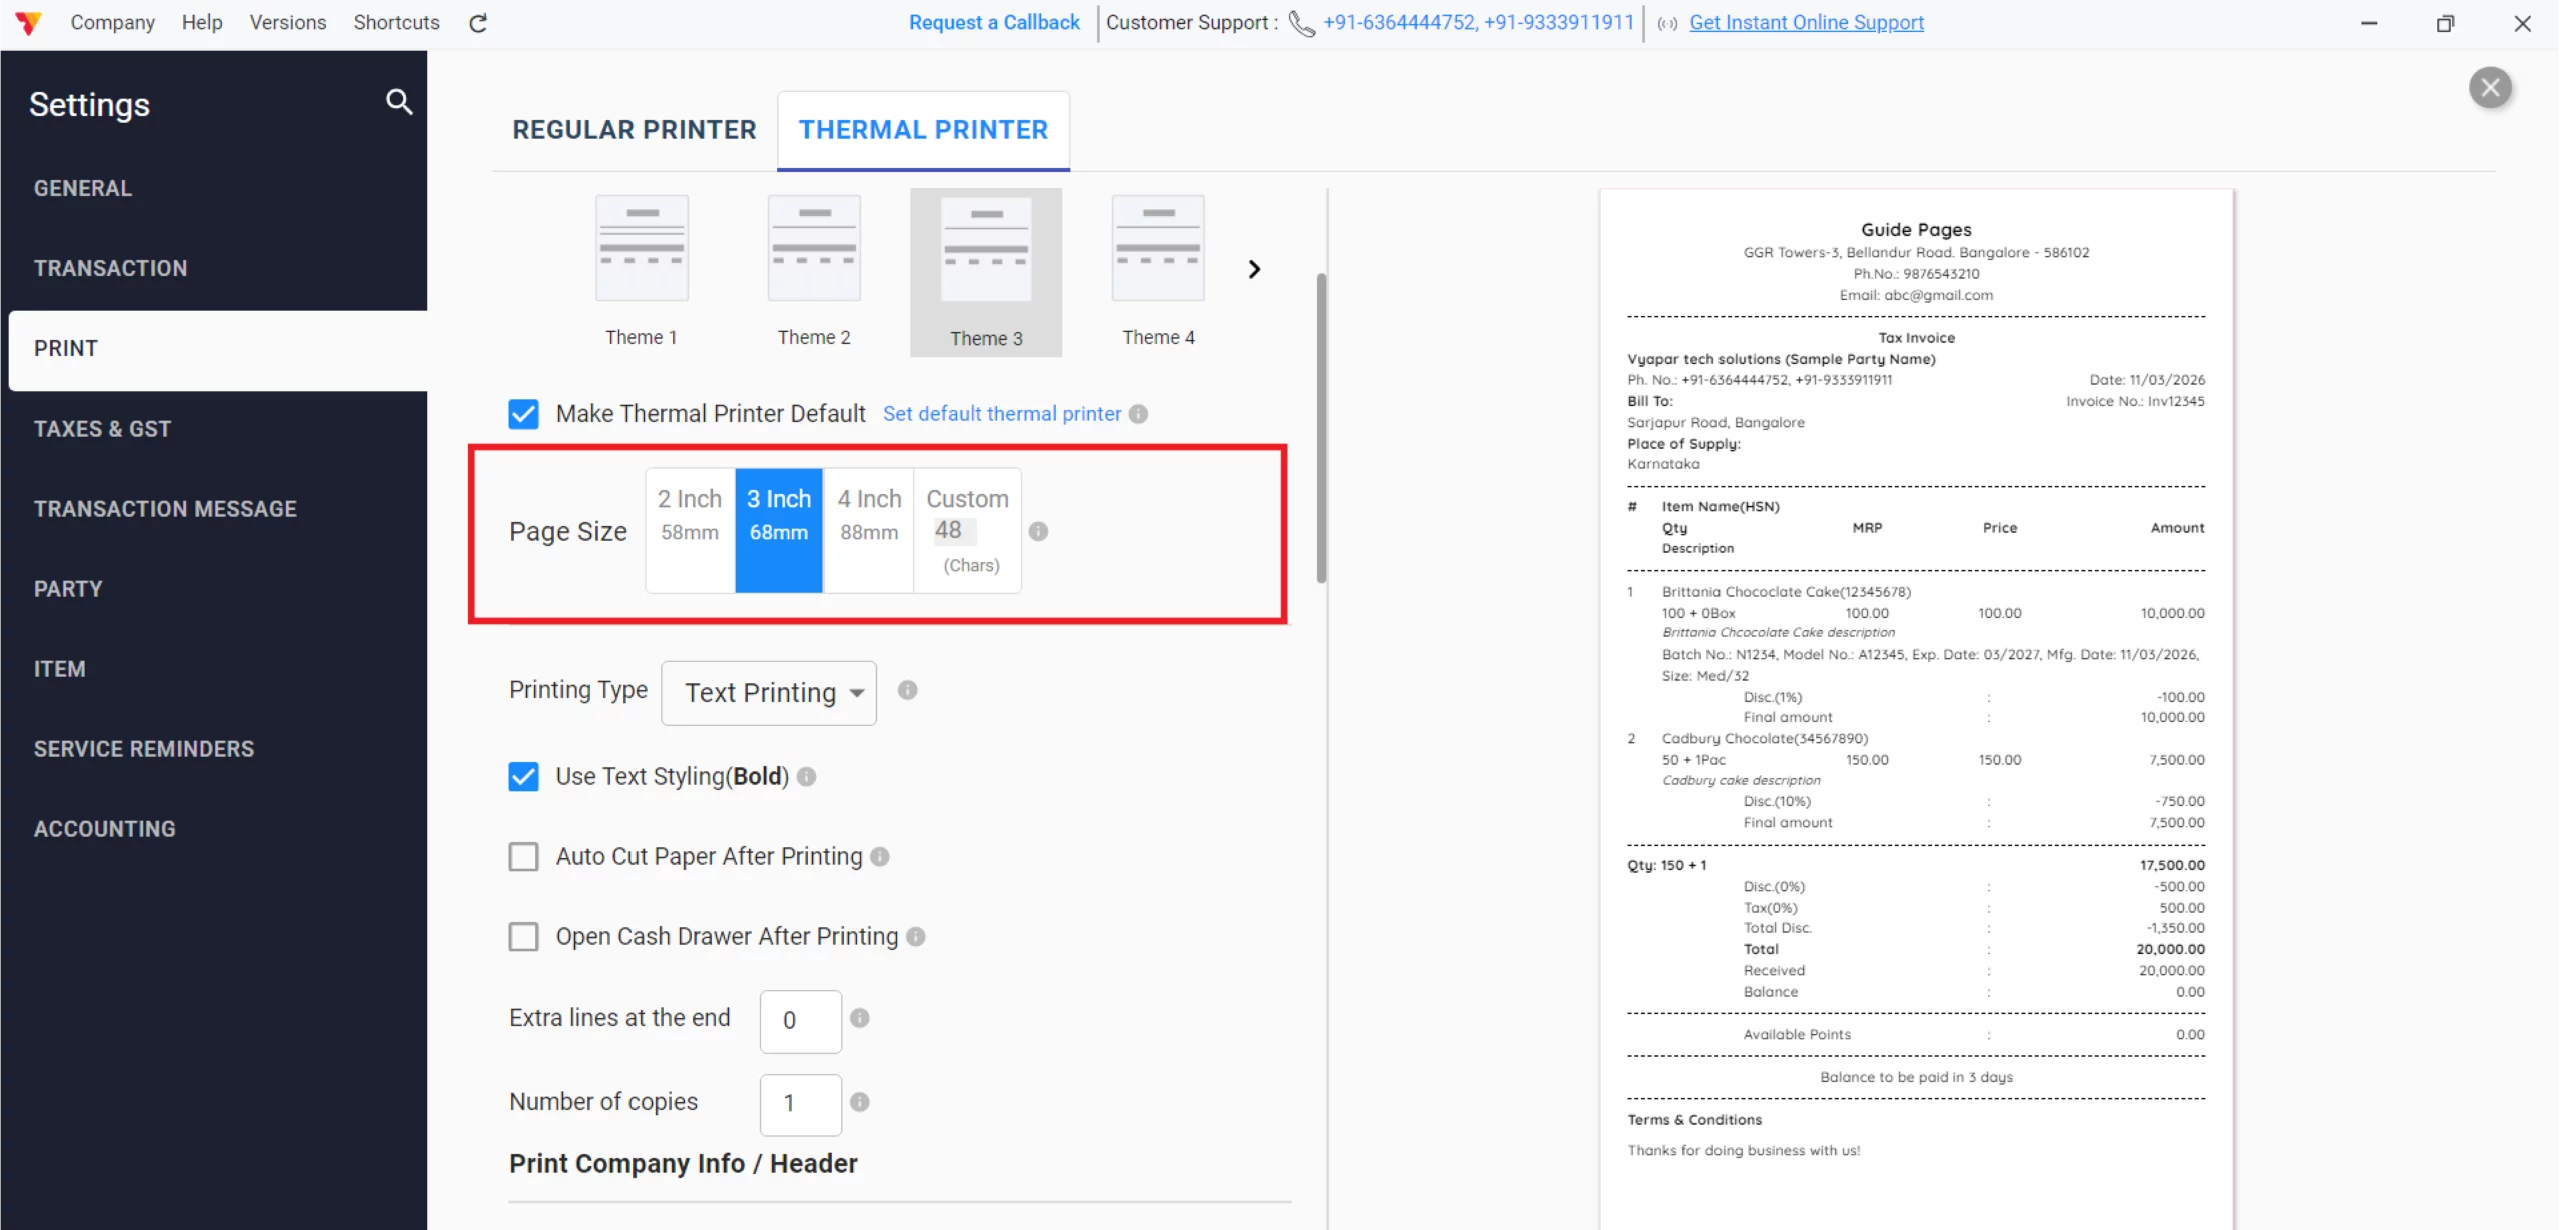
Set Paper Dimensions
Use the Paper Size dropdown to select your specific roll width, such as 2 Inch (58mm), 3 Inch (80mm), or 4 Inch (88mm).
7/B
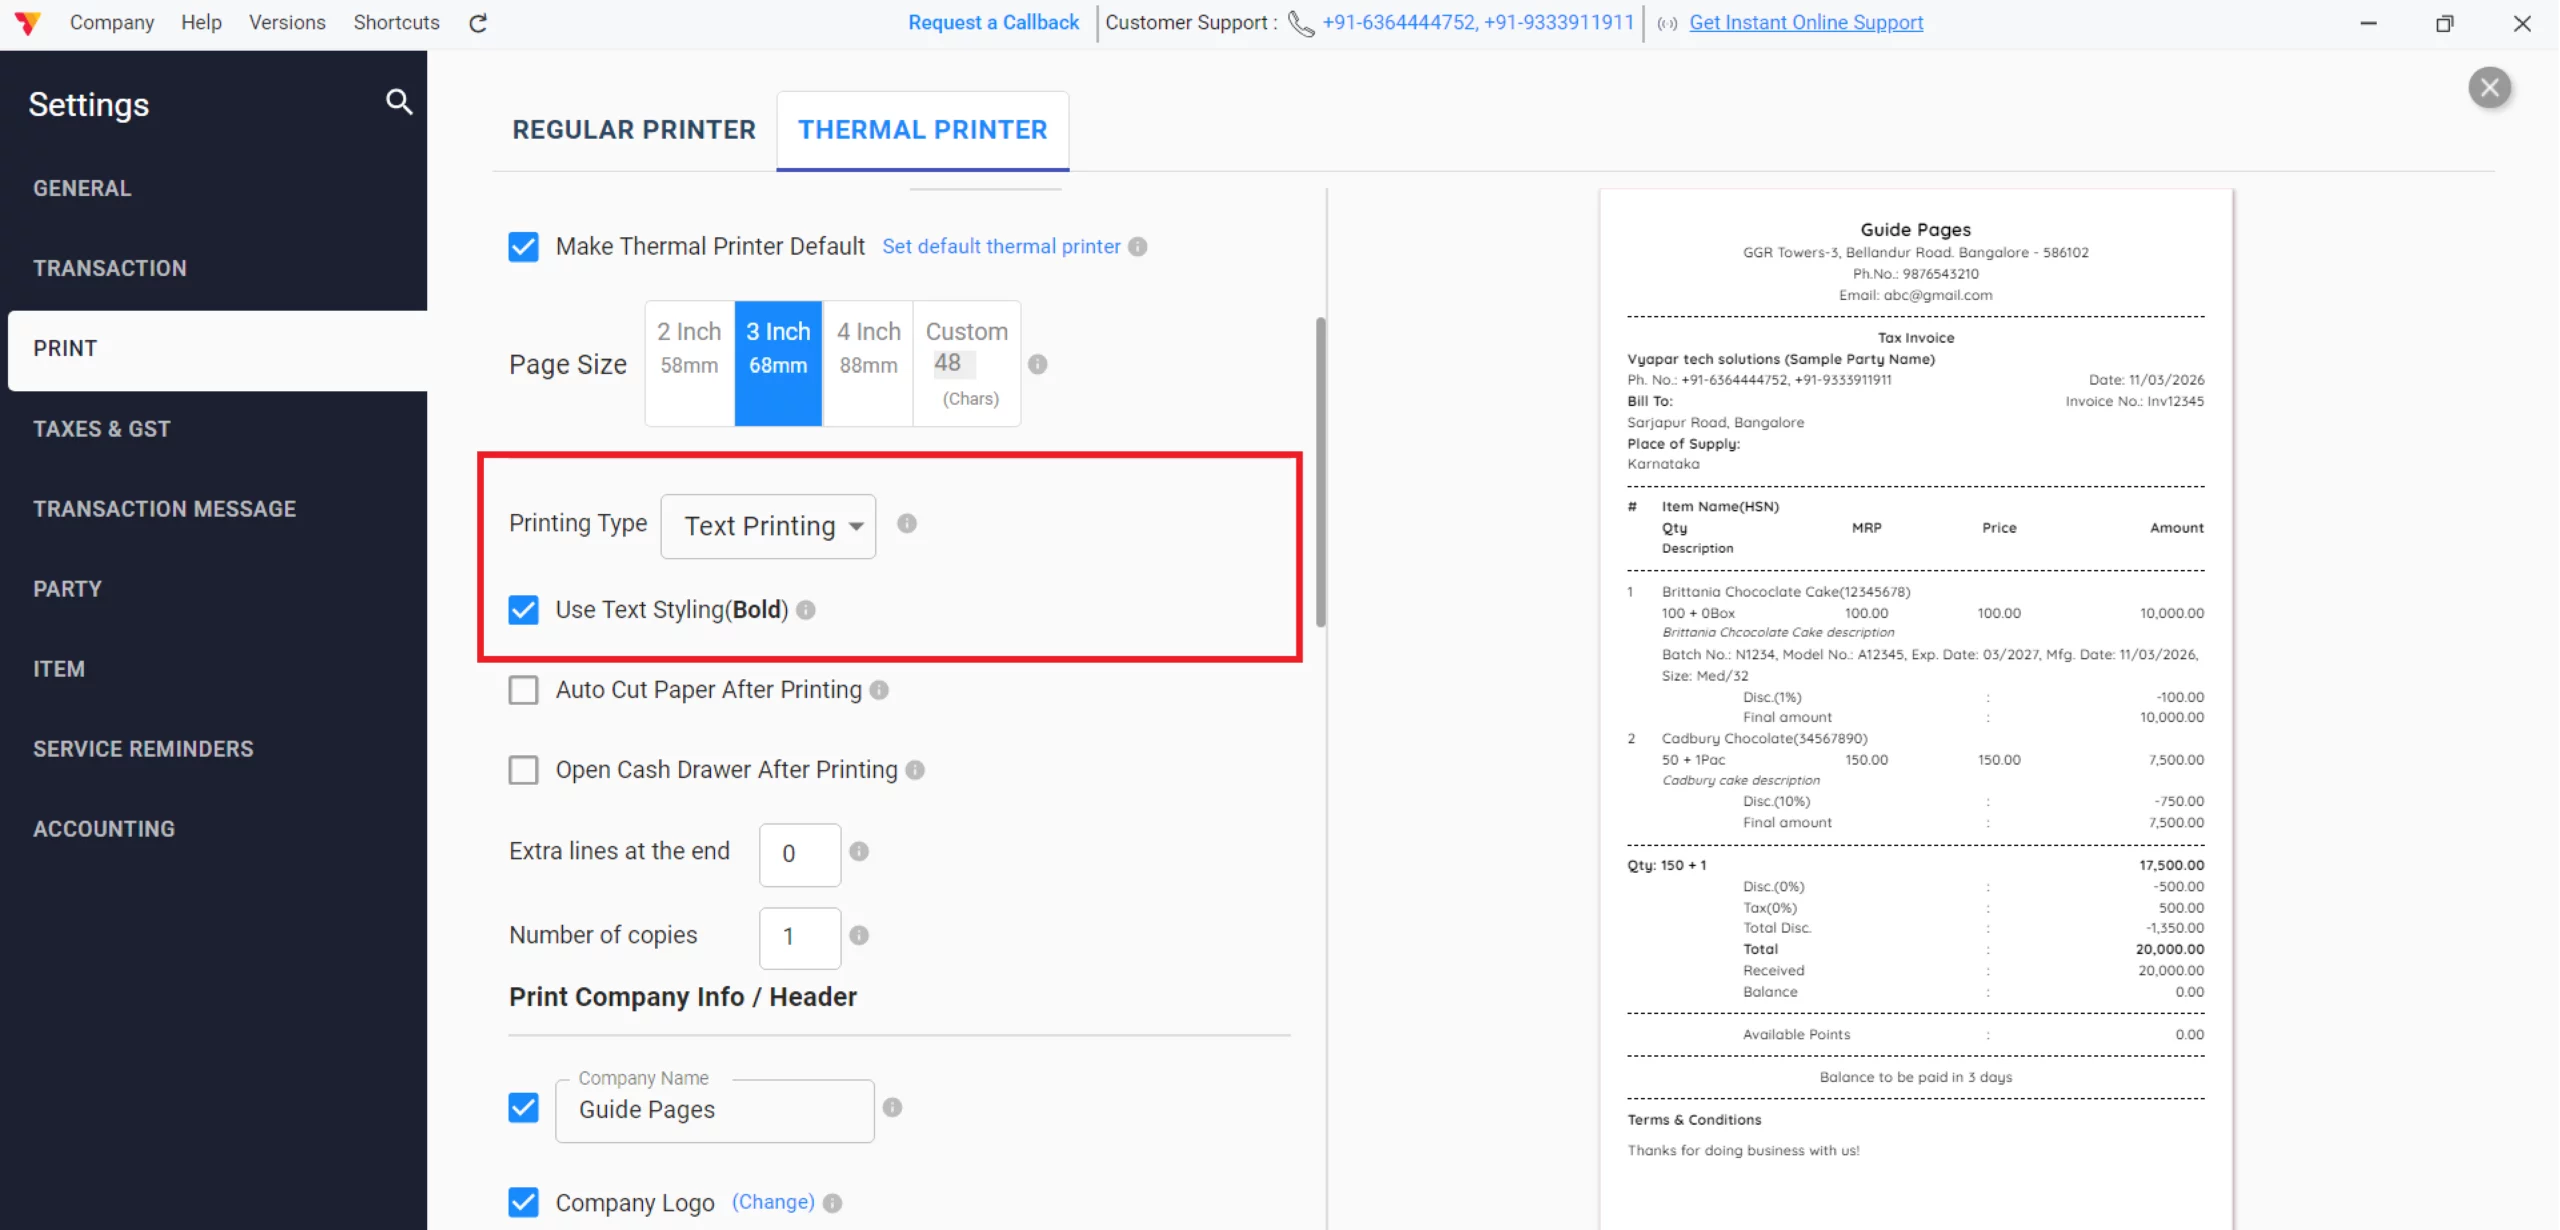
Setup Thermal Printer
Choose your Printing Type (e.g., Text Printing), enable “Use Text Styling (Bold)” for better readability on thermal paper, and adjust “Extra lines at the end” to ensure the receipt is fully visible before it is cut.
Tip: You can enable “Auto Cut Paper After Printing” and “Open Cash Drawer After Printing” if your hardware supports these features to speed up your checkout process.
8/B

Configure Company Info
Check the boxes to display your Company Name, Logo, GSTIN on Sale, and Phone Number in the header to maintain your brand identity on small receipts.
9/B
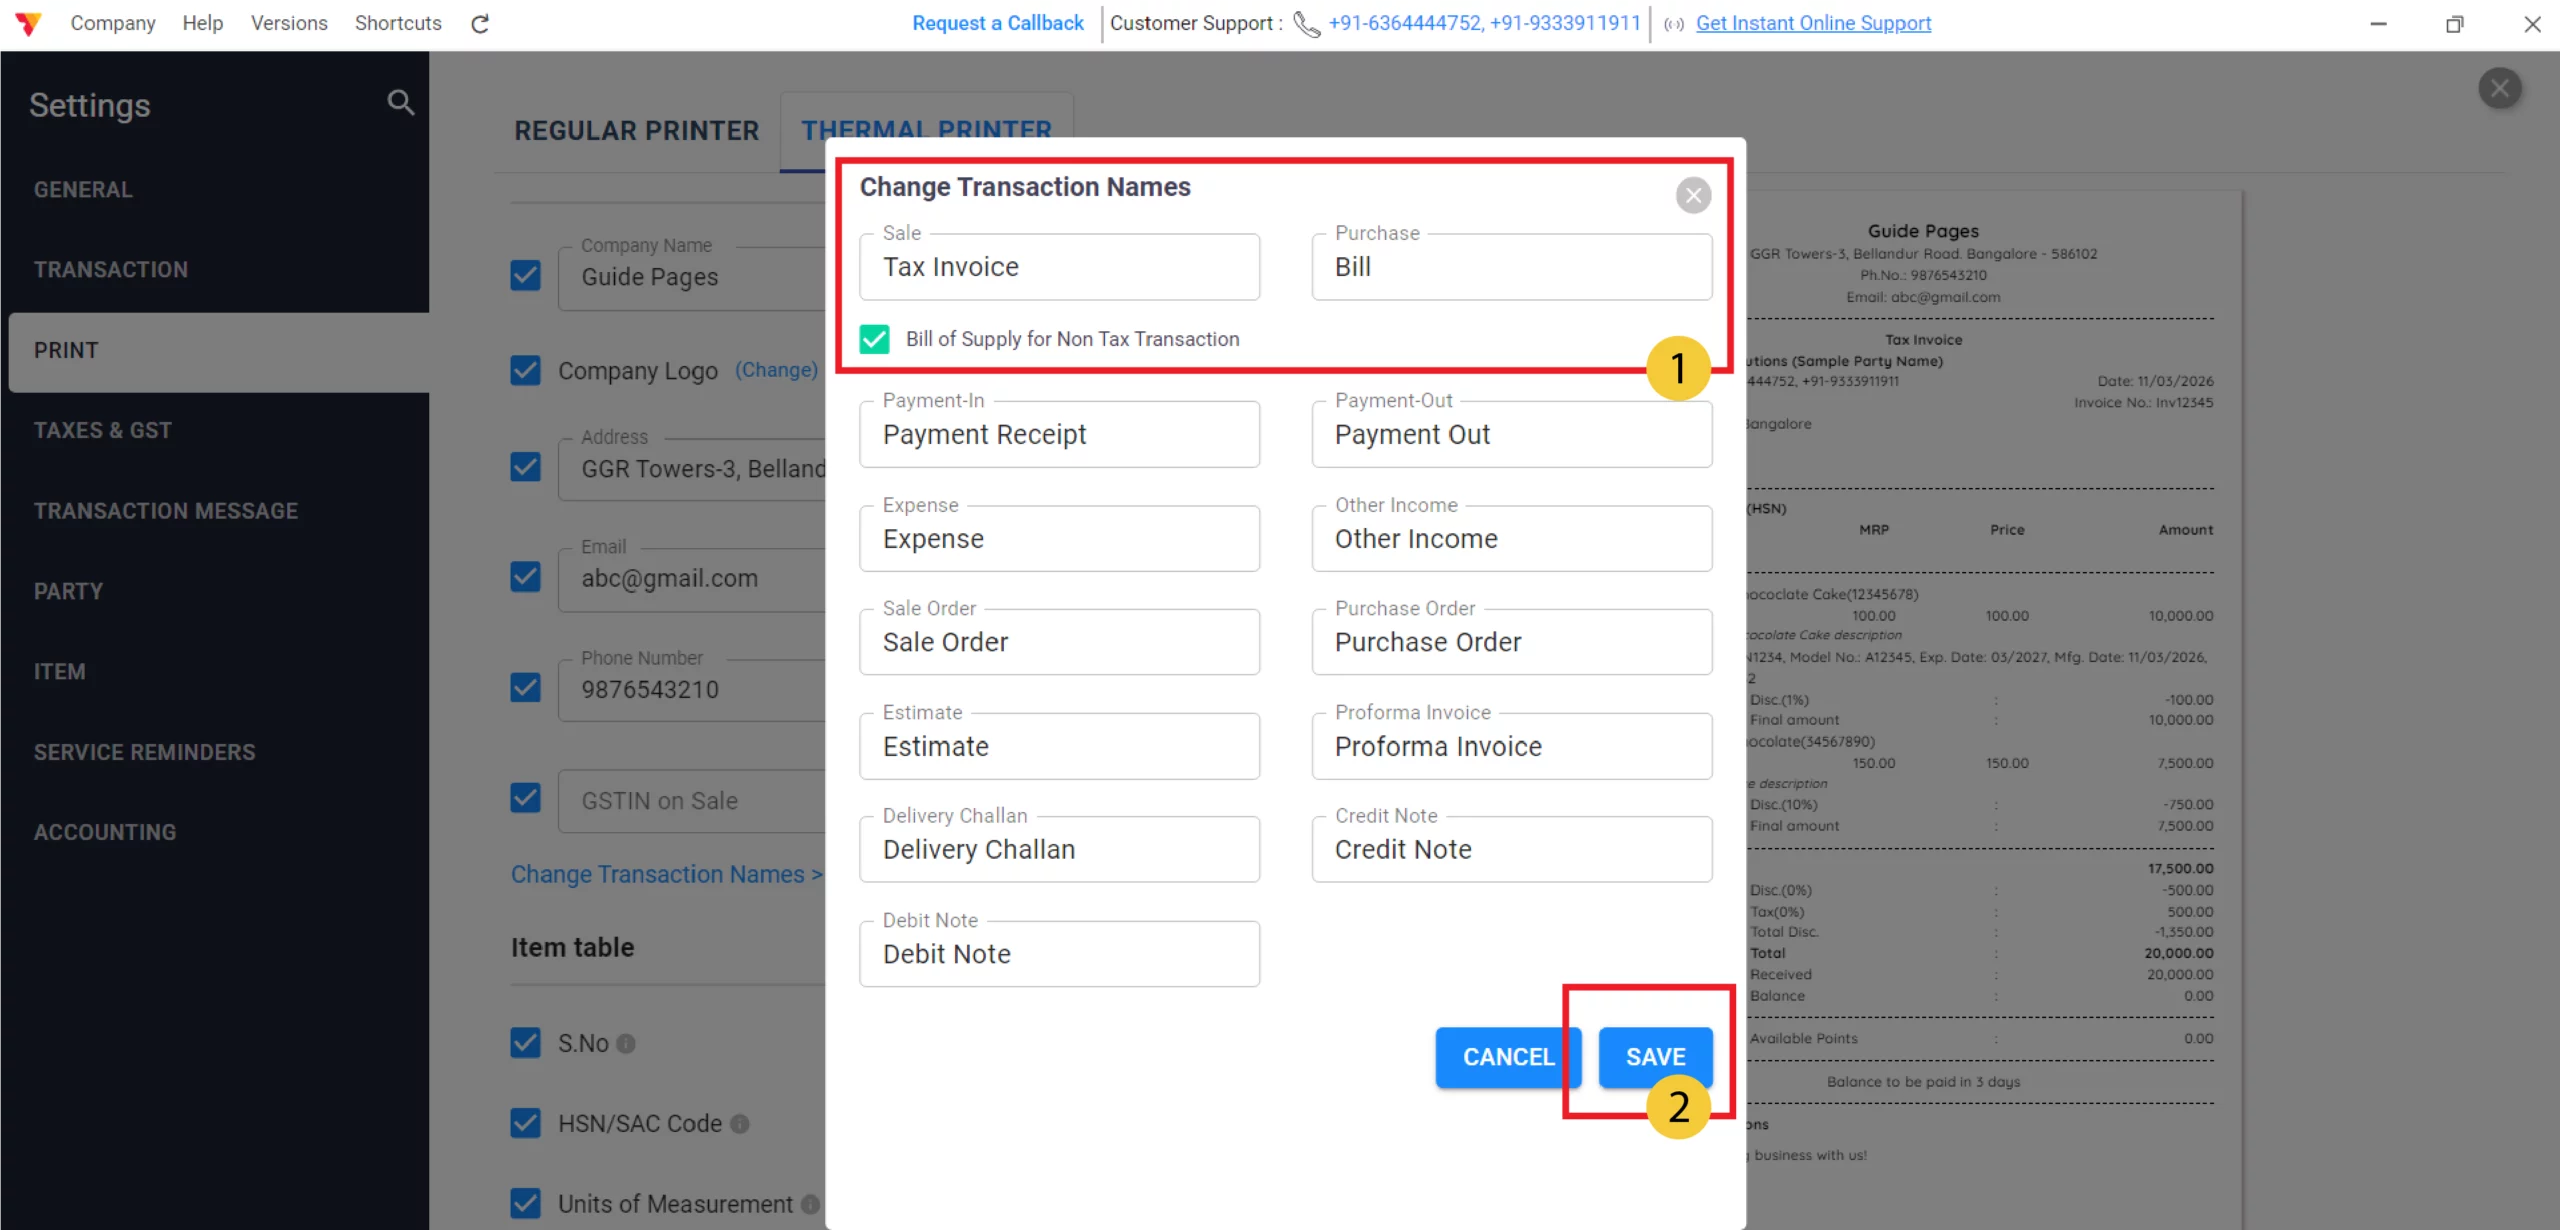
Change Transaction Name
Click on “Change Transaction Names” to customize the labels for your documents, such as changing “Sale” to “Tax Invoice” or “Estimate” to “Quotation,” and click “Save” to apply these titles.
10/B
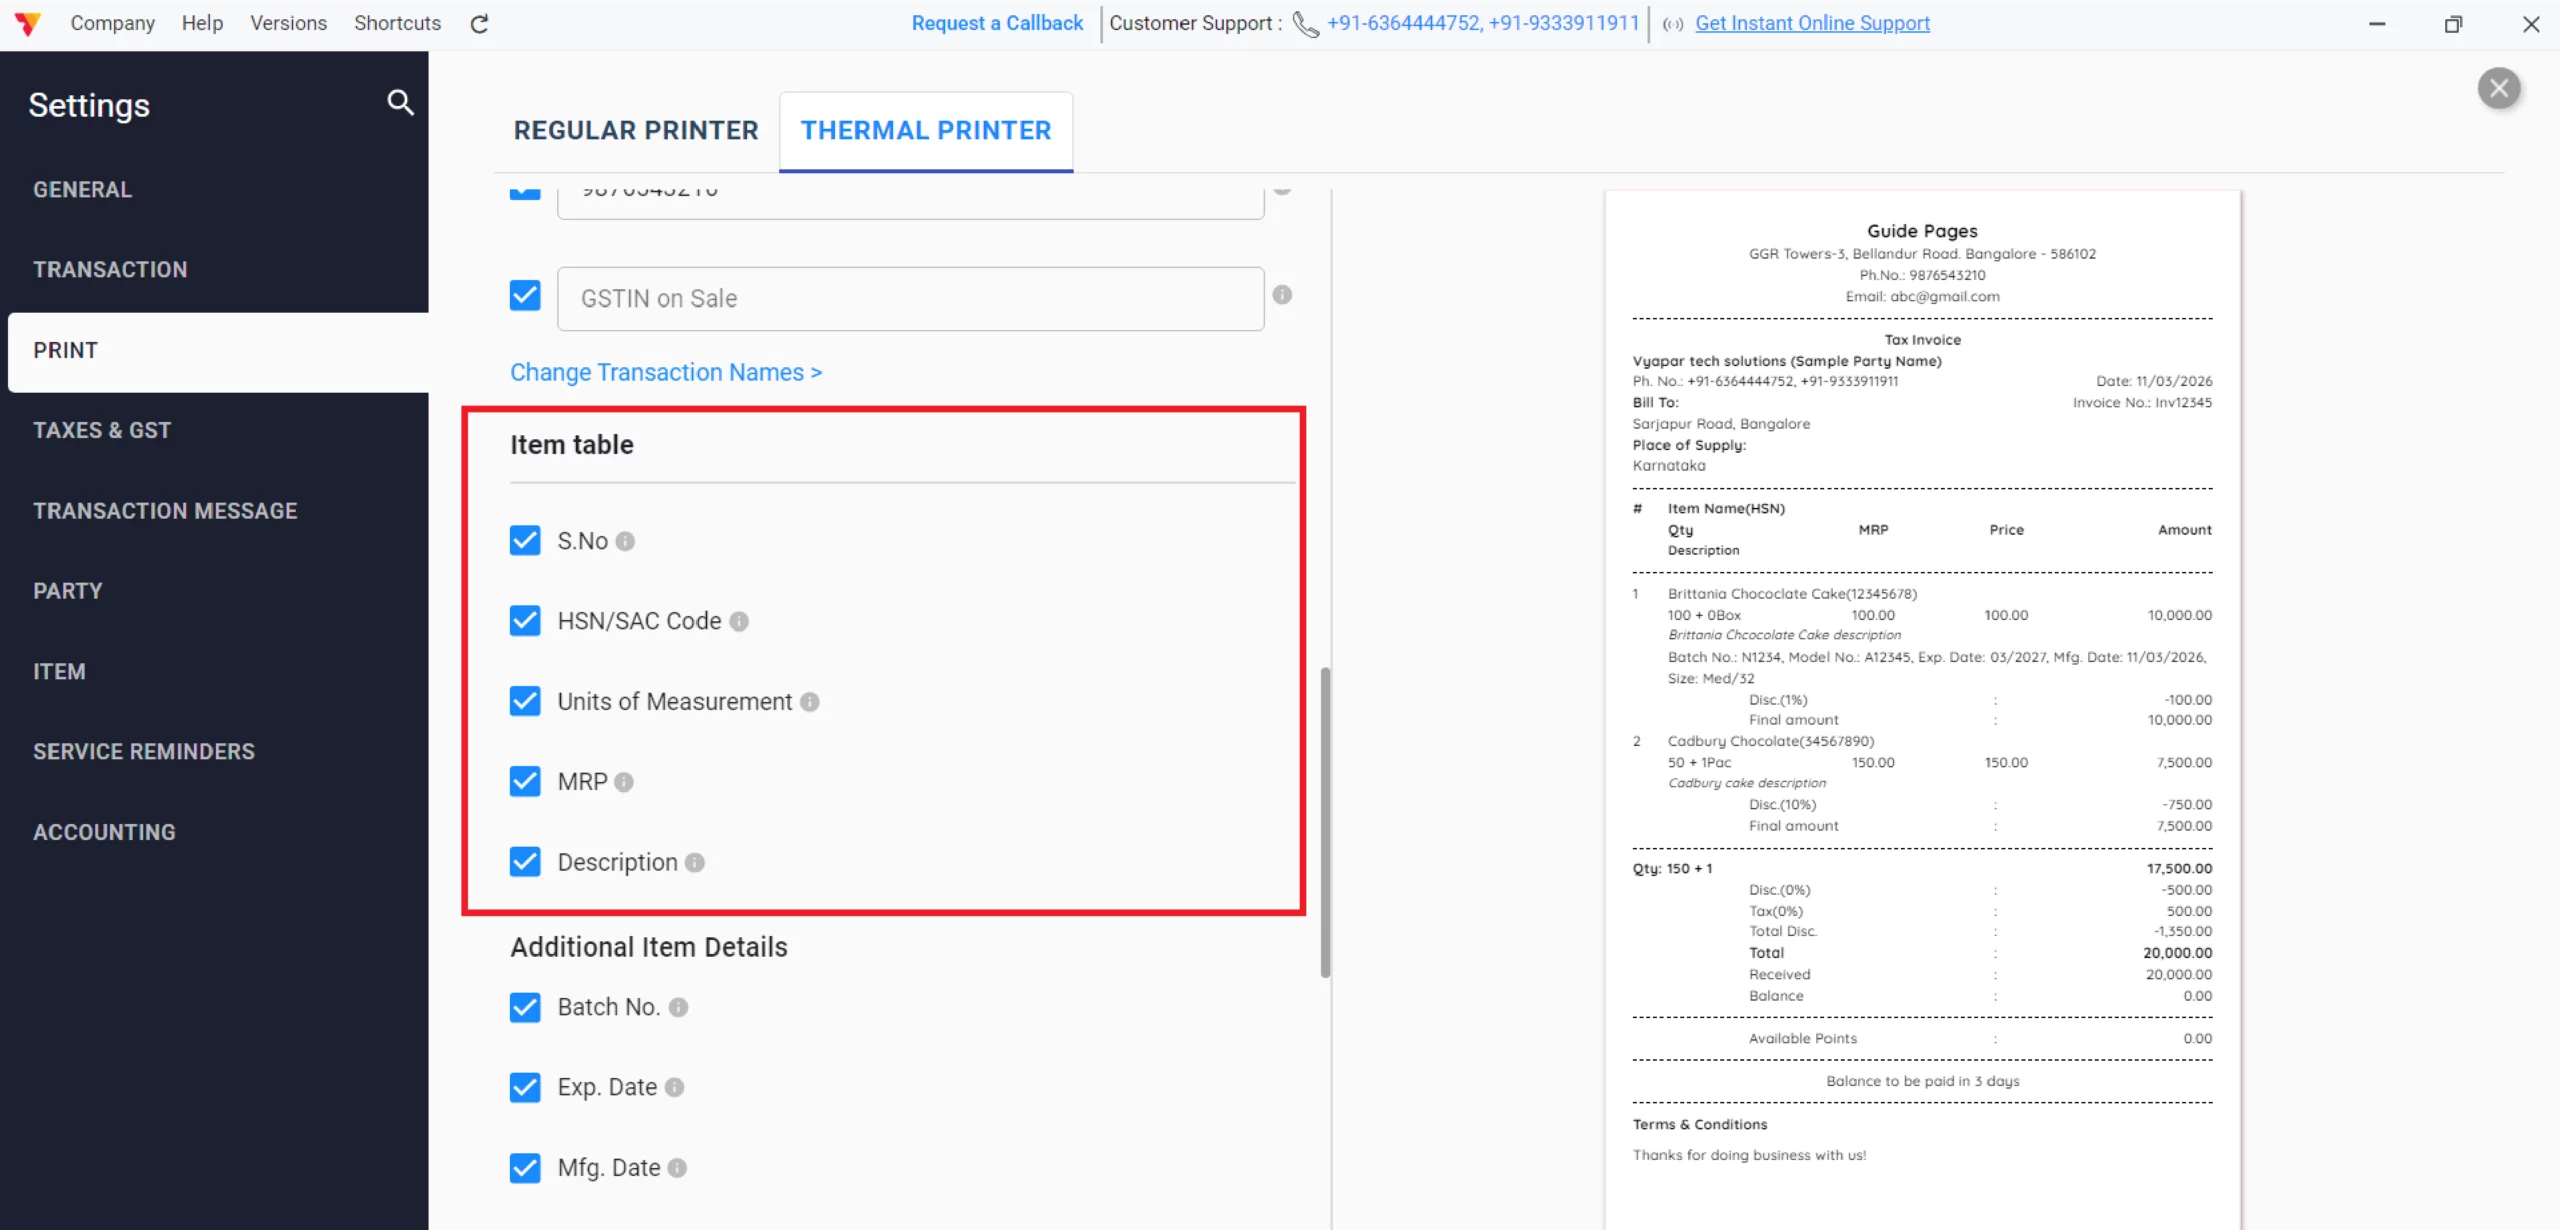
Customize the Thermal Item Table
Check the boxes to include essential columns like S.No, HSN/SAC Code, Units of Measurement, MRP, and Description to ensure all product information fits the compact receipt format.
11/B
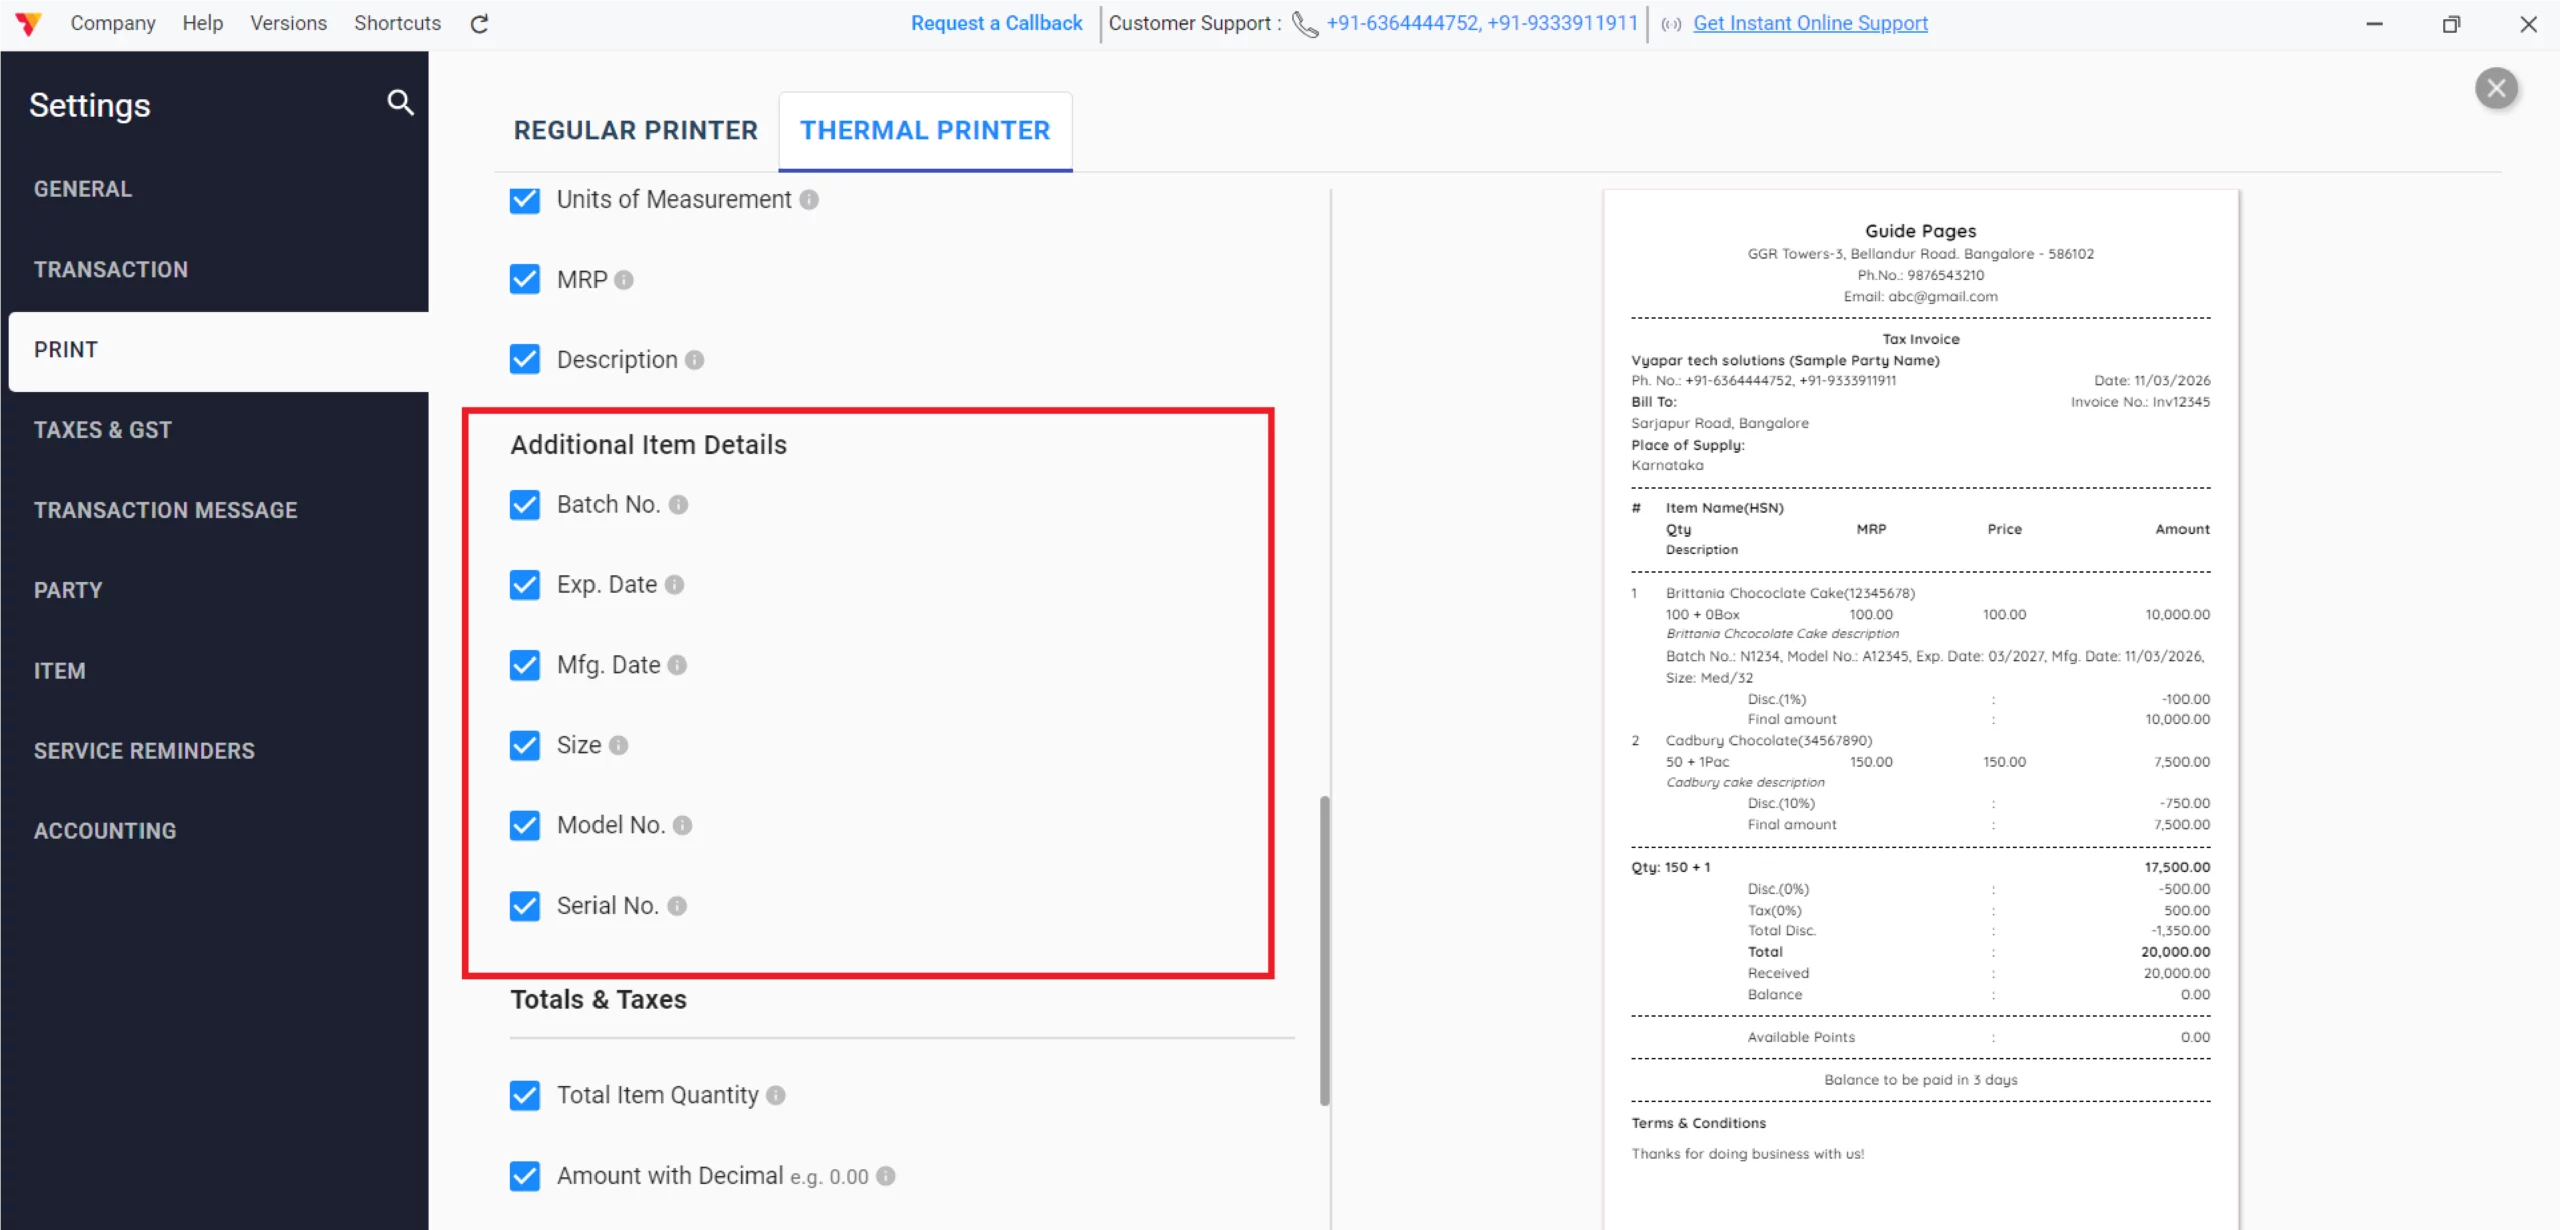
Customize the Additional Item Details
Enable “Additional Item Details” such as Batch No., Exp. Date, Mfg. Date, Size, Model No., and Serial No. to provide customers with specific product tracking information directly on their thermal bill.
12/B

Customize Totals & Taxes
For a clear summary of your transaction, check the boxes for Total Item Quantity, Received Amount, Balance Amount, Tax Details, and You Saved, and choose between Indian or English for your “Amount in Words” format.
Tip: Select “Indian” and enable “Print Amount with Grouping” so your figures display in the Indian numbering system (e.g., 20,00,000) rather than the international format (e.g., 2,000,000).
13/B
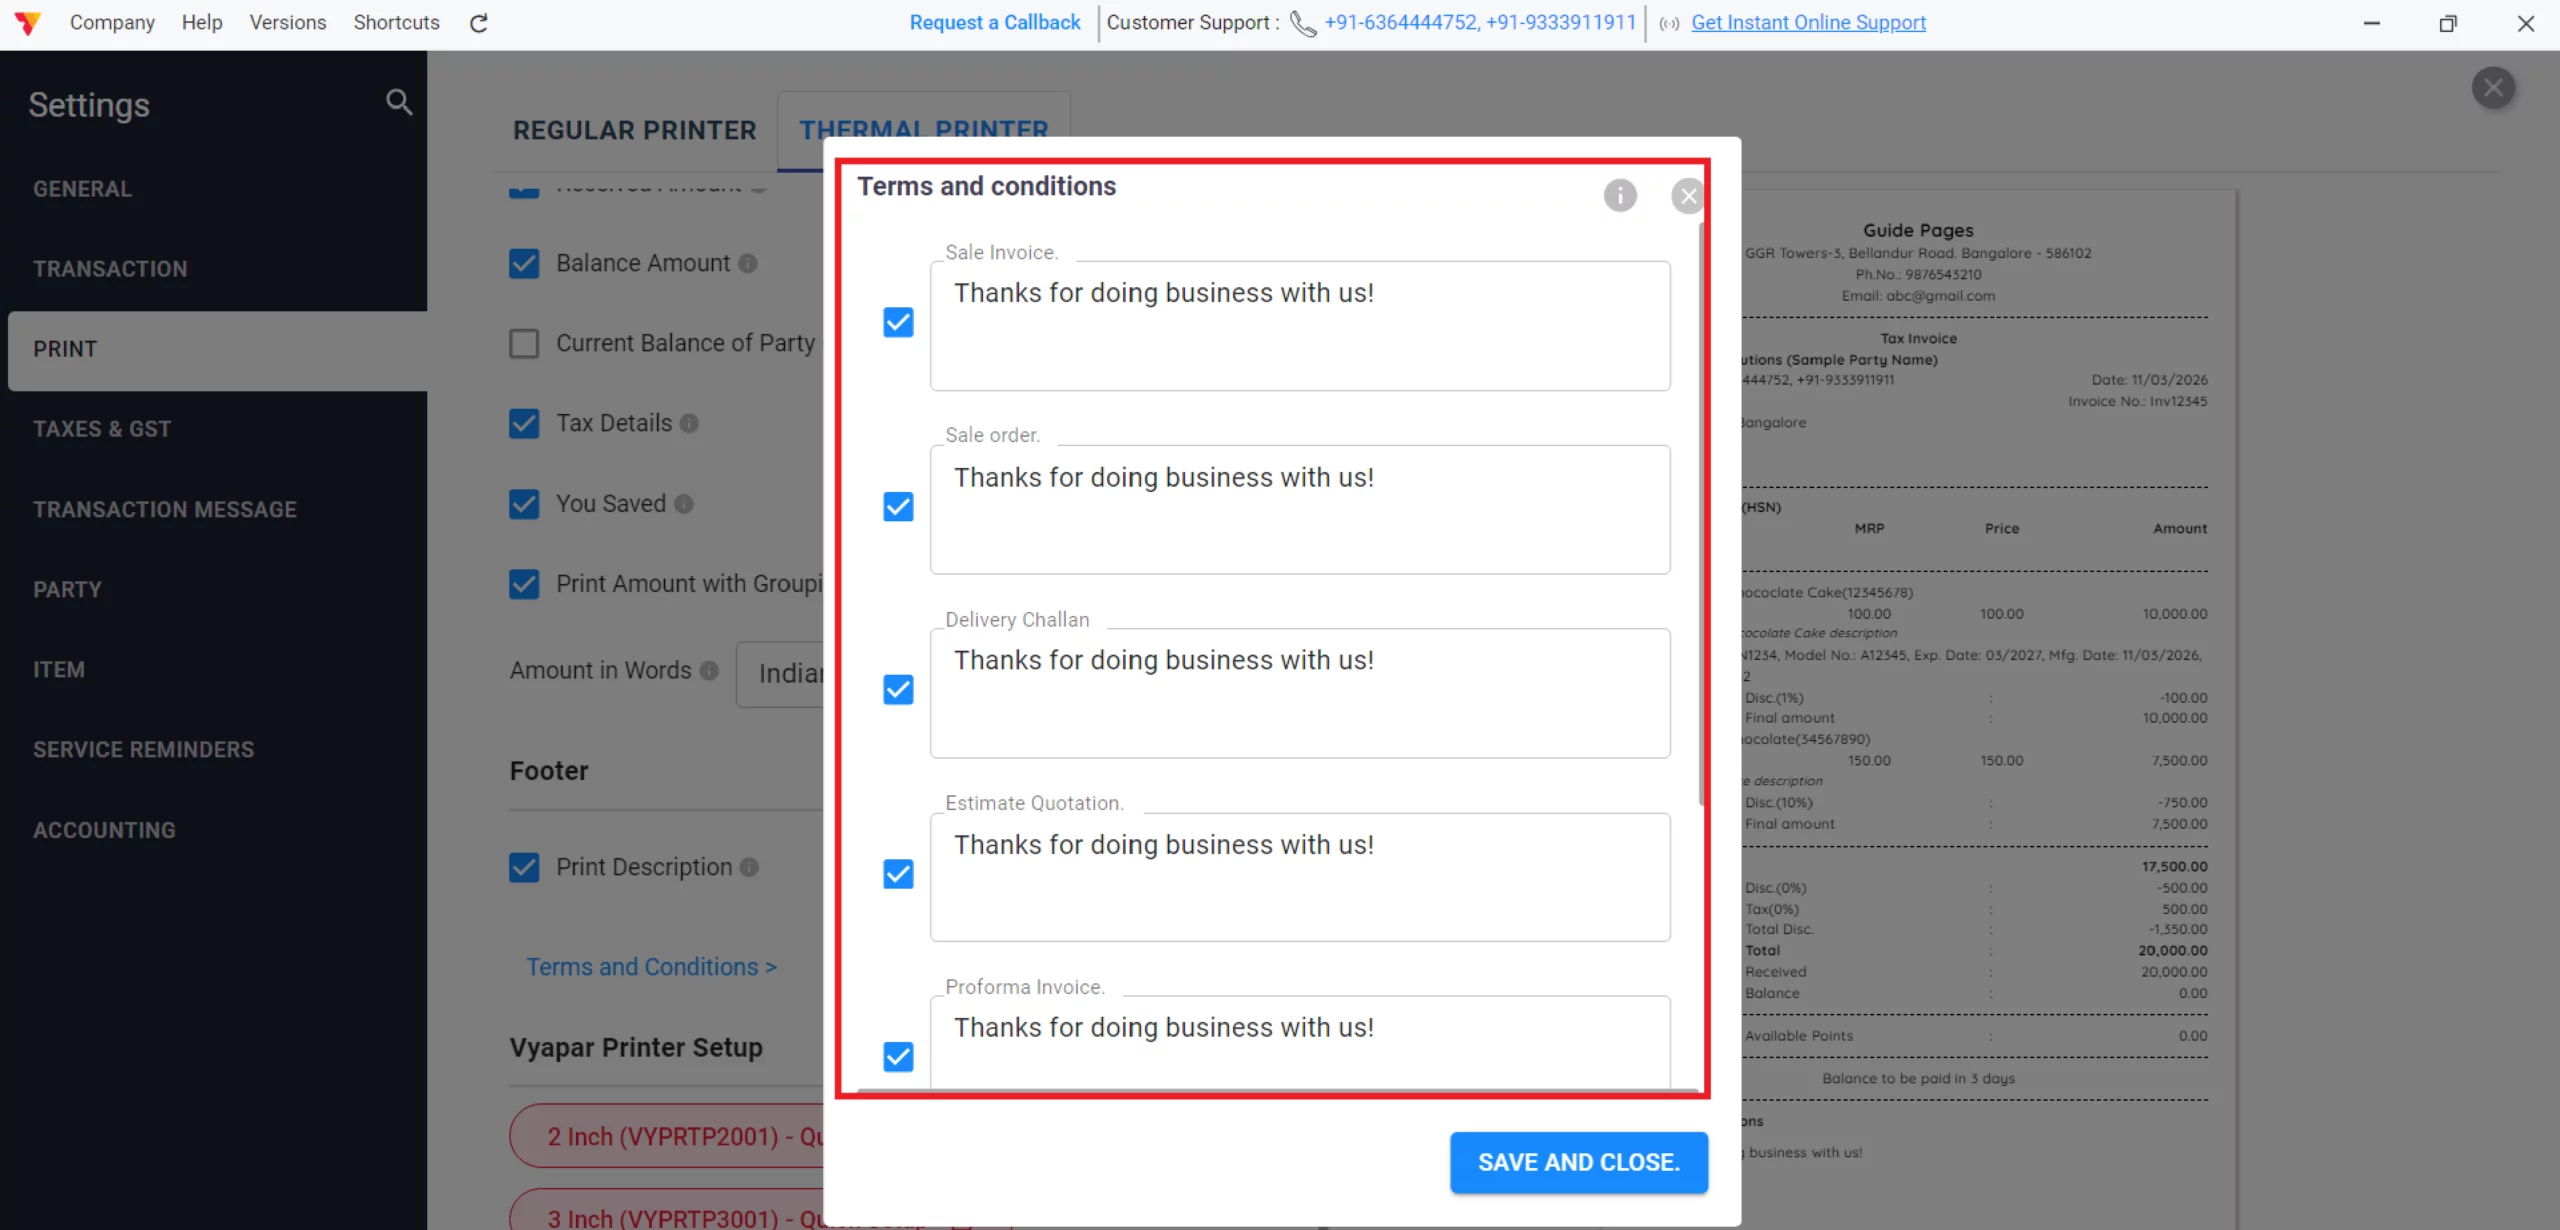
Finalize Footer
Click “Terms and Conditions >” to add your specific business rules to the bottom of the receipt.
14/B
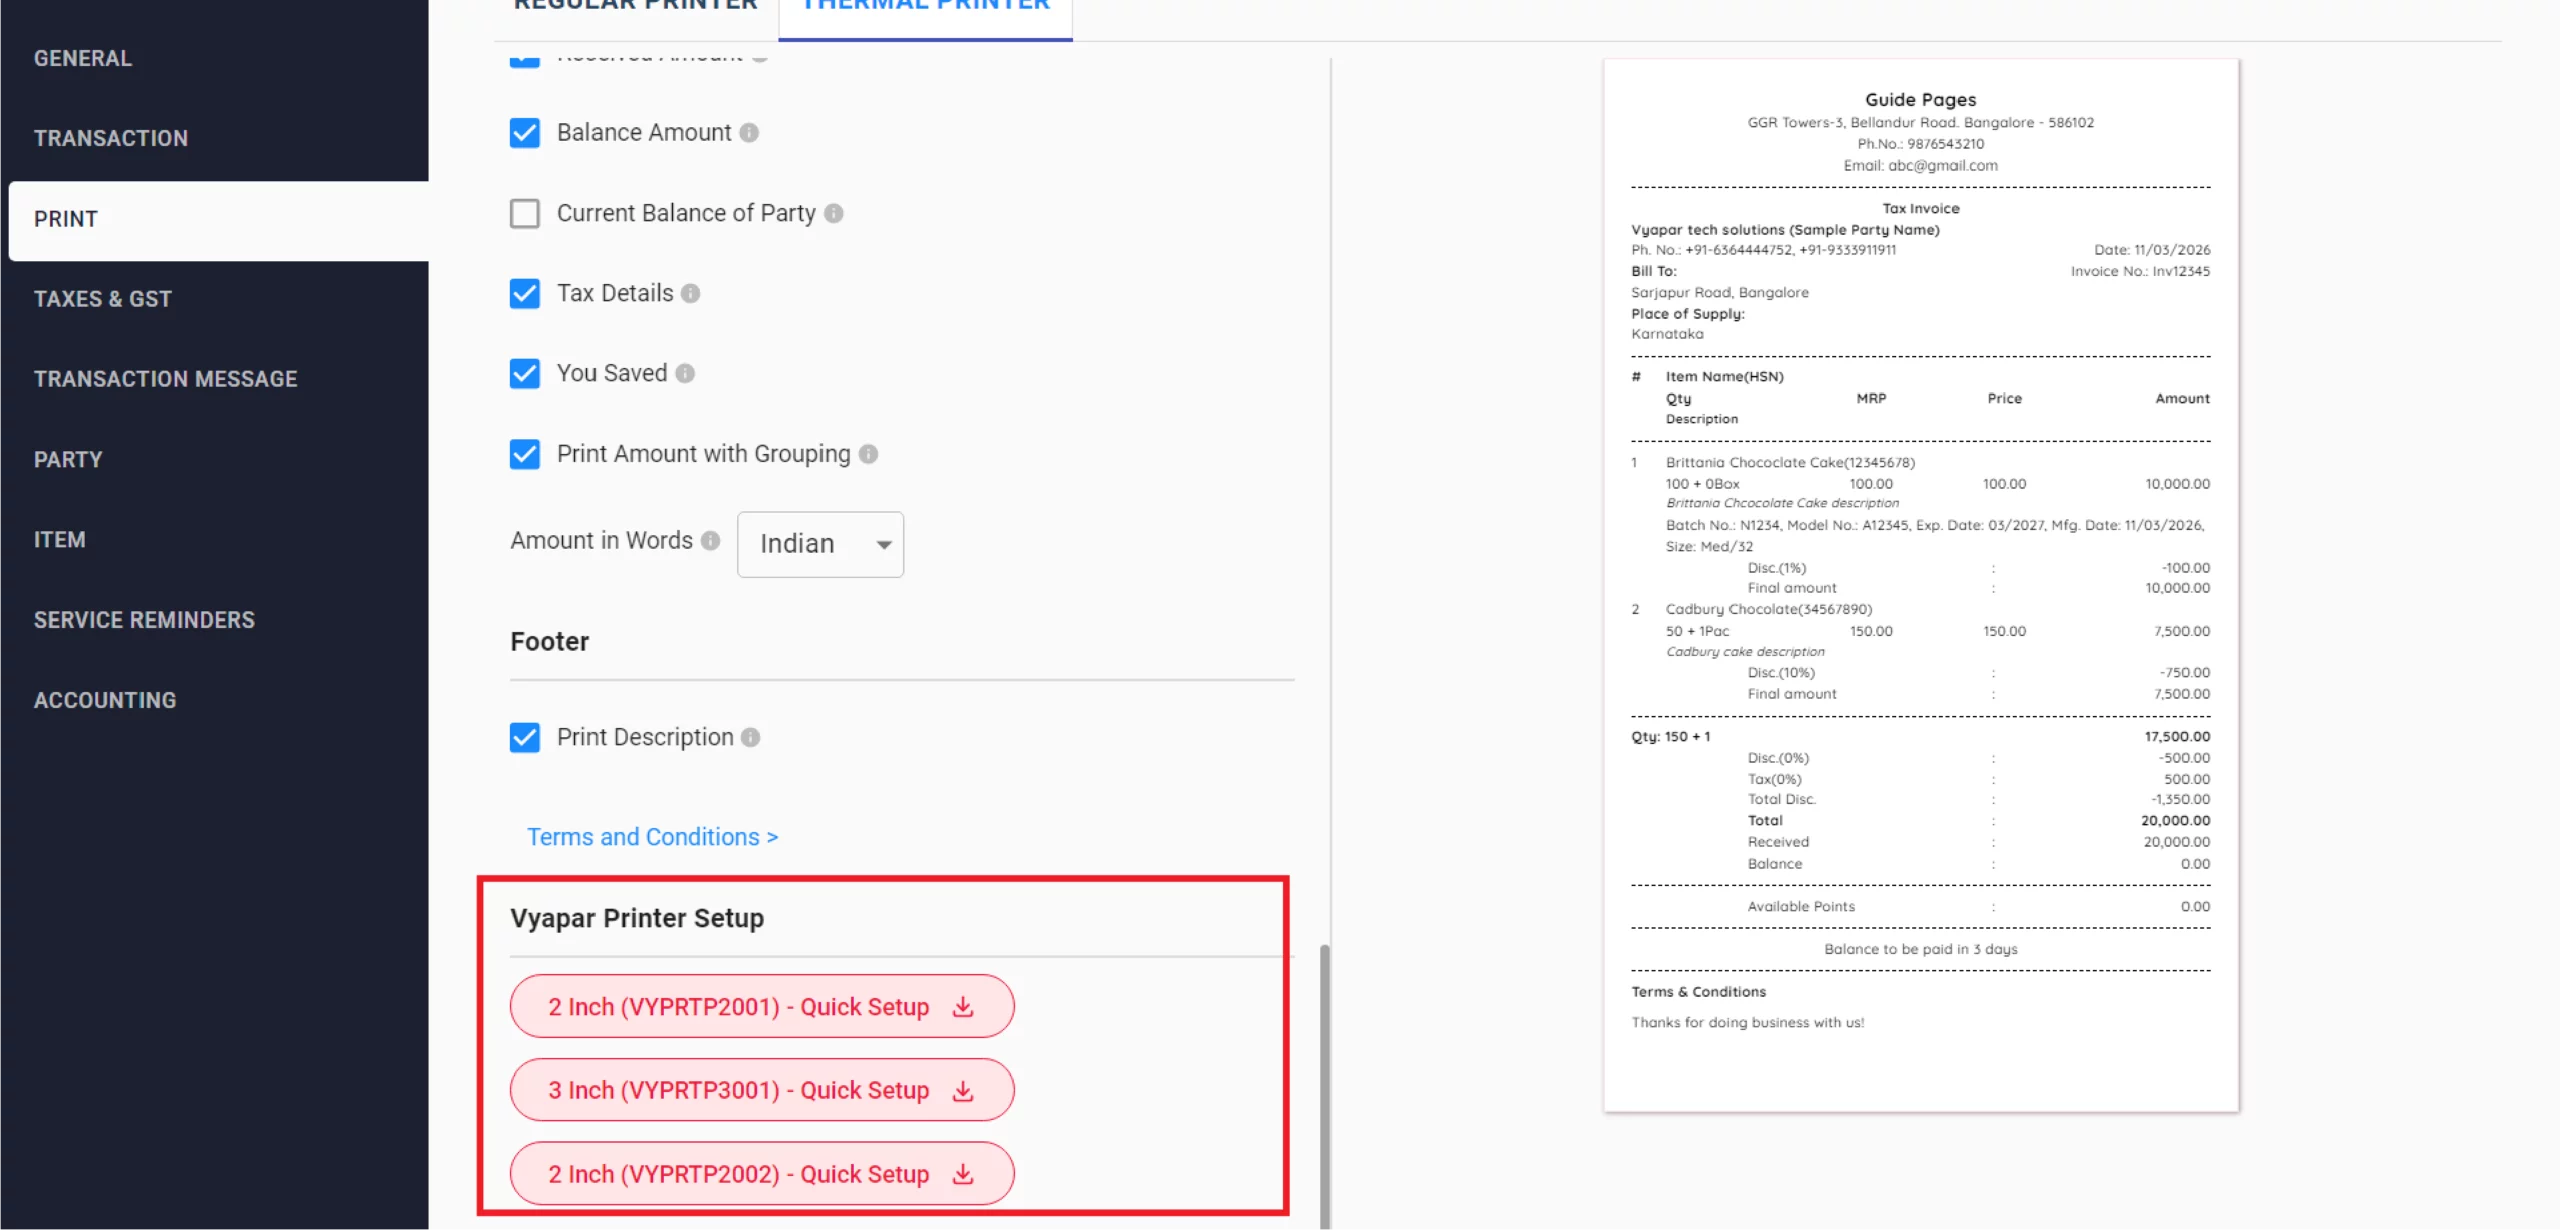
Only for Vyapar Hardware’s
If you are using Vyapar thermal printers, you can directly download the “Quick Setup” drivers for 2-inch (VYPRTP2001/VYPRTP2002) or 3-inch (VYPRTP3001) models from the Vyapar Printer Setup section to ensure your hardware is perfectly synced.
15/B
Still stuck? Get help in minutes.
Our support team is ready to help you succeed.
![]()
![]() 24/7 Support
24/7 Support
Why Is This Important for Your Business?
Build lasting trust through professional, customized invoices.

Professional Brand Identity
Customized invoices with your logo and specific business colors build trust and make your brand more memorable to your customers.
Legal & Tax Compliance
Ensuring fields like GSTIN, HSN codes, and Place of Supply are correctly displayed keeps your business compliant with government tax regulations.
Improved Operational Clarity
Adding clear details like Batch Numbers, Expiry Dates, and custom payment terms reduces customer confusion and speeds up the payment collection process.
Frequently Asked Questions (FAQs)
Can I use different themes for Regular and Thermal printers?
Yes, Vyapar allows you to select and save independent themes for each printer type under their respective tabs in the Print settings.
How do I add my digital signature to a Thermal receipt?
Currently, the “Authorized Signatory” toggle is only available for Regular Printer layouts; however, you can manually type your name or signature line into the “Terms and Conditions” section for thermal receipts.
Will my customizations be lost if I change my device?
No, your settings are linked to your Vyapar account and company data, but you should ensure you have the correct printer drivers installed on any new hardware.
Ready to Brand Your Billing?
Enable invoice customization today and increase payment speed by 30%.


