Mastering POS (Point of Sale) Billing in Vyapar
Vyapar’s POS (Point of Sale) interface is a dedicated feature designed specifically for the Desktop application. This specialized environment is optimized for high-speed retail operations, allowing shop owners to handle heavy customer footfall using professional hardware like barcode scanners and weighing machines.

Before You Start

Desktop Application: Ensure you are using the Vyapar POS Billing Software, as the dedicated POS interface is not available on mobile.
Hardware Connection: Connect your USB or Bluetooth barcode scanner and thermal printer to your PC.
Weighing Machine Setup: For businesses selling items by weight (like groceries), ensure your weighing machine is connected for dedicated POS billing support.
Complete Guide: From Setup to POS Billing
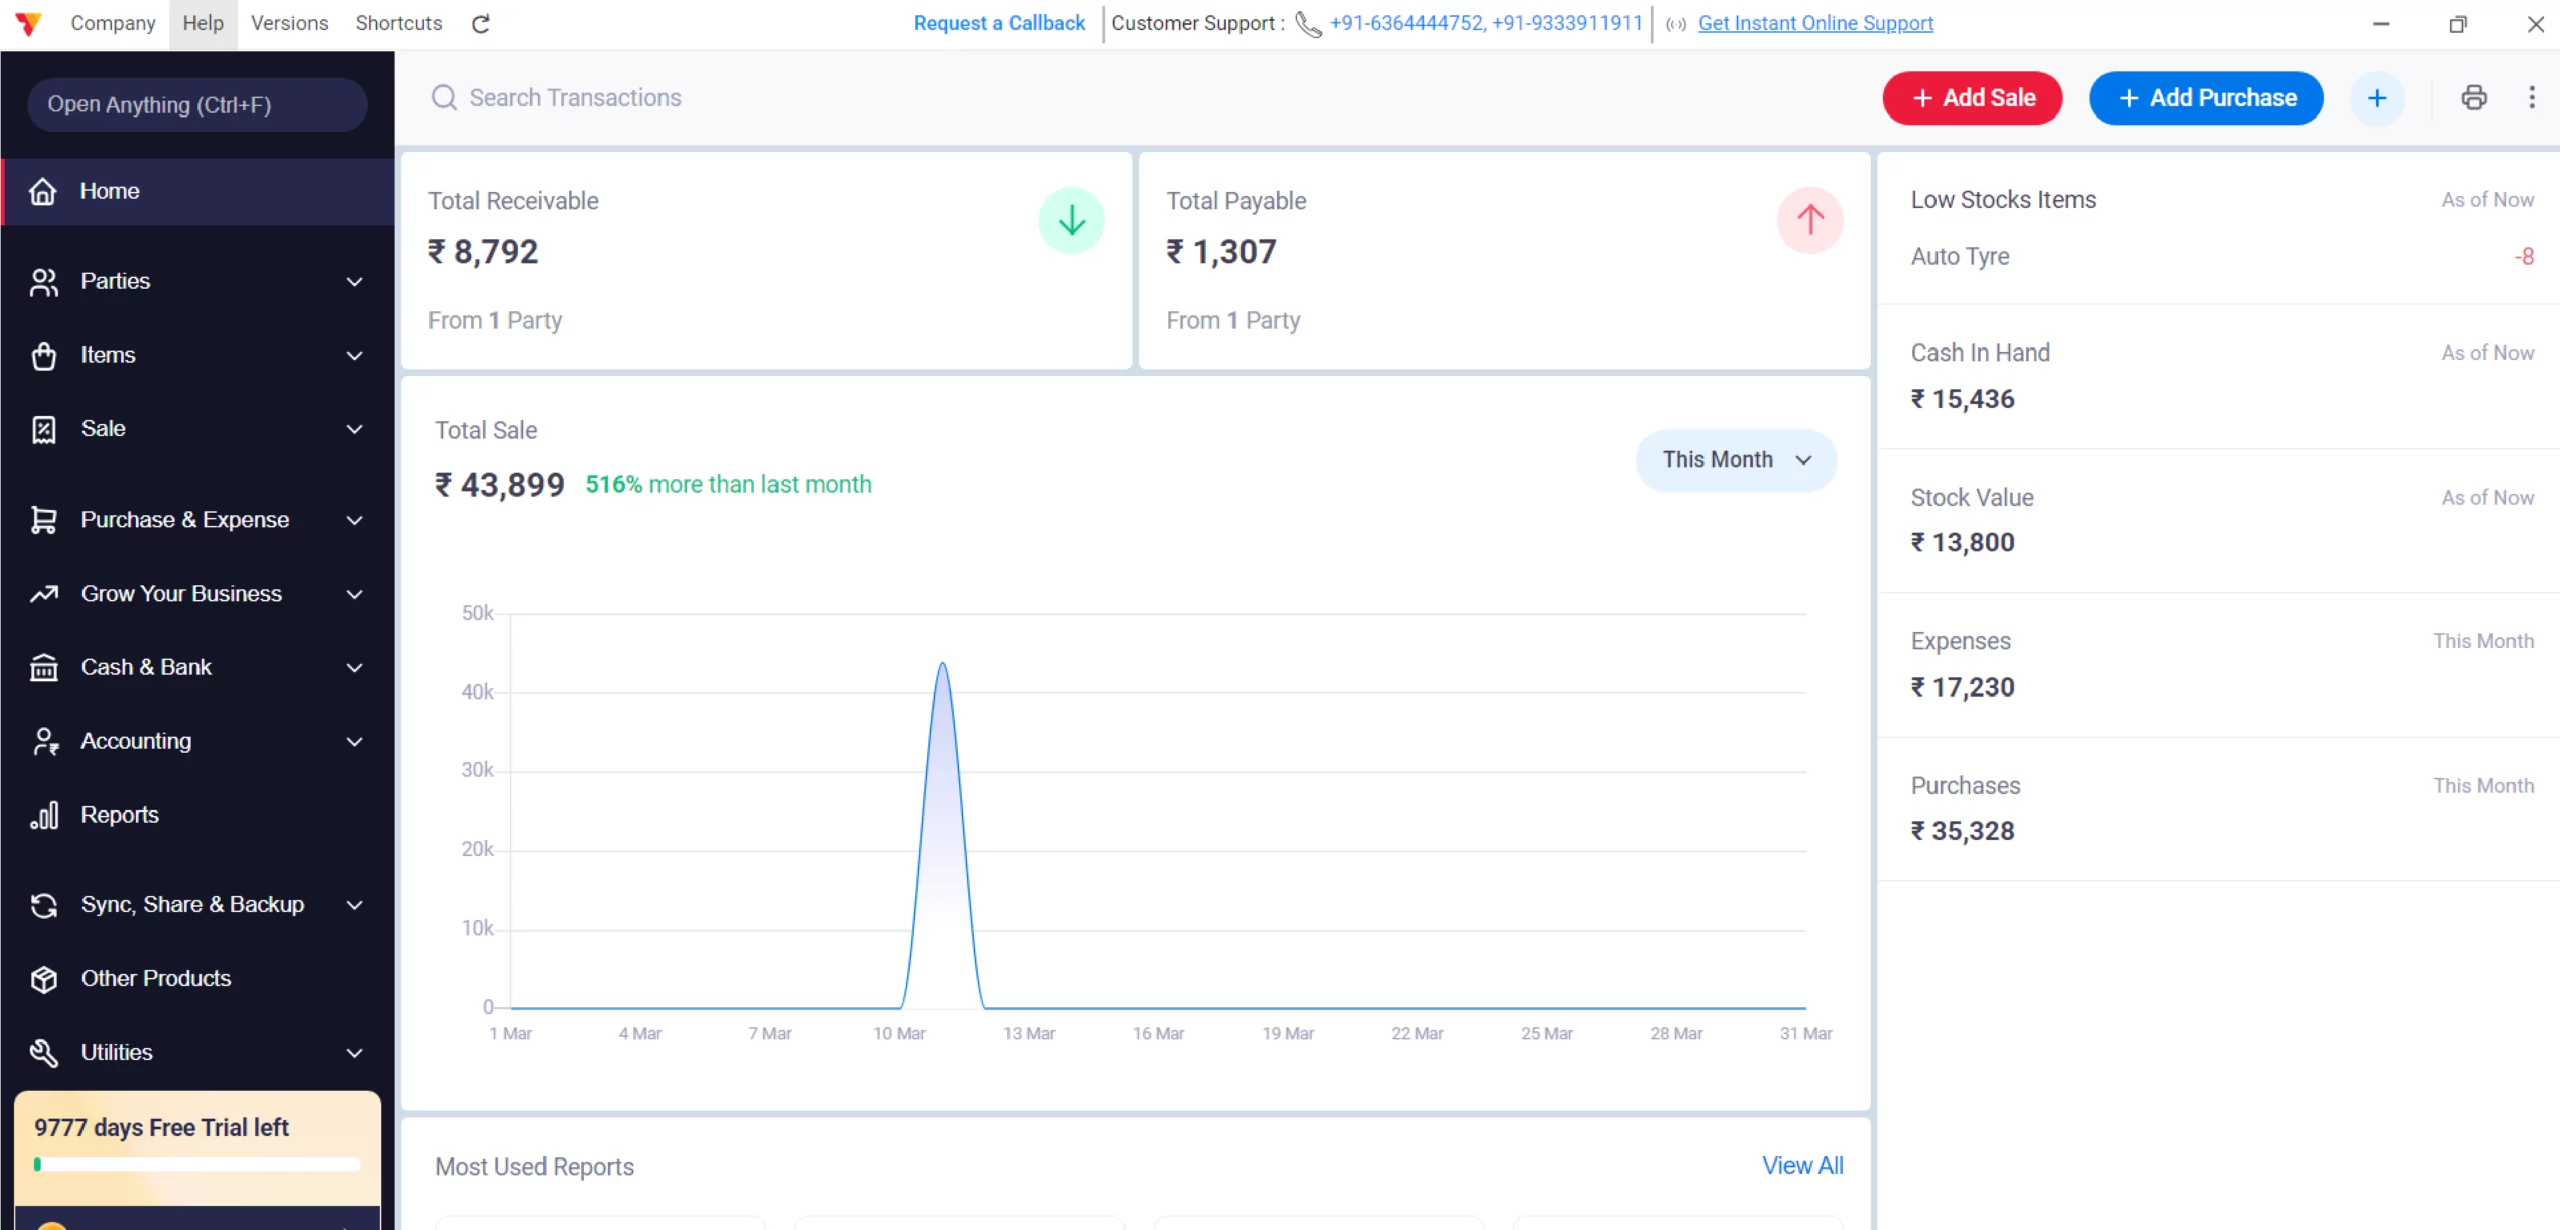
Open Vyapar App
Launch the application on your Desktop device.
01
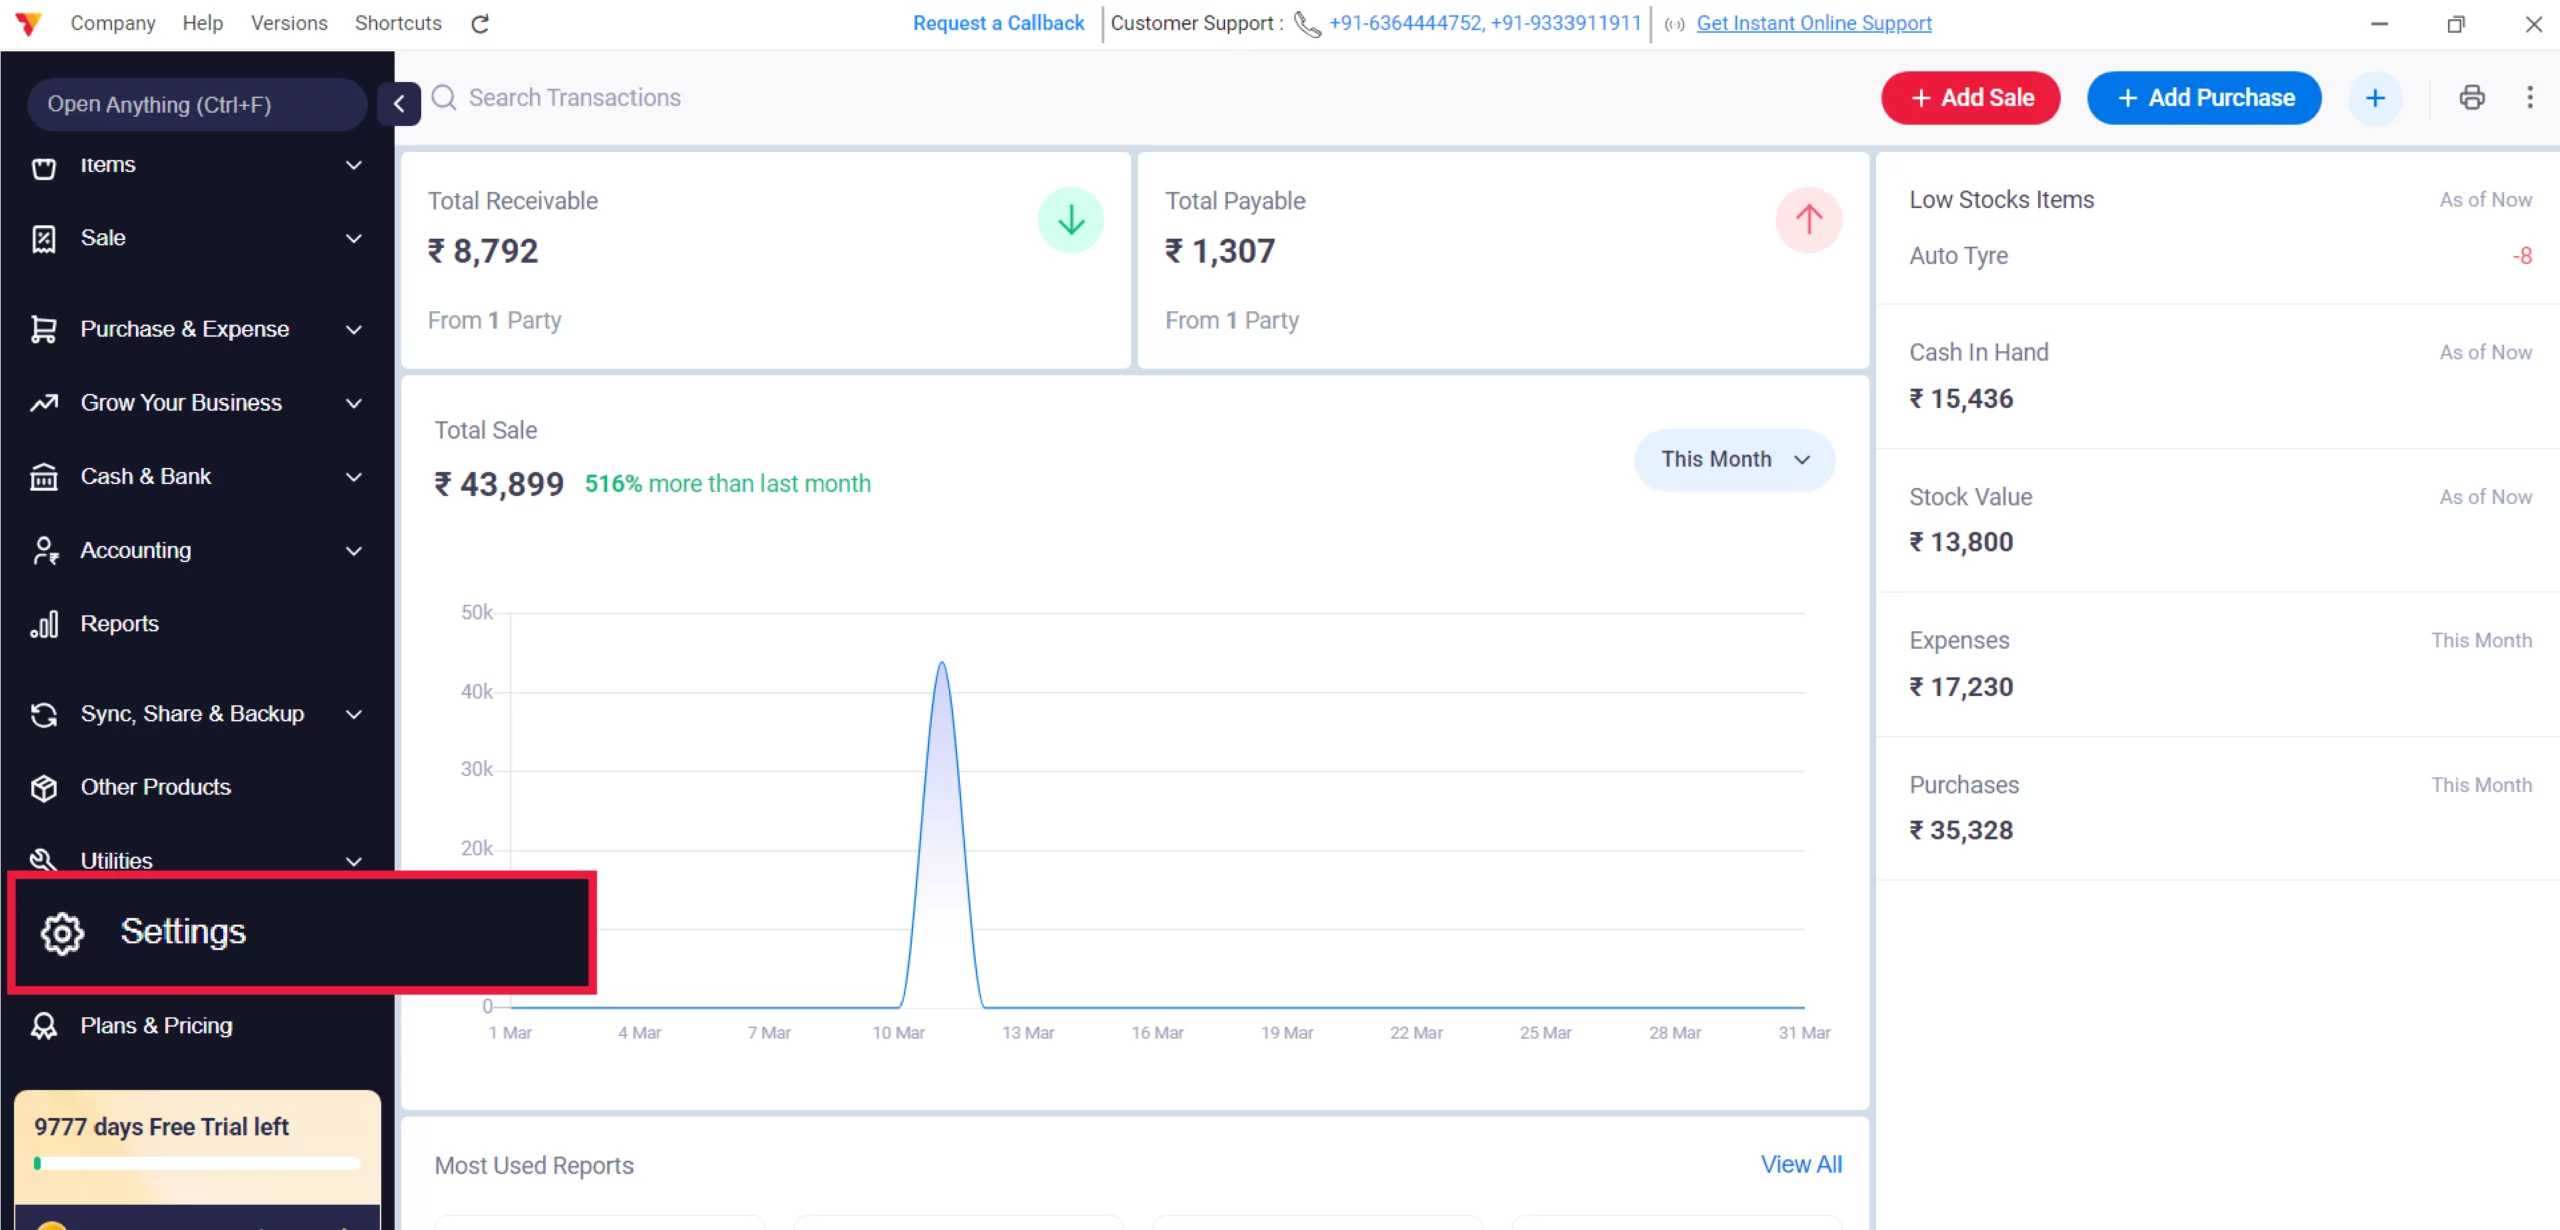
Access Settings
Click the Settings gear icon in the left-hand navigation menu.
02
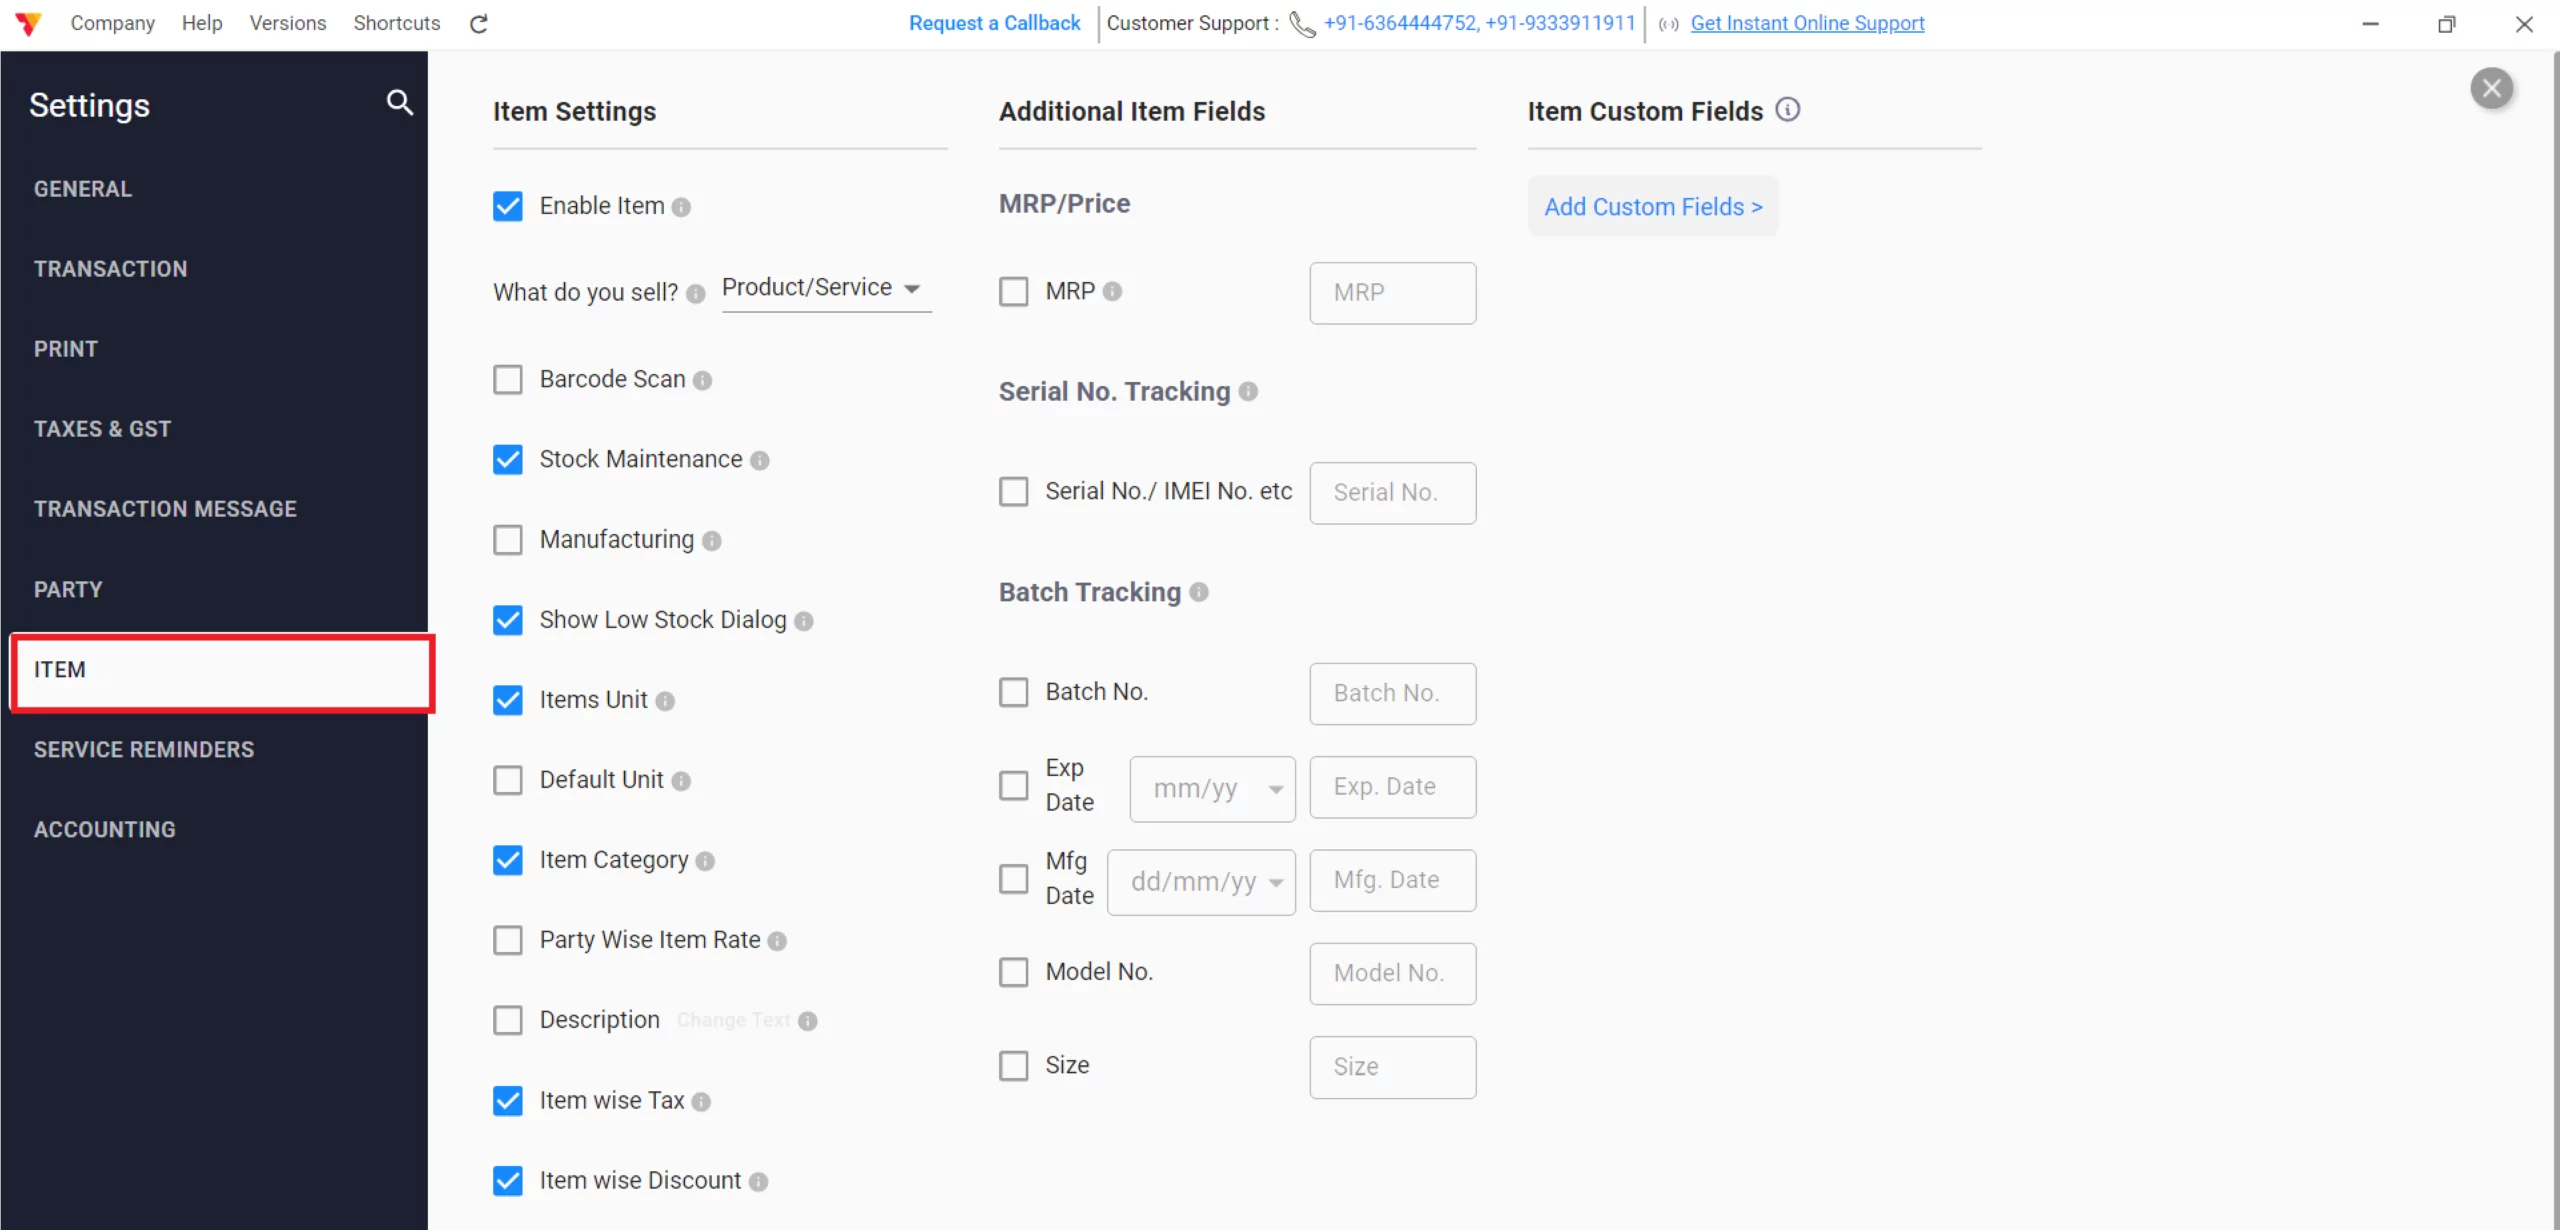
Access Item Settings
Select the Item tab from the settings categories.
03
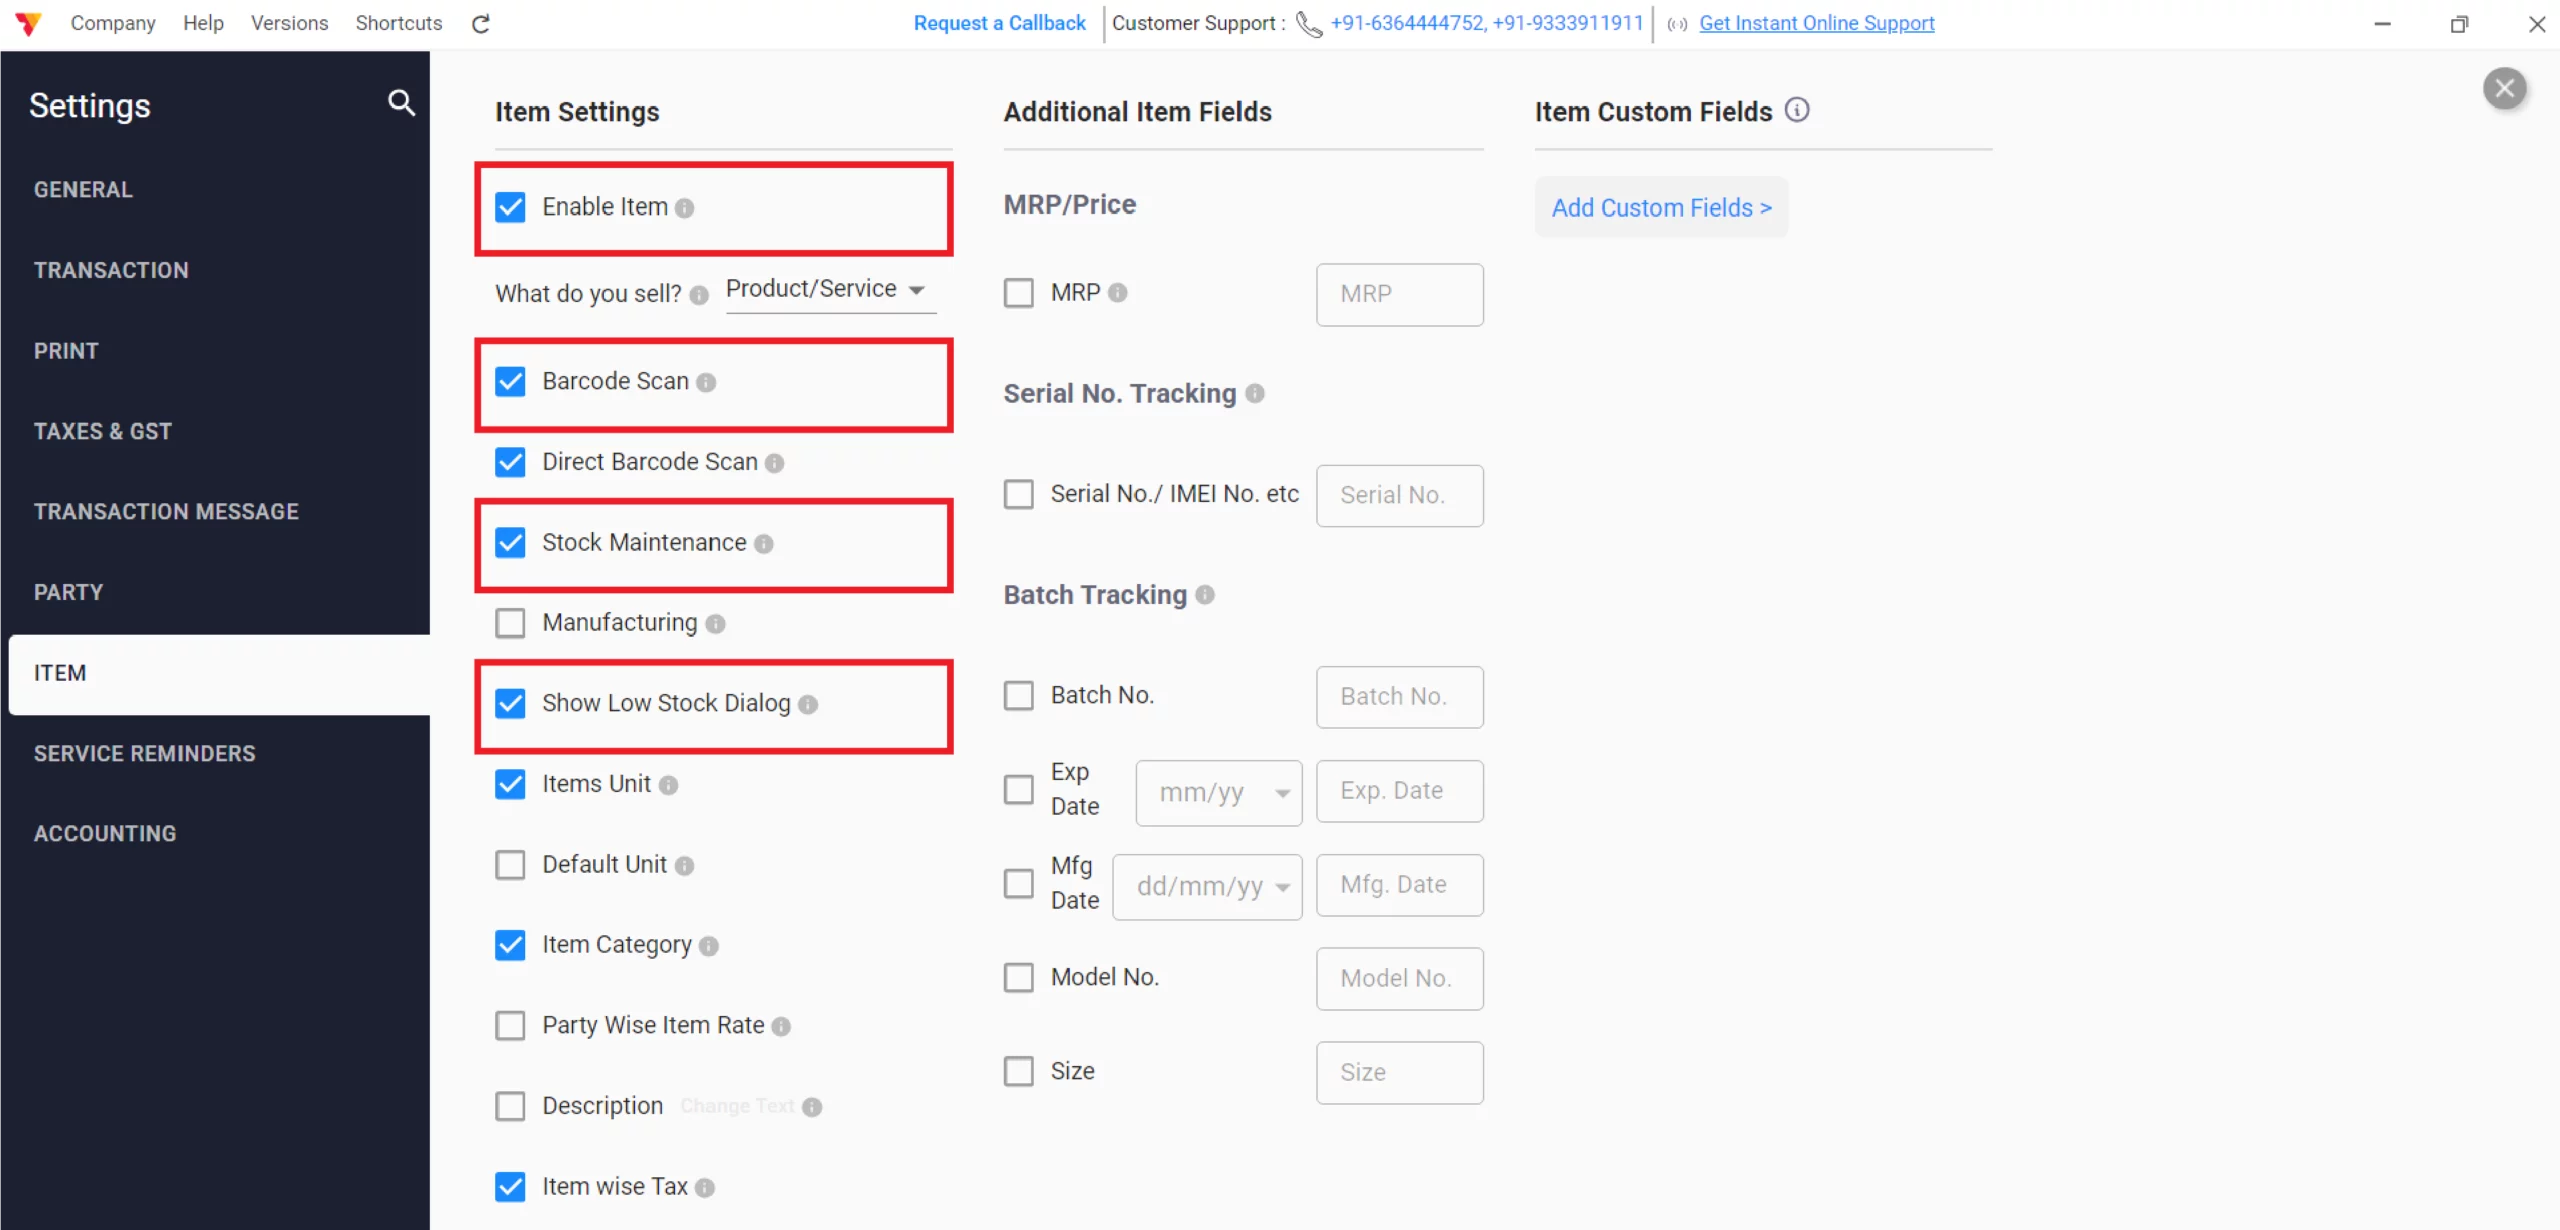
Configure Core Item Features
Enable the following to prepare your inventory:
Enable Item: Activate the item module for your business.
Barcode Scan: Enable both “Barcode Scan” and “Direct Barcode Scan” for instant product identification.
Stock Maintenance: Turn this ON to ensure POS sales automatically update your inventory levels.
Show Low Stock: Enable this dialog to receive alerts when items reach critical levels during billing.
04
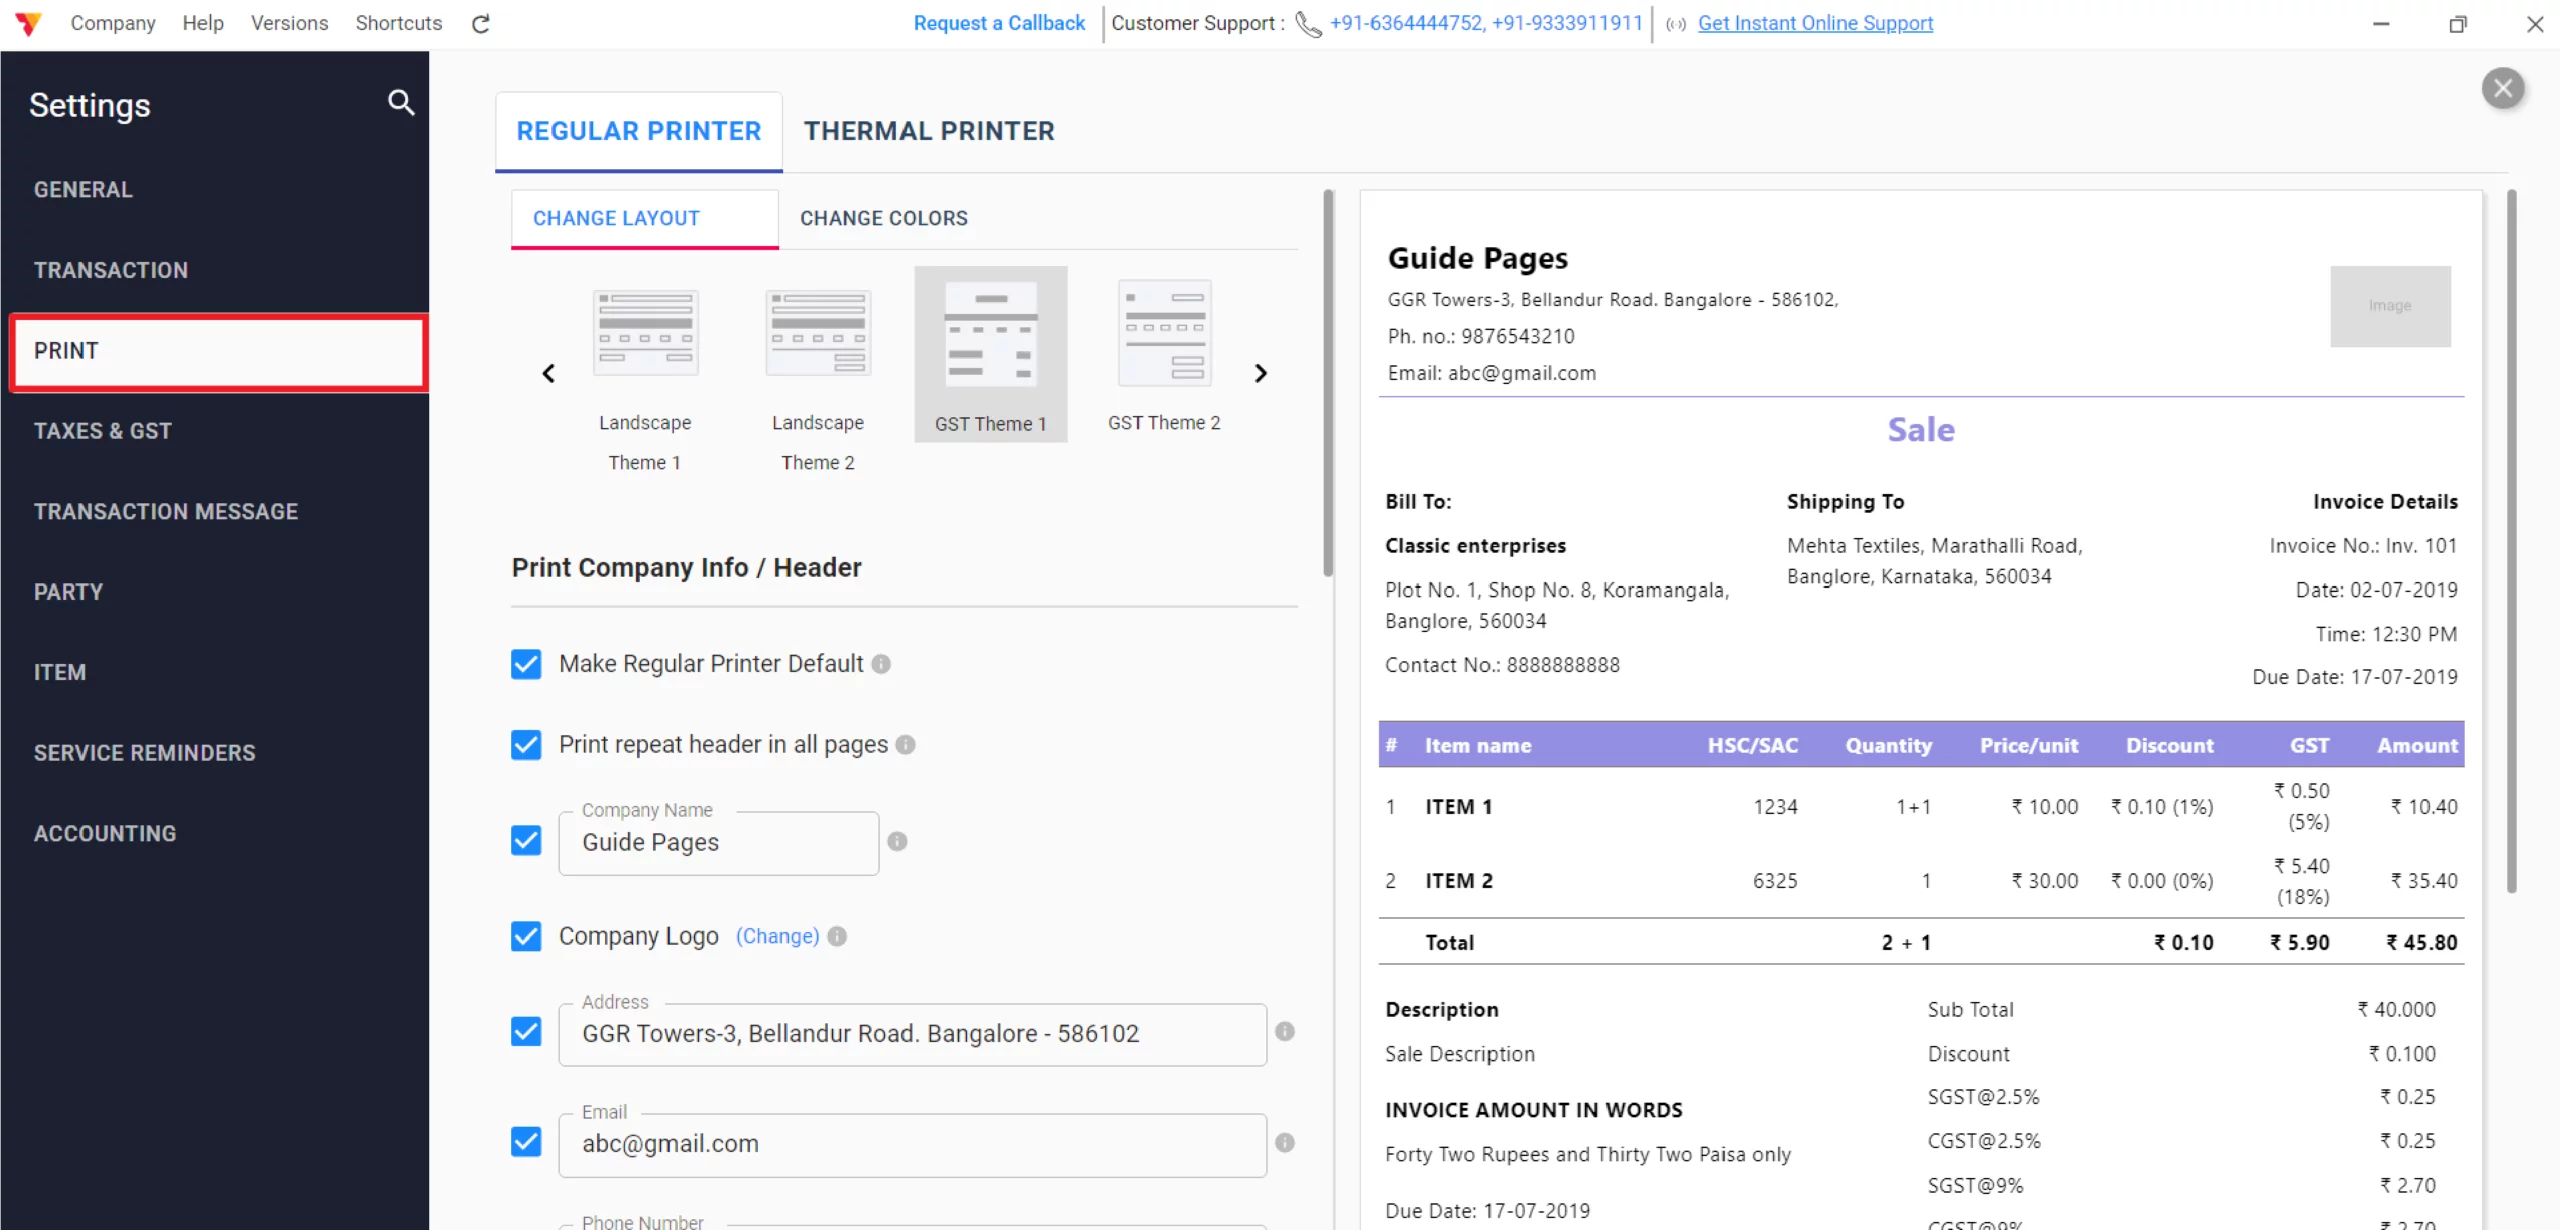
Printer Settings
Navigate to Settings and click on the print option
05
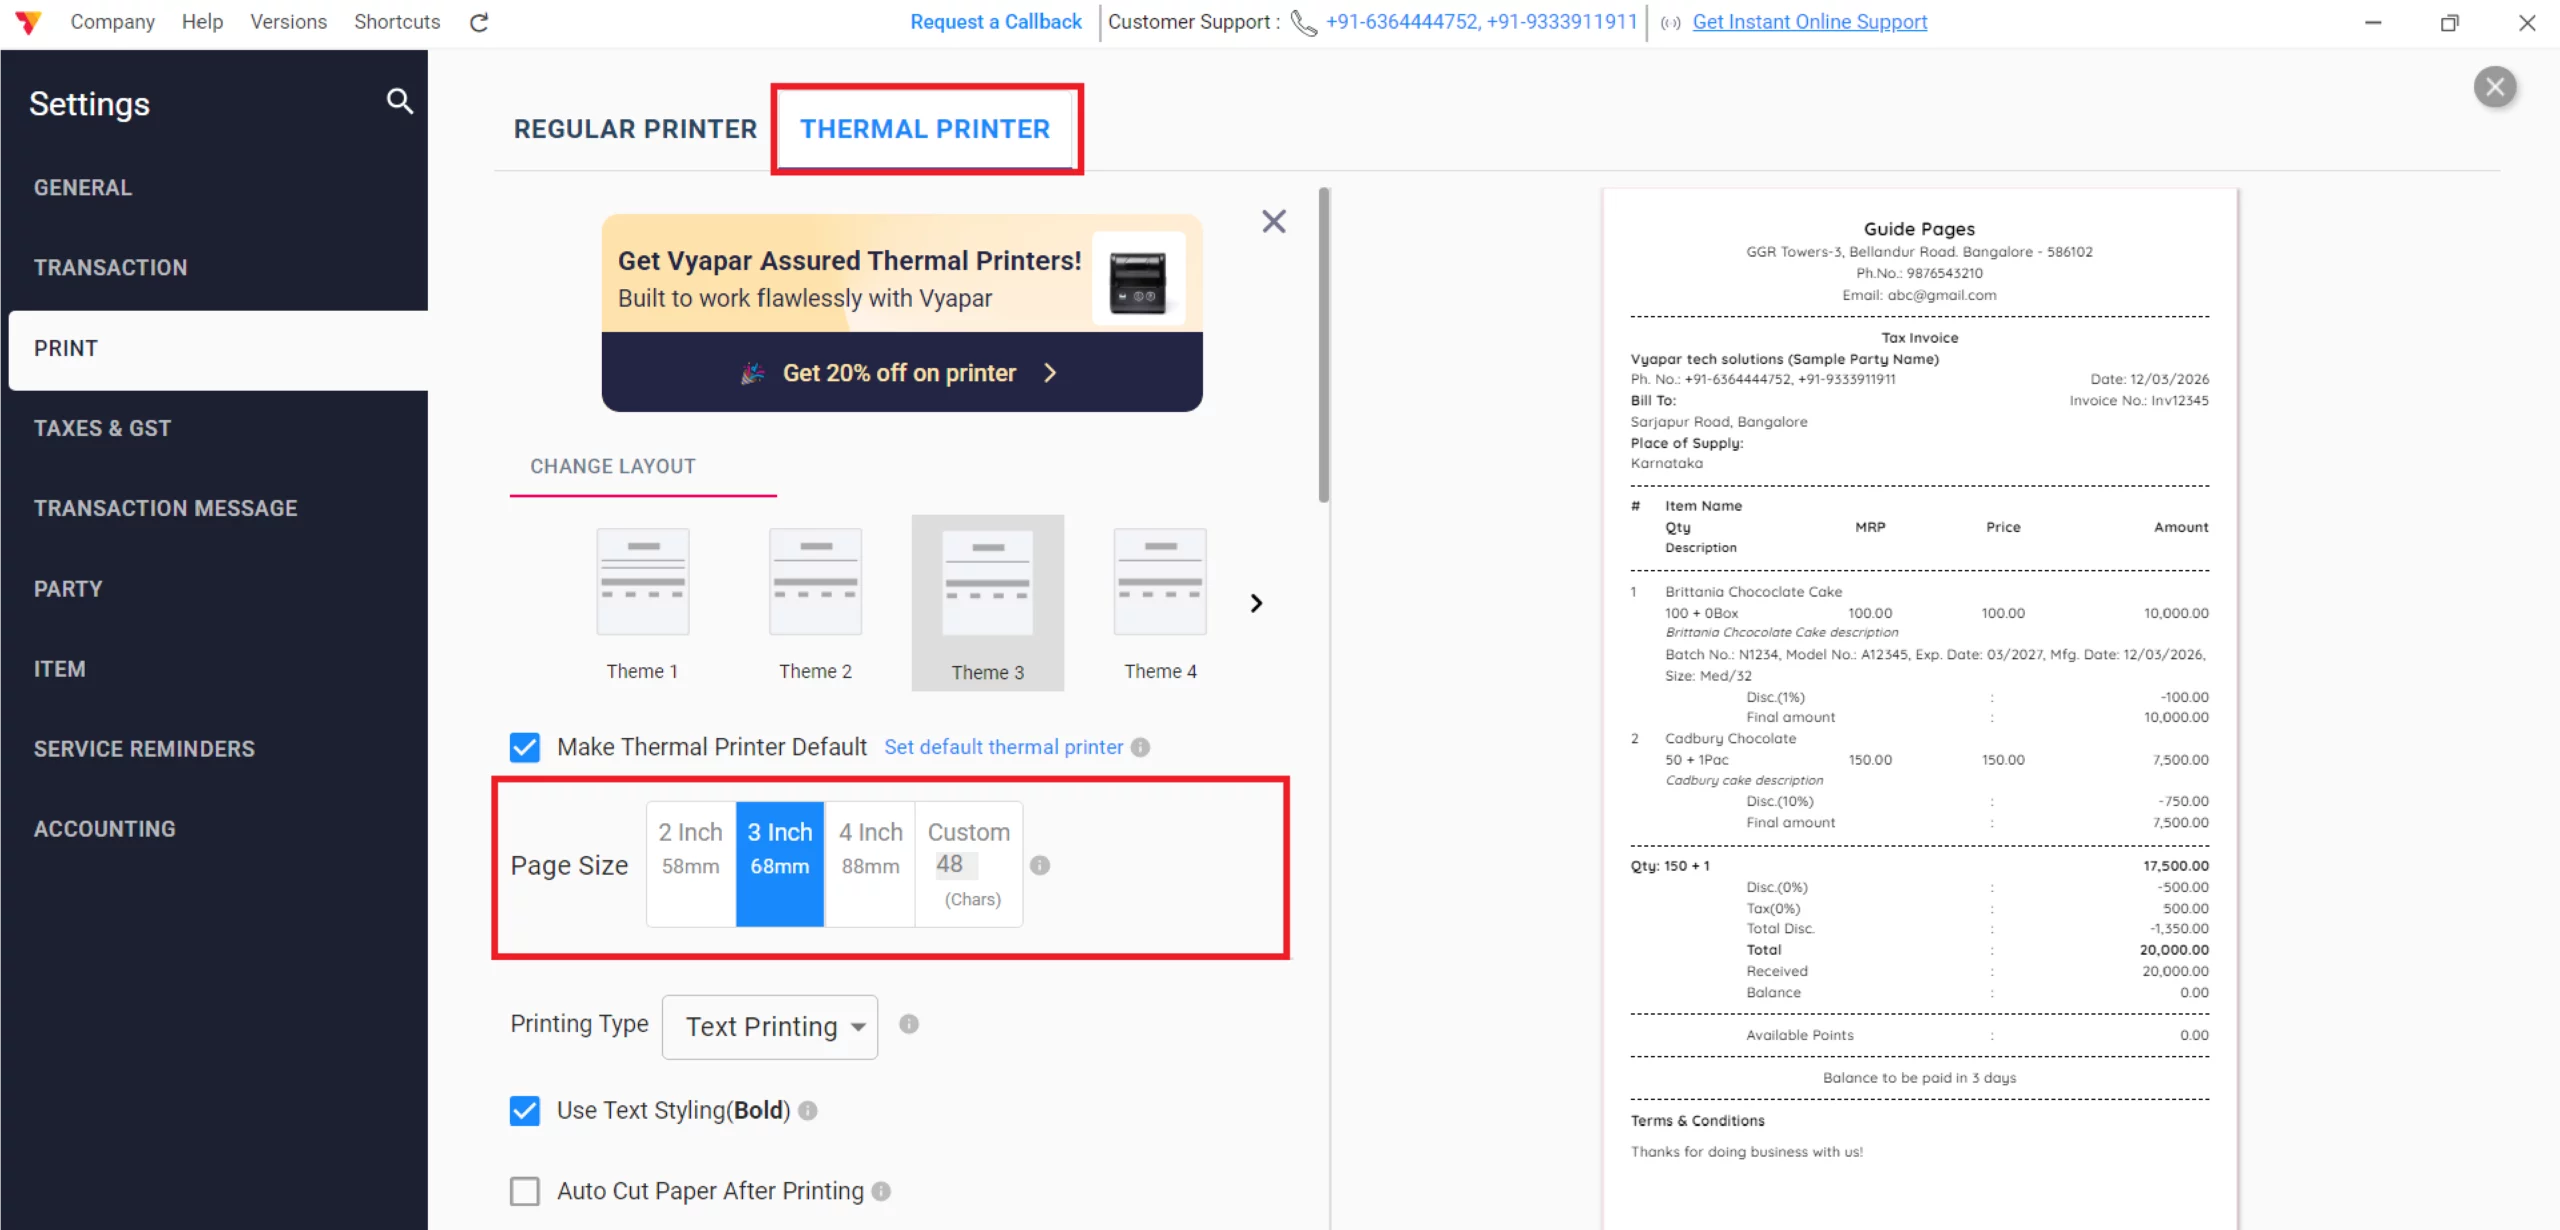
Configure Thermal Printer
Choose Thermal as your default printer type and select your preferred paper size (e.g., 2-inch, 3-inch or 4-inch) to match your hardware, & Close it.
06

Navigate to Cash & Bank
Click the Cash & Bank section in the main menu.
07
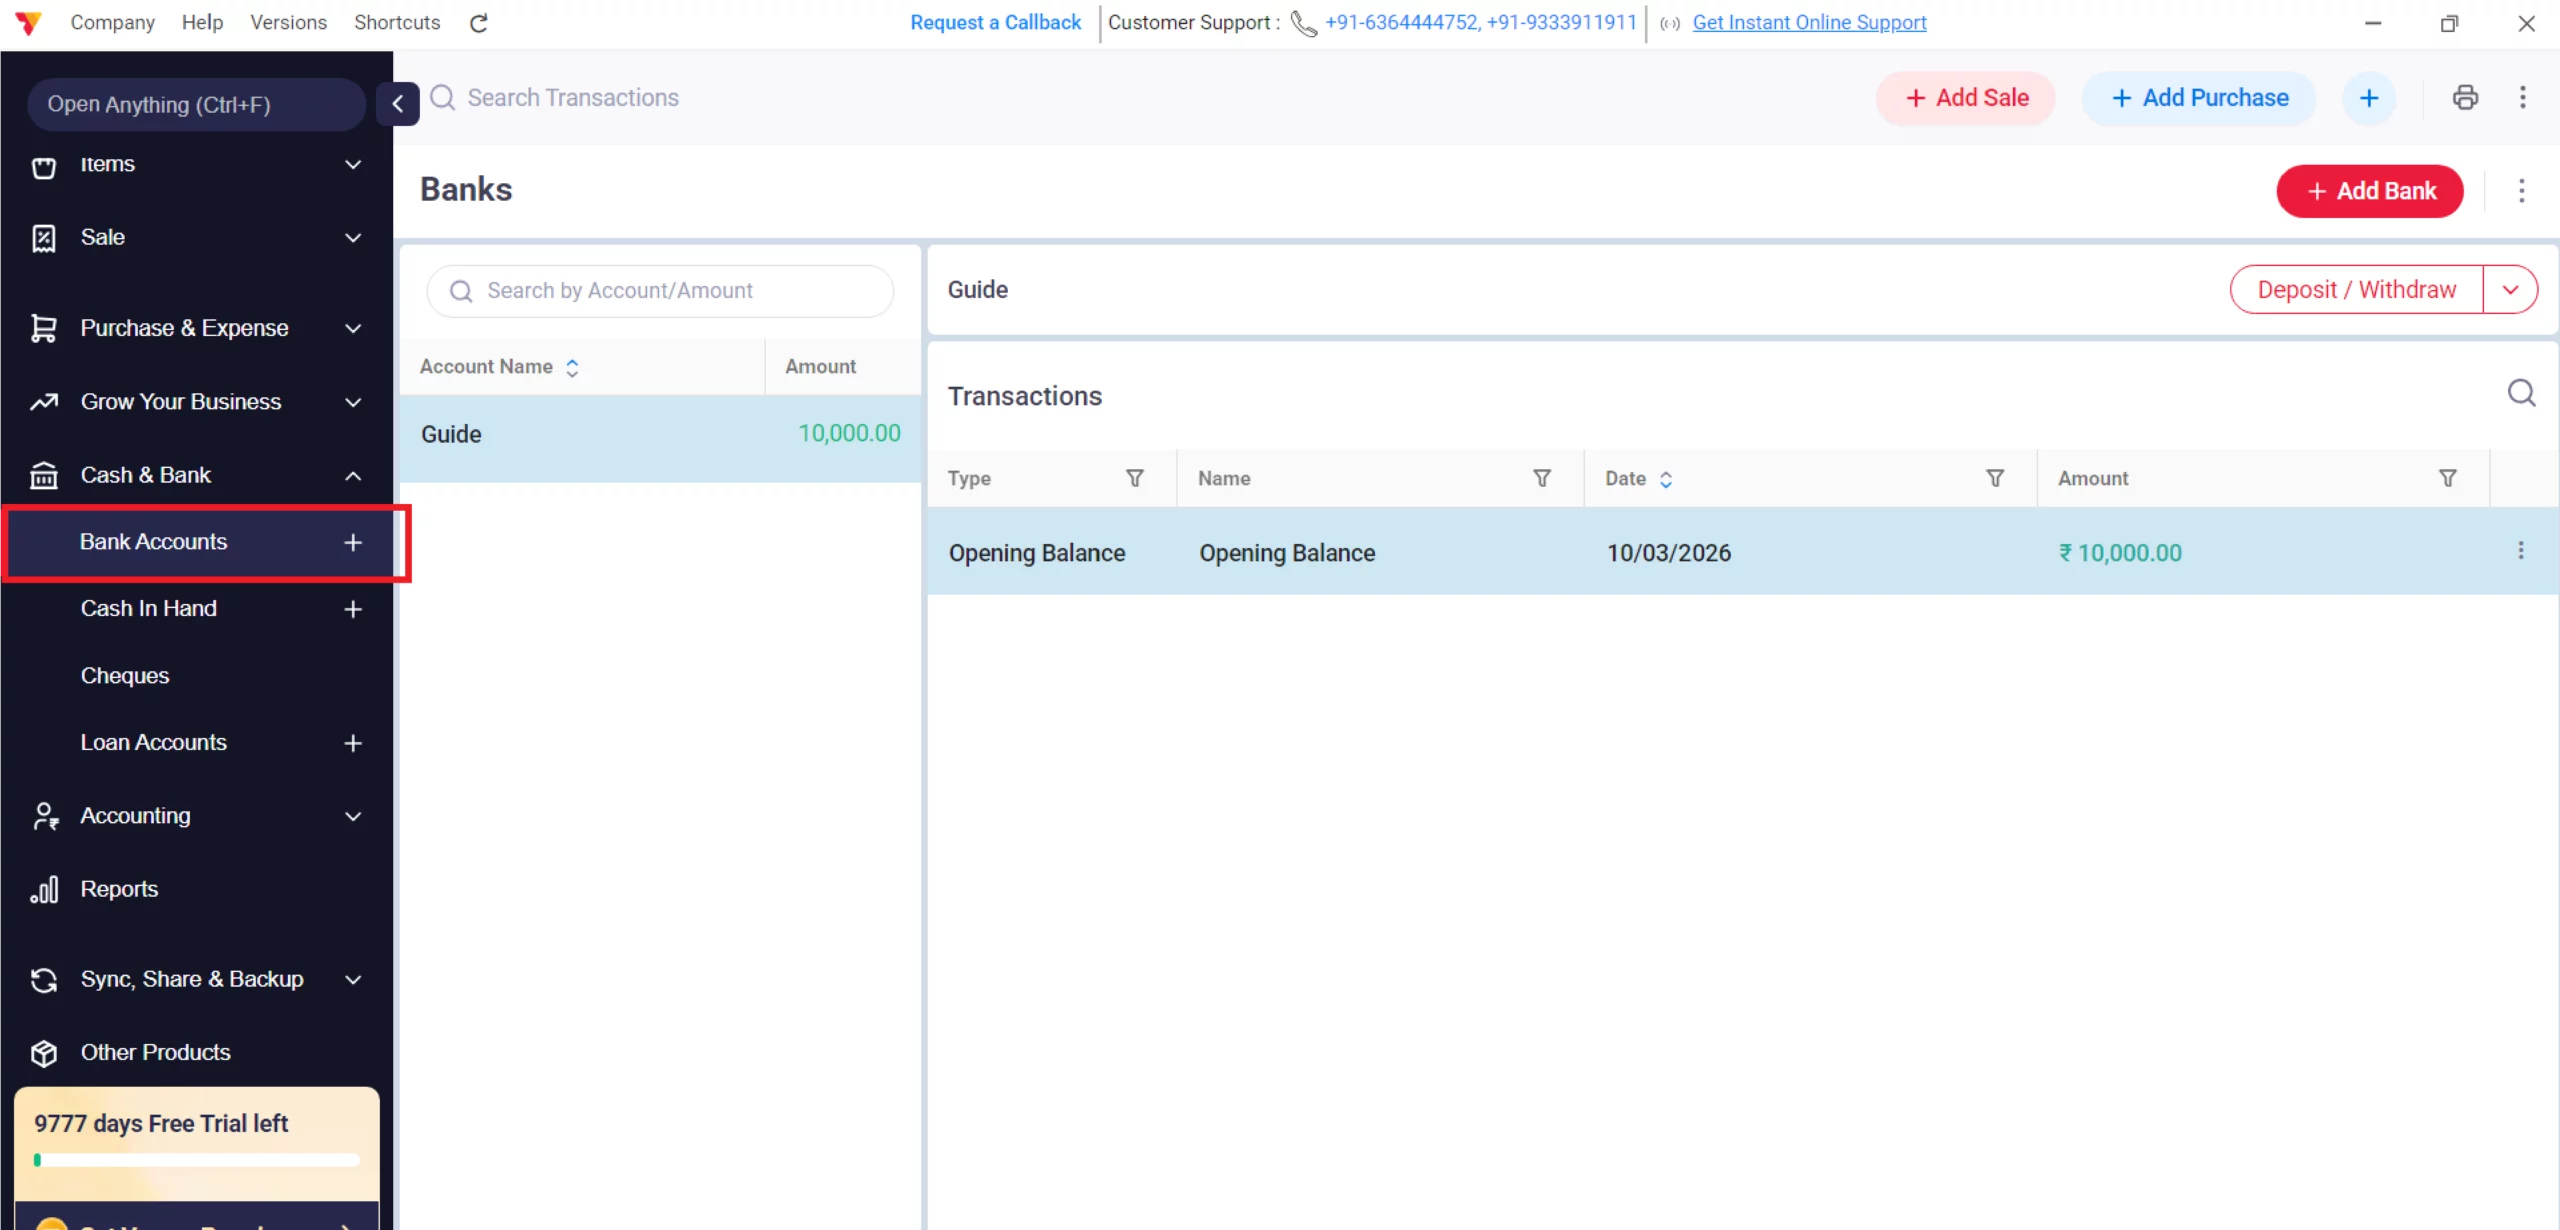
Bank Accounts
Select the Bank Accounts option.
08
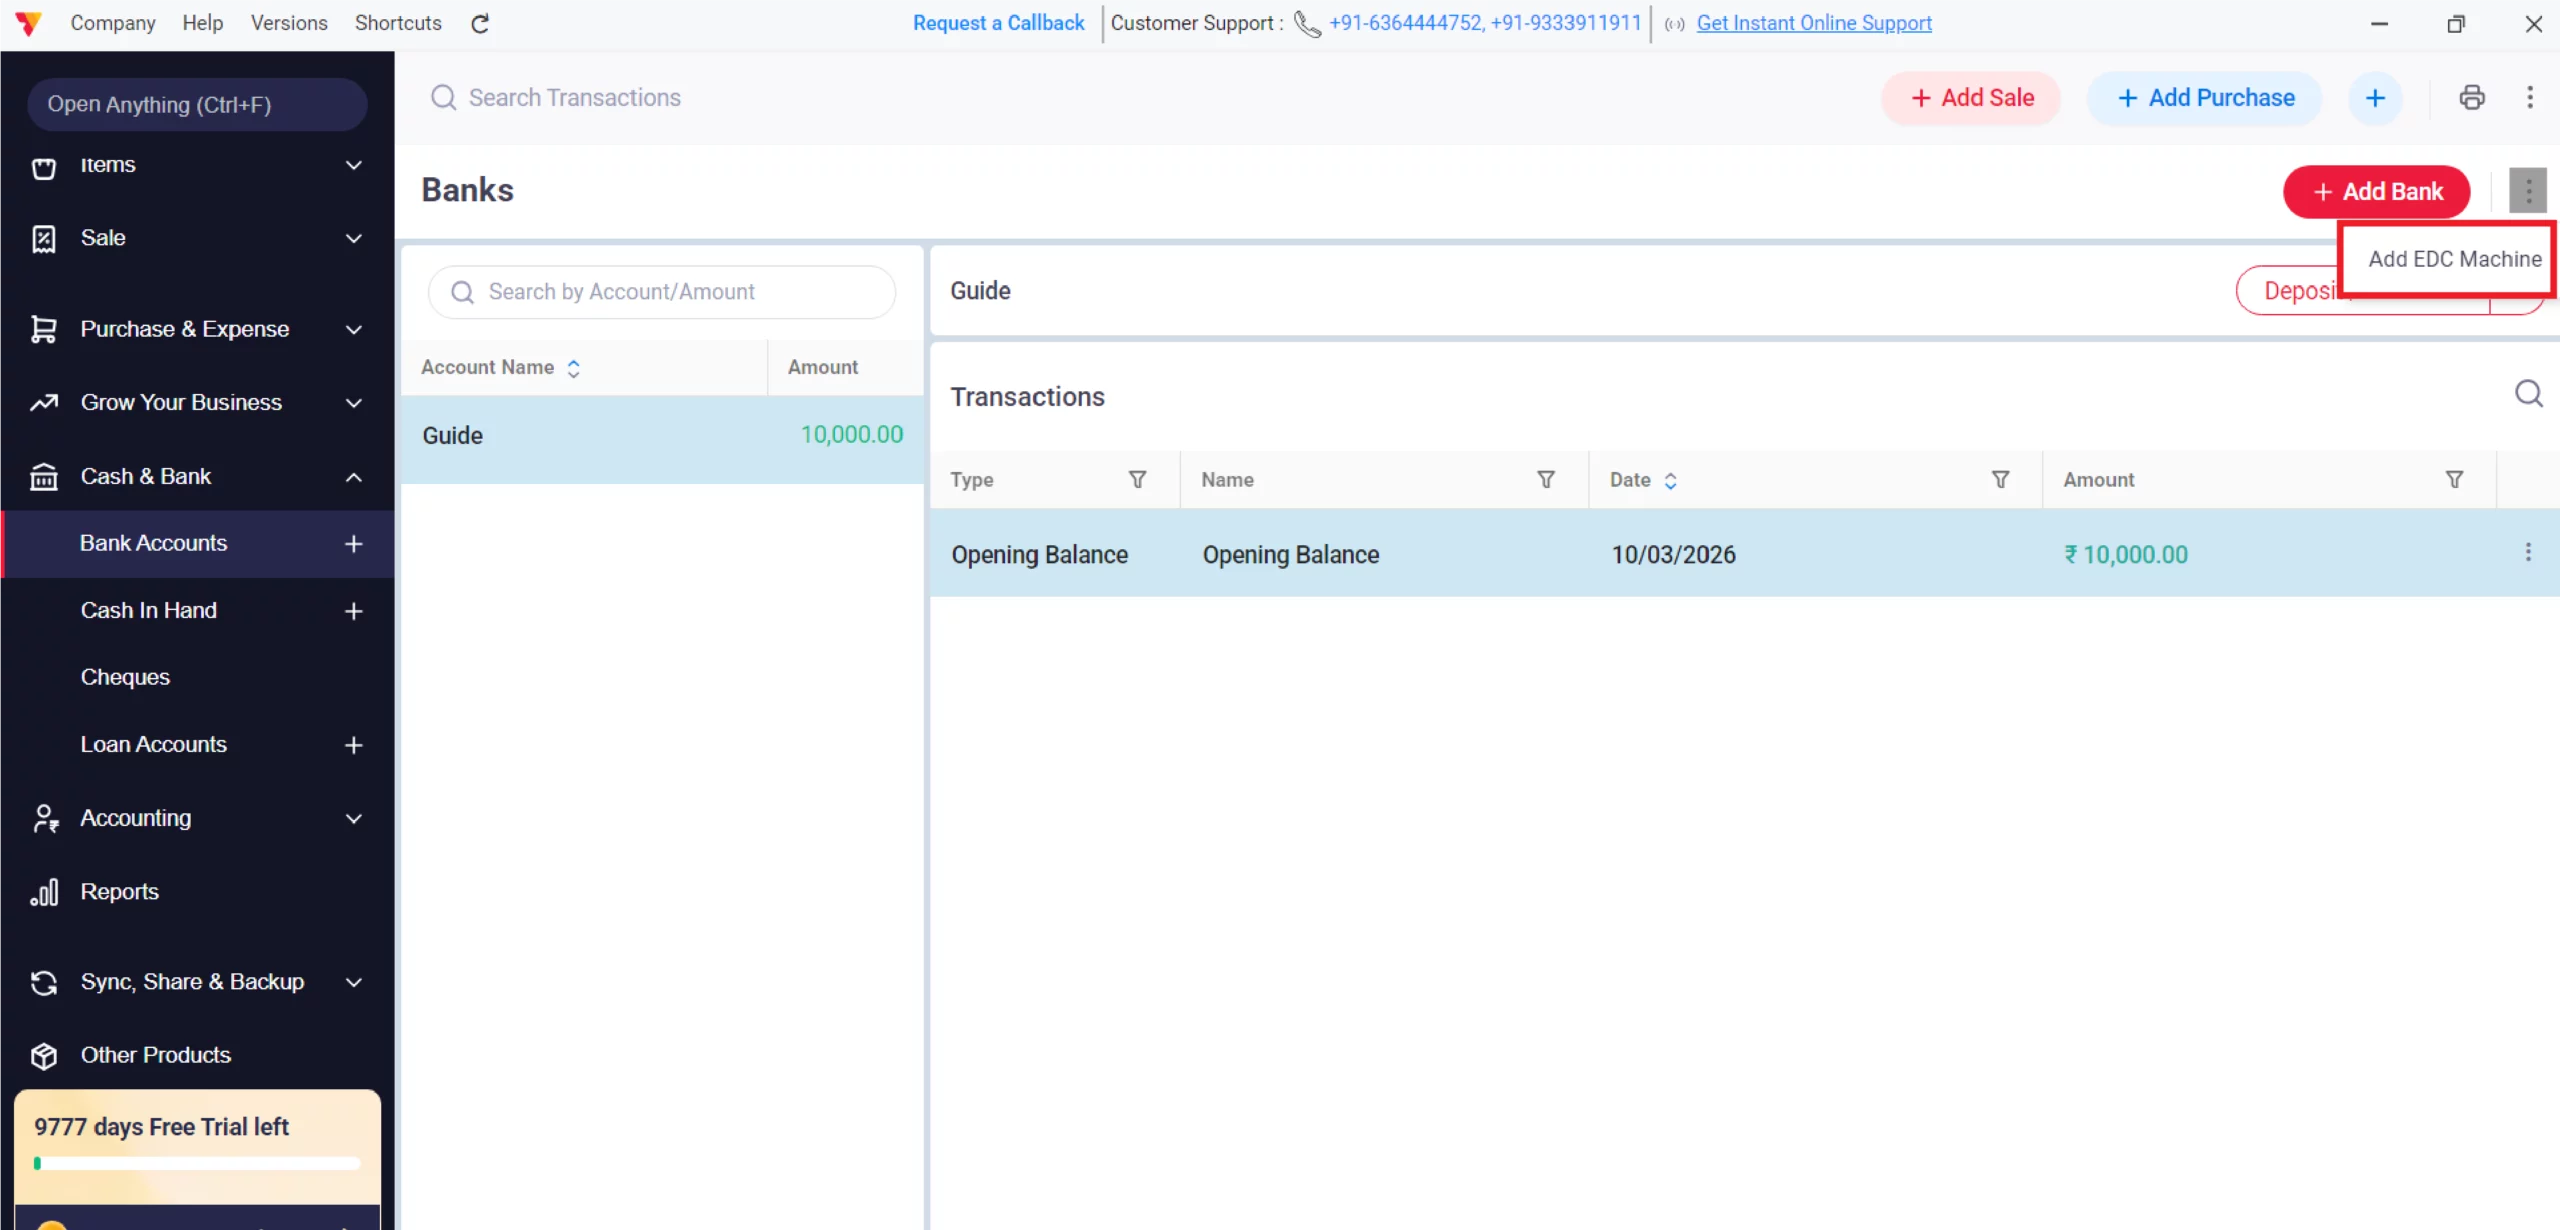
Add EDC Machine
Click the “Add EDC Machine” button at the top right of the screen.
09
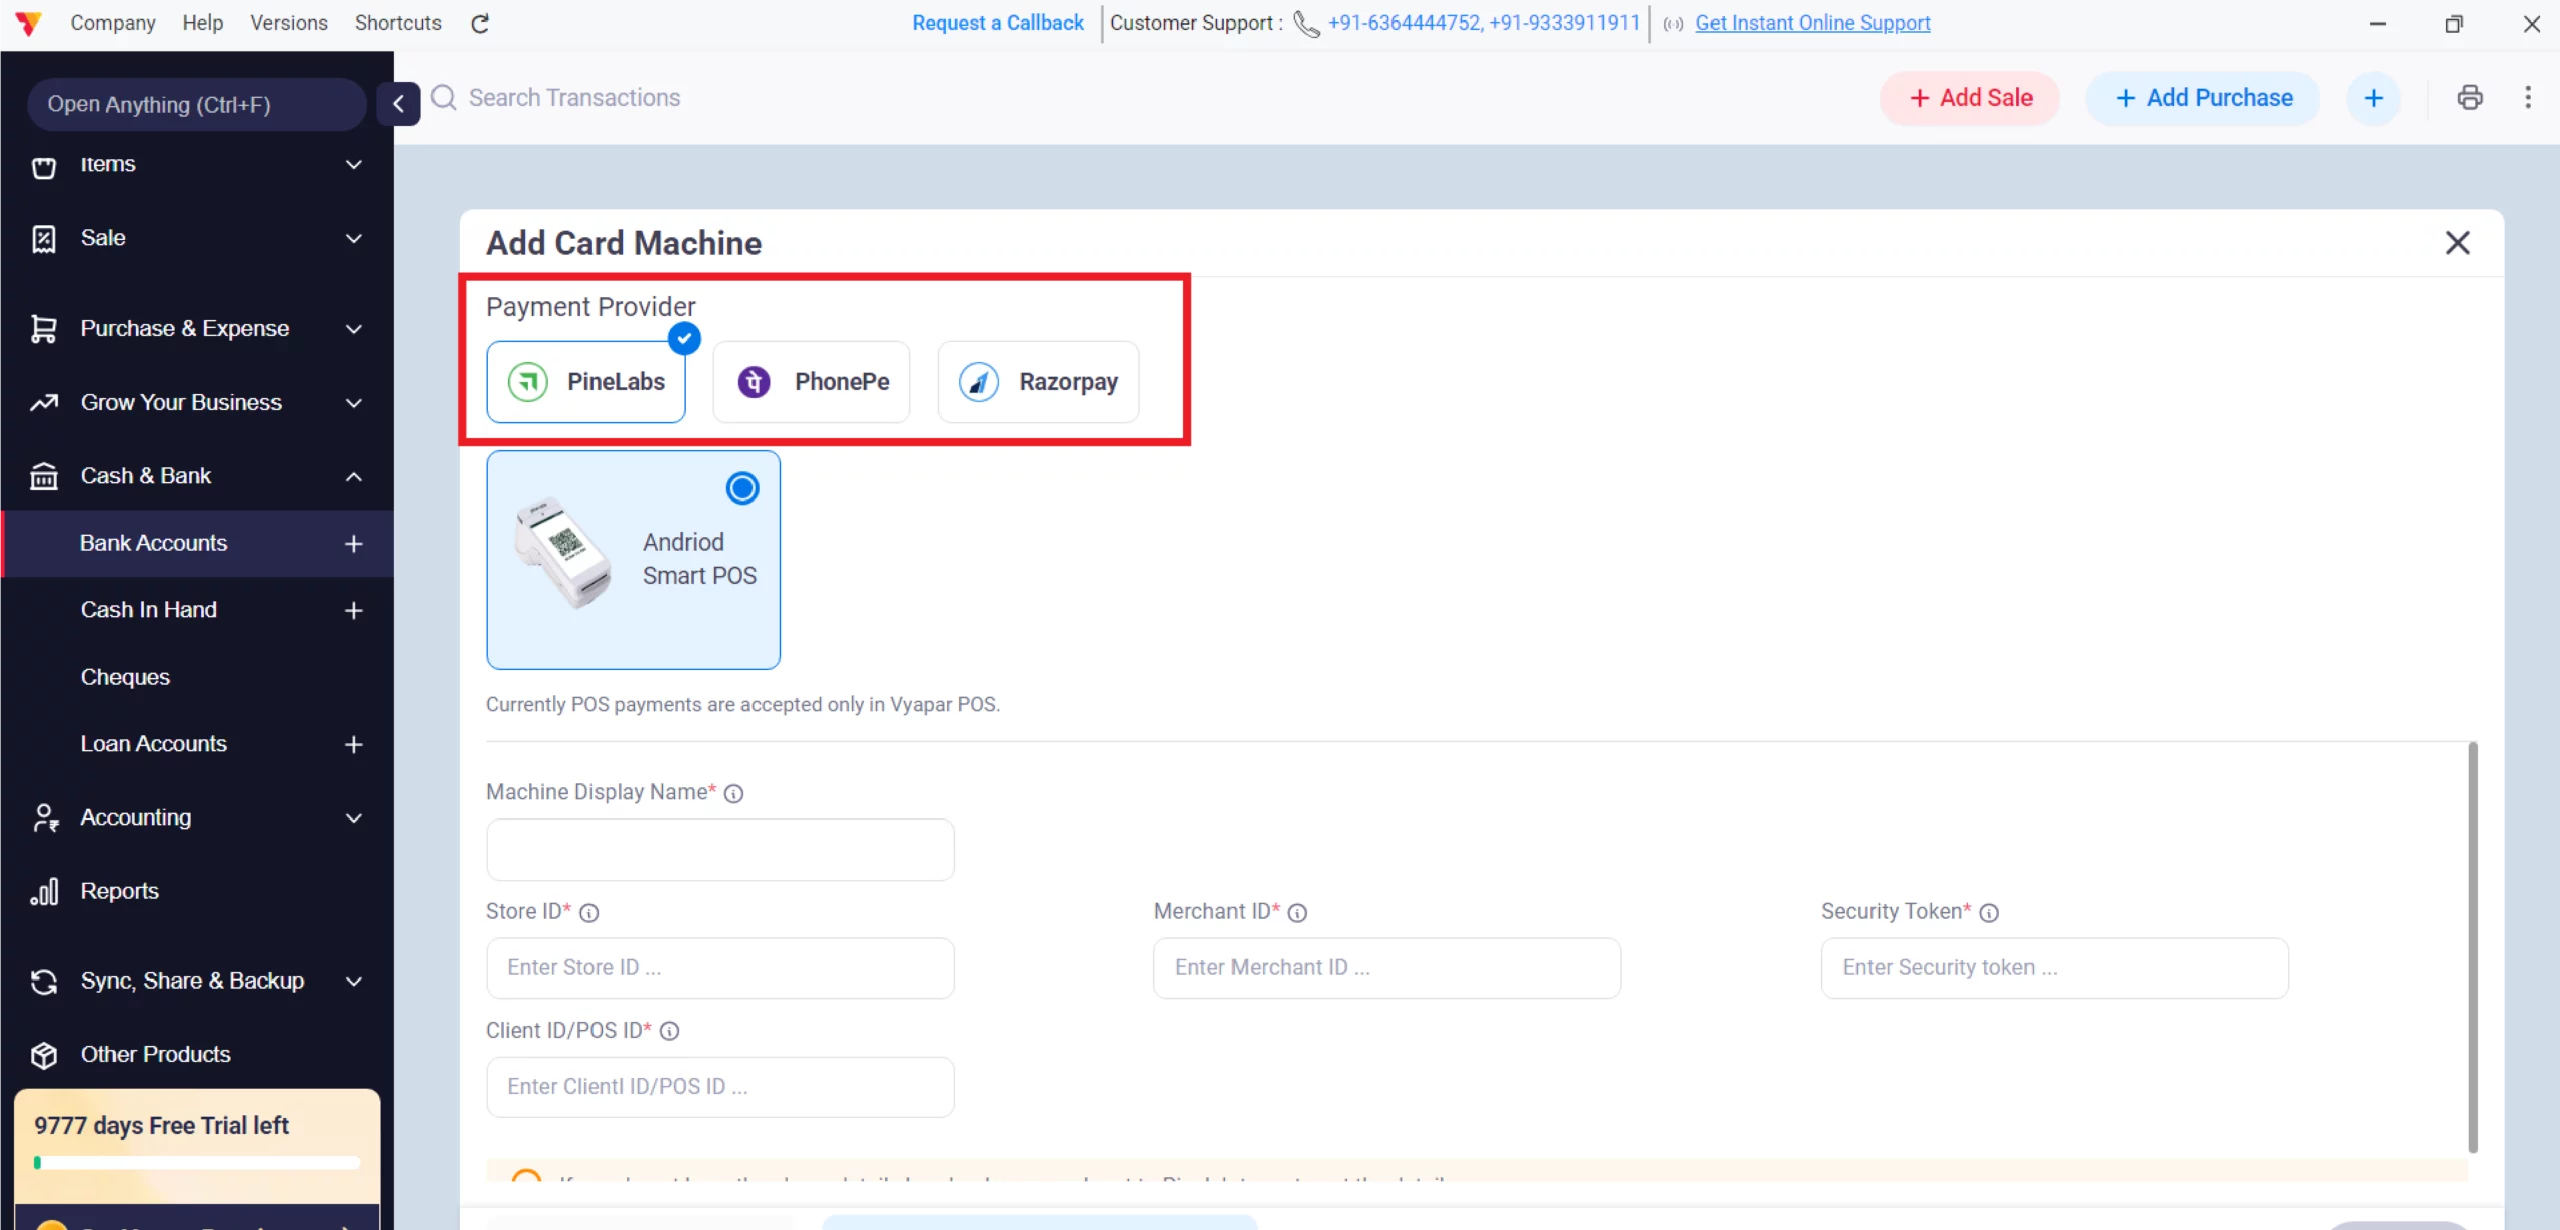
Select a Payment Provider
Choose your integrated card payment partner, such as PineLabs, PhonePe, or Razorpay.
10

Enter Machine Credentials
Provide the Store ID, Merchant ID, and Security Token provided by your payment partner.
11
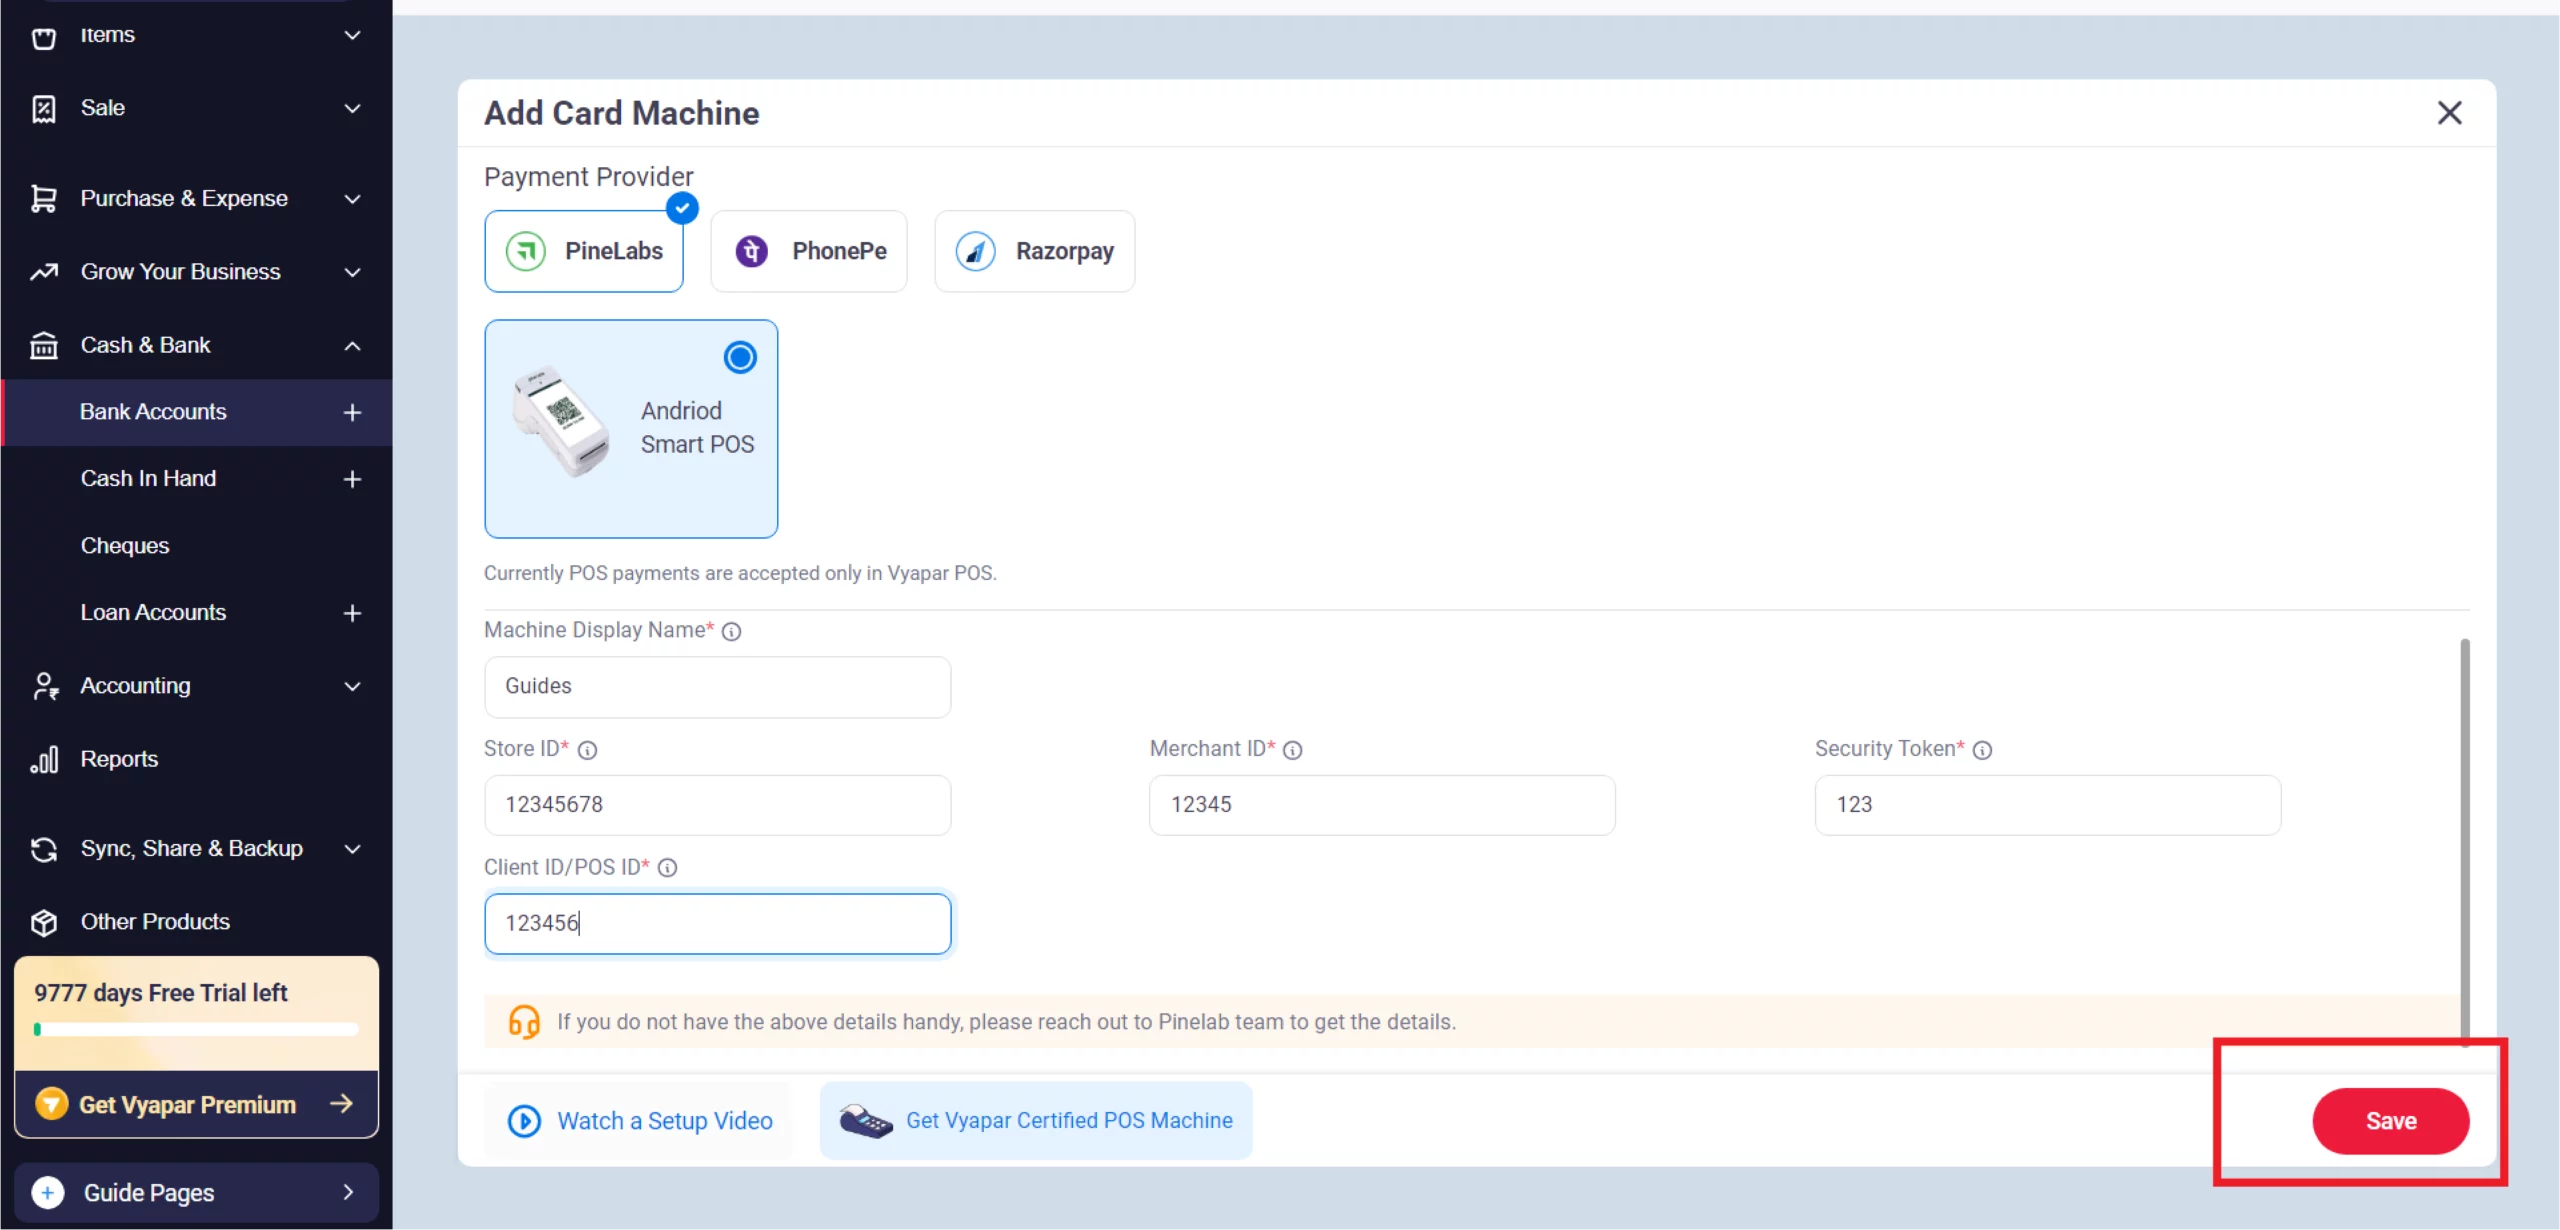
Finalize the Connection
Enter the Client ID/POS ID and click Save to link the hardware.
12
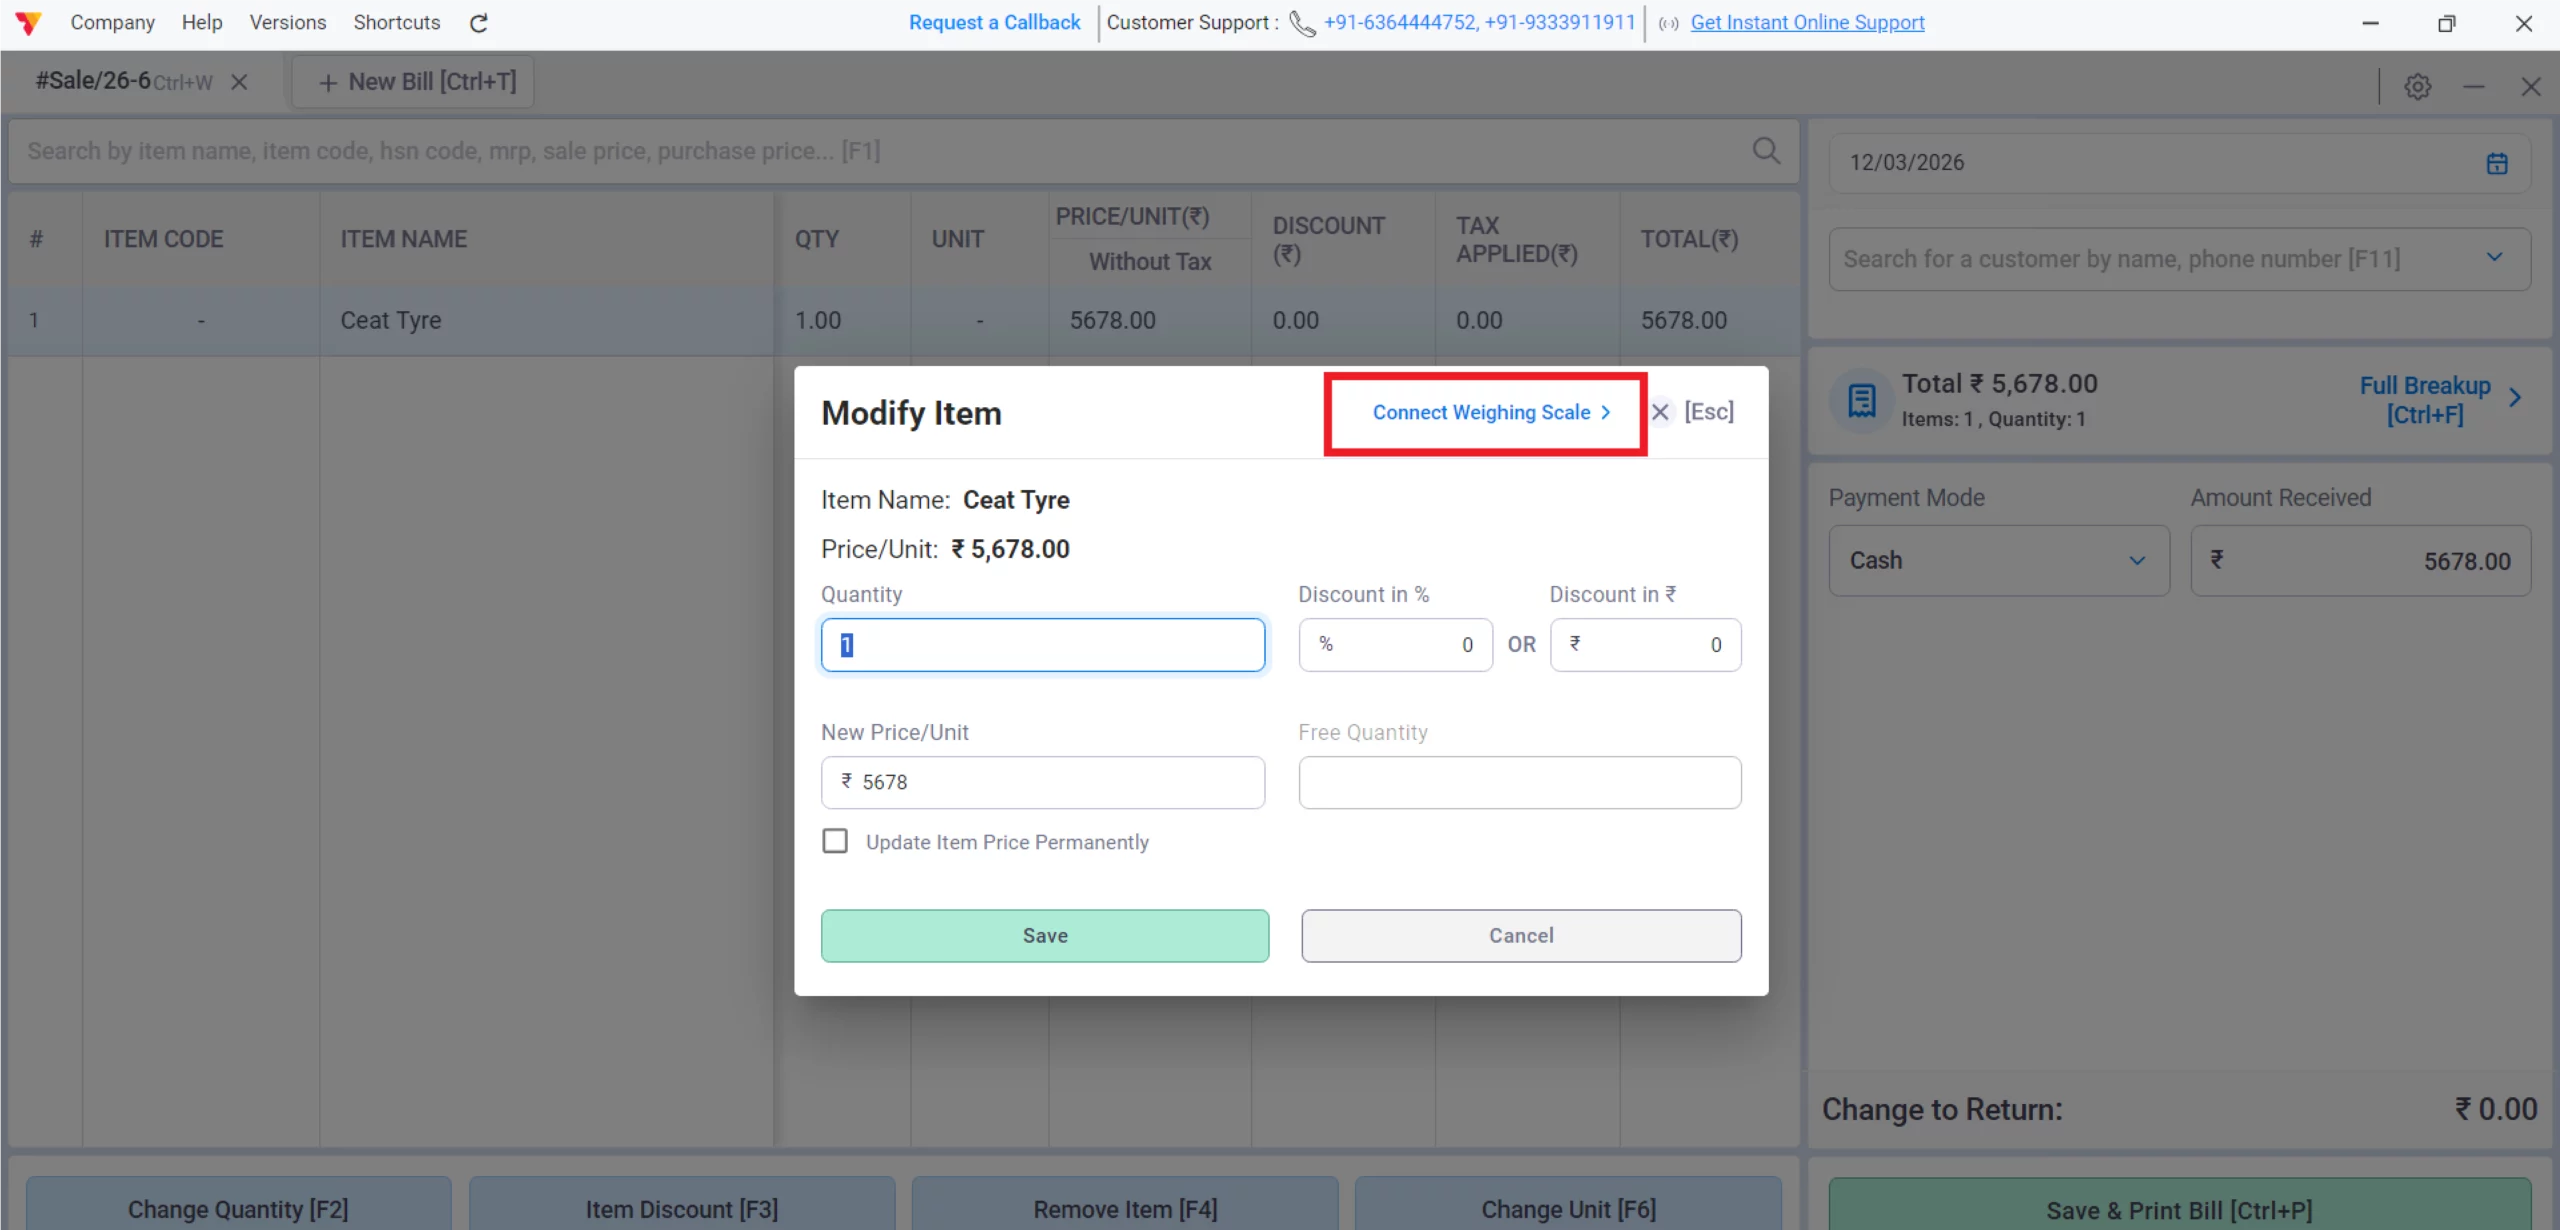
Connect Weighing Machine
Ensure your weighing machine is connected to the PC via USB or Bluetooth; Vyapar will auto-detect the weight for loose items during billing. ( This will be directly connected to the device via a USB or Bluetooth)
13
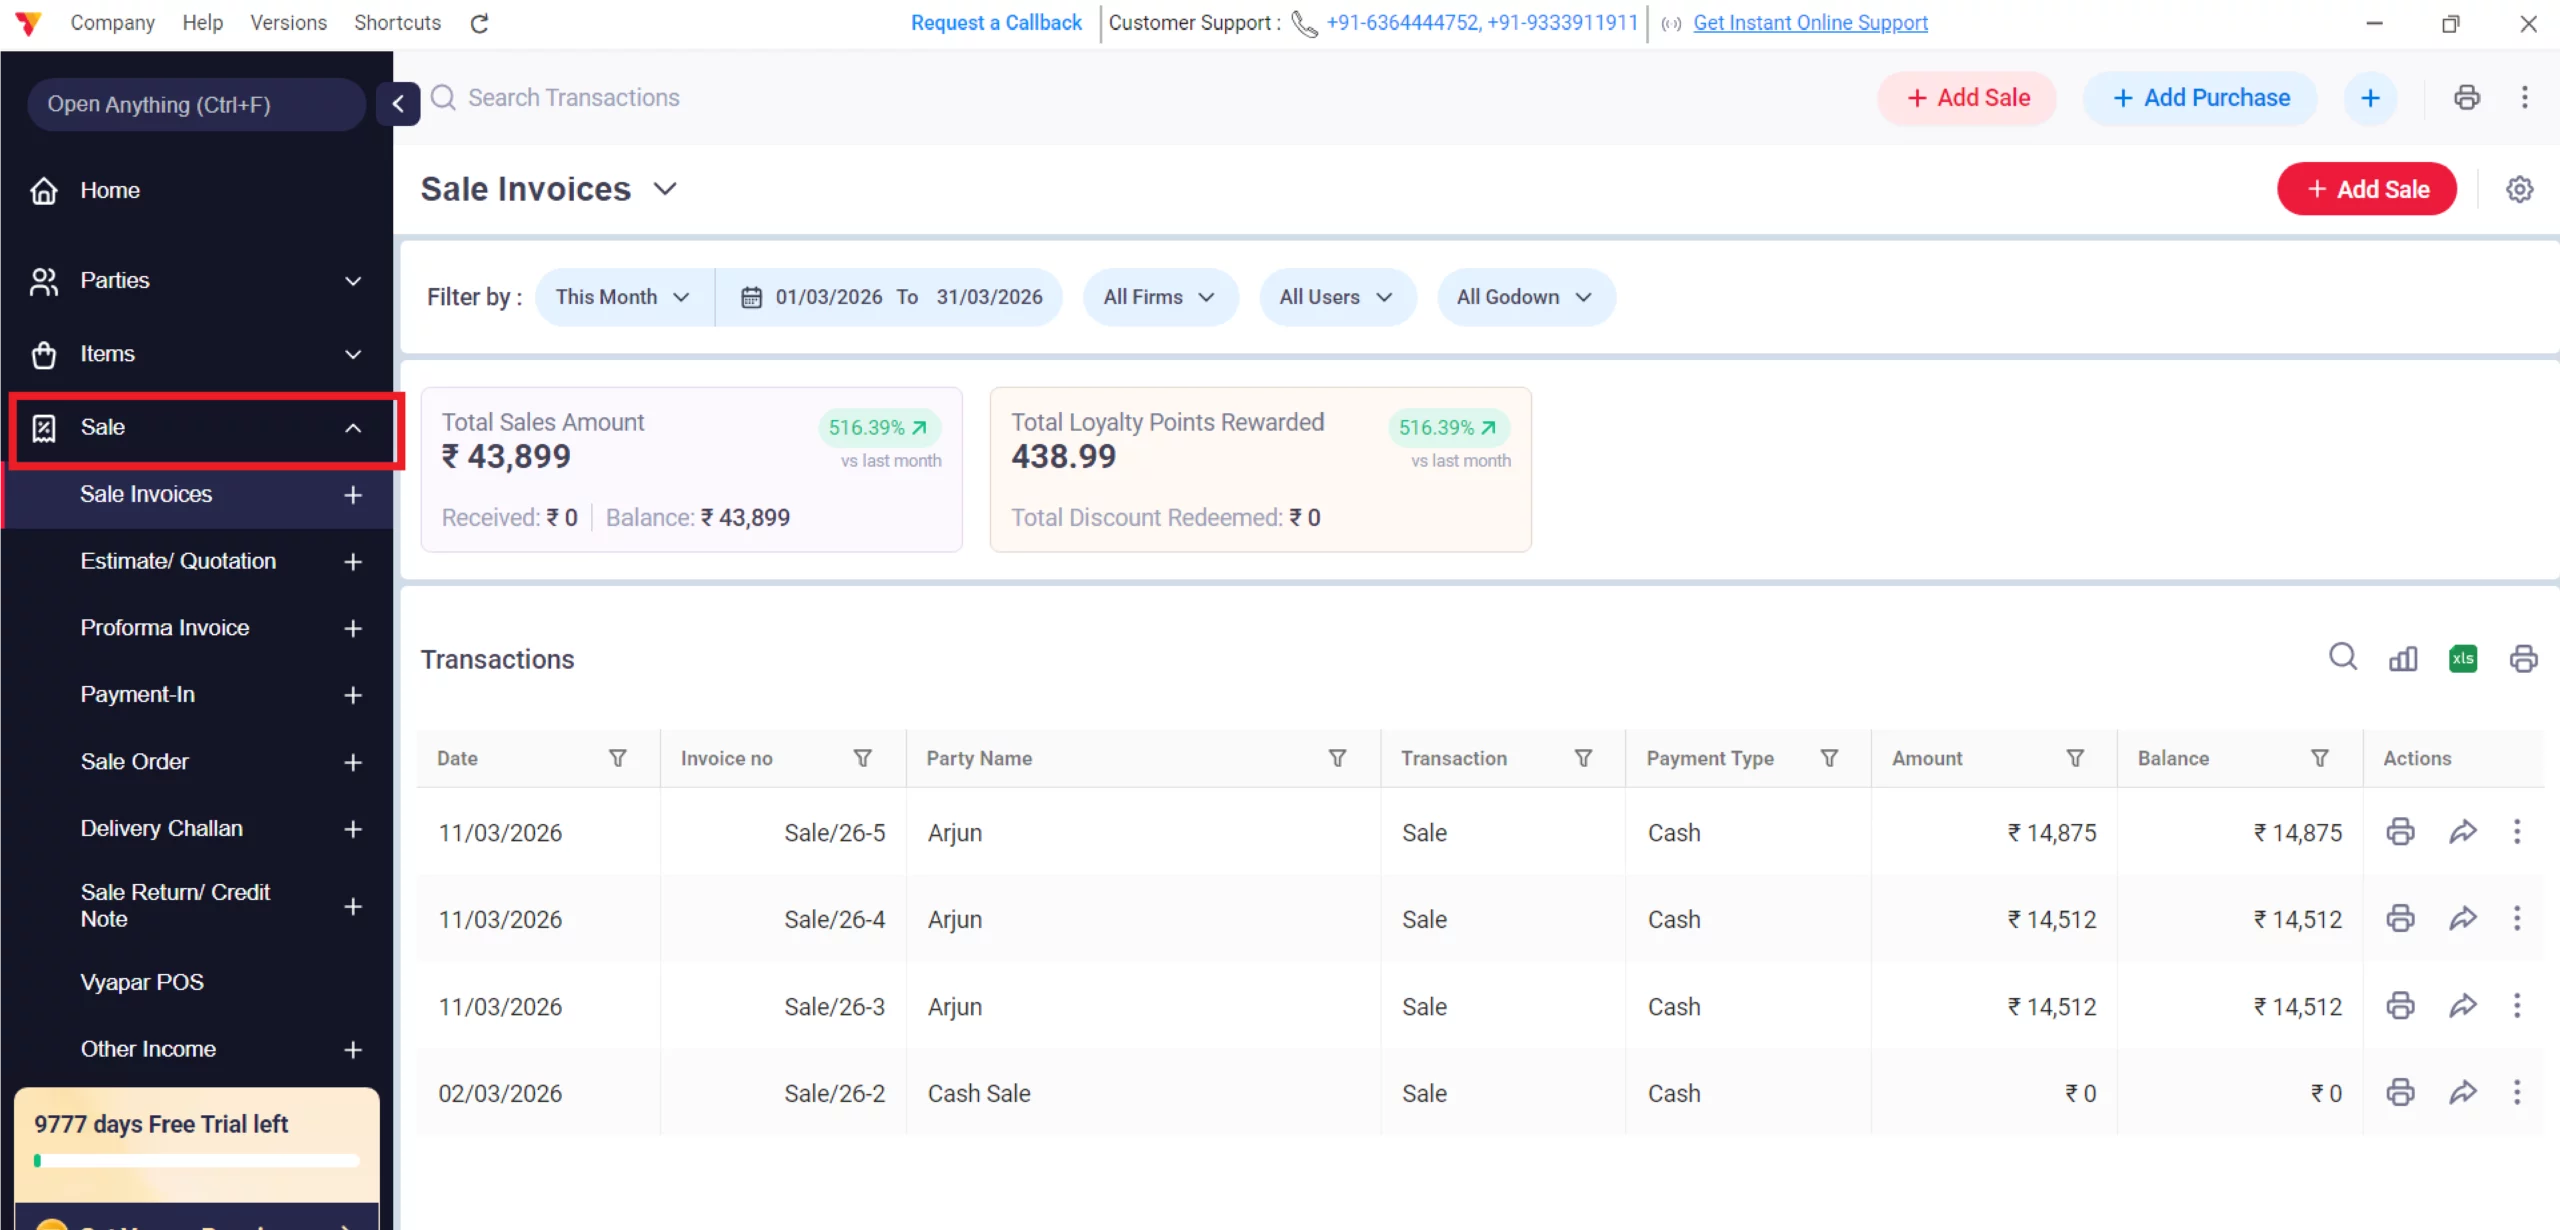
Navigate to Sale
Click on the Sale tab in the main sidebar.
14
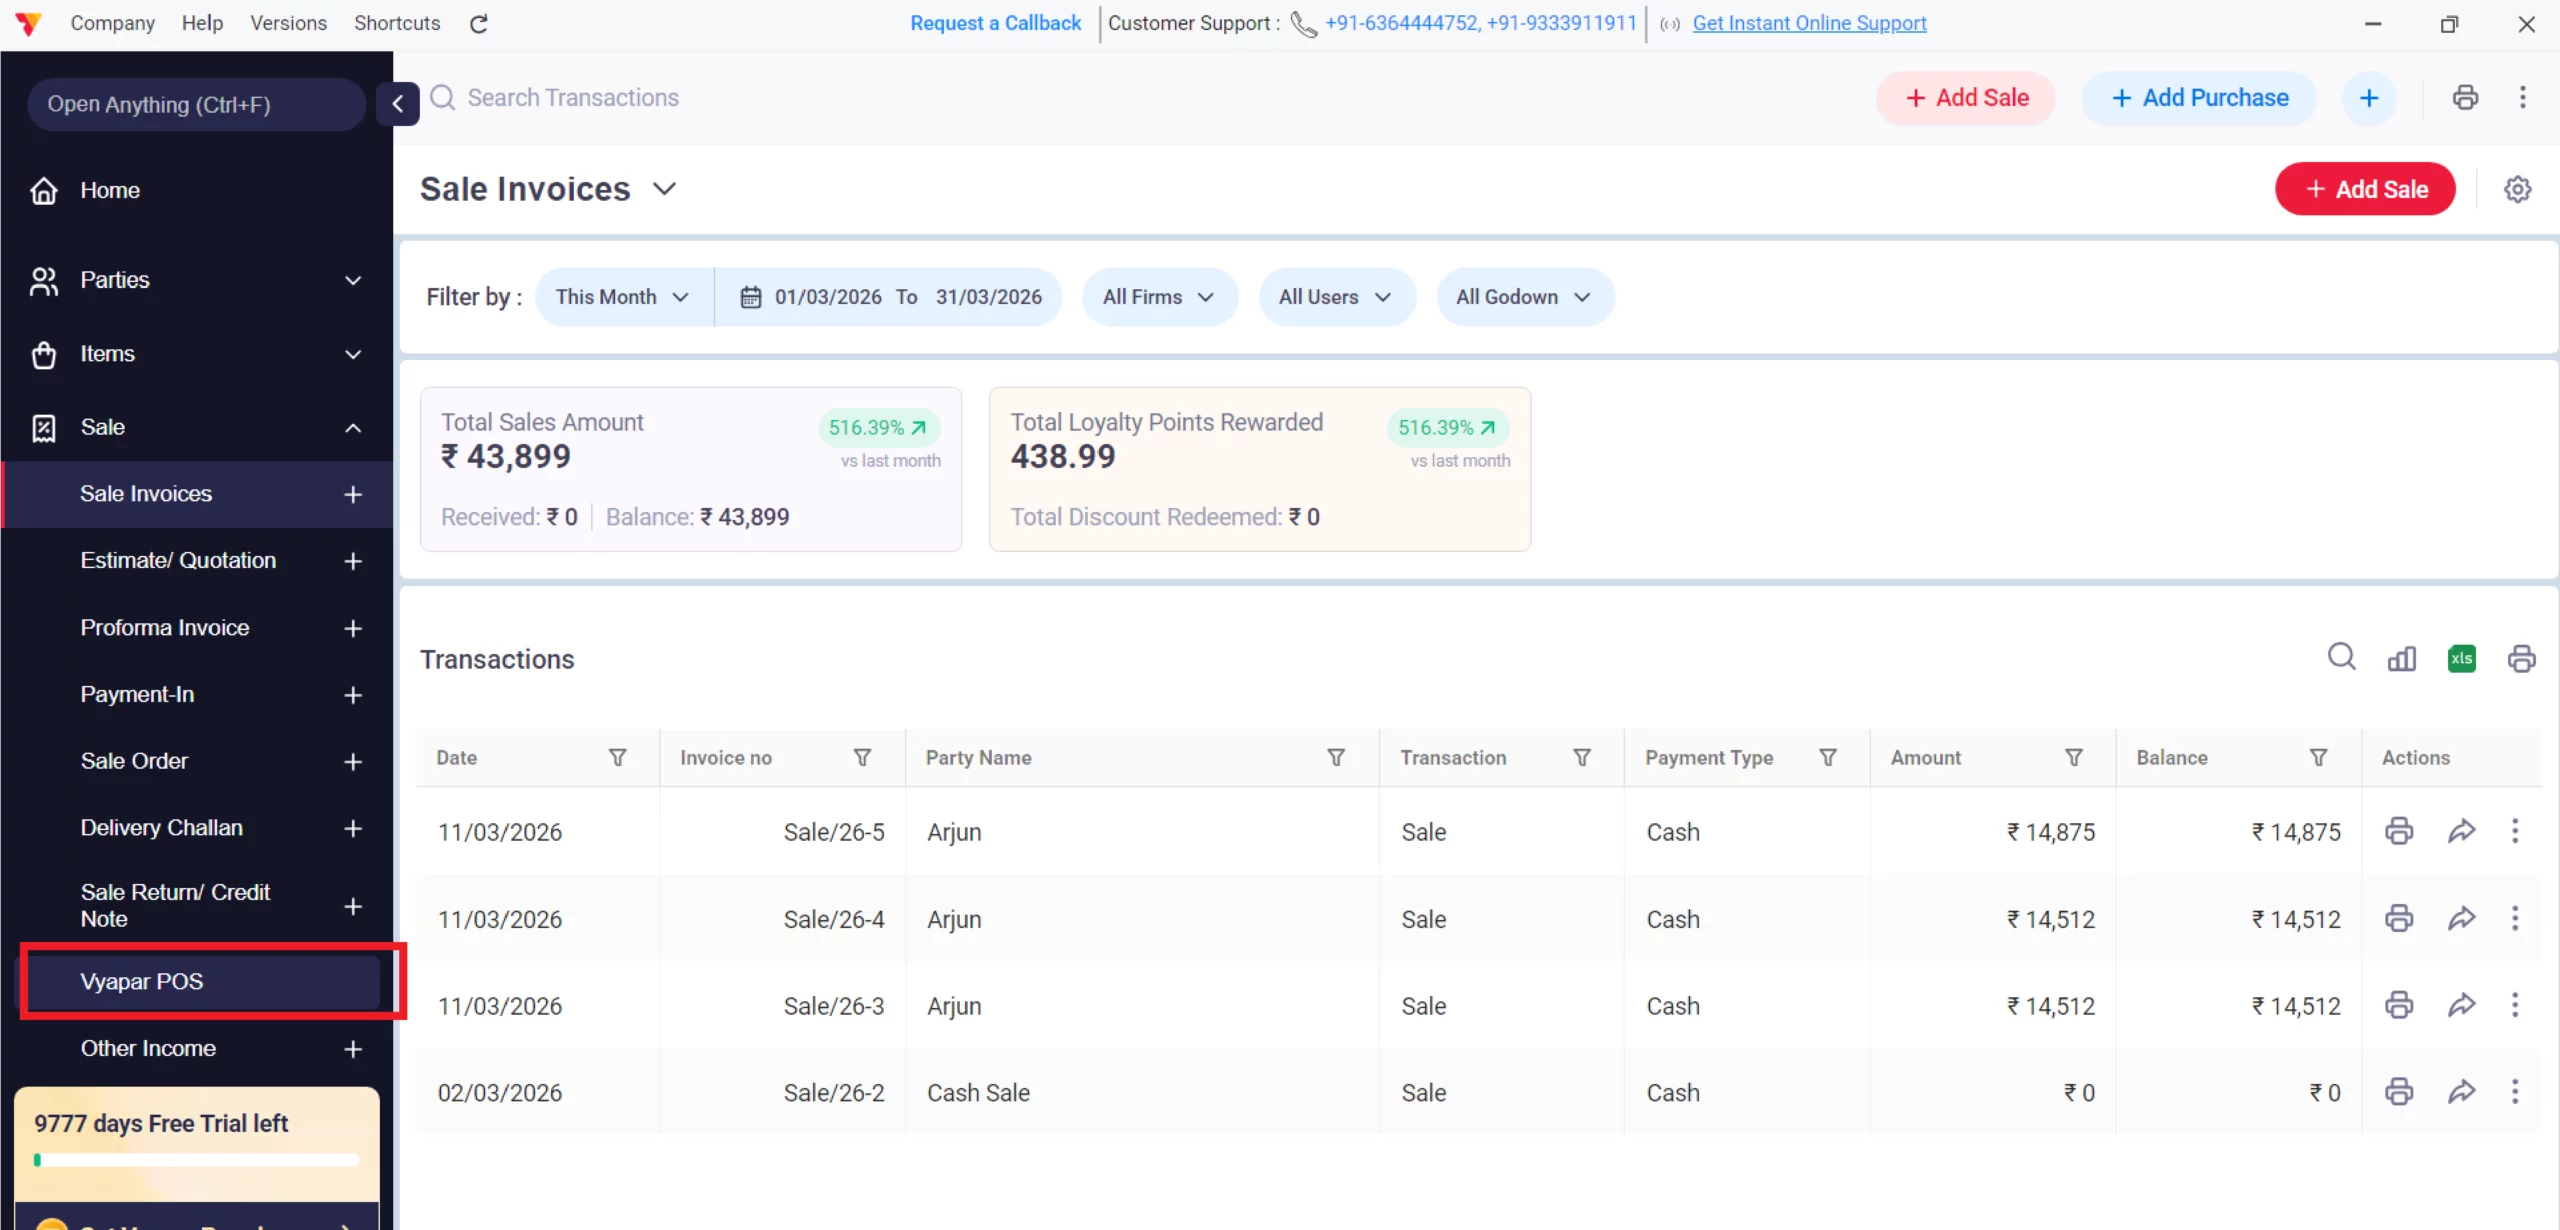
Click on Vyapar POS
Launch the dedicated Vyapar POS interface (Shortcut: Alt+D).
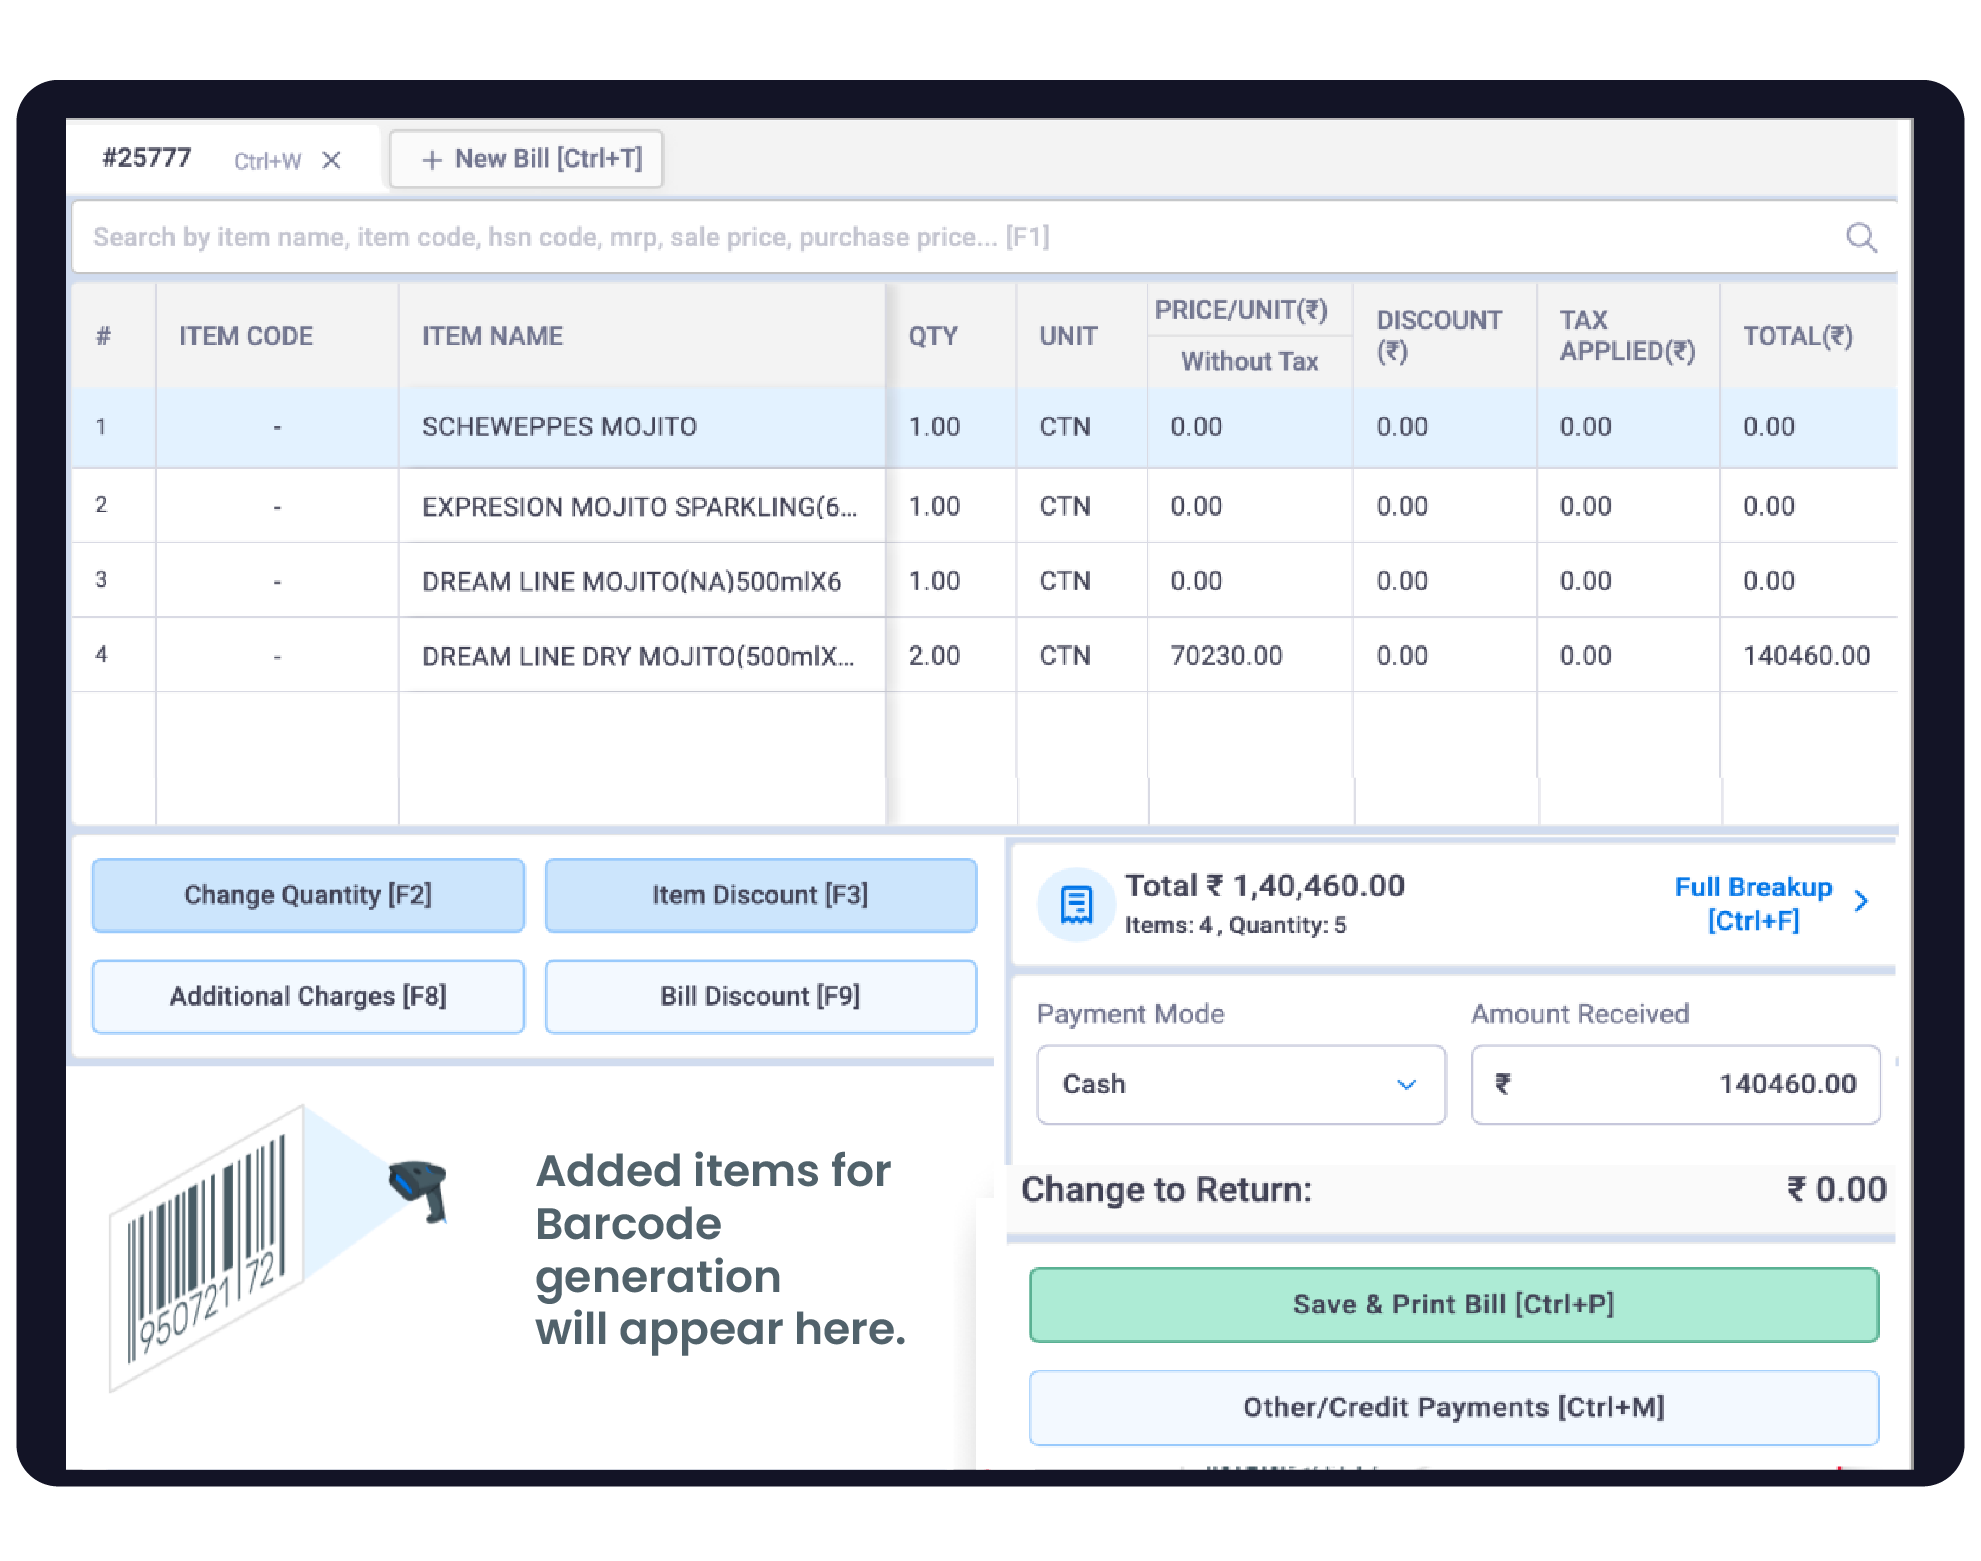
15
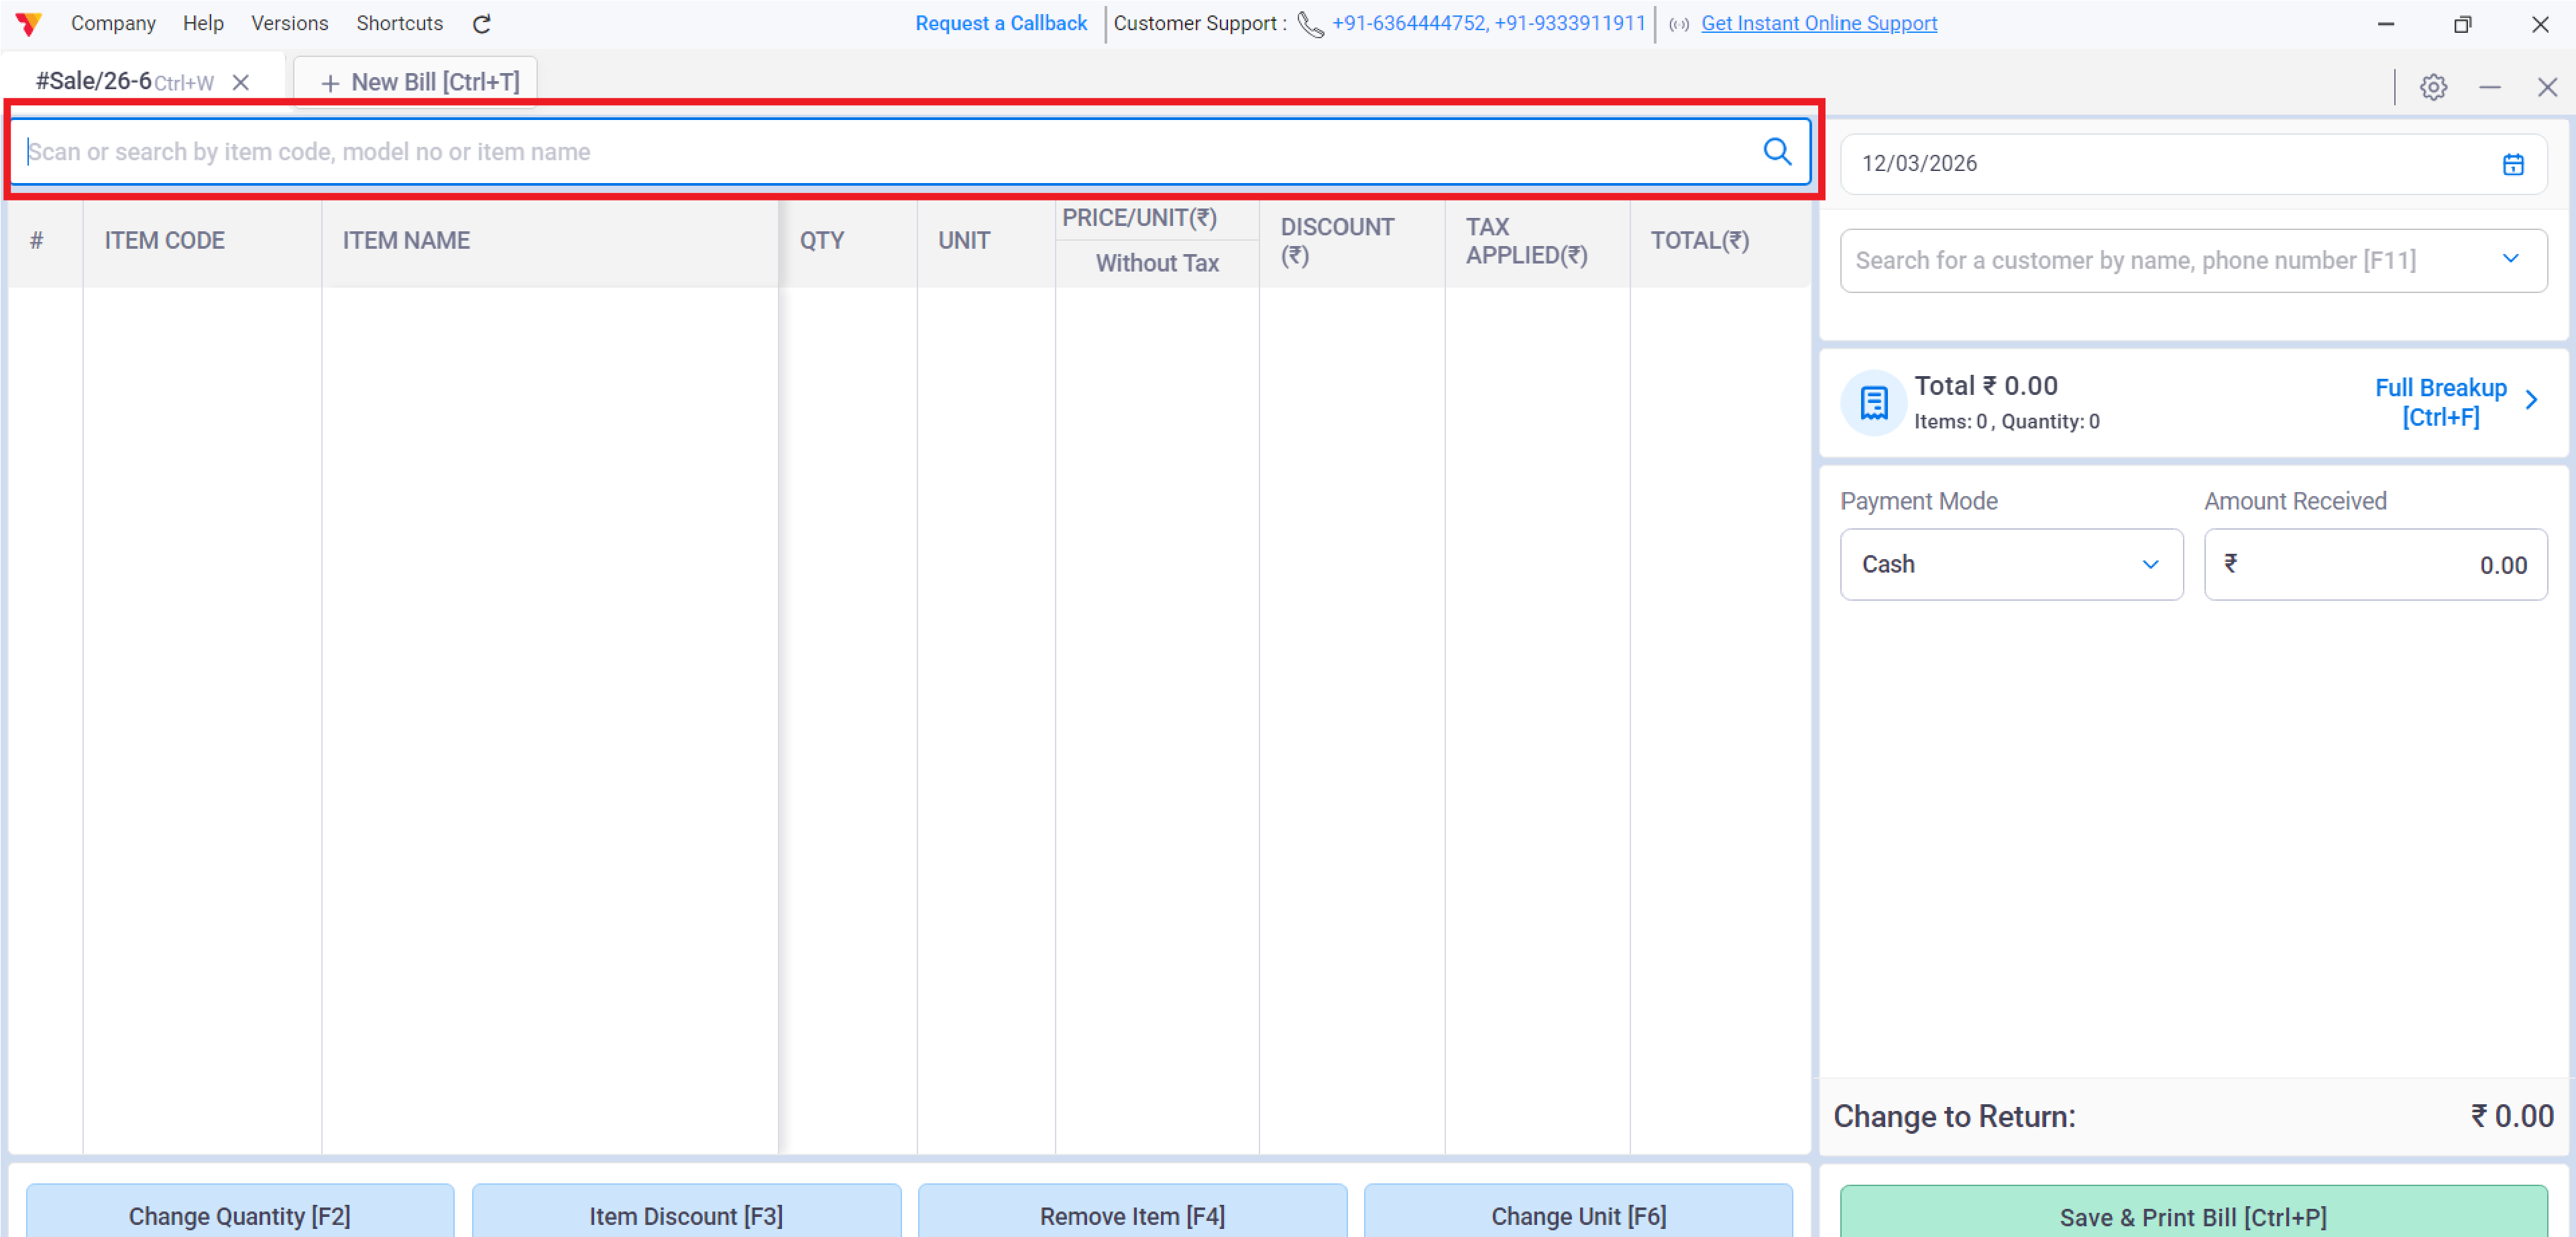
Start Scanning or Weighing
Use your scanner for packaged goods or place loose items on the weighing machine to fetch the quantity automatically.
16
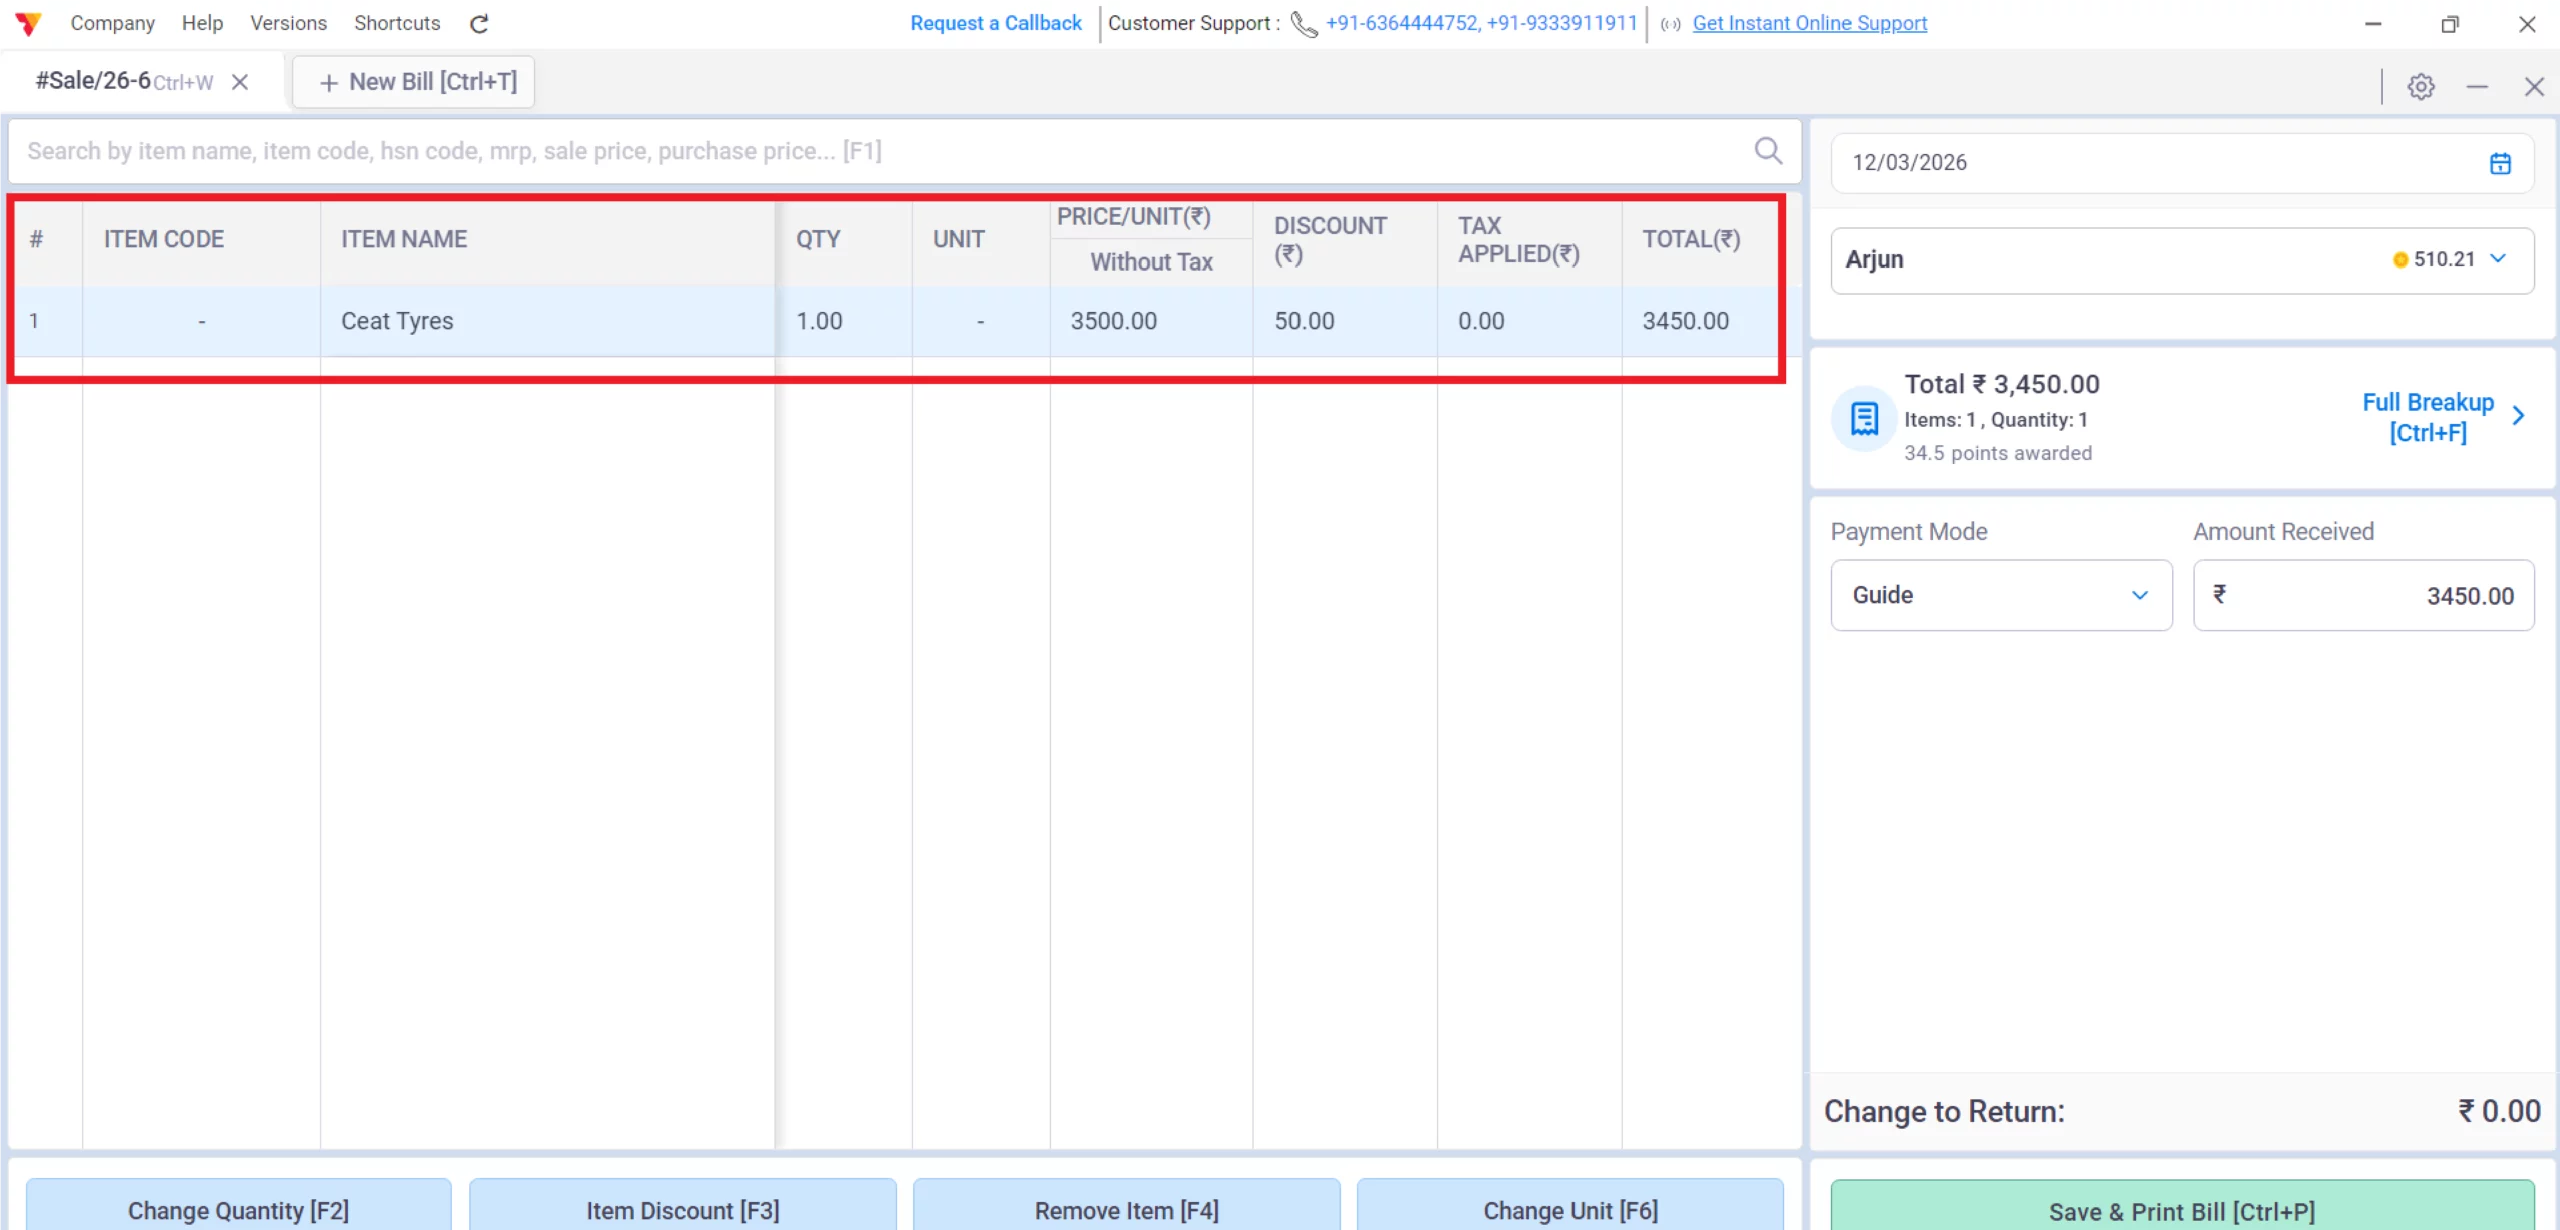
Automatic Calculation
Vyapar will instantly calculate the total price based on the weight or quantity scanned.
17
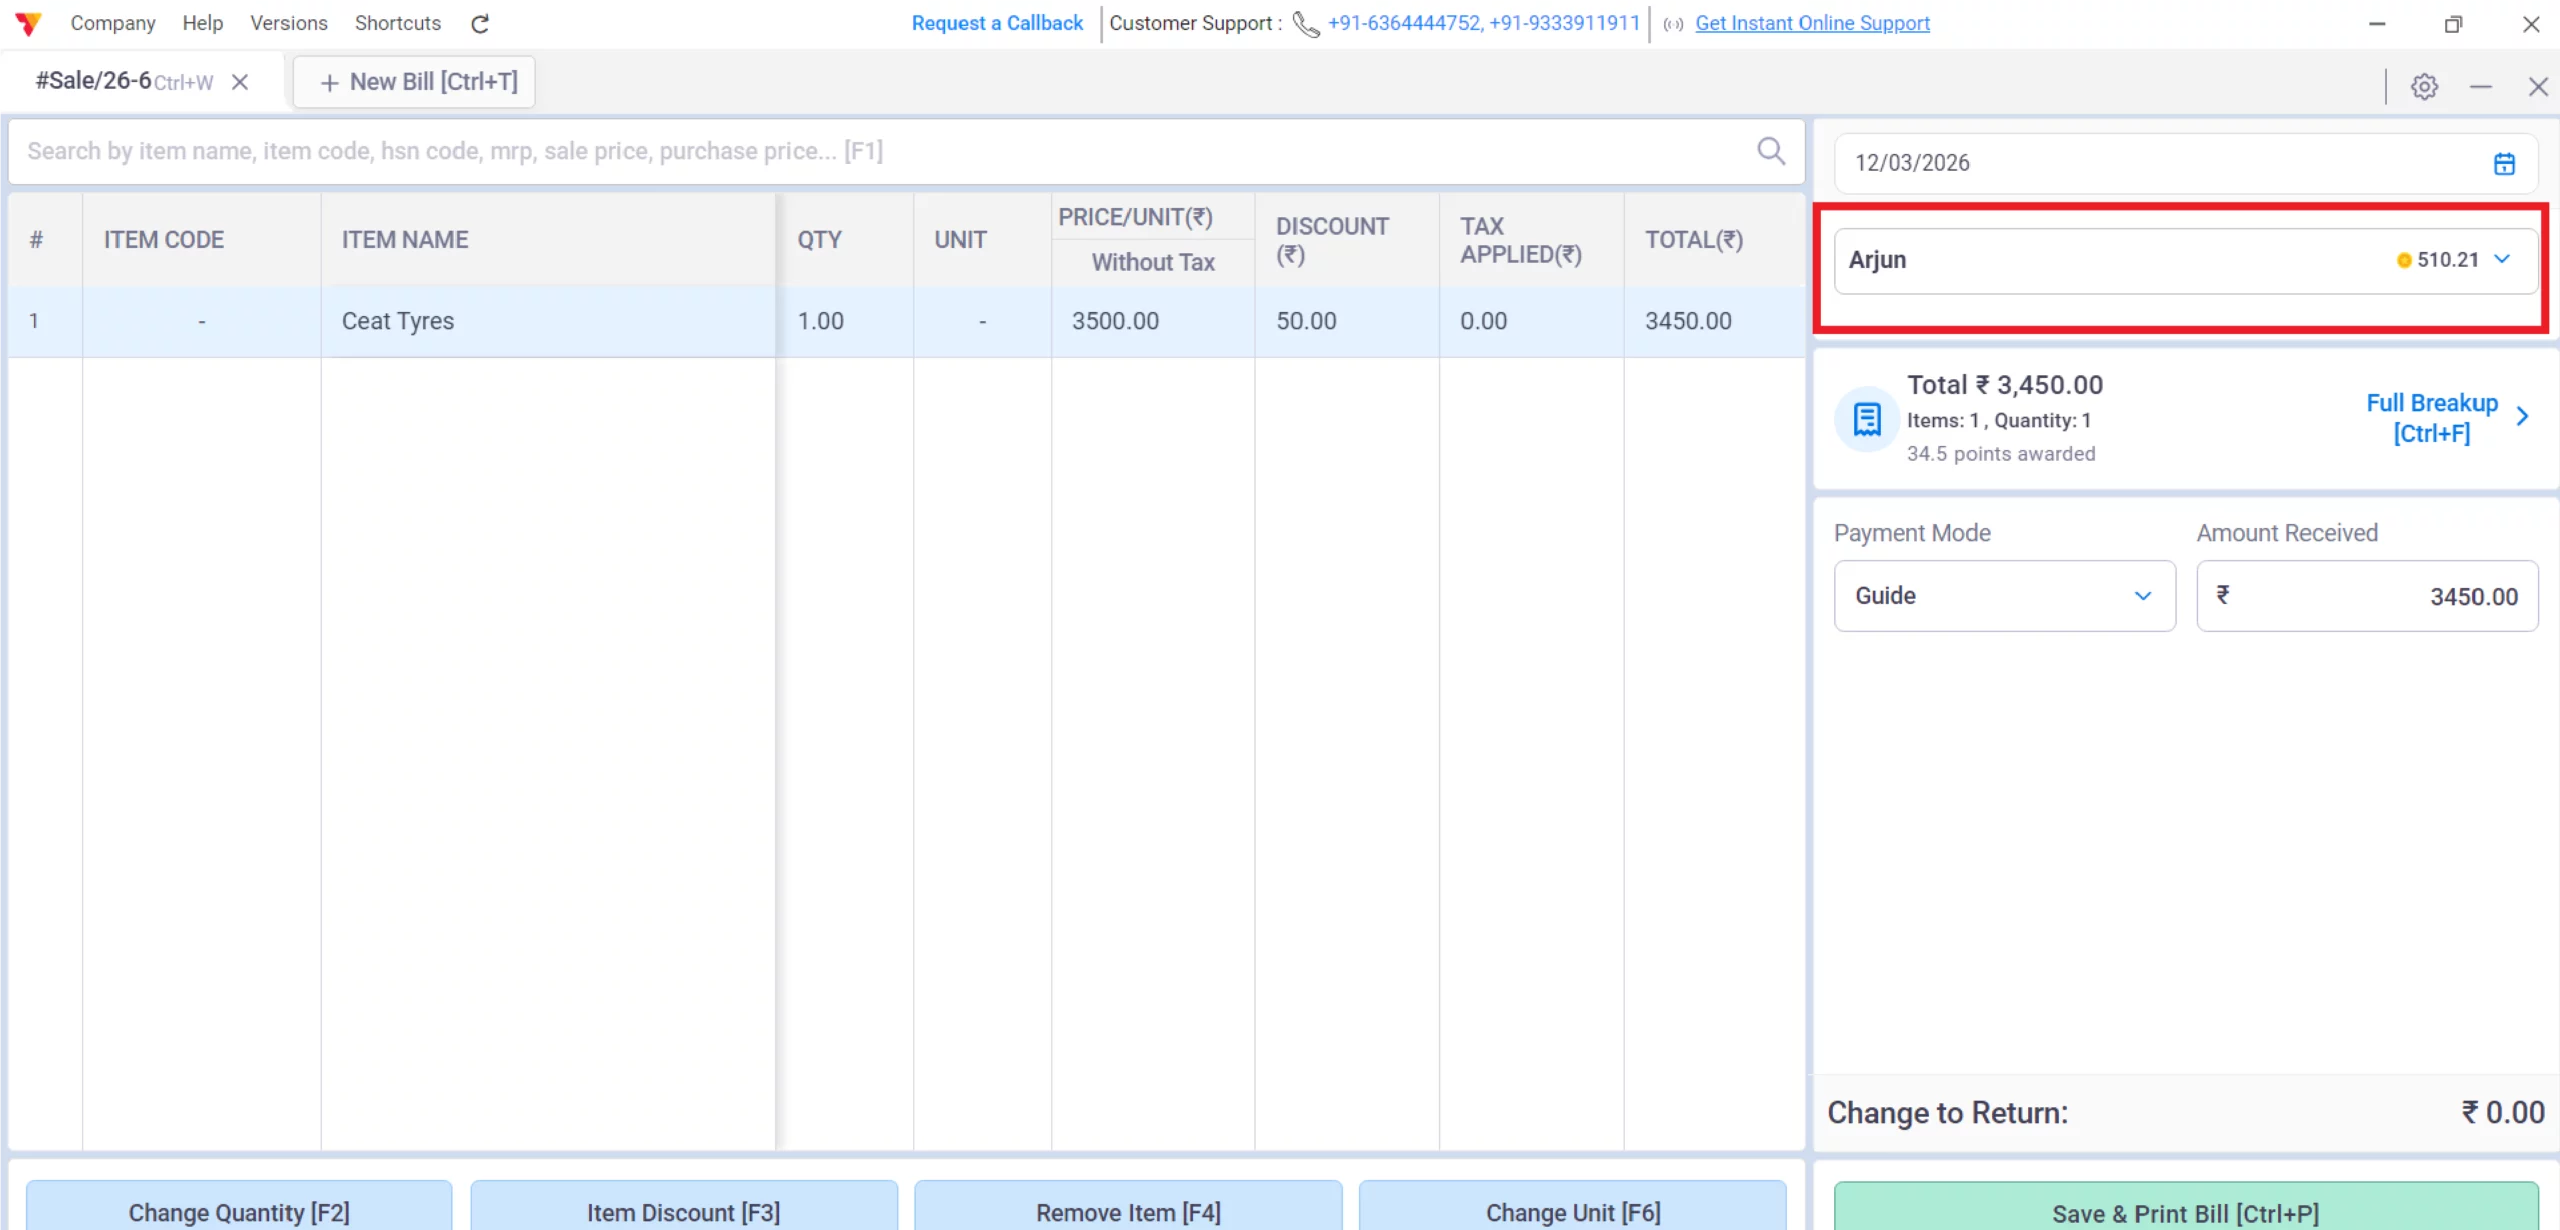
Add Item & Party Details
Finalize the list of items and select the customer (or leave as “Cash Sale”).
18
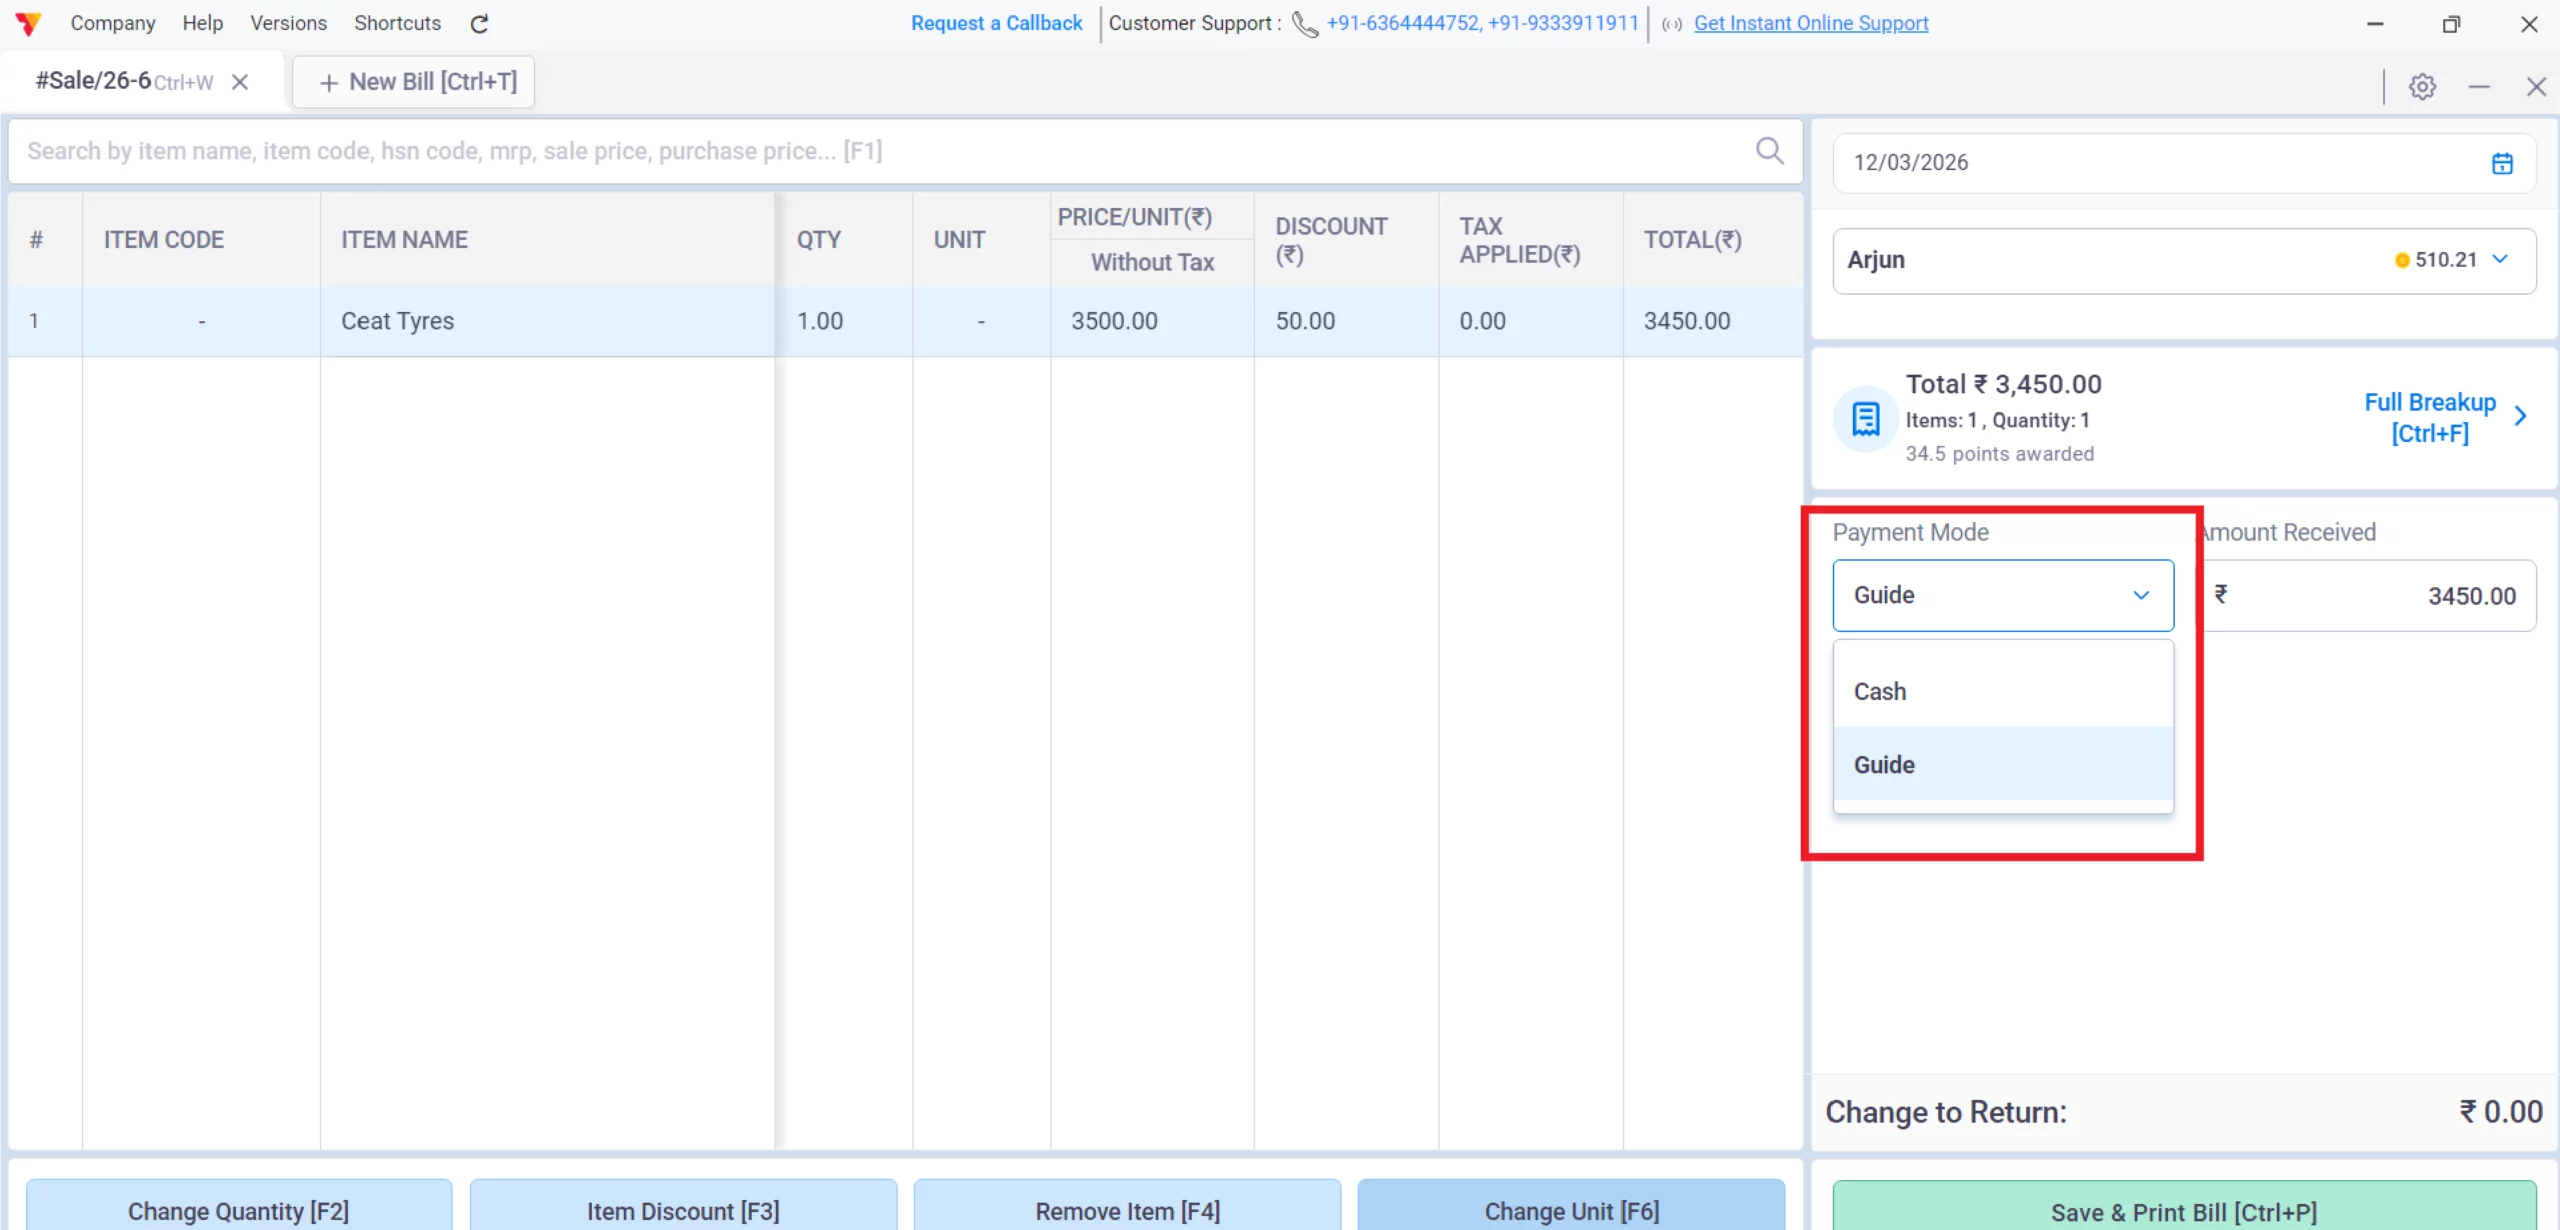
Collect Payment via EDC
Initiate the payment on your integrated EDC machine for a seamless card transaction.
19
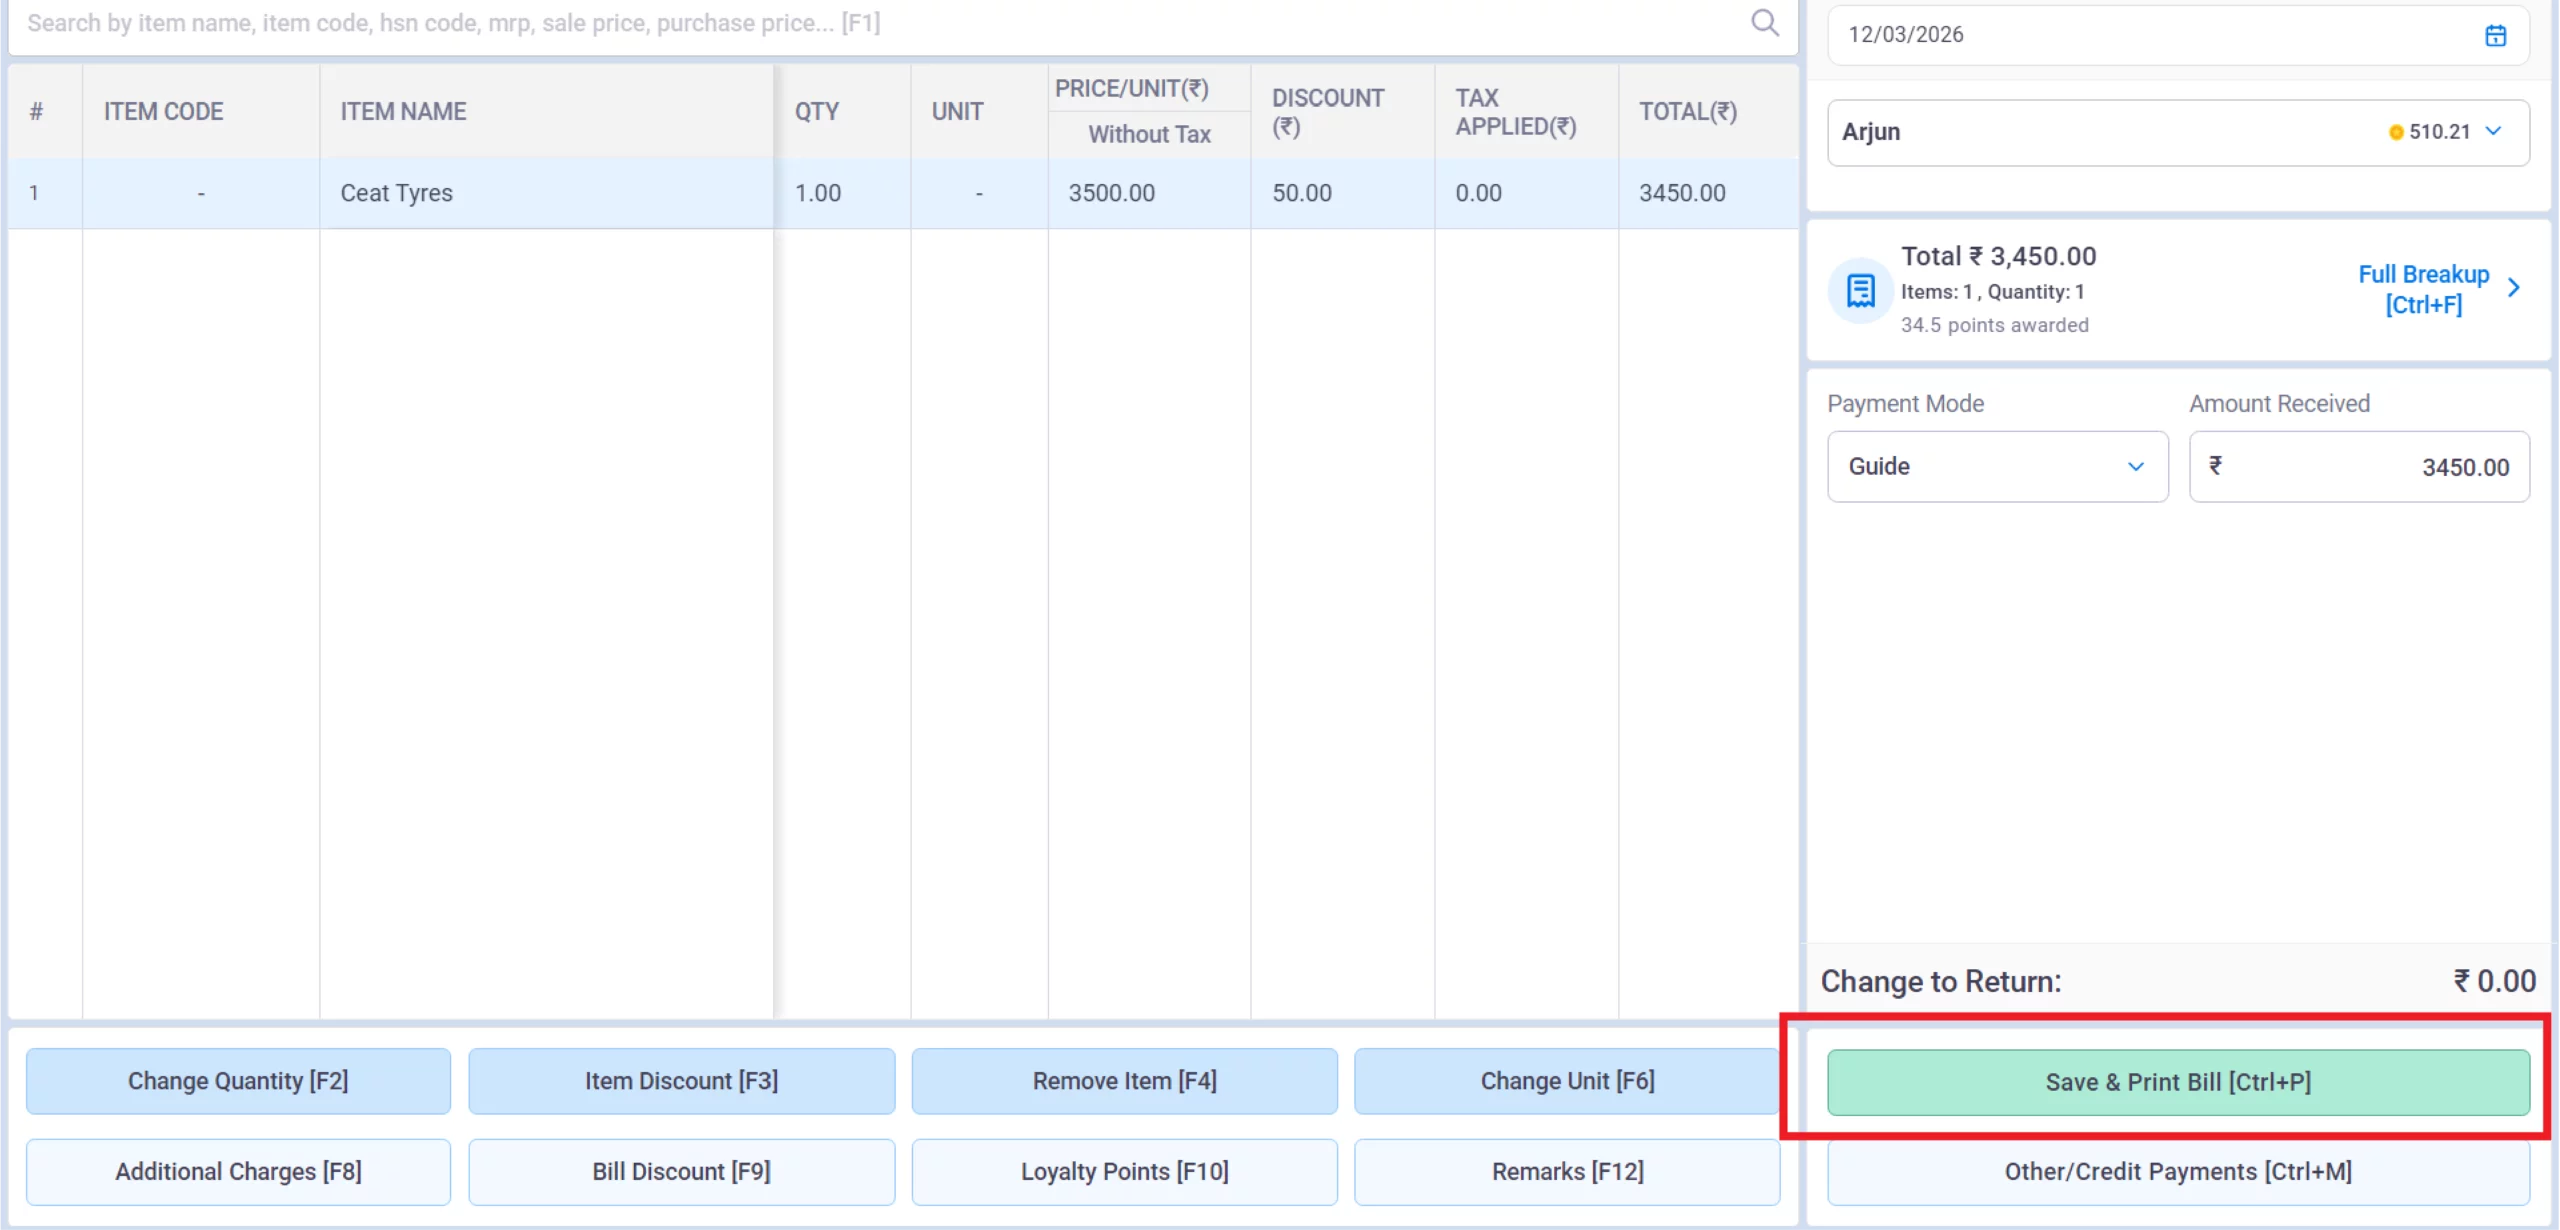
Save & Print
Click Save to finalize the invoice and automatically trigger the thermal receipt for the customer.
20
Still stuck? Get help in minutes.
Our support team is ready to help you succeed.
![]()
![]() 24/7 Support
24/7 Support
Why Does This Workflow Work for Your Store?
Automating your transaction-level communication provides several key advantages:

Reduced Human Error
Automated weights and barcode scans eliminate manual typing mistakes.
Fast Checkout
Integrated EDC machines and thermal printers cut down customer waiting time significantly.
Professionalism
Providing a digital, itemized receipt enhances your brand’s trust.
Frequently Asked Questions (FAQs)
Can I use my phone camera as a barcode scanner?
No, since the dedicated POS interface is exclusive to the Desktop app, you must use an external barcode scanner connected to your computer.
Does Vyapar support weighing machine integration?
Vyapar supports standard weighing machine integration specifically for the dedicated POS billing workflow on Desktop.
Can I customize the thermal receipt?
Yes, you can add your business logo, custom greetings, and contact details via Invoice Print Settings.
Ready to Speed Up Every Sale?
Start POS billing today and cut checkout time by 50%.


