How to Add Expiry Dates of Items in Vyapar App
Tracking Expiry Dates is essential for businesses dealing with perishable goods, pharmaceuticals, or any product with a limited shelf life.
Vyapar’s expiry tracking ensures you sell older stock first, reduces losses from expired inventory, and helps maintain compliance with safety standards.
Follow this guide to enable and manage expiry dates on your Desktop app.

Before You Start

Item Type: Ensure your item is saved as a Product; expiry tracking does not apply to Services.
Batch Tracking Enabled: Expiry dates are managed as part of the Batch Tracking feature in Vyapar.
Inventory Details: Have your product’s Expiry Date and Manufacturing Date ready for entry.
Step-by-Step Guide to Add Expiry Dates:

Open Vyapar App
Launch the Vyapar App on your Desktop device.
01
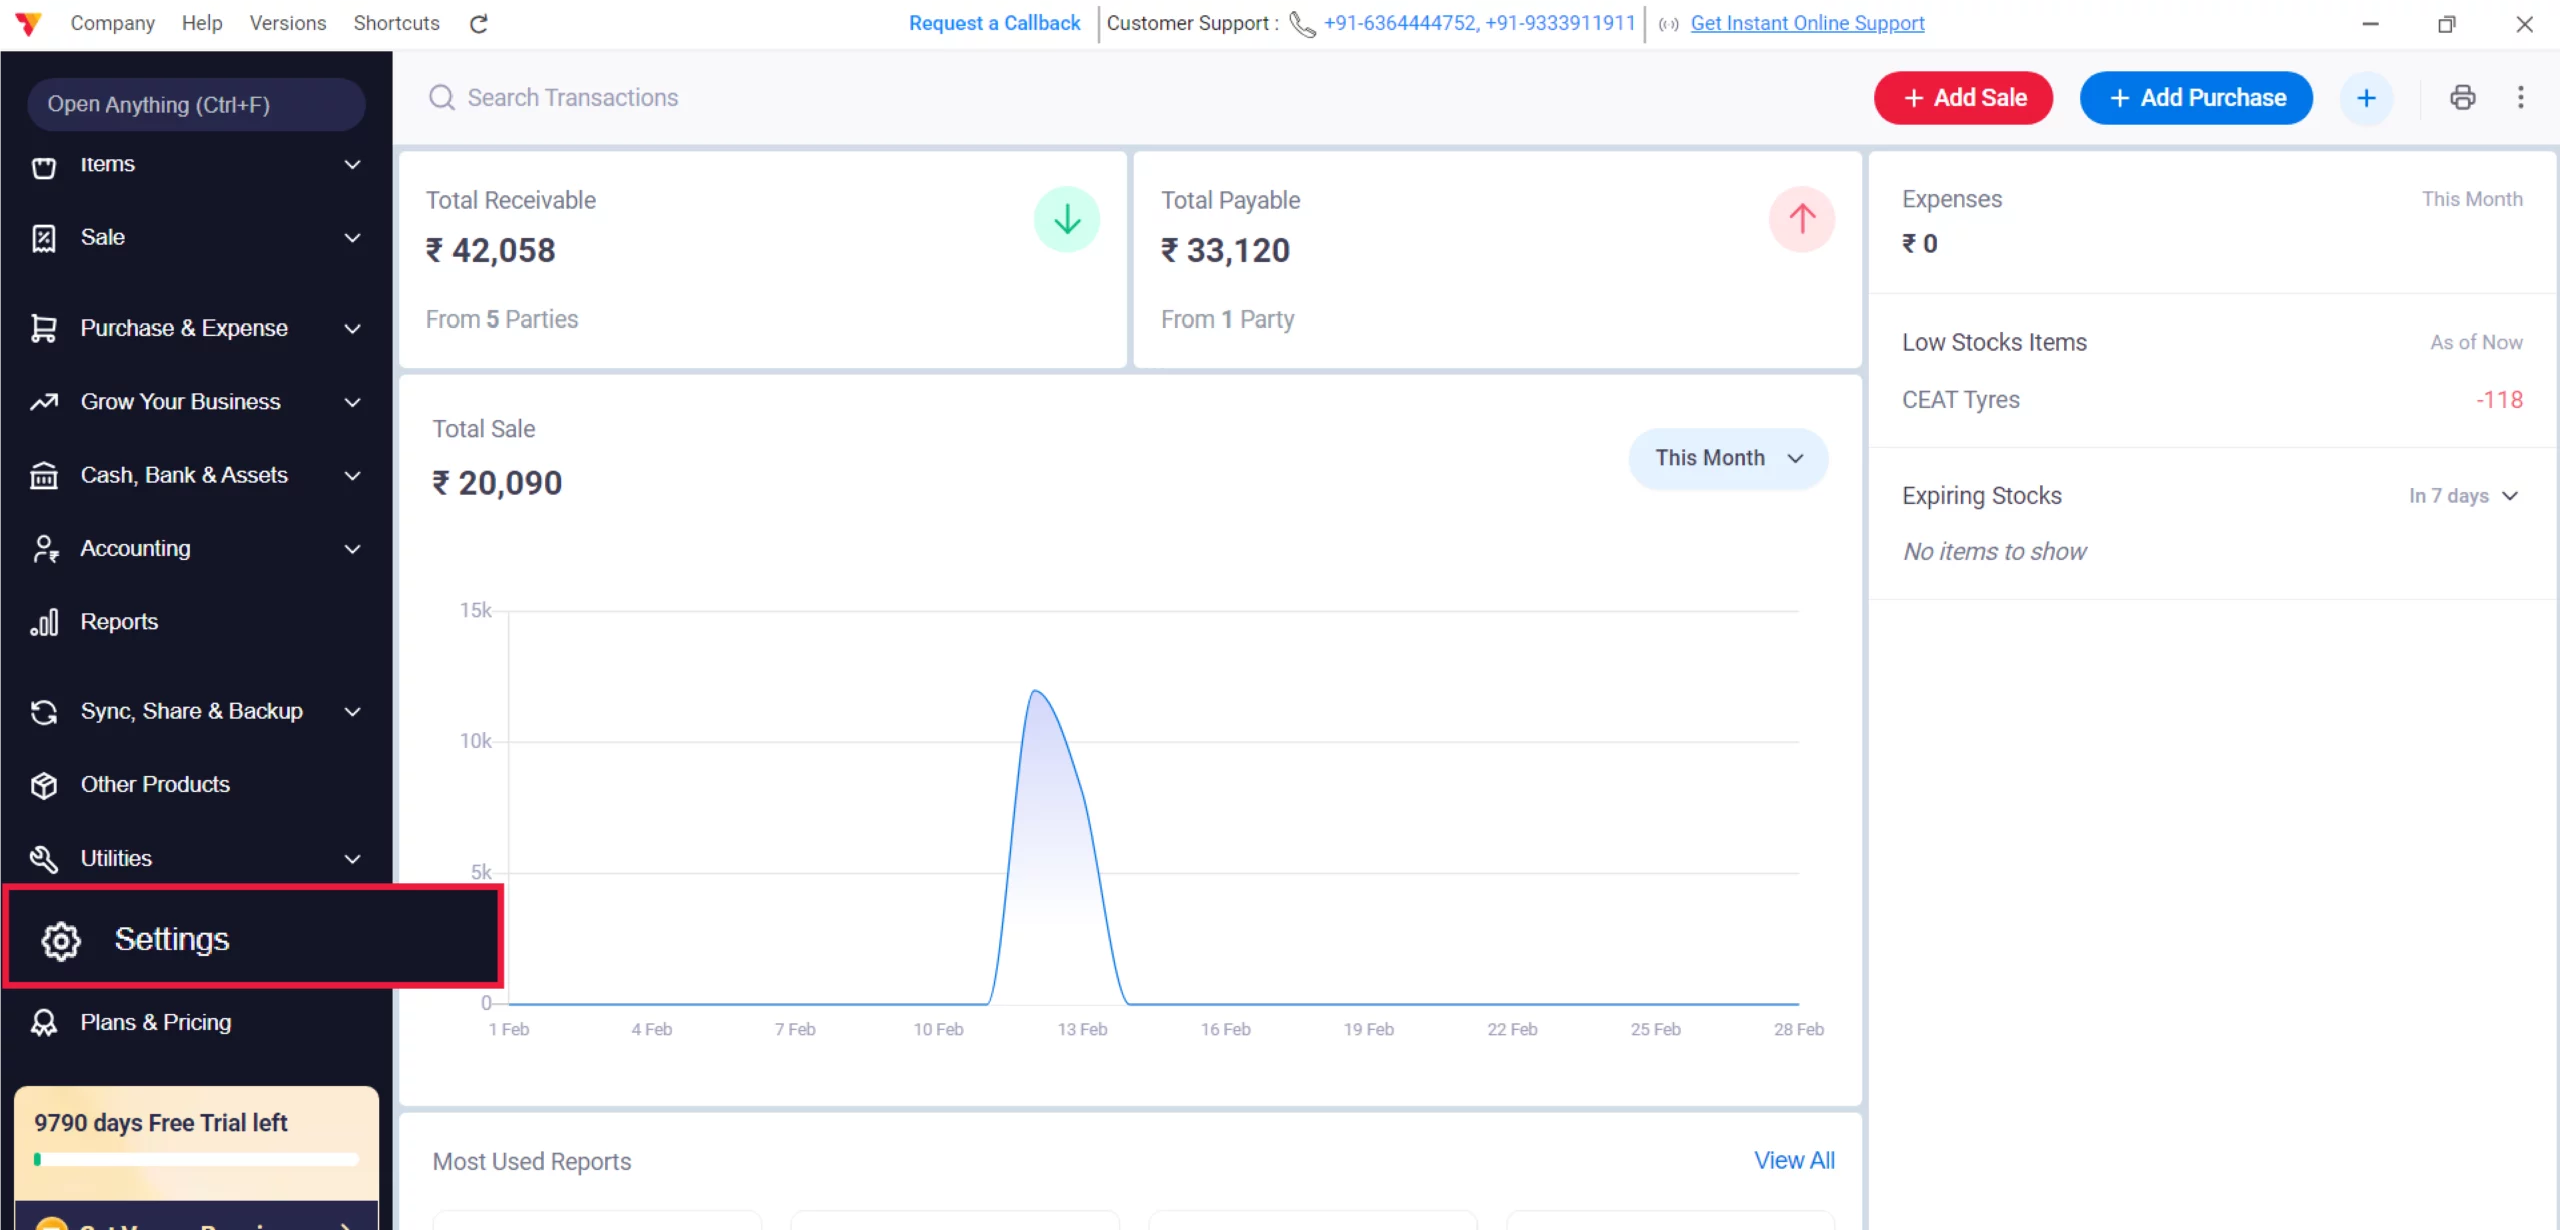
Access Settings
Navigate to the Left Menu, locate the Settings gear icon at the bottom, and click it.
02

Enable Item Settings
From the left-hand sidebar, select the ITEM tab.
03
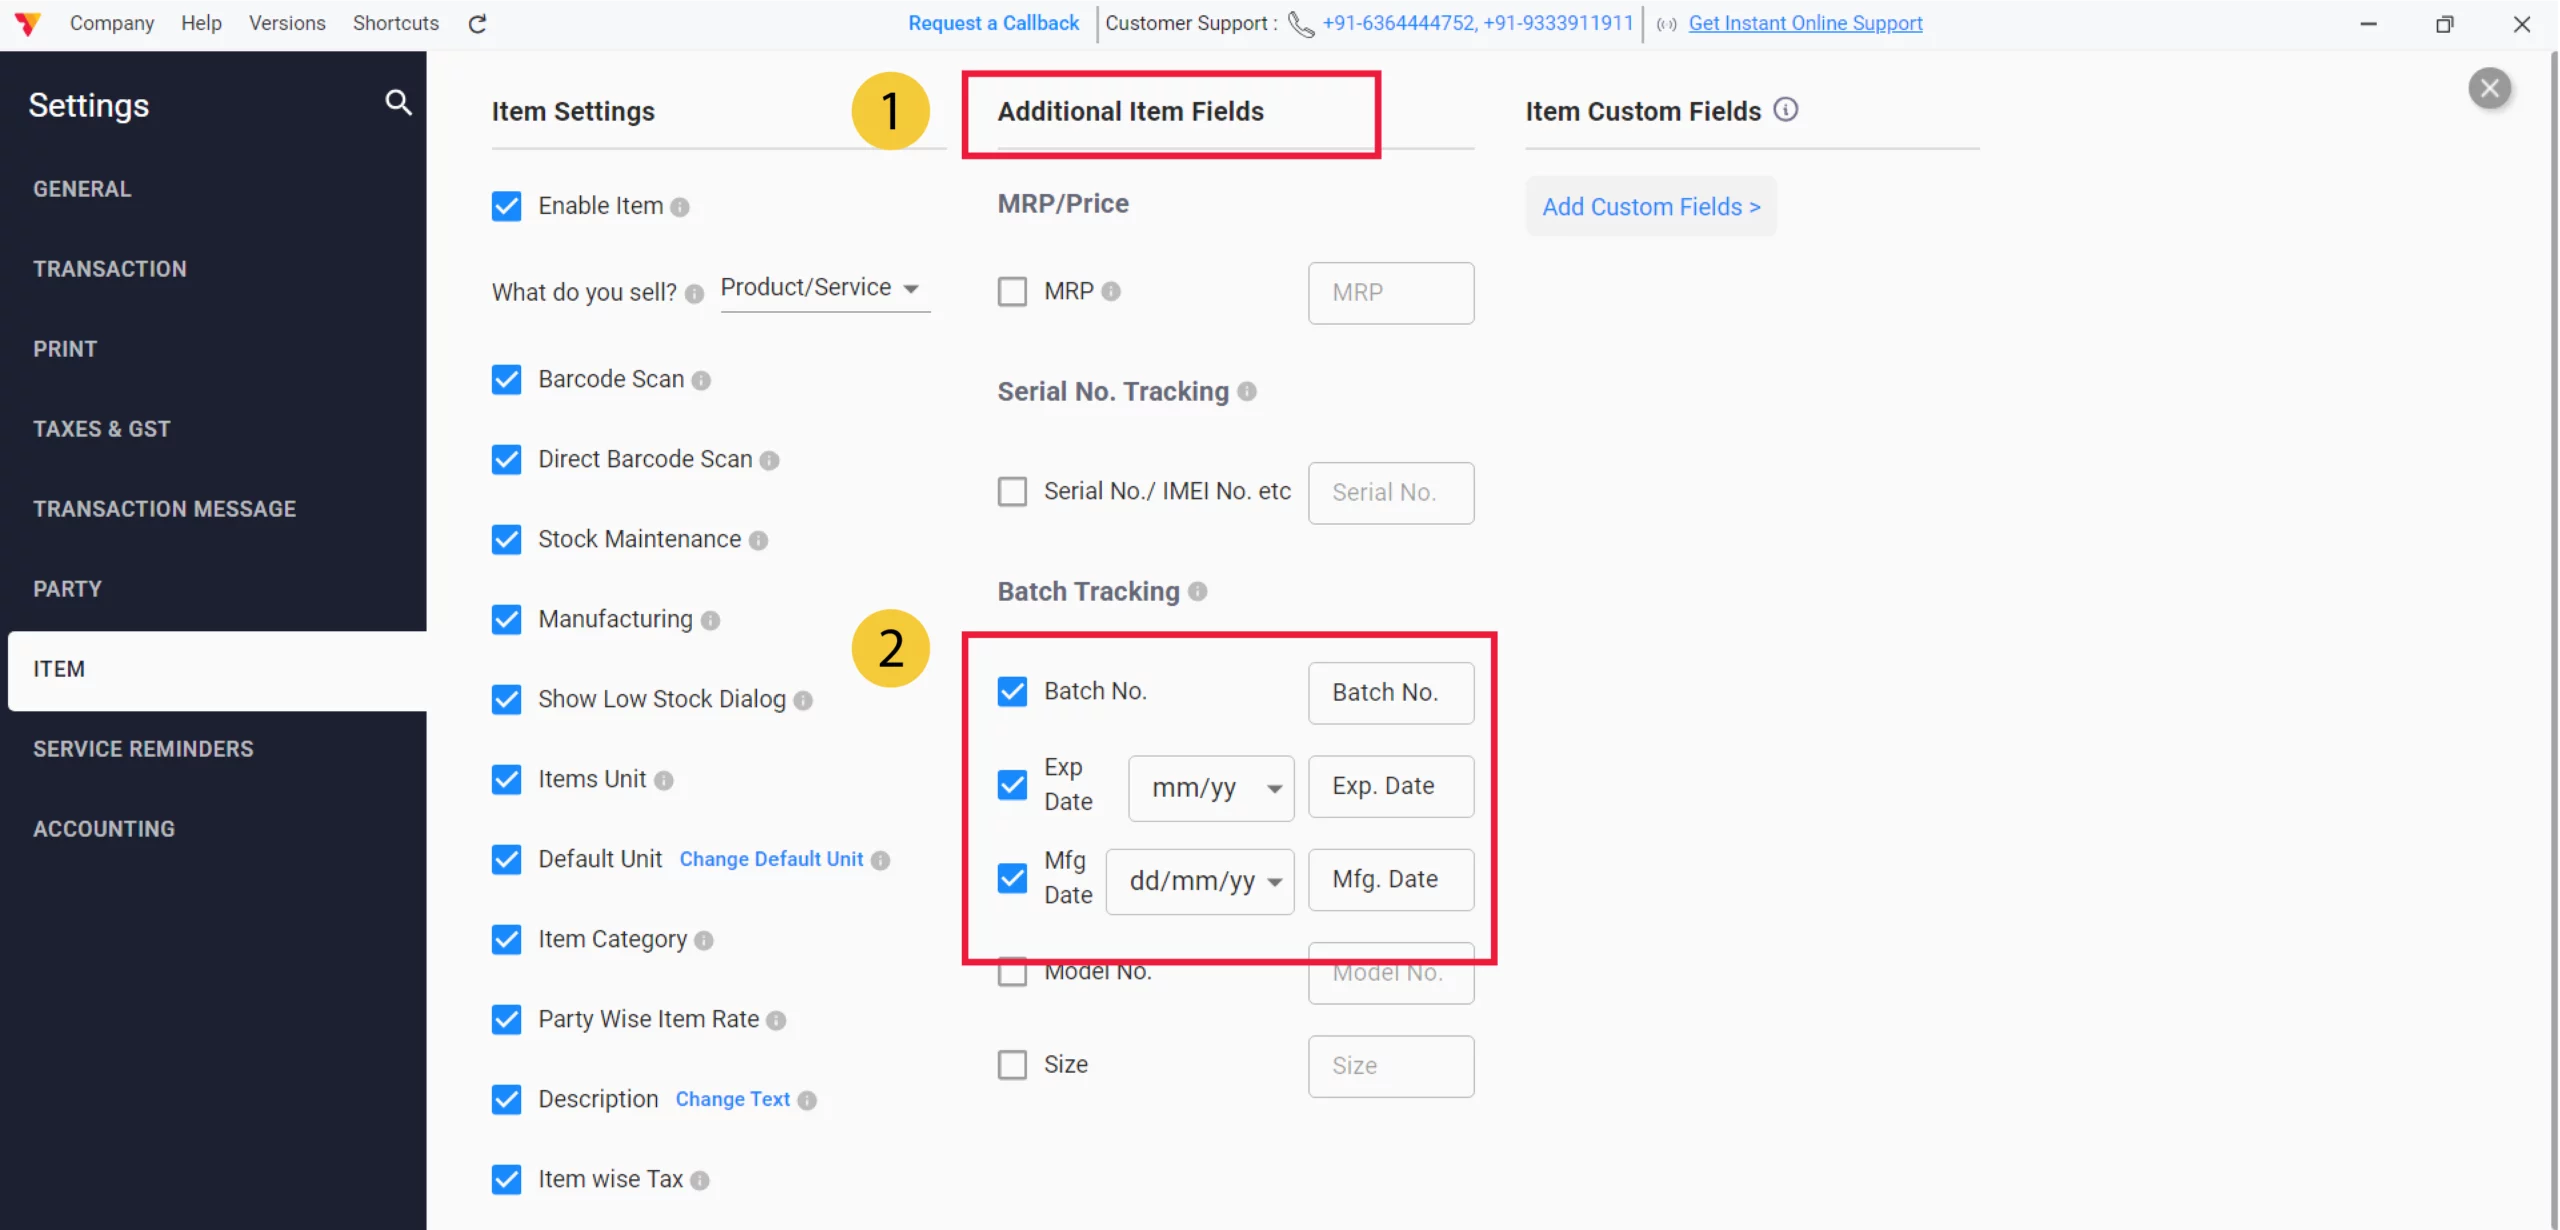
Activate Expiry Date Fields
Under the “Additional Item Fields” section, locate the Batch Tracking category and select the following:
Exp. Date: Check this box to enable the expiry date field.
Mfg. Date: (Optional) Check this box if you also want to track the manufacturing date.
Batch Tracking: Incase, if you are tracking Expiry in terms of groups.
04
Navigate to Item Master
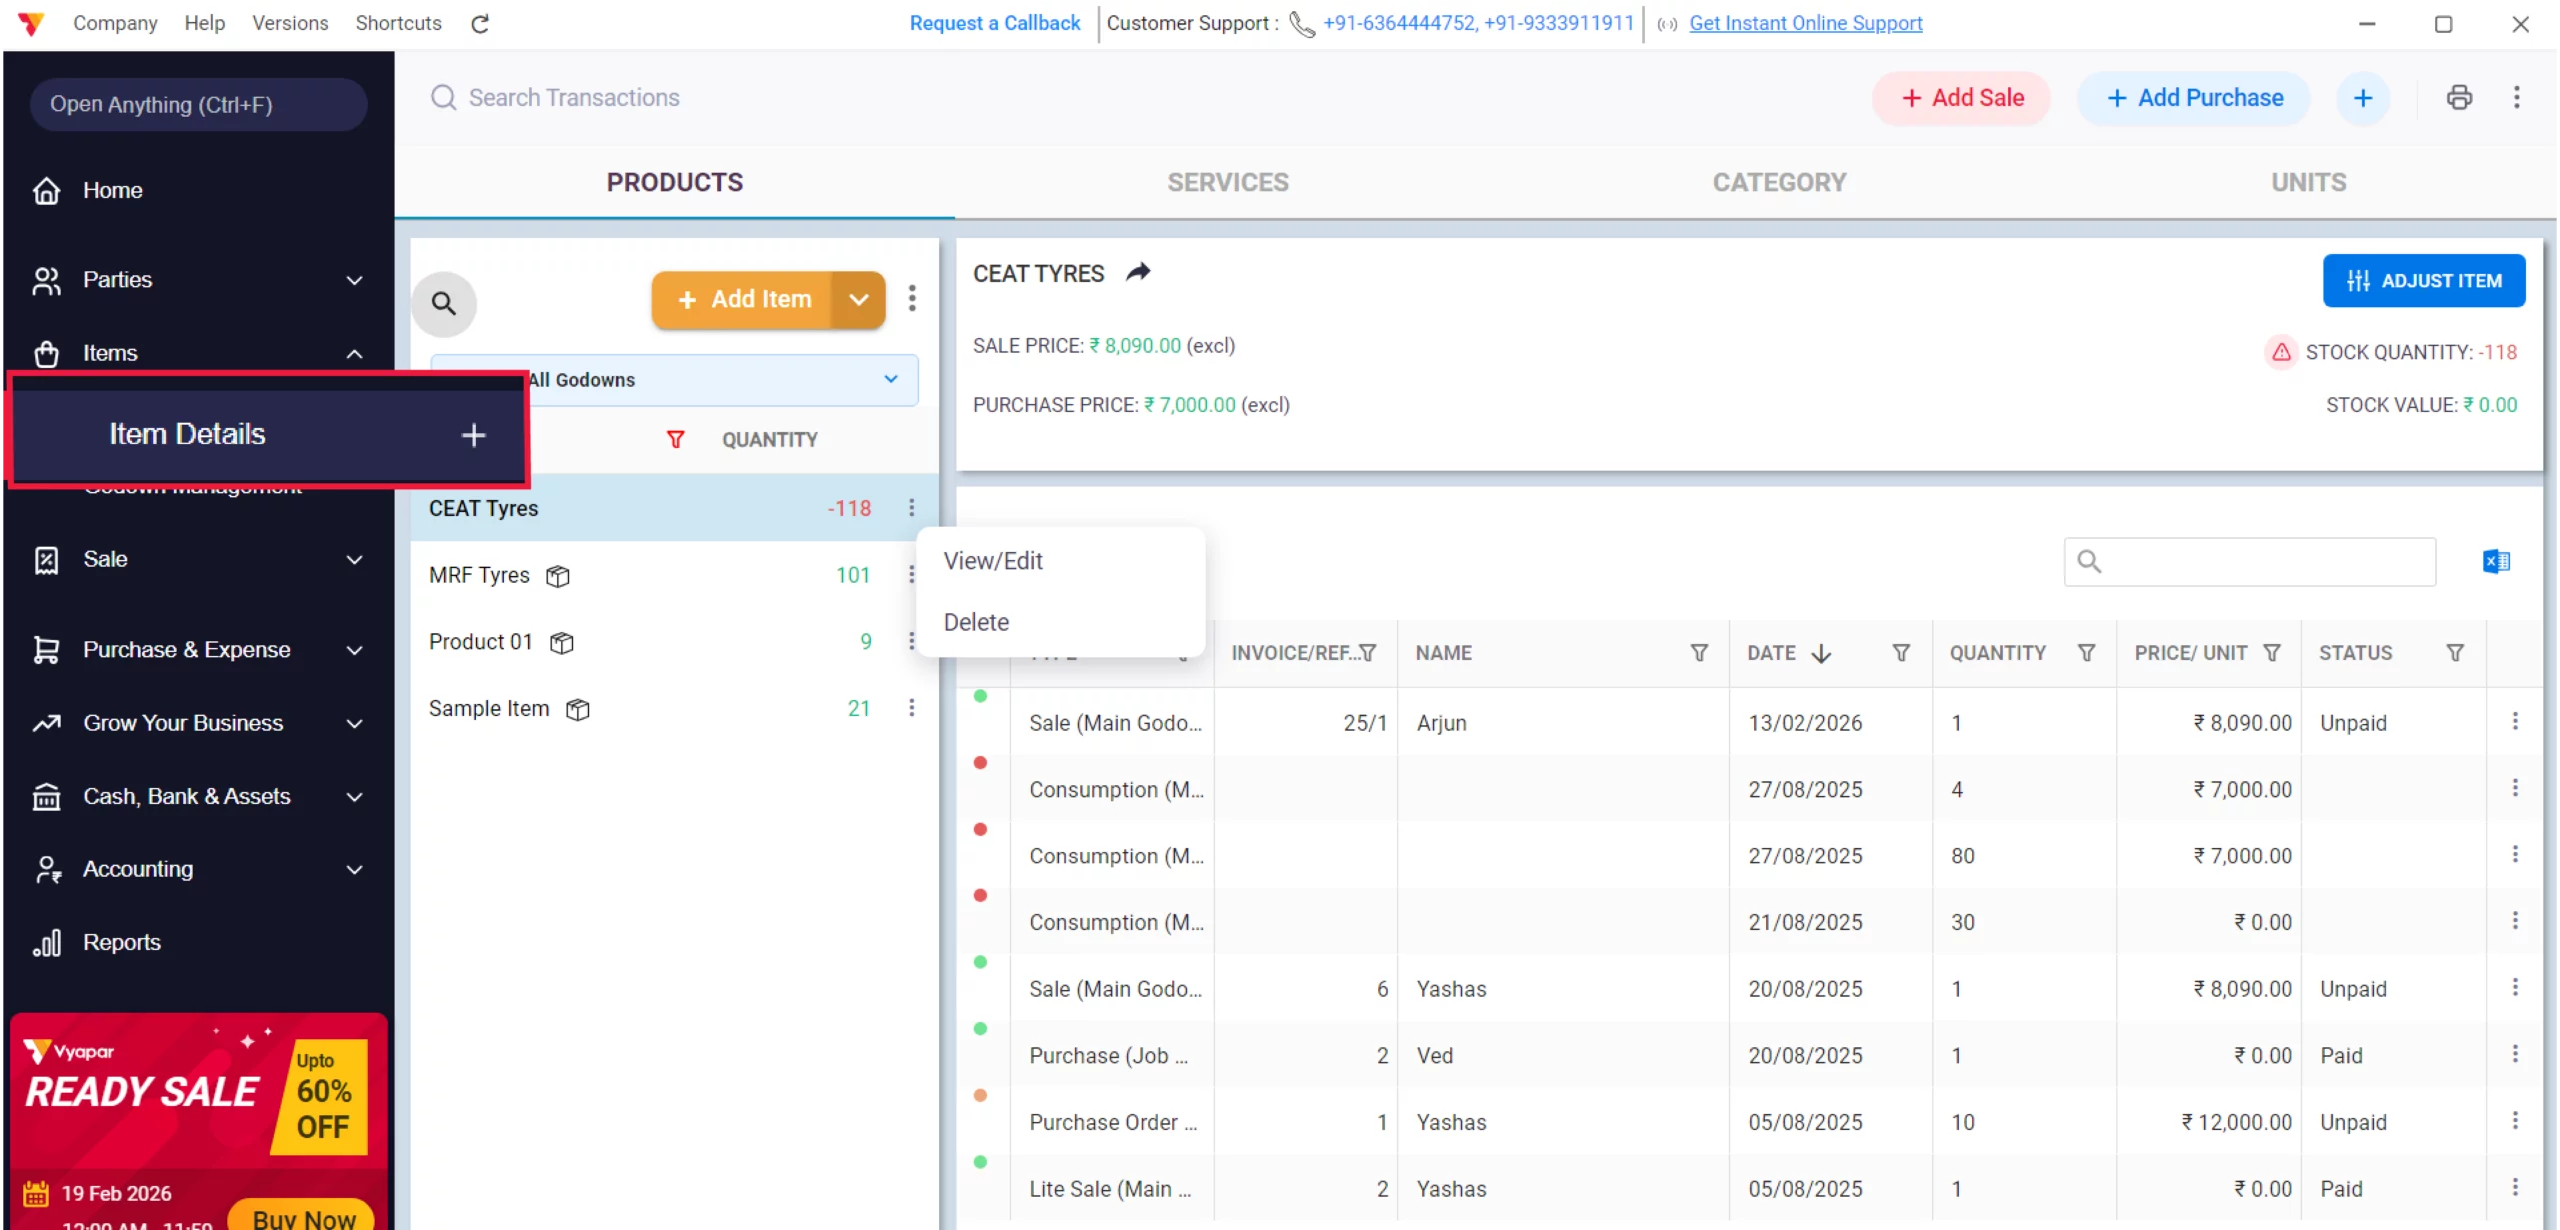
Close the settings window. From the main dashboard, click on Items in the left sidebar and select Item Details.
05
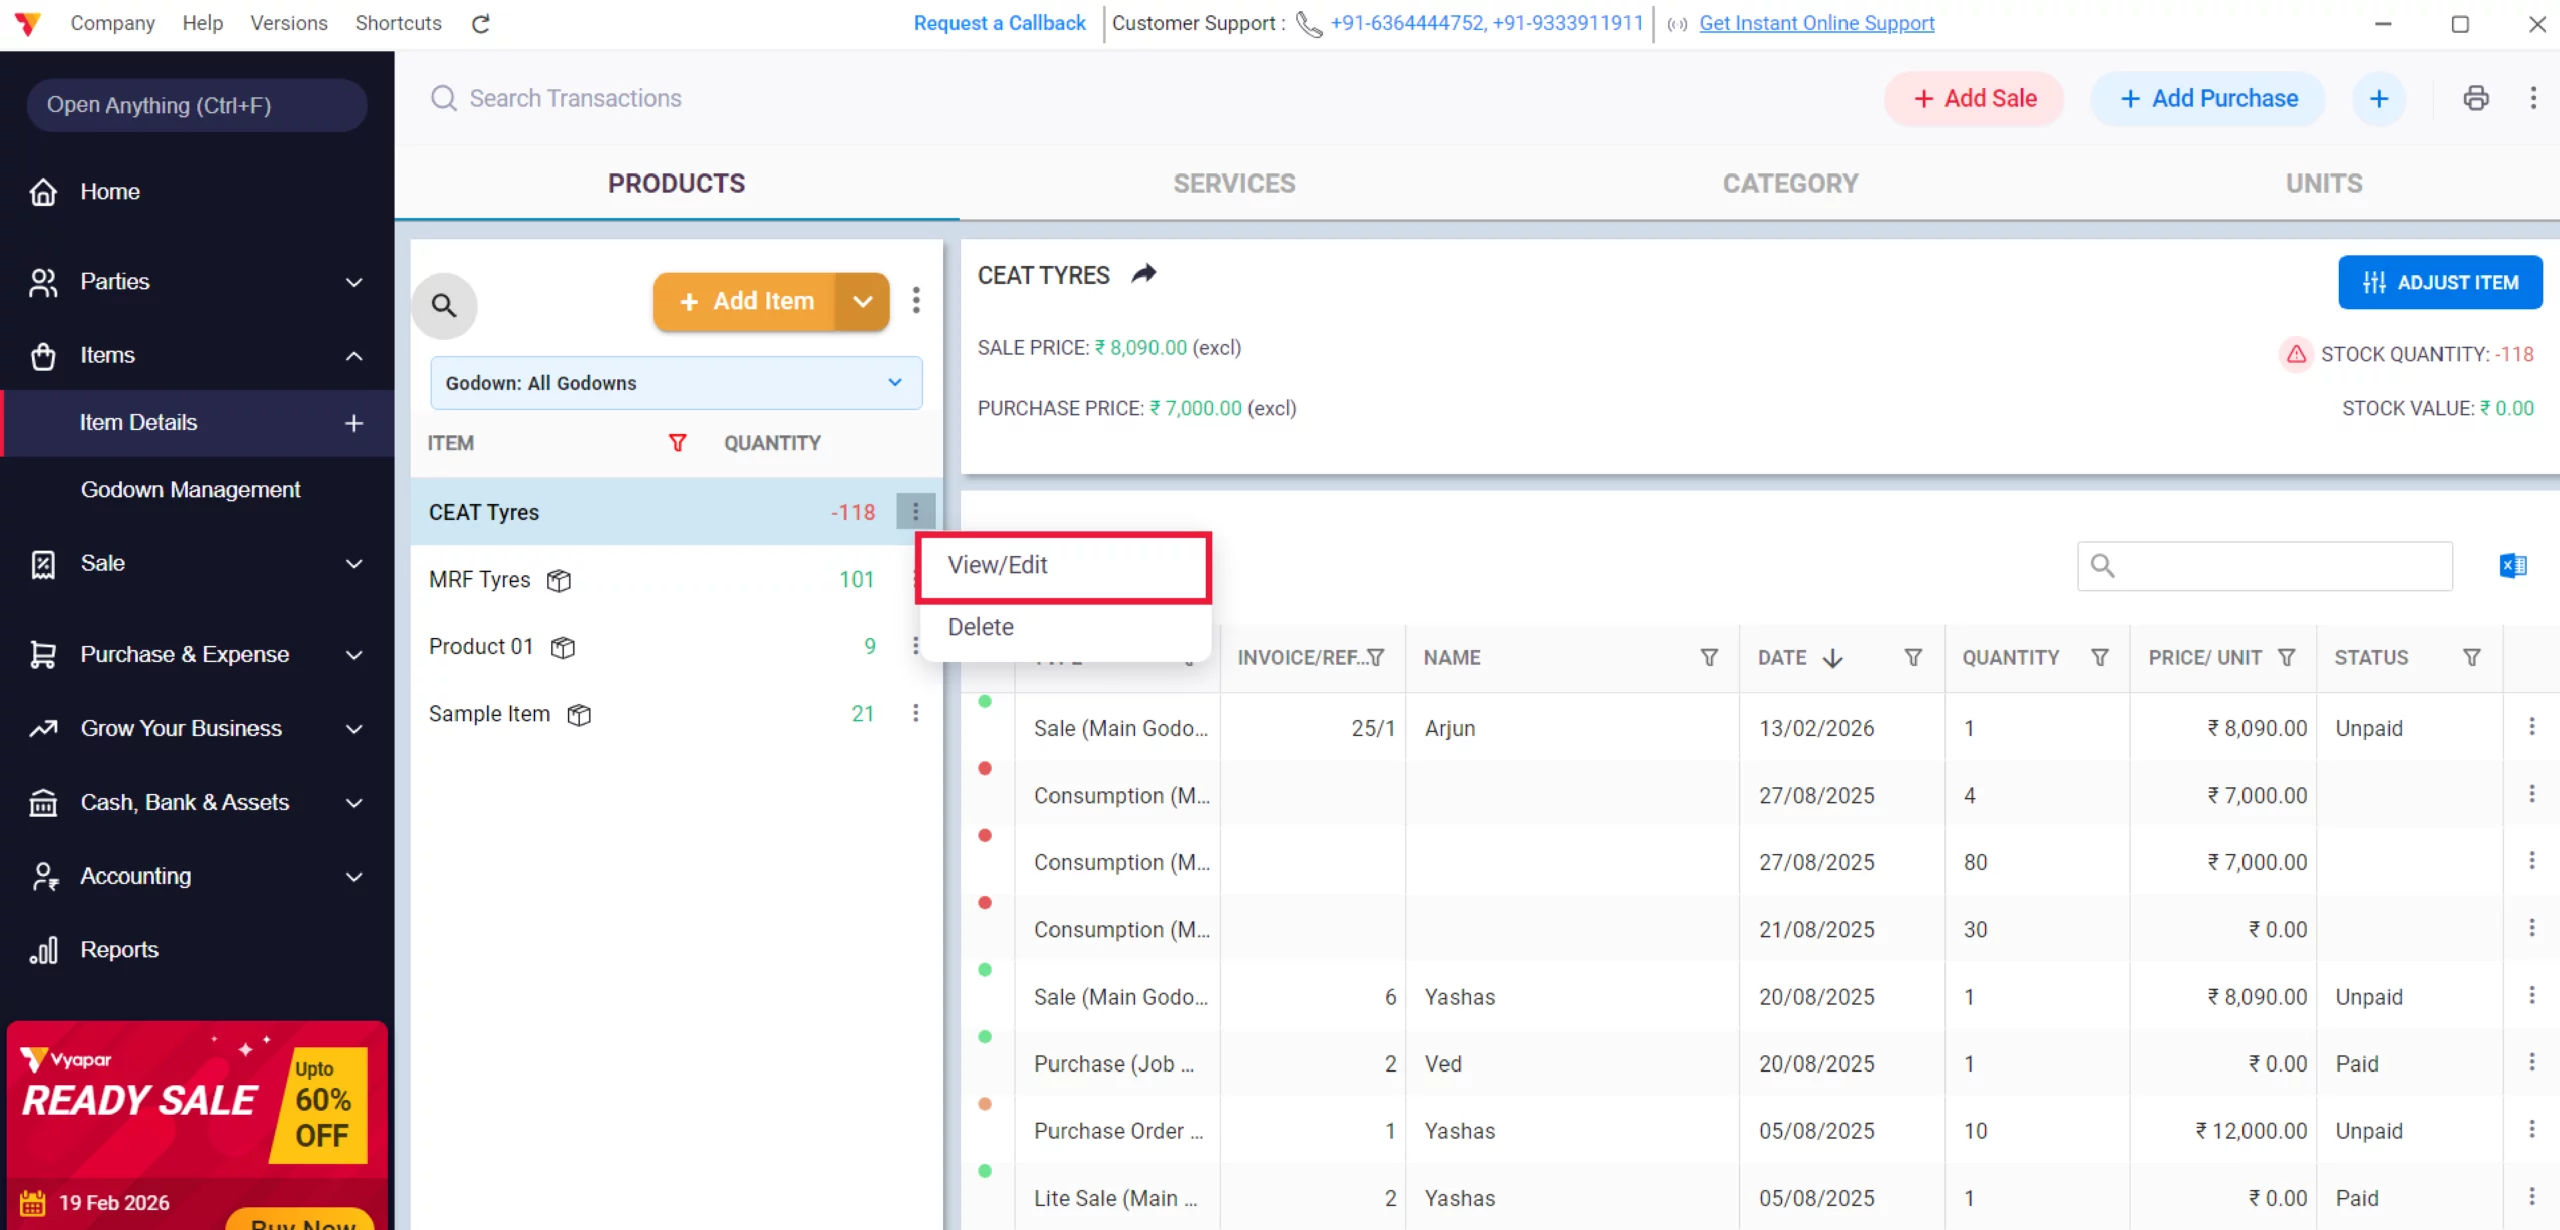
Edit Your Item
Find the product you want to track. Click on the three dots (⋮) next to the Item Name and select View/Edit. (Double Click on Item)
06
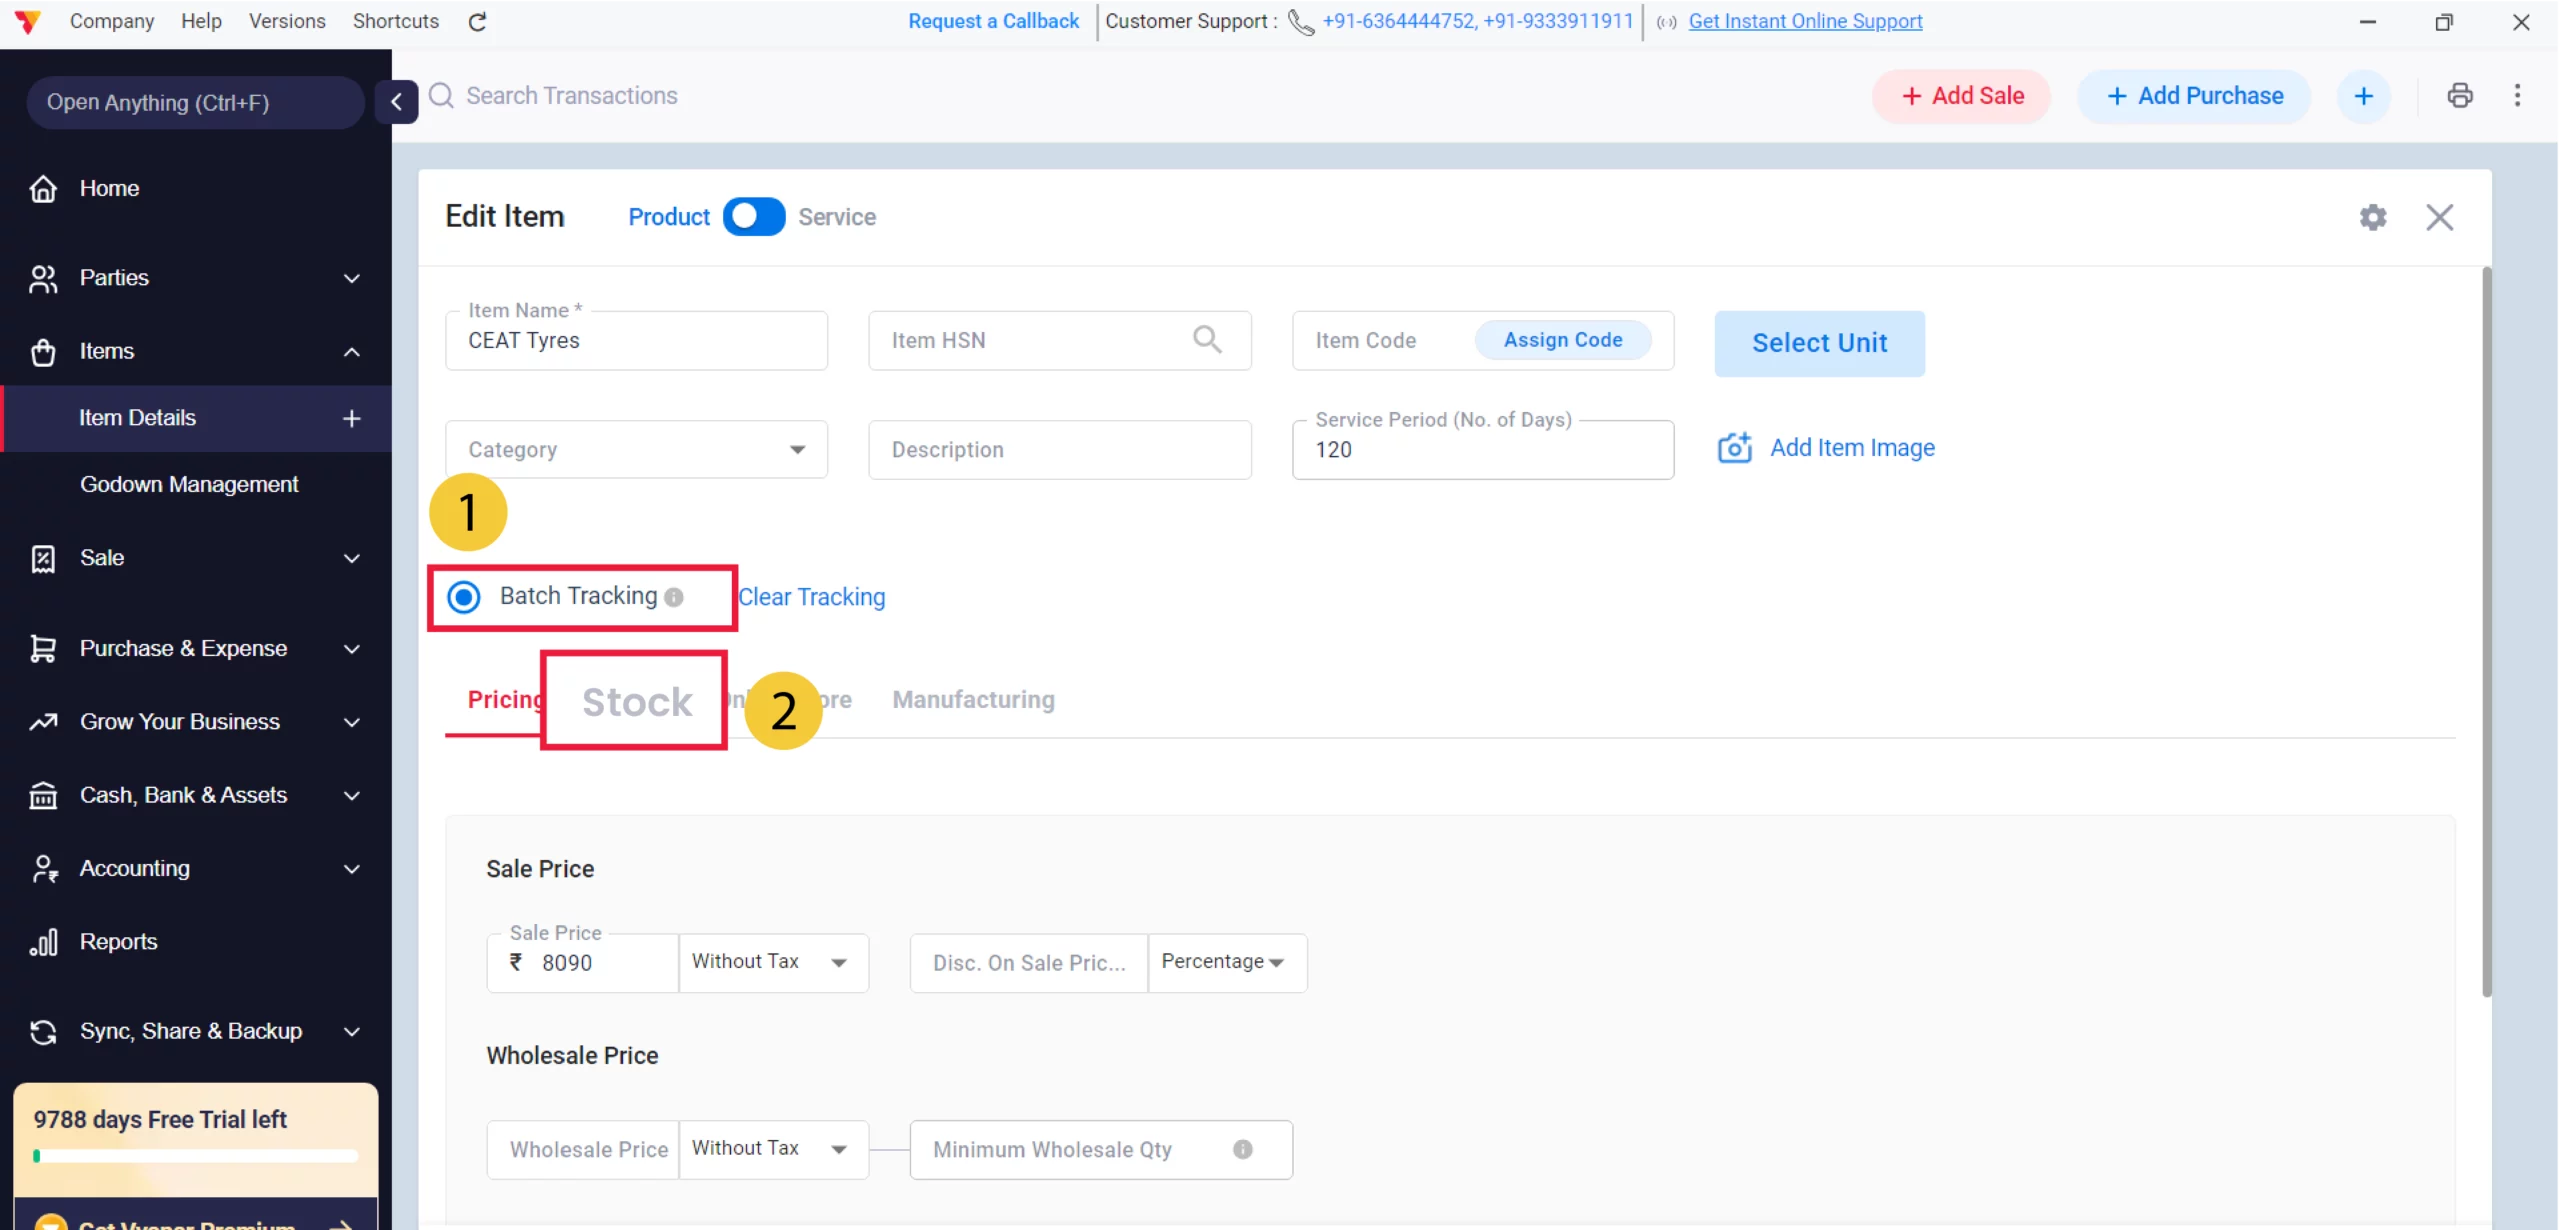
Enable Batch or Serial Tracking for the Item
On the Edit Item screen, select the radio button for Batch Tracking to allow the entry of specific lot details like expiry dates and navigate to the Stock tab.
07
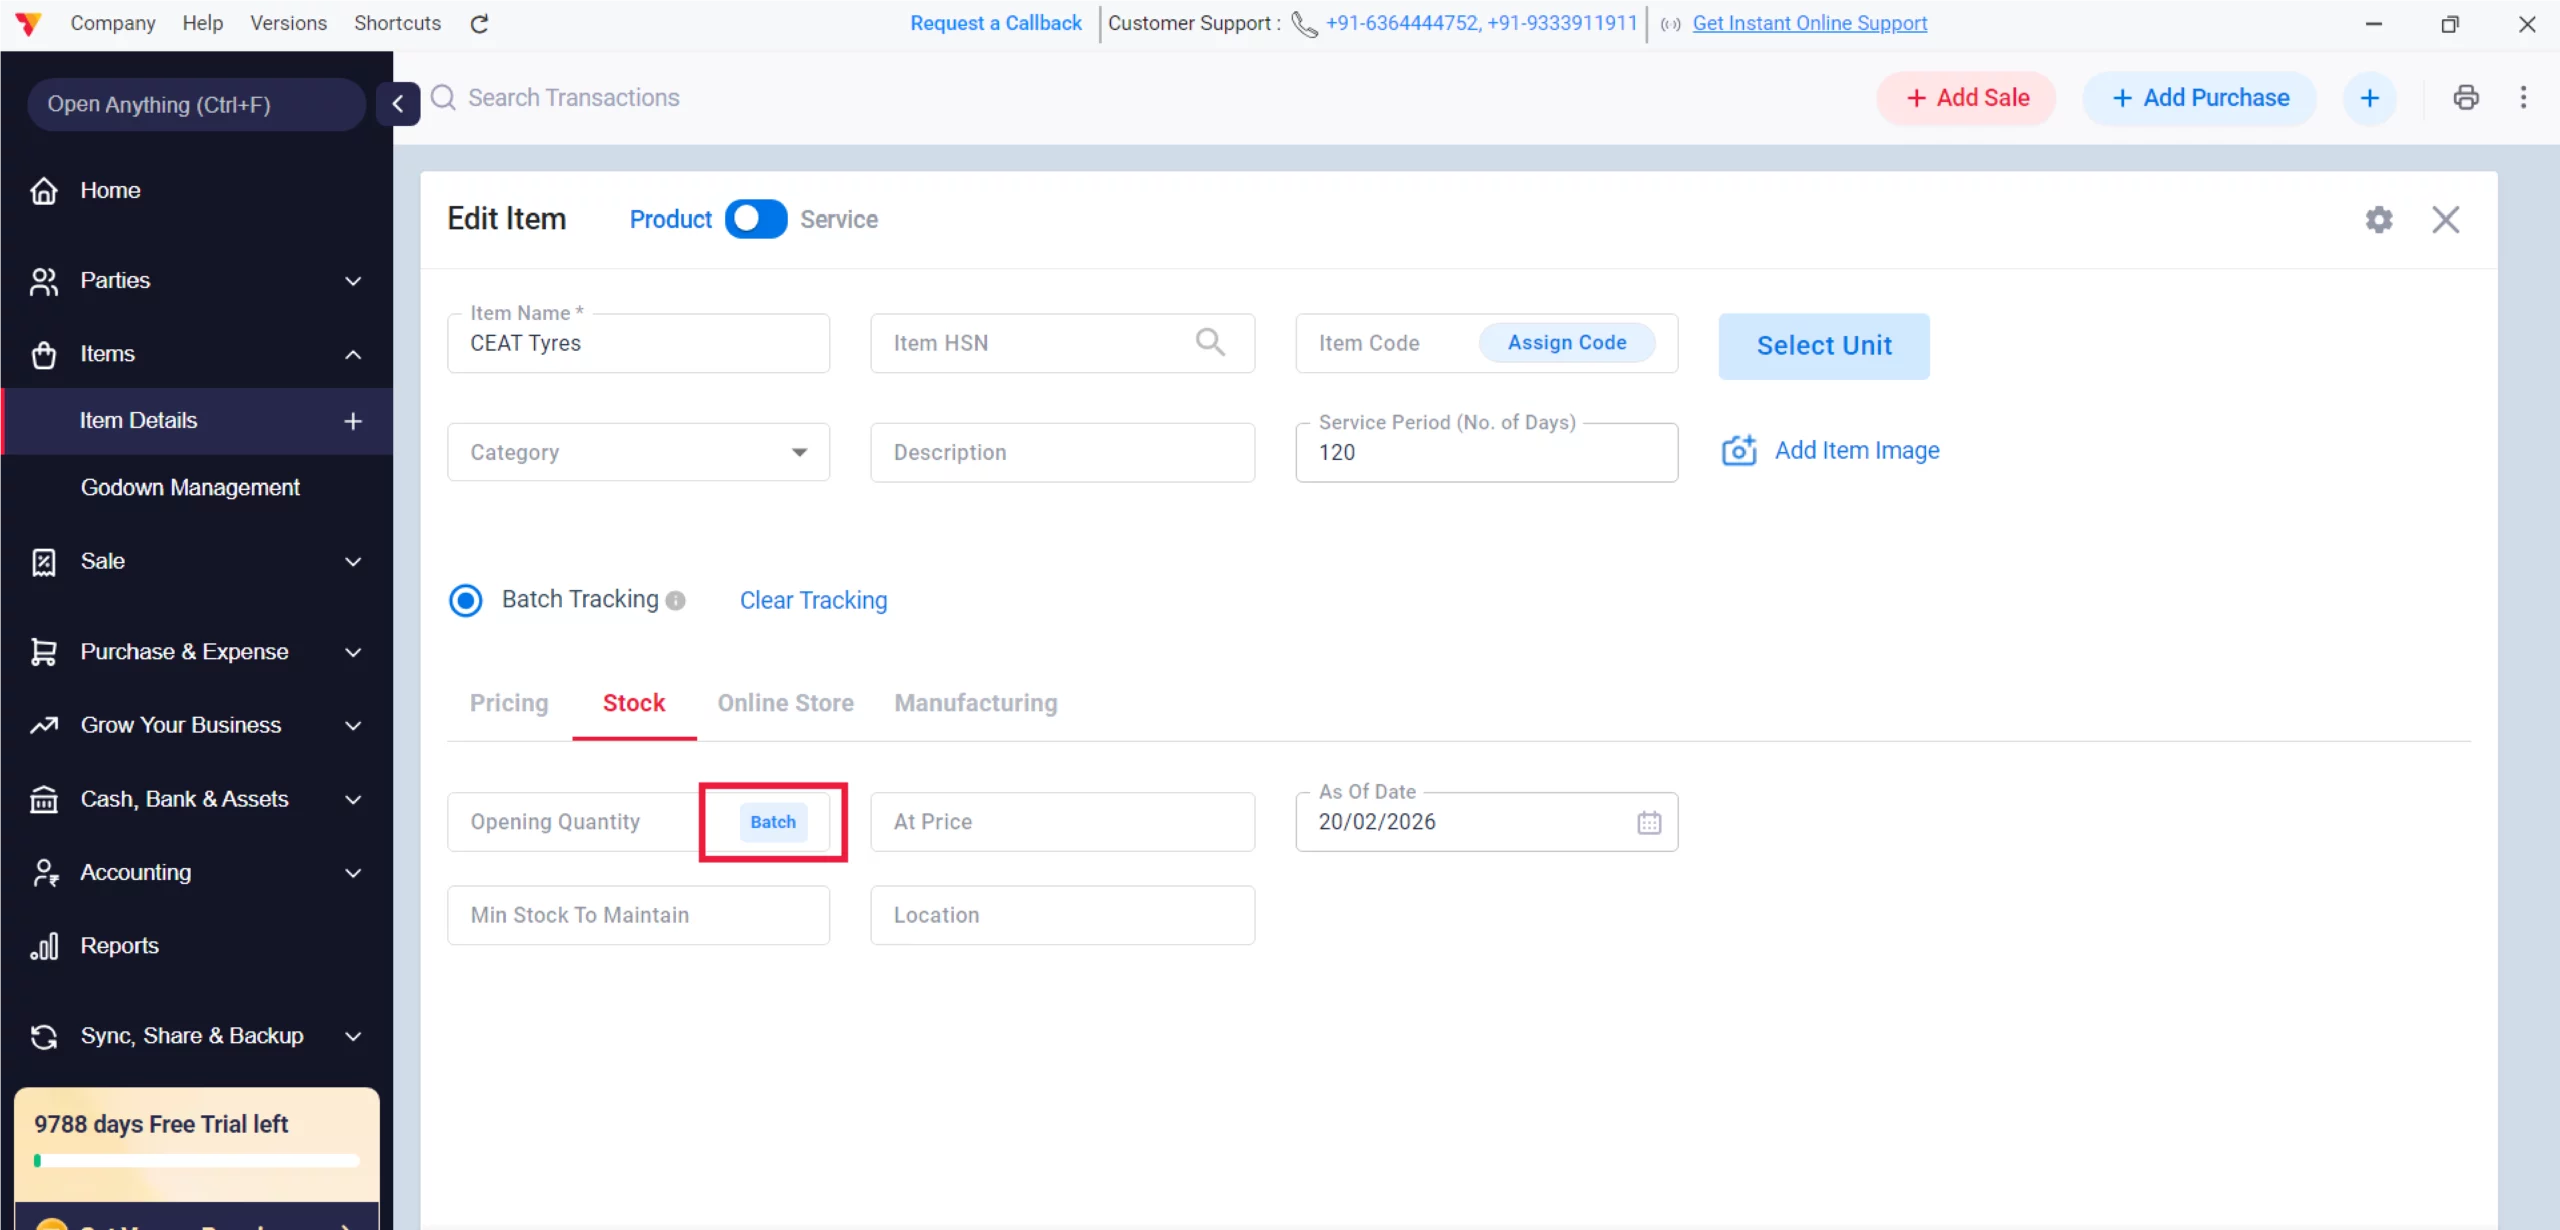
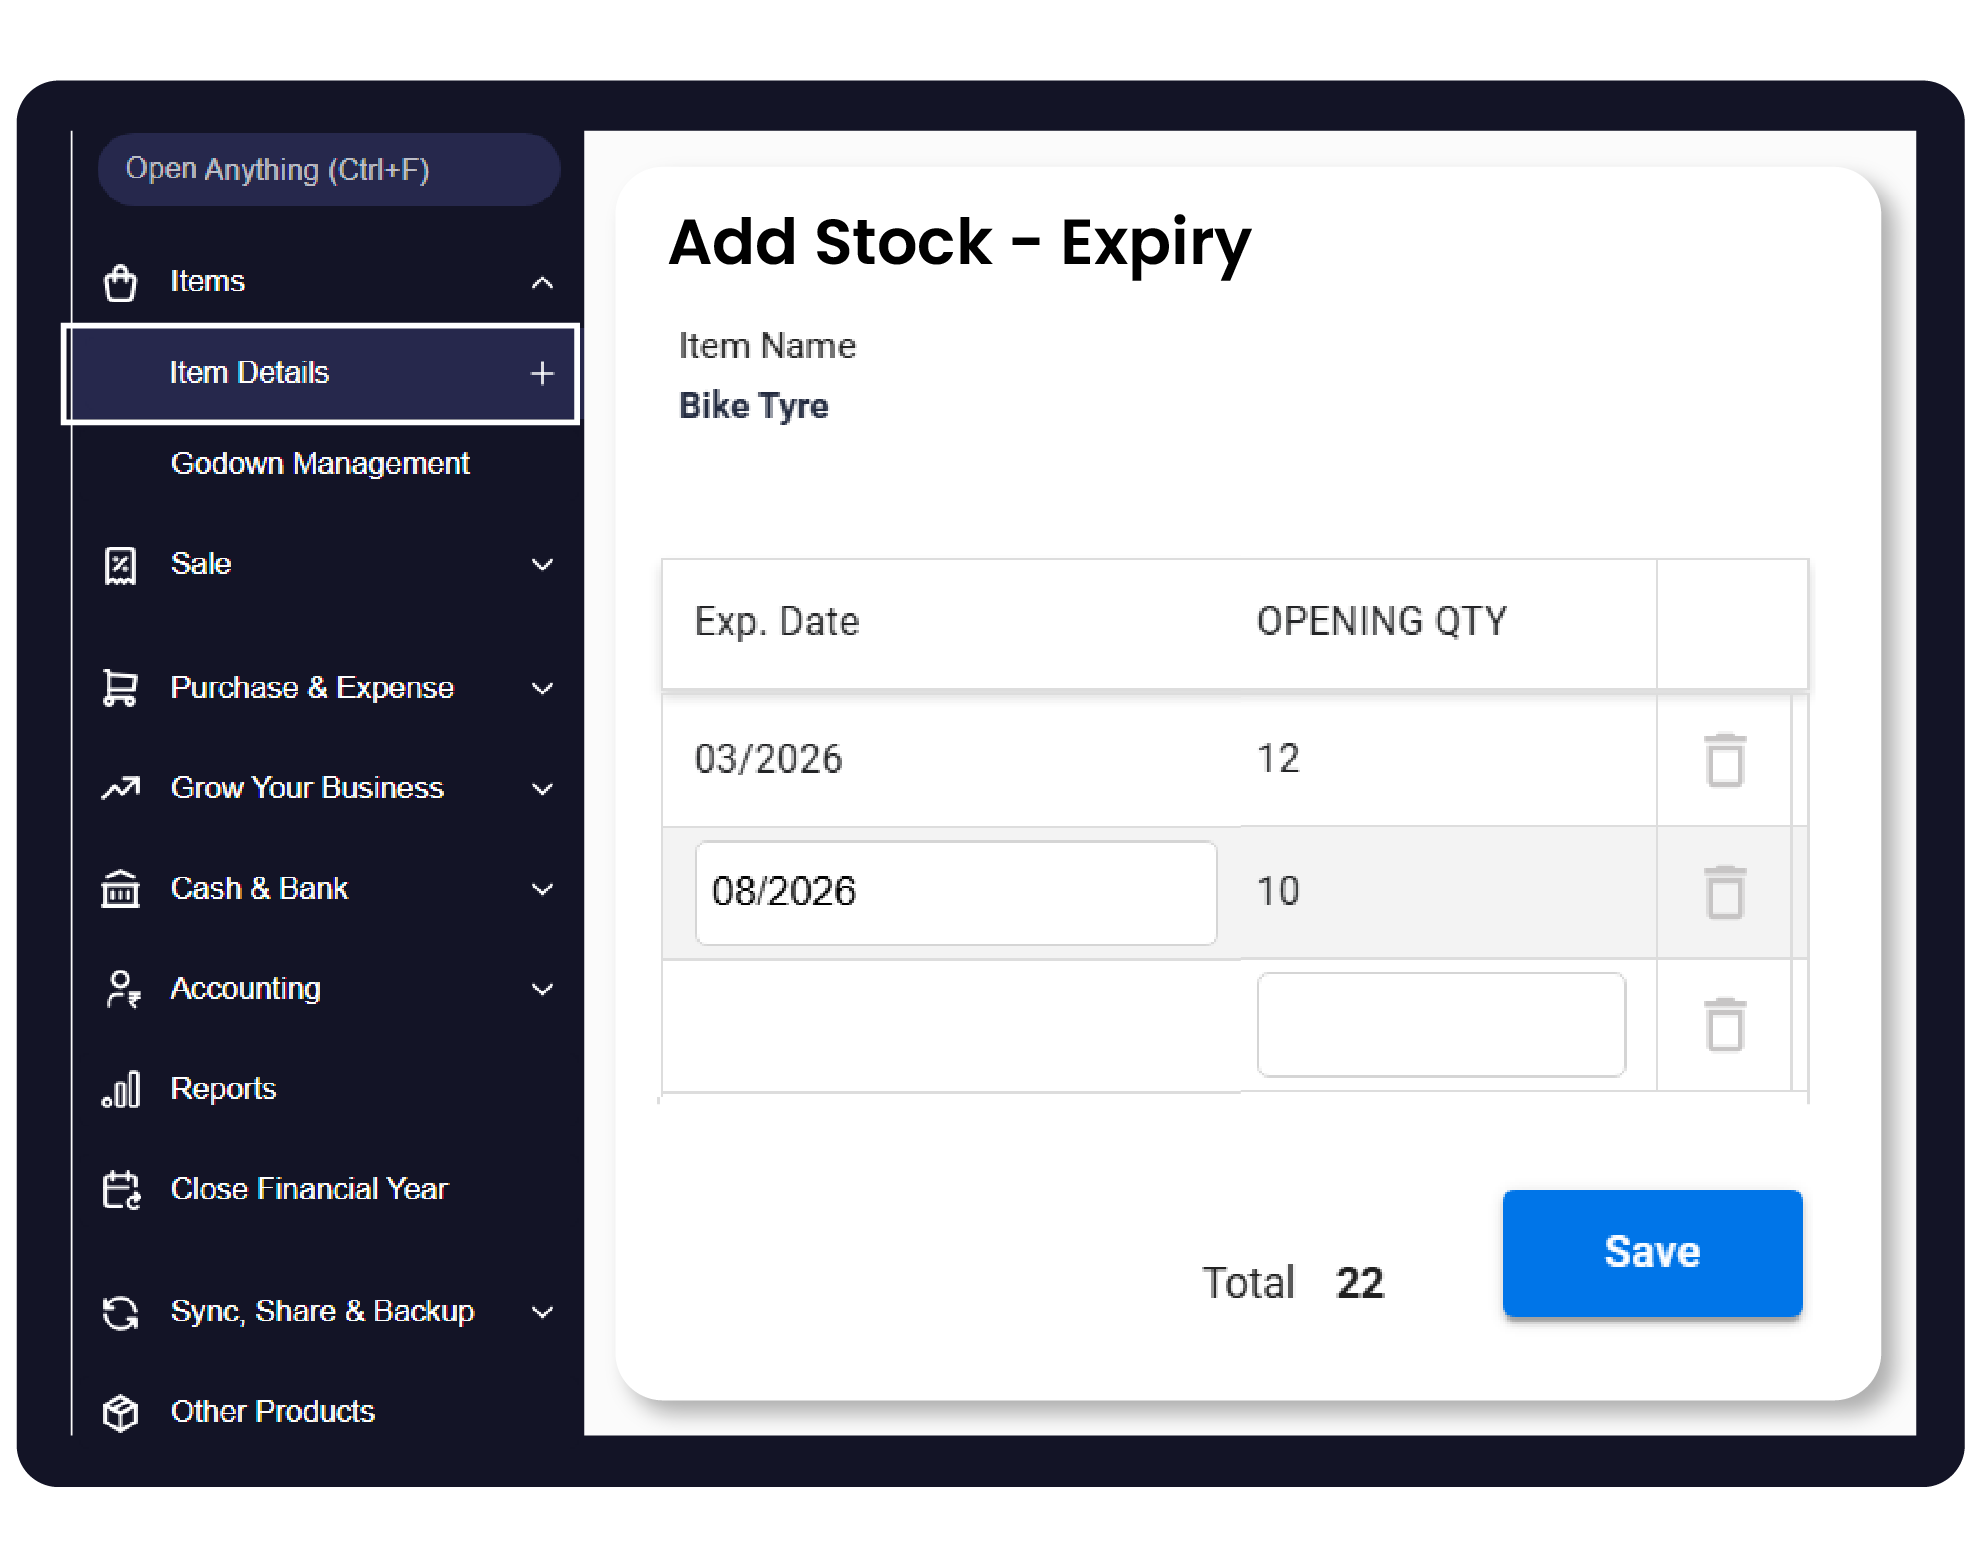
Add Opening Stock
Click the Batch button located inside the Opening Quantity field.
08

Enter Expiry Details
A pop-up window titled “Add Stock – Batches” will appear. Enter the following for each lot:
Exp. Date: Click the calendar icon to select the expiration date.
Mfg. Date: Enter these details to keep your records organized.
Batch No.: Enter the Batch value, to track group of items Expiry
Opening Qty: Enter the current stock amount for this specific batch and click Save.
09
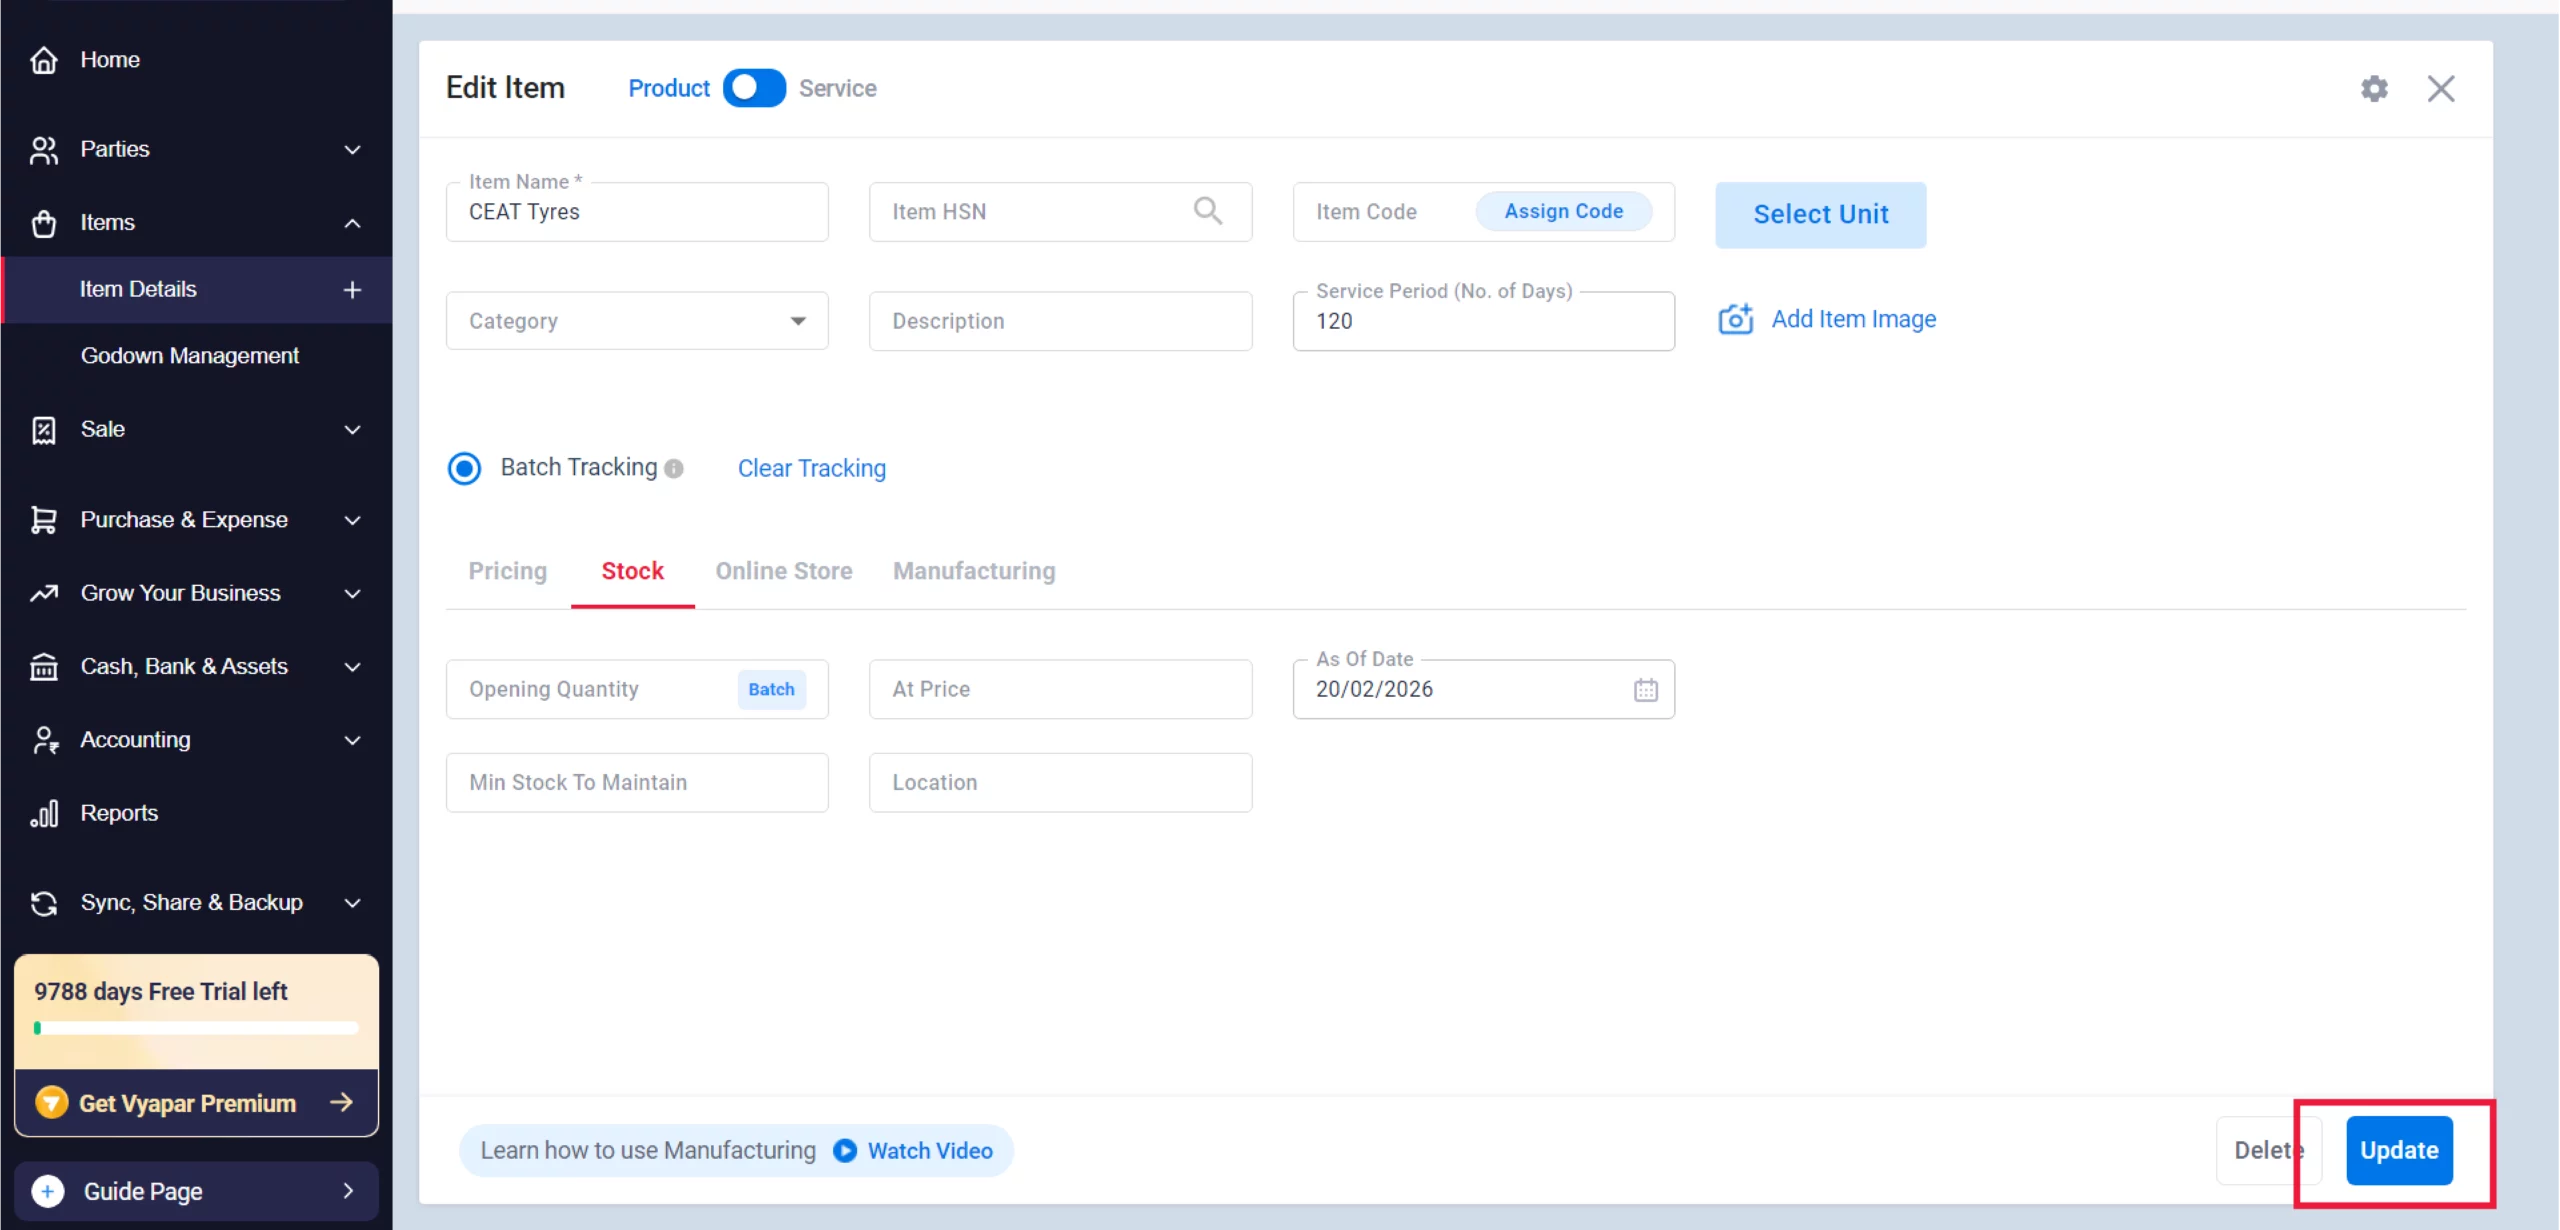
Update and Save
After saving the batch details, click the blue “Update” button at the bottom right of the main Edit Item screen to finalise your settings.
10
Watch Step-by-Step Video Guide to Add Expiry Dates of Items
Add Expiry Dates of Items: Desktop Guide.
Still stuck? Get help in minutes.
Our support team is ready to help you succeed.
![]()
![]() 24/7 Support
24/7 Support
Where Will You Use These Details?
Once you have added expiry dates to your items, Vyapar uses this information to help you manage your stock efficiently across these areas:

Main Dashboard
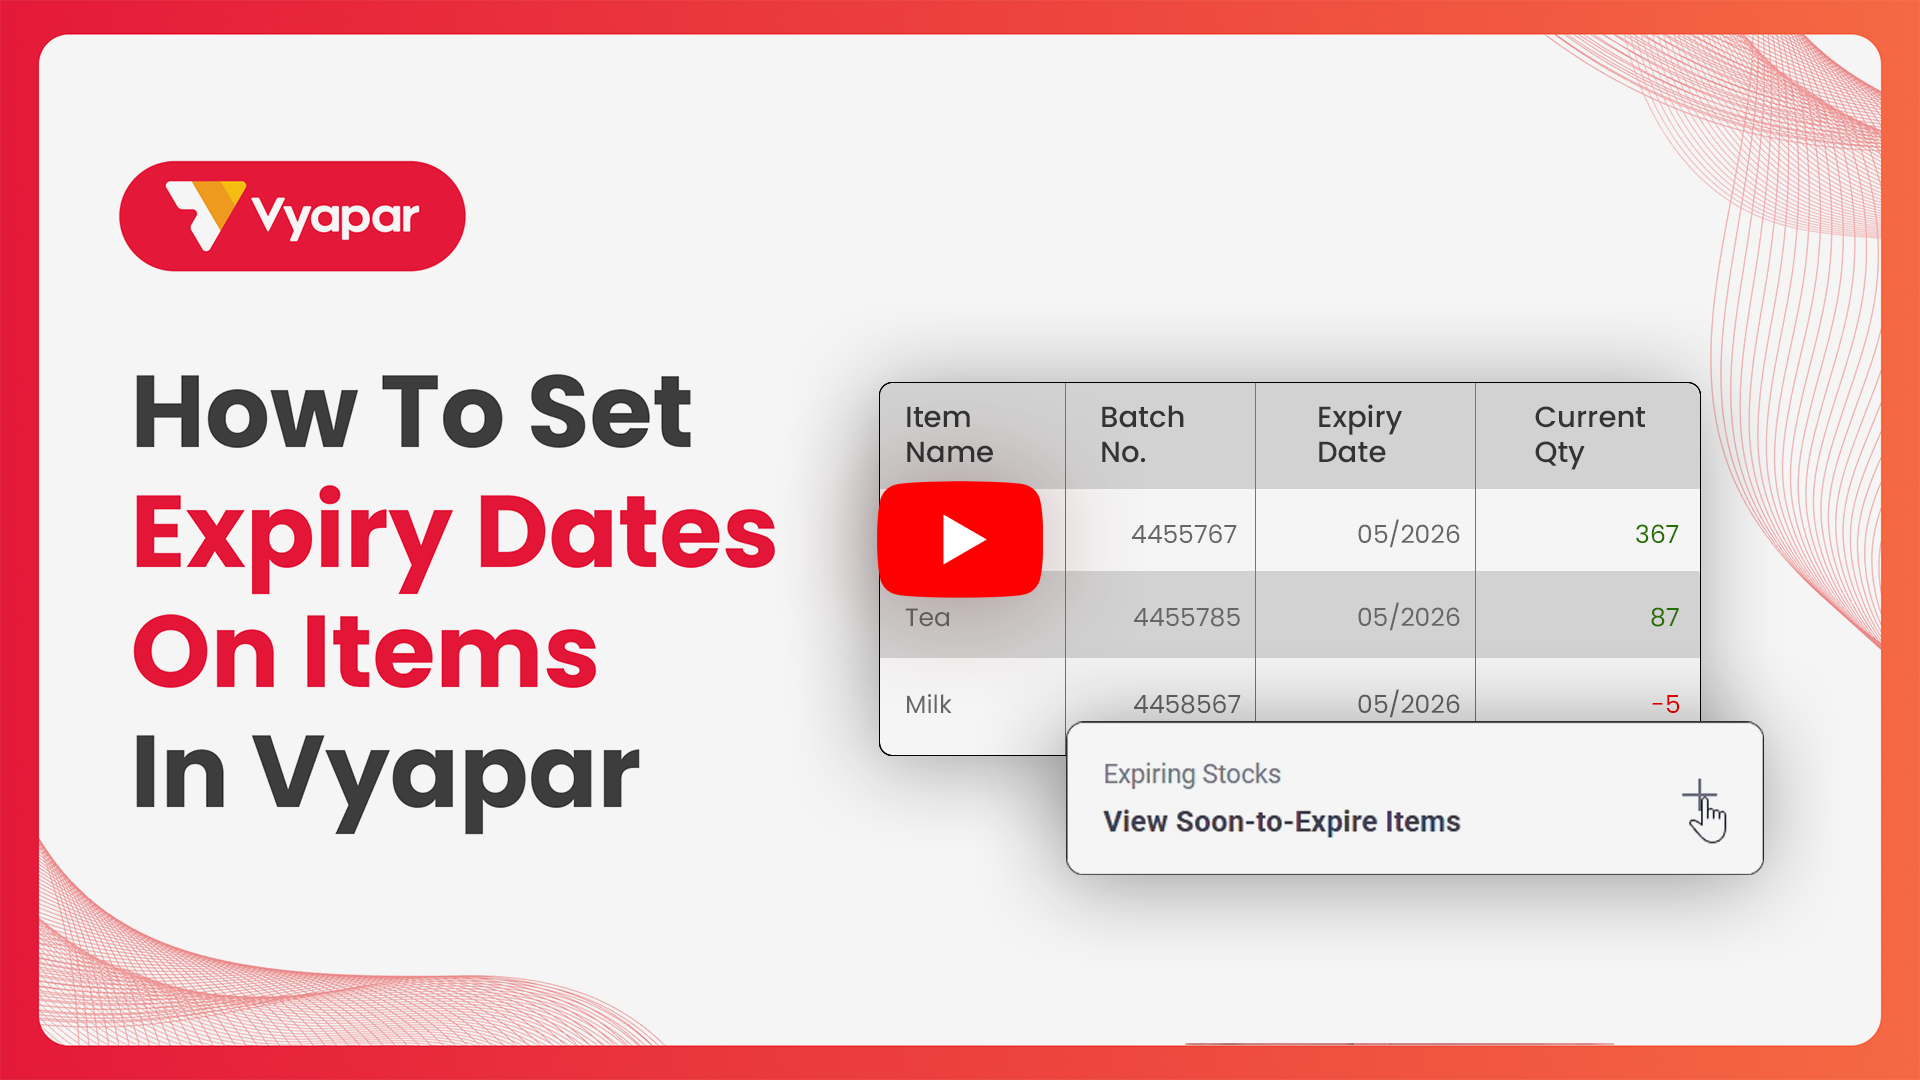
Your home screen provides an immediate summary of your inventory status, including a dedicated “Expiring Stocks” widget that highlights items nearing their end-of-life. (Need to add it from the dashboard at the bottom right corner)
During Sales
When you add an item to a sale, Vyapar inventory management software will prompt you to select the specific batch with the relevant expiry date, ensuring you can follow FIFO (First-In, First-Out) practices to reduce waste.
Detailed Expiry Reports
You can generate a comprehensive Item Expiry Report from the Reports section to see a full list of all products and their remaining shelf life.
Frequently Asked Questions (FAQs)
Can I change the expiry date format?
Yes. In the ITEM settings, you can choose between different date formats
(e.g., mm/yy or dd/mm/yy) for your expiry fields.
Will Vyapar alert me automatically when an item is about to expire?
You can view upcoming expiries in the Item Expiry Report. Additionally, the main dashboard features an “Expiring Stocks” widget that highlights items nearing their end-of-life.
Can I add expiry dates without enabling Batch Tracking?
No. In Vyapar, expiry dates are inherently tied to specific batches or lots, so Batch Tracking must be enabled to access the expiry date field.
Ready to Stop Waste Today?
Enable expiry date alerts now and reduce your stock loss by 60%.


