Add Bank Account Details on Invoice – Video
Learn how to add bank details to your invoice so customers can pay you easily and quickly.
Transcript
This video explains how to add your bank details and UPI QR code to invoices in the Vyapar app so customers can easily make payments.
Step 1: Open App & Go to Cash & Bank
Open the Vyapar app, go to the main menu, and click on “Cash & Bank” to manage your bank accounts.
Step 2: Add Bank Account
Click on “Add Bank Account”, enter a display name (like your bank name) and add the opening balance as per your current bank amount.
Step 3: Enable Invoice Options
Turn on “Print Bank Details on Invoice” and optionally enable “Print UPI QR Code on Invoice” if you want to show QR on bills.
Step 4: Enter Bank & UPI Details
Fill in your account number, IFSC code (bank name auto-fills), UPI ID, and account holder name, then save the details.
Step 5: Create Invoice
Go to “Add Sale”, select the customer and items, and choose your bank account as the payment mode while creating the bill.
Step 6: Check Invoice with Details
After saving, the invoice will show your bank details and QR code. The QR code is generated for the exact pending amount, making payment easy for customers.
Adding bank details and a QR code to invoices helps you receive payments faster and gives customers a simple way to pay directly.
Read More
Related Videos

How to Accept Cash, Card & UPI Payments in Vyapar
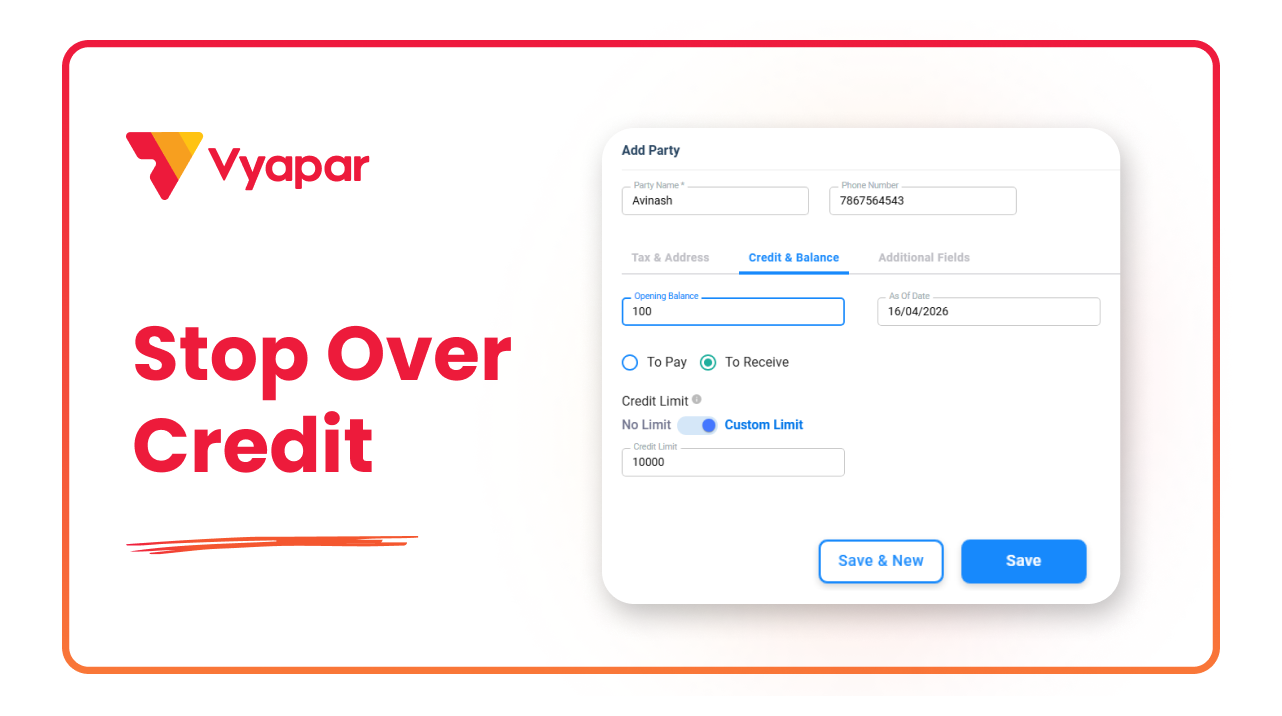
How to Set Credit Limit for Customer
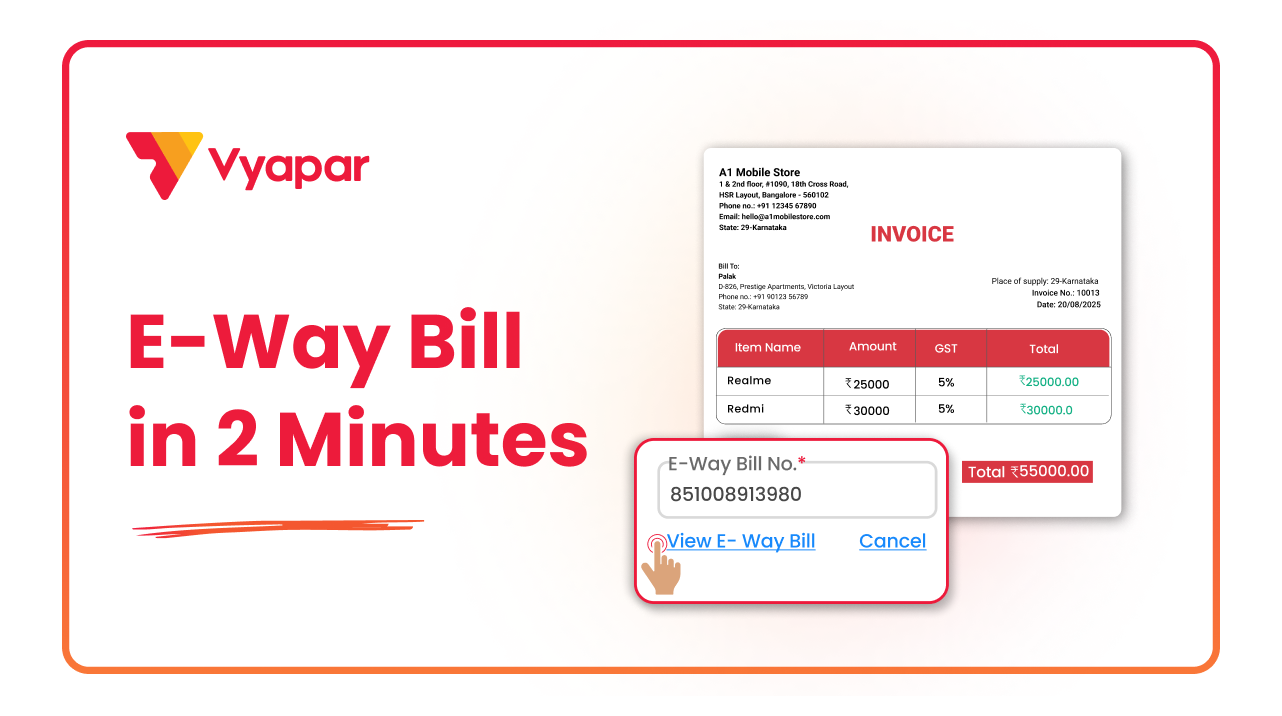
How to Generate E-way Bill
Transform Your Business in Just 5 Minutes – Start Free Today!
Join 1.5 crore + small business owners using Vyapar’s automated billing, inventory & accounting software to save 10+ hours every week.


