GST and Non-GST Billing – Video
Understand how to create invoices for GST and non-GST transactions in a structured way.
Transcript
Struggling to create GST and non-GST bills manually? Here’s a simple way to generate them quickly using Vyapar app.
Step 1: Open App & Select Company
Open the app, go to the left menu, and select your company. If you have a GST number, keep it selected. For non-GST billing, you can remove it and save changes.
Step 2: Add or Select Party
Go to the Party section and choose an existing customer or add a new one. You can also enter the party’s GST number if available, or proceed without it for non-GST billing.
Step 3: Add or Select Item
Move to the Item section and select an item or add a new one. Ensure that details such as HSN code and sale price are filled in.
Step 4: Set GST or Non-GST
Choose the GST rate (e.g., 18%) for GST billing. If you want a non-GST bill, select “None” for GST.
Step 5: Create Sale Entry
Click on “Add Sale,” select the party, and choose the item. The app will automatically show GST details if applied.
Step 6: Save & Generate Invoice
Save the entry, and your invoice will be created instantly with all details like item name, GST rate, and total amount.
In just a few steps, you can generate accurate GST or non-GST invoices with complete details, ready to share with your customers.
Read More
Related Videos
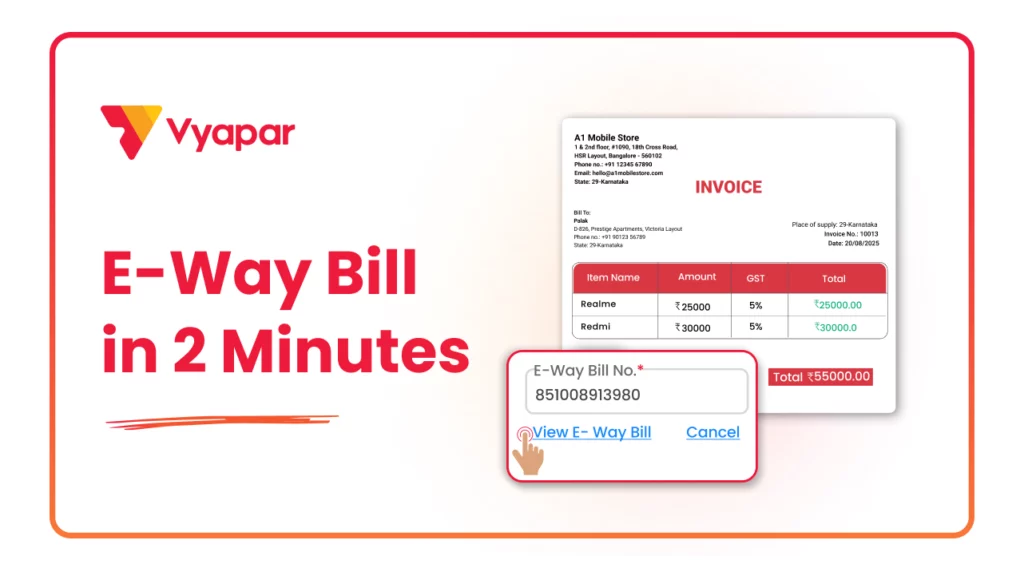
How to Generate E-way Bill
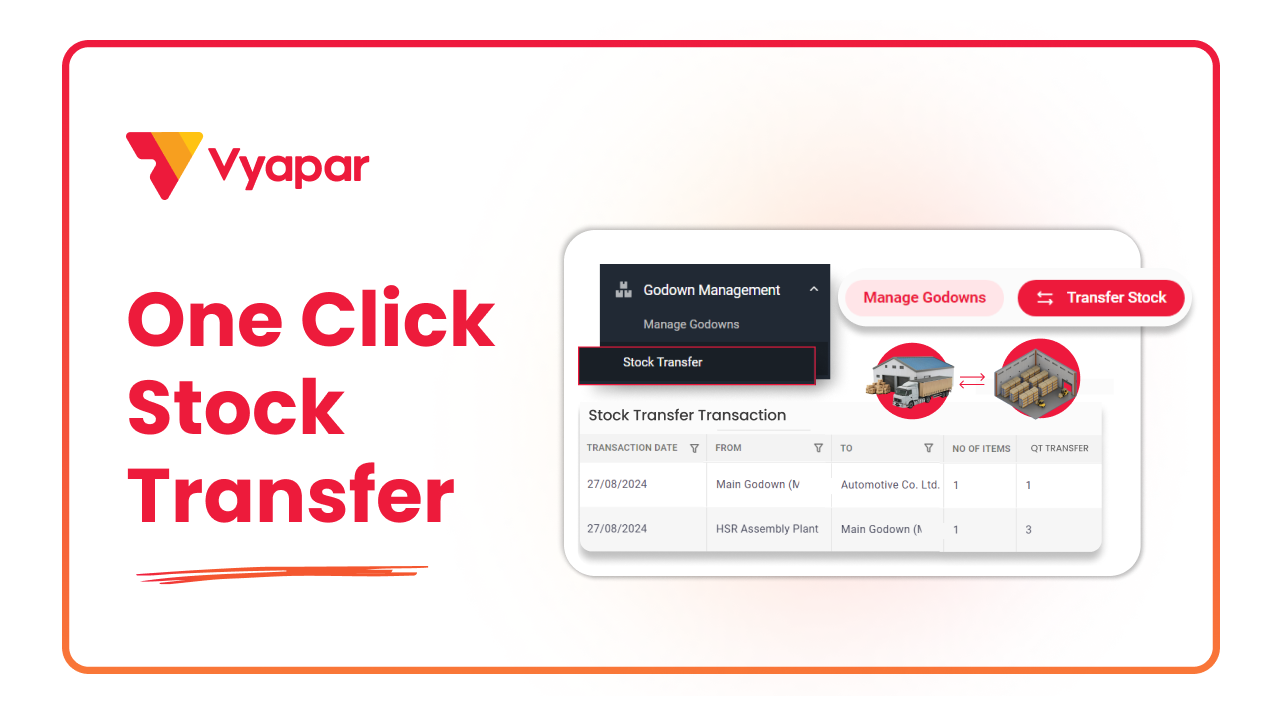
How to Transfer Stock
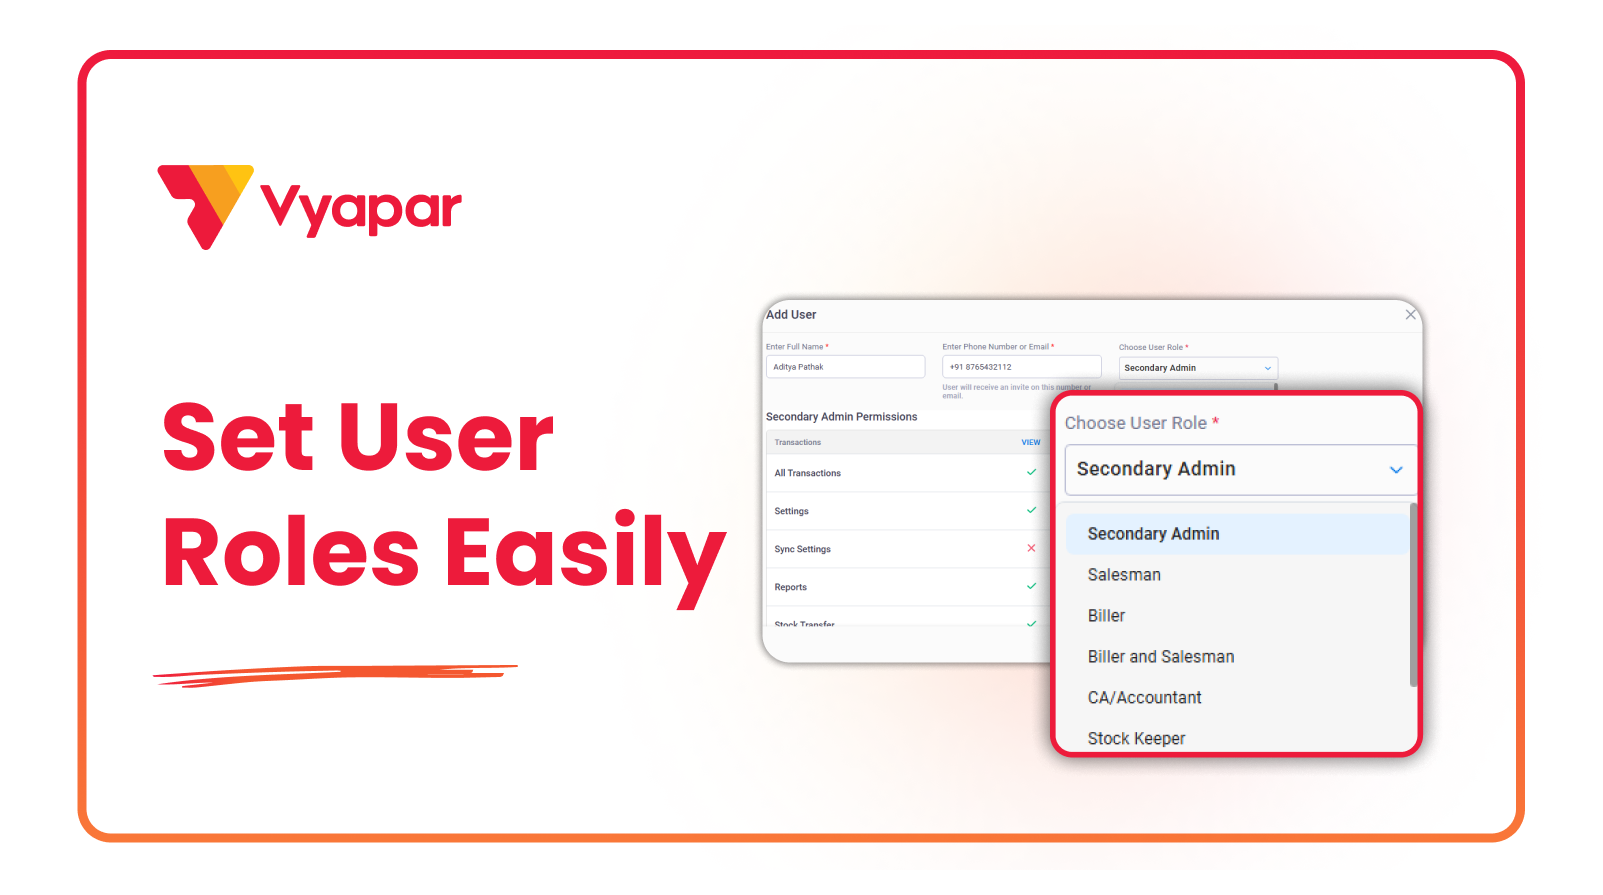
How to Manage User Roles & Permissions
Transform Your Business in Just 5 Minutes – Start Free Today!
Join 1.5 crore + small business owners using Vyapar’s automated billing, inventory & accounting software to save 10+ hours every week.


